小白的springboot之路(三)、集成mybatis与MySQL
0、前言
mybatis属于半自动的ORM,相比hibernate这种全自动的ORM,兼顾了性能与易用;目前企业项目中,基本都是mybatis的天下;今天就来整合mybatis与MySQL;
1、整合
1.-1、添加依赖:
        <!-- 集成mybatis -->

        <dependency>

            <groupId>org.mybatis.spring.boot</groupId>

            <artifactId>mybatis-spring-boot-starter</artifactId>

            <version>2.1.0</version>

        </dependency>

        <dependency>

            <groupId>mysql</groupId>

            <artifactId>mysql-connector-java</artifactId>

            <version>8.0.16</version>

        </dependency>
1-2、创建数据表:
-- ----------------------------

-- Table structure for user

-- ----------------------------

DROP TABLE IF EXISTS `user`;

CREATE TABLE `user` (

  `id` int(32) NOT NULL AUTO_INCREMENT COMMENT '用户ID',

  `userName` varchar(32) NOT NULL COMMENT '用户名称',

  `passWord` varchar(50) NOT NULL COMMENT '用户密码',

  `realName` varchar(32) DEFAULT NULL COMMENT '中文名字',

  PRIMARY KEY (`id`)

) ENGINE=InnoDB AUTO_INCREMENT=4 DEFAULT CHARSET=utf8;

-- ----------------------------

-- Records of user

-- ----------------------------

INSERT INTO `user` VALUES ('', 'anson', '', '张三');

INSERT INTO `user` VALUES ('', 'Alex', '', '李四');

INSERT INTO `user` VALUES ('', 'kks', '', '王五');
1-3、增加实体类User.java
package com.anson.model;

public class User {

    private Integer id;

    private String username;

    private String password;

    private String realname;

    public Integer getId() {

        return id;

    }

    public void setId(Integer id) {

        this.id = id;

    }

    public String getUsername() {

        return username;

    }

    public void setUsername(String username) {

        this.username = username == null ? null : username.trim();

    }

    public String getPassword() {

        return password;

    }

    public void setPassword(String password) {

        this.password = password == null ? null : password.trim();

    }

    public String getRealname() {

        return realname;

    }

    public void setRealname(String realname) {

        this.realname = realname == null ? null : realname.trim();

    }

}
1-4、增加Mapper接口UserMapper.java;注意添加@Repository注解
package com.anson.dao;

import com.anson.model.User;

import org.springframework.stereotype.Repository;

@Repository  //添加Repository注解

public interface UserMapper {

    int deleteByPrimaryKey(Integer id);

    int insert(User record);

    int insertSelective(User record);

    User selectByPrimaryKey(Integer id);

    int updateByPrimaryKeySelective(User record);

    int updateByPrimaryKey(User record);

}
1-5、添加Mapper对应的XML文件UserMapper.xml,注意<mapper namespace="com.anson.dao.UserMapper">对应Mapper包
<?xml version="1.0" encoding="UTF-8"?>

<!DOCTYPE mapper PUBLIC "-//mybatis.org//DTD Mapper 3.0//EN" "http://mybatis.org/dtd/mybatis-3-mapper.dtd">

<mapper namespace="com.anson.dao.UserMapper">

  <resultMap id="BaseResultMap" type="com.anson.model.User">

    <id column="id" jdbcType="INTEGER" property="id" />

    <result column="userName" jdbcType="VARCHAR" property="username" />

    <result column="passWord" jdbcType="VARCHAR" property="password" />

    <result column="realName" jdbcType="VARCHAR" property="realname" />

  </resultMap>

  <sql id="Base_Column_List">

    id, userName, passWord, realName

  </sql>

  <select id="selectByPrimaryKey" parameterType="java.lang.Integer" resultMap="BaseResultMap">

    select

    <include refid="Base_Column_List" />

    from user

    where id = #{id,jdbcType=INTEGER}

  </select>

  <delete id="deleteByPrimaryKey" parameterType="java.lang.Integer">

    delete from user

    where id = #{id,jdbcType=INTEGER}

  </delete>

  <insert id="insert" parameterType="com.anson.model.User">

    insert into user (id, userName, passWord,

      realName)

    values (#{id,jdbcType=INTEGER}, #{username,jdbcType=VARCHAR}, #{password,jdbcType=VARCHAR},

      #{realname,jdbcType=VARCHAR})

  </insert>

  <insert id="insertSelective" parameterType="com.anson.model.User">

    insert into user

    <trim prefix="(" suffix=")" suffixOverrides=",">

      <if test="id != null">

        id,

      </if>

      <if test="username != null">

        userName,

      </if>

      <if test="password != null">

        passWord,

      </if>

      <if test="realname != null">

        realName,

      </if>

    </trim>

    <trim prefix="values (" suffix=")" suffixOverrides=",">

      <if test="id != null">

        #{id,jdbcType=INTEGER},

      </if>

      <if test="username != null">

        #{username,jdbcType=VARCHAR},

      </if>

      <if test="password != null">

        #{password,jdbcType=VARCHAR},

      </if>

      <if test="realname != null">

        #{realname,jdbcType=VARCHAR},

      </if>

    </trim>

  </insert>

  <update id="updateByPrimaryKeySelective" parameterType="com.anson.model.User">

    update user

    <set>

      <if test="username != null">

        userName = #{username,jdbcType=VARCHAR},

      </if>

      <if test="password != null">

        passWord = #{password,jdbcType=VARCHAR},

      </if>

      <if test="realname != null">

        realName = #{realname,jdbcType=VARCHAR},

      </if>

    </set>

    where id = #{id,jdbcType=INTEGER}

  </update>

  <update id="updateByPrimaryKey" parameterType="com.anson.model.User">

    update user

    set userName = #{username,jdbcType=VARCHAR},

      passWord = #{password,jdbcType=VARCHAR},

      realName = #{realname,jdbcType=VARCHAR}

    where id = #{id,jdbcType=INTEGER}

  </update>

</mapper>
1-6、编写service接口UserService.java:
package com.anson.service;

import com.anson.model.User;

public interface UserService

{

    int deleteByPrimaryKey(Integer id);

    int insert(User record);

    int insertSelective(User record);

    User selectByPrimaryKey(Integer id);

    int updateByPrimaryKeySelective(User record);

    int updateByPrimaryKey(User record);

}
编写接口实现类UserServiceImpl.java,注意增加@Service注解:
package com.anson.service.Impl;

        import com.anson.dao.UserMapper;

        import com.anson.model.User;

        import com.anson.service.UserService;

        import org.springframework.beans.factory.annotation.Autowired;

        import org.springframework.stereotype.Service;

/**

 * @description: service实现类

 * @author: anson

 * @Date: 2019/9/5 0:37

 * @version: 1.0

 */

@Service

public class UserServiceImpl implements UserService

{

    @Autowired

    UserMapper usermapper;

    @Override

    public User selectByPrimaryKey(Integer id)

    {

        return  usermapper.selectByPrimaryKey(id);

    }

    @Override

    public int deleteByPrimaryKey(Integer id)

    {

        return   usermapper.deleteByPrimaryKey(id);

    }

    @Override

    public  int insert(User record)

    {

        return  usermapper.insert(record);

    }

    @Override

    public int insertSelective(User record)

    {

        return  usermapper.insertSelective(record);

    }

    @Override

    public int updateByPrimaryKeySelective(User record)

    {

        return  usermapper.updateByPrimaryKeySelective(record);

    }

    @Override

    public int updateByPrimaryKey(User record)

    {

        return  usermapper.updateByPrimaryKey(record);

    }

}
1-7、编写controller:
package com.anson.controller;

import com.anson.model.User;

import com.anson.service.UserService;

import io.swagger.annotations.Api;

import io.swagger.annotations.ApiImplicitParam;

import io.swagger.annotations.ApiOperation;

import org.springframework.beans.factory.annotation.Autowired;

import org.springframework.web.bind.annotation.PathVariable;

import org.springframework.web.bind.annotation.RequestMapping;

import org.springframework.web.bind.annotation.RequestMethod;

import org.springframework.web.bind.annotation.RestController;

/**

 * @description: TODO

 * @author: anson

 * @Date: 2019/9/5 0:42

 * @version: 1.0

 */

@RestController

@Api(value = "用户接口")

@RequestMapping("/user")

public class UserController

{

    @Autowired

    private UserService userservice;

    @ApiOperation(value = "获取用户", notes = "根据id查询用户信息")

    @ApiImplicitParam(name = "id", value = "用户id", required=true, dataType="int") //API参数

    @RequestMapping(value="/getUserById/{id}",method= RequestMethod.GET)

    public User selectByPrimaryKey(@PathVariable int id)

    {

        return userservice.selectByPrimaryKey(id);

    }

}
1-8、启动类中增加包扫描注解:
@SpringBootApplication

@MapperScan("com.anson.dao") //增加Mapper包扫描注解

public class application

{

    public static   void main(String[] args)

    {

        SpringApplication.run(application.class,args);

    }

}
1-9、配置文件中增加数据源和mybatis的注解:
#服务器配置

server.port=8090

#mysql数据源配置

spring.datasource.driverClassName = com.mysql.cj.jdbc.Driver

spring.datasource.url = jdbc:mysql://localhost:3306/mydb?useUnicode=true&characterEncoding=utf-8&useSSL=true&serverTimezone=UTC

spring.datasource.username = root

spring.datasource.password =88888888

#mybatis配置

mybatis.type-aliases-package=com.anson.model

mybatis.mapperLocations=classpath:mapper/*Mapper.xml

#showSql

logging.level.com.anson.dao=debug
好了,完毕,运行,可以在swagger中查看和运行接口:
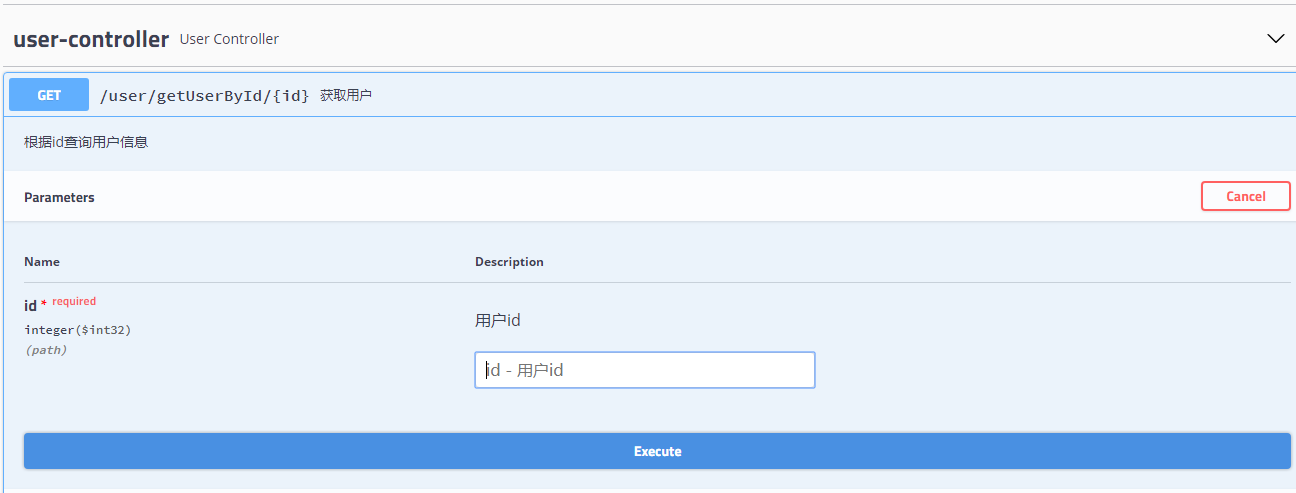

可以看到已经正常运行了;
好了,本节到此为止,下节将讲介绍mybatis-generator自动生成实体、mapper和mapper对应的XML
源码地址:https://github.com/anson-yang/cloverDemo.git
小白的springboot之路(三)、集成mybatis与MySQL的更多相关文章
- 小白的springboot之路(一)、环境搭建、第一个实例
小白的springboot之路(一).环境搭建.第一个实例 0- 前言 Spring boot + spring cloud + vue 的微服务架构技术栈,那简直是爽得不要不要的,怎么爽法,自行度娘 ...
- 小白的springboot之路(十五)、mybatis的PageHelper分页插件使用
0.前言 用mybatis,那么分页必不可少,基本都是用PageHelper这个分页插件,好用方便: 1.实现 1.1.添加依赖: <!-- 3.集成 mybatis pagehelper--& ...
- SpringBoot 集成Mybatis 连接Mysql数据库
记录SpringBoot 集成Mybatis 连接数据库 防止后面忘记 1.添加Mybatis和Mysql依赖 <dependency> <groupId>org.mybati ...
- SpringBoot 入门教程:集成mybatis,redis
SrpingBoot相较于传统的项目具有配置简单,能快速进行开发的特点,花更少的时间在各类配置文件上,更多时间在具体业务逻辑上. SPringBoot采用纯注解方式进行配置,不喜欢xml配置的同学得仔 ...
- 小白的springboot之路(十六)、mybatis-plus 的使用
0-前言 mybatis plus是对mybatis的增强,集成mybatis plus后,简单的CRUD和分页就不用写了,非常方便,五星推荐: 1-集成 1-1.添加依赖 <!-- .集成my ...
- Spring Boot(六)集成 MyBatis 操作 MySQL 8
一.简介 1.1 MyBatis介绍 MyBatis 是一款优秀的持久层框架,它支持定制化 SQL.存储过程以及高级映射.MyBatis 避免了几乎所有的 JDBC代码和手动设置参数以及获取结果集. ...
- 小白的springboot之路(二)、集成swagger
0-前言 现在的项目开发,基本都是前后端分离,后端专注于API接口开发,都需要编写和维护API接口文档.如果你还在用Word来编写接口文档,那你就out了,这个时候,当当当当~神兵利器swagger隆 ...
- 小白的springboot之路(五)、集成druid
0-前言 Druid阿里巴巴开源的一个java数据库连接池,是Java语言中最好的数据库连接池,Druid能够提供强大的监控和扩展功能:集成它能够方便我们对数据库连接进行监控和分析,下面我们来集成它: ...
- 小白的springboot之路(十二)、集成log4j2日志
0.前言 日志记录对系统来说必不可少,spring boot中常用的日志组件有log4j.logback.log4j2,其中logback是spring boot默认的,已自带:选用log4j2就可以 ...
随机推荐
- javaScipt类定义和实现
最近在几个群上经常看到有人问在一个类里的一个 function 怎么调用 this. 定义后公开的方法.现发一篇类实现的随笔.首先说说类,在一个类里我们会有以下的几个特征:1. 公有方法2. 私有 ...
- Laravel用户认证
前期准备 Laravel的权限配置文件位于 config/auth.php,Laravel的认证组件由"guards"和"providers"组成, Guard ...
- NOIP模拟测试33
这次考试很失败. T1sb题,40分钟切了,当我打完对拍全过去上厕所的时候,碰到了yxm. yxm:我又自闭了,没有一点进展. 我:…… yxm:你会做几个? 我(思考再三):T1只会暴力. (我这么 ...
- ElasticSearch(二):文档的基本CRUD与批量操作
ElasticSearch(二):文档的基本CRUD与批量操作 学习课程链接<Elasticsearch核心技术与实战> Create 文档 支持自动生成文档_id和指定文档_id两种方式 ...
- SysTick系统定时器
1.SysTick定时器介绍 SysTick定时器也叫SysTick滴答定时器,它是Cortex-M3内核的一个 外设,被嵌入在 NVIC 中.它是一个24 位向下递减的定时器,每计数一 次所需时间为 ...
- 网站搭建 - Linux虚拟系统 - 时间设置 - root密码修改 - 建站
先试一下,如果不成的话,就不发表了. 下载织梦: 额,这个先还是不要下了. Linux是Apache + MySQL + PHP的套路,先下载吧,不摆图了,直接摆命令,我的是虚拟机,可能没有那么顺利. ...
- [LC] 108题 将有序数组转换为二叉搜索树 (建树)
①题目 将一个按照升序排列的有序数组,转换为一棵高度平衡二叉搜索树. 本题中,一个高度平衡二叉树是指一个二叉树每个节点 的左右两个子树的高度差的绝对值不超过 1. 示例: 给定有序数组: [-10,- ...
- nyoj 1112-求次数 (string, substr(begin, length), map, pair)
1112-求次数 内存限制:64MB 时间限制:1000ms 特判: No 通过数:3 提交数:8 难度:2 题目描述: 题意很简单,给一个数n 以及一个字符串str,区间[i,i+n-1] 为一个新 ...
- python3.7.1安装Scrapy爬虫框架
python3.7.1安装Scrapy爬虫框架 环境:win7(64位), Python3.7.1(64位) 一.安装pyhthon 详见Python环境搭建:http://www.runoob.co ...
- linux 内核的RCU本质
RCU,Read-Copy Update,是一种同步机制,它的本质就是在同步什么?1. 它只有reader-side lock,并且不产生锁竞争.2. 它同步reader-side 临界区和 recl ...