
[Part 3] 在Ubuntu 16.04源码编译PCL 1.8.1支持VTK和QT
本文首发于个人博客https://kezunlin.me/post/137aa5fc/,欢迎阅读!
Part-3: Install and Configure PCL 1.8.1 with vtk qt support on Ubuntu 16.04 from source
Series
- Part-1: Install and Configure Qt5 on Ubuntu 16.04
- Part-2: Install and Configure VTK 8.1.0 from source with Qt5 on Ubuntu 16.04
- Part-3: Install and Configure PCL 1.8.1 with vtk qt support on Ubuntu 16.04 from source
- Part-4: Install and Configure PCL 1.8.1 with vtk qt support on windows 10 from source
Guide
- qt: 5.7.0
- qmake: 3.0
- qtcreator: 3.5.1
- vtk: 8.1.0 (source)
- pcl :1.8.1 (source)
Setup Prerequisites
 sudo apt-get update

 sudo apt-get install git build-essential linux-libc-dev

 sudo apt-get install cmake cmake-gui

 sudo apt-get install libusb-dev libudev-dev

 sudo apt-get install mpi-default-dev openmpi-bin openmpi-common

 sudo apt-get install libpcap-dev

 sudo apt-get install libflann1.8 libflann-dev

 sudo apt-get install libeigen3-dev

 sudo apt-get install libopenni2-dev

 sudo apt-get install libqhull7 libqhull-dev

 sudo apt-get install freeglut3-dev pkg-config

 sudo apt-get install libxmu-dev libxi-dev

 sudo apt-get install mono-complete

 sudo apt-get install openjdk-8-jdk openjdk-8-jre
dropped
 sudo apt-get install qt-sdk

 sudo apt-get install libvtk5.10-qt4 libvtk5.10 libvtk5-dev

 sudo apt-get install vtk6 libvtk6-dev libvtk6-qt-dev
Notice for vtk version.
metslib
for cmake error:
no metslib found.
fix by
wget https://www.coin-or.org/download/source/metslib/metslib-0.5.3.tgz

tar xzvf metslib-0.5.3.tgz

cd metslib-0.5.3

./configure

make

sudo make install
glxinfo
install
sudo apt-get install mesa-utils

glxinfo
possible error
X Error of failed request:  BadRequest (invalid request code or no such operation)

Major opcode of failed request:  154 (GLX)

Minor opcode of failed request:  34 ()

Serial number of failed request:  34

Current serial number in output stream:  33
fix,make sure NVIDIA drivers are installed successfully and no conflict.
check display OpenGL info
$ glxinfo | grep OpenGL

OpenGL vendor string: NVIDIA Corporation

OpenGL renderer string: GeForce GTX 1060/PCIe/SSE2

OpenGL core profile version string: 4.5.0 NVIDIA 384.90

OpenGL core profile shading language version string: 4.50 NVIDIA

OpenGL core profile context flags: (none)

OpenGL core profile profile mask: core profile

OpenGL core profile extensions:

OpenGL version string: 4.5.0 NVIDIA 384.90

OpenGL shading language version string: 4.50 NVIDIA

OpenGL context flags: (none)

OpenGL profile mask: (none)

OpenGL extensions:

OpenGL ES profile version string: OpenGL ES 3.2 NVIDIA 384.90

OpenGL ES profile shading language version string: OpenGL ES GLSL ES 3.20

OpenGL ES profile extensions:
It means we use OpenGL version 4.5.0 for NVIDIA display.
Or by nvidia-settings, NVIDIA X Server Settings--> X Screen 0 --> OpenGL/GLX Information.
compile
wget https://github.com/PointCloudLibrary/pcl/archive/pcl-1.8.1.tar.gz

 cd pcl

 mkdir build

 cd build

 cmake-gui ..
with options
 QT_USE_FILE /home/kezunlin/program/pcl-1.8.1/build/use-qt5.cmake

 VTK_DIR  /usr/local/lib/cmake/vtk-8.1

 CMAKE_BUILD_TYPE       Release

 CMAKE_CONFIGURATION_TYPES Release

 CMAKE_INSTALL_PREFIX  /usr/local

 PCL_SHARED_LIBS       ON

 PCL_QT_VERSION        5

 PCL_ENABLE_SSE        ON

 Build_visualization ON

 Build_apps ON

 Build_examples OFF # error may occur
Using CPU native flags for SSE optimization: -march=native
make and install
 # it may take several minutes, wait ...

 make -j8

 sudo make -j8 install
cmake install to
/usr/local/bin,/usr/local/lib/,/usr/local/include/pcl-1.8
PCL_DIRwill be/usr/local/share/pcl-1.8
error for example
/home/kezunlin/program/pcl-1.8.1/examples/segmentation/example_cpc_segmentation.cpp:493:17: error: ‘class vtkUnsignedCharArray’ has no member named ‘InsertNextTupleValue’

         colors->InsertNextTupleValue (color);
so cmake with options
Build_examples OFF
Test pcl_viewer
test pcl_viewer
/usr/local/bin/pcl_viewer ~/program/pcl-1.8.1/test/car6.pcd
Success.
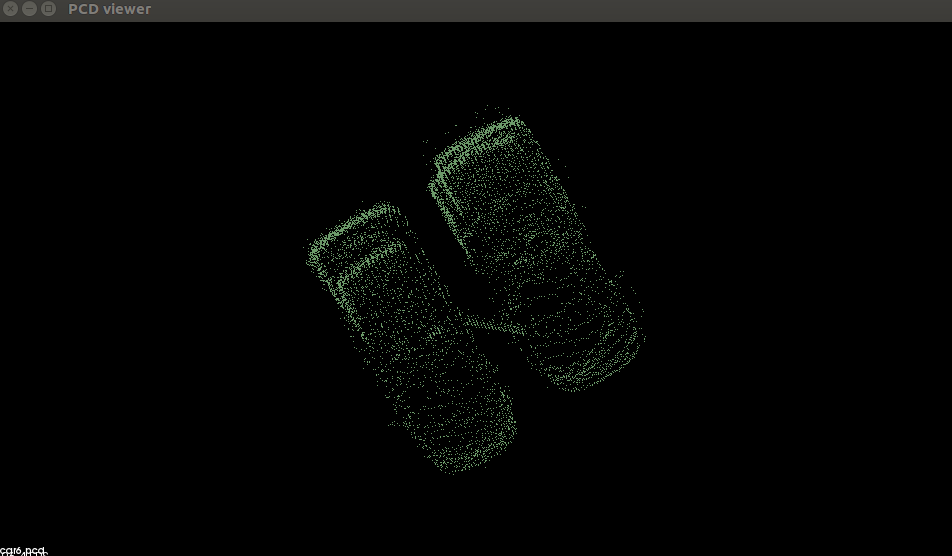
Tips: screen snapshot by gnome-screenshot -a.
Cloud Viewer
cloud_viewer.cpp
#include <pcl/visualization/cloud_viewer.h>

#include <iostream>

#include <pcl/io/io.h>

#include <pcl/io/pcd_io.h>

int user_data;

void

viewerOneOff (pcl::visualization::PCLVisualizer& viewer)

{

    viewer.setBackgroundColor (1.0, 0.5, 1.0);

    pcl::PointXYZ o;

    o.x = 1.0;

    o.y = 0;

    o.z = 0;

    viewer.addSphere (o, 0.25, "sphere", 0);

    std::cout << "i only run once" << std::endl;

}

void

viewerPsycho (pcl::visualization::PCLVisualizer& viewer)

{

    static unsigned count = 0;

    std::stringstream ss;

    ss << "Once per viewer loop: " << count++;

    viewer.removeShape ("text", 0);

    viewer.addText (ss.str(), 200, 300, "text", 0);

    //FIXME: possible race condition here:

    user_data++;

}

int

main ()

{

    // car6 x y z

    // colored_cloud x y z rbga

    pcl::PointCloud<pcl::PointXYZRGBA>::Ptr cloud (new pcl::PointCloud<pcl::PointXYZRGBA>);

    pcl::io::loadPCDFile ("colored_cloud.pcd", *cloud);

    pcl::visualization::CloudViewer viewer("Cloud Viewer");

    //blocks until the cloud is actually rendered

    viewer.showCloud(cloud);

    //use the following functions to get access to the underlying more advanced/powerful

    //PCLVisualizer

    //This will only get called once

    viewer.runOnVisualizationThreadOnce (viewerOneOff);

    //This will get called once per visualization iteration

    viewer.runOnVisualizationThread (viewerPsycho);

    while (!viewer.wasStopped ())

    {

    //you can also do cool processing here

    //FIXME: Note that this is running in a separate thread from viewerPsycho

    //and you should guard against race conditions yourself...

    user_data++;

    }

    return 0;

}

/*

http://pointclouds.org/documentation/tutorials/cloud_viewer.php

http://pointclouds.org/documentation/tutorials/pcl_visualizer.php

http://docs.pointclouds.org/1.7.0/structpcl_1_1_point_x_y_z_r_g_b.html

*/
CMakeLists.txt
cmake_minimum_required(VERSION 2.8 FATAL_ERROR)

project(cloud_viewer)

# set bin folder

set(CMAKE_BINARY_DIR ${CMAKE_SOURCE_DIR}/bin)

set(EXECUTABLE_OUTPUT_PATH ${CMAKE_BINARY_DIR})

set(LIBRARY_OUTPUT_PATH ${CMAKE_BINARY_DIR})

find_package(PCL 1.8.1 REQUIRED)

#message( [***] ${PCL_INCLUDE_DIRS})

#message( [***] ${PCL_LIBRARY_DIRS})

#message( [***] ${PCL_DEFINITIONS})

#message( [***] ${PCL_LIBRARIES})

include_directories(${PCL_INCLUDE_DIRS})

link_directories(${PCL_LIBRARY_DIRS})

add_definitions(${PCL_DEFINITIONS})

add_executable (cloud_viewer cloud_viewer.cpp)

target_link_libraries (cloud_viewer ${PCL_LIBRARIES})
compile
mkdir build

cd build

cmake ..

make
run demo
bin folder
$ tree bin/

bin/

├── cloud_viewer

└── colored_cloud.pcd

0 directories, 2 files
run demo
./cloud_viewer
Code Example
Pcd write
see Part-4: Install and Configure PCL 1.8.1 with vtk qt support on windows 10 from source
Reference
for windows
History
- 20180105: created.
- 20180227: rewrite pcl compile part.
Copyright
- Post author: kezunlin
- Post link: https://kezunlin.me/post/137aa5fc/
- Copyright Notice: All articles in this blog are licensed under CC BY-NC-SA 3.0 unless stating additionally.
[Part 3] 在Ubuntu 16.04源码编译PCL 1.8.1支持VTK和QT的更多相关文章
- [Part 4] 在Windows 10上源码编译PCL 1.8.1支持VTK和QT,可视化三维点云
本文首发于个人博客https://kezunlin.me/post/2d809f92/,欢迎阅读! Part-4: Compile pcl with vtk qt5 support from sour ...
- Ubuntu 16.04 源码编译安装PHP7+swoole
备注: Ubuntu 16.04 Server 版安装过程图文详解 Ubuntu16镜像地址: 链接:https://pan.baidu.com/s/1XTVS6BdwPPmSsF-cYF6B7Q 密 ...
- ubuntu 16.04源码编译OpenCV教程 | compile opencv on ubuntu 16.04
本文首发于个人博客https://kezunlin.me/post/15f5c3e8/,欢迎阅读! compile opencv on ubuntu 16.04 Series Part 1: comp ...
- ubuntu 16.04源码编译和配置caffe详细教程 | Install and Configure Caffe on ubuntu 16.04
本文首发于个人博客https://kezunlin.me/post/b90033a9/,欢迎阅读! Install and Configure Caffe on ubuntu 16.04 Series ...
- Ubuntu 16.04源码编译boost库 编写CMakeLists.txt | compile boost 1.66.0 from source on ubuntu 16.04
本文首发于个人博客https://kezunlin.me/post/d5d4a460/,欢迎阅读! compile boost 1.66.0 from source on ubuntu 16.04 G ...
- Ubuntu 16.04 源码编译安装PHP7
一.下载PHP7的最新版源码 php7.0.9 下载地址 http://php.net/get/php-7.0.9.tar.gz/from/a/mirror 二.解压 tar -zxf /tmp/p ...
- Ubuntu 16.04源码编译安装nginx 1.10.0
一.下载相关的依赖库 pcre 下载地址 http://120.52.73.43/jaist.dl.sourceforge.net/project/pcre/pcre/8.38/pcre-8.38.t ...
- [环境配置]Ubuntu 16.04 源码编译安装OpenCV-3.2.0+OpenCV_contrib-3.2.0及产生的问题
1.OpenCV-3.2.0+OpenCV_contrib-3.2.0编译安装过程 1)下载官方要求的依赖包 GCC 4.4.x or later CMake 2.6 or higher Git GT ...
- [笔记] Ubuntu 18.04源码编译安装OpenCV 4.0流程
标准常规安装方法安装的OpenCV版本比较低,想尝鲜使用4.0版本,只好源码安装. 安装环境 OS:Ubuntu 18.04 64 bit 显卡:NVidia GTX 1080 CUDA:10.0 c ...
随机推荐
- 简单认识JVM
准备: 在具体聊JVM之前,我们先看两张图,通过分析图,咱们慢慢来聊聊JVM. JVM内存结构图 JVM内存结构脑图 上面两张图中,第二张图相对来说比较直观,就是JVM内存结构都划分成了哪些模块,各个 ...
- 那些惊艳的 GIS 轮子
一.前言 GIS 涉及测绘.几何拓扑.人文社科等多方面的科学知识.在 .Net 平台下有着许多优秀的开源产品,比如:MapWindow.SharpMap.WorldWind等.而在这其中,Coordi ...
- electron调用c#动态库
electron调用c#动态库 新建C#动态库 方法要以异步任务的方式,可以直接包装,也可以写成天然异步 代码如下 public class Class1 { public async Task< ...
- CCBPM工作流系统中如何在特定的一个步骤,调用起另外一条流程
关键词: 工作流快速开发平台 工作流设计 业务流程管理 asp.net 开源工作流bpm工作流系统 java工作流主流框架 自定义工作流引擎 需求描述: 1, 操作员在操作最后一个节点时, ...
- JVM学习记录1--JVM内存布局
先上个图 这是根据<Java虚拟机规范(第二版)>所画的jvm内存模型. 程序计数器:程序计数器是用来记录当前线程方法执行顺序的,对应的就是我们编程中一行行代码的执行顺序,如分支,跳转,循 ...
- Mac高效开发之iTerm2、Prezto和Solarized主题
本文首发于个人网站:Mac高效开发之iTerm2.Prezto和Solarized主题 工欲善其事必先利其器,作为开发,我追求极致的高效,因此会在很多细节上追求效率,例如:命令行窗口敲命令的时候,如果 ...
- 什么是Viewport
什么是Viewport 手机浏览器是把页面放在一个虚拟的“窗口”(viewport)中,通常这个虚拟的“窗口”(viewport)比屏幕宽,这样就不用把每个网页挤到很小的窗口中(这样会破坏没有针对手机 ...
- linux sqlite安装
wget http://www.sqlite.org/sqlite-3.6.16.tar.gz tar -zxvf sqlite-3.6.16.tar.gz cd sqlite-3.6.16 ./c ...
- 设计模式C++描述----06.适配器(Adapter)模式
一. 定义 适配器模式将一个类的接口转换成客户希望的另外一个接口,使得原本由于接口不兼容而不能一起工作的那些类可以一起工作. Adapter 模式的两种类别:类模式和对象模式. 二. 举例说明 实际中 ...
- 关于 mybatis 报invalid comparison: java.util.Arrays$ArrayList and java.lang.String异常
今天碰到个问题,来记录下,希望可以帮助到大家 贴错误源码: 这是一个根据list集合的查找数据的 sql,在接收list的时候加了判断 list != ‘ ’ “”,引起了集合与Stirng类型的比较 ...