
配置管理-git研究(版本管理)
1. 安装git2.7
git2.7具体安装步骤如下:
[root@host1 ~]# yum install curl-devel expat-devel gettext-devel openssl-devel zlib-devel gcc-c++ perl-ExtUtils-MakeMaker -y
[root@host1 src]# pwd
/usr/local/src
[root@host1 src]# wget https://github.com/git/git/archive/v2.7.4.zip
[root@host1 src]# ll
total 6756
-rw-r--r-- 1 root root 6918037 Nov 5 15:45 v2.7.4.zip
[root@host1 src]# unzip v2.7.4.zip
[root@host1 src]# cd git-2.7.4/
[root@host1 git-2.7.4]# make prefix=/usr/local/get all
[root@host1 git-2.7.4]# make prefix=/usr/local/git install
[root@host1 git-2.7.4]# rm -rf /usr/bin/git (删除原来的git1.8版本的软连接)
[root@host1 git-2.7.4]# ln -s /usr/local/git/bin/git /usr/bin/git (重新创建git2.7版本的软连接)
[root@host1 git-2.7.4]# git --version (查看git版本)
git version 2.7.4
2. git相关操作命令
git安装完成后,需要进行初始化操作,可以新建git有关目录。
git初始化
新建git有关目录:[root@host1 ~]# mkdir /git-test
初始化git:
[root@host1 ~]# cd /git-test/
[root@host1 git-test]# pwd
/git-test
[root@host1 git-test]# git init
Initialized empty Git repository in /git-test/.git/
添加版本库信息(提交代码或者文件的用户,邮箱等信息):
[root@host1 git-test]# git config --global user.name "rybtest"
[root@host1 git-test]# git config --global user.email "rybtest@163.com"
查看git 配置信息:
[root@host1 git-test]# git config --list
user.name=rybtest
user.email=rybtest@163.com
core.repositoryformatversion=0
core.filemode=true
core.bare=false
core.logallrefupdates=true
3. git基本原理
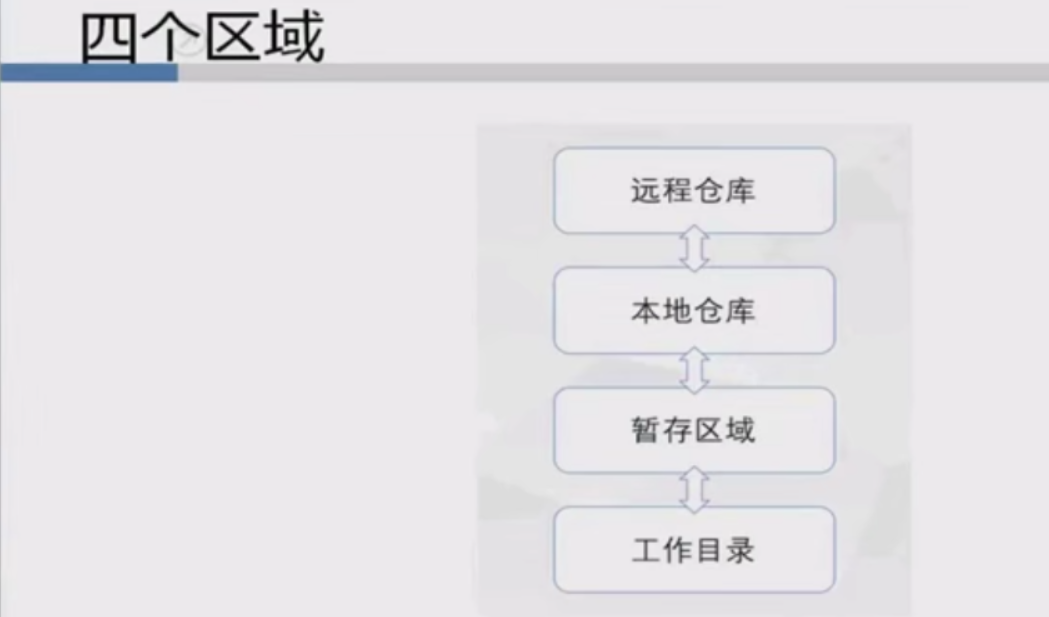
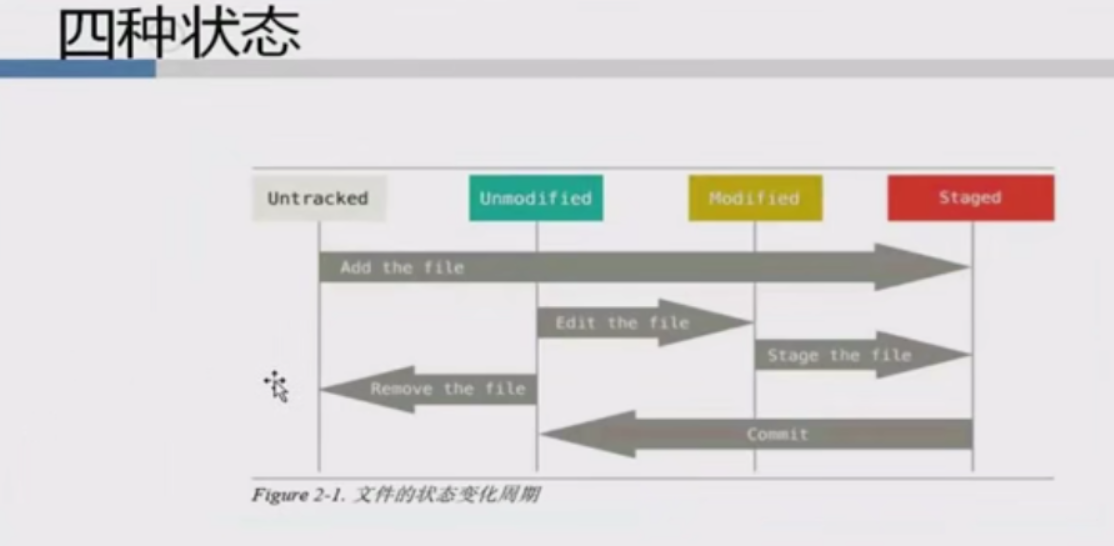
4. git常用命令
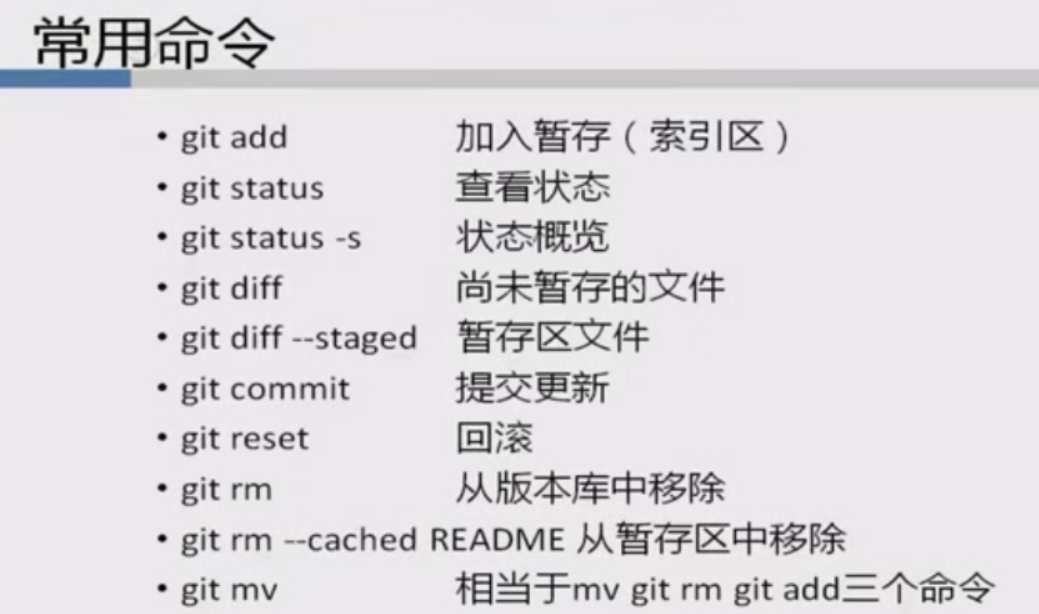
查看历史版本:[root@host1 git-test]# git log
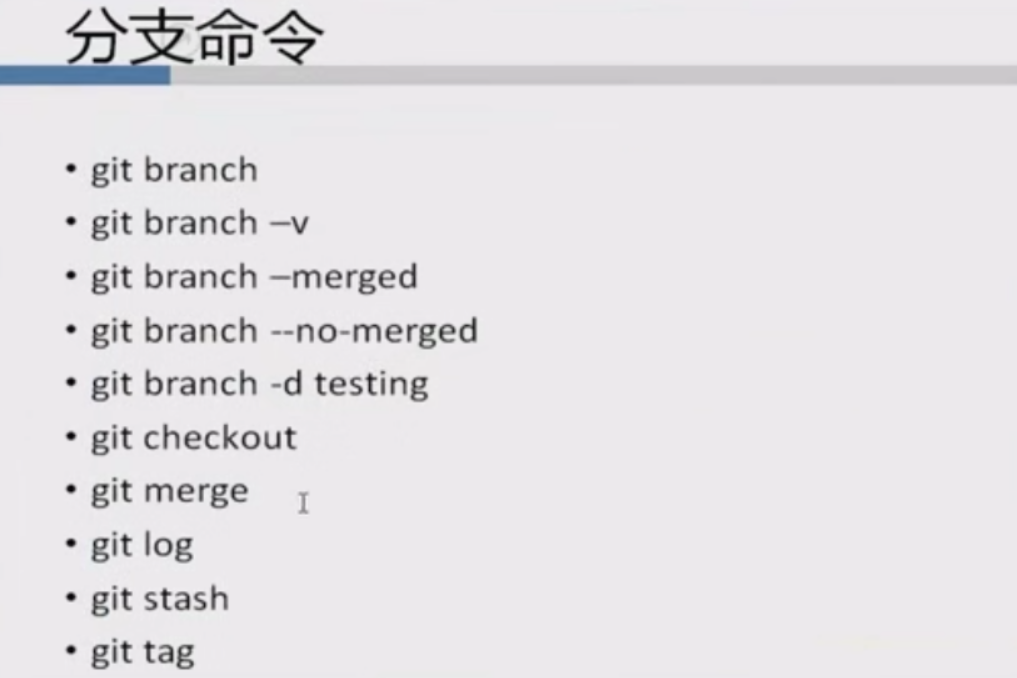
5. git 分支管理
6. git高级管理

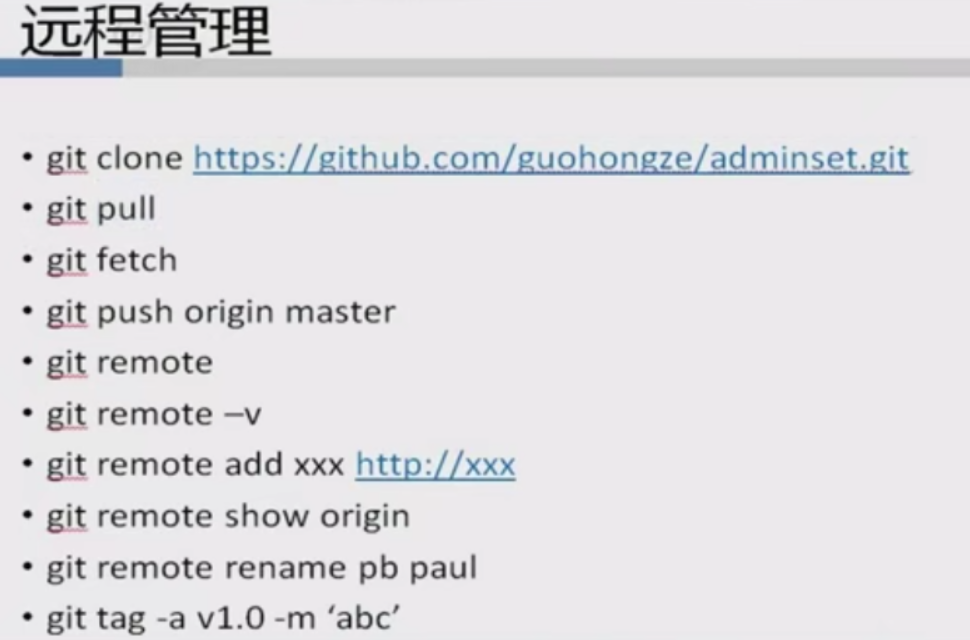
7. git远程管理
8. gitlab安装配置
具体安装步骤如下:
[root@host1 git-test]# yum install curl policycoreutils openssl-server openssh-clients
[root@host1 git-test]# systemctl enable sshd
[root@host1 git-test]# systemctl start sshd
[root@host1 git-test]# yum install postfix -y
[root@host1 git-test]# systemctl enable postfix
[root@host1 git-test]# systemctl start postfix
[root@host1 ~]# rpm -ivh gitlab-ce-8.9.0-ce.0.el7.x86_64.rpm
安装完成后开始进行配置:
[root@host1 ~]# vim /etc/gitlab/gitlab.rb
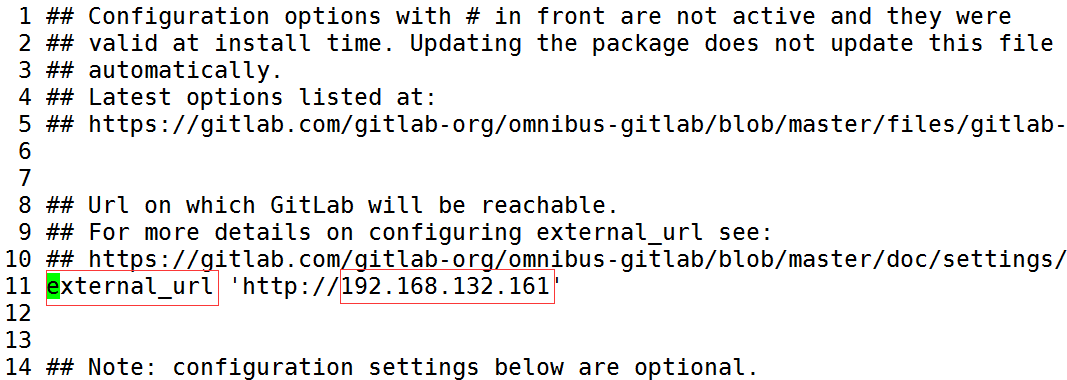
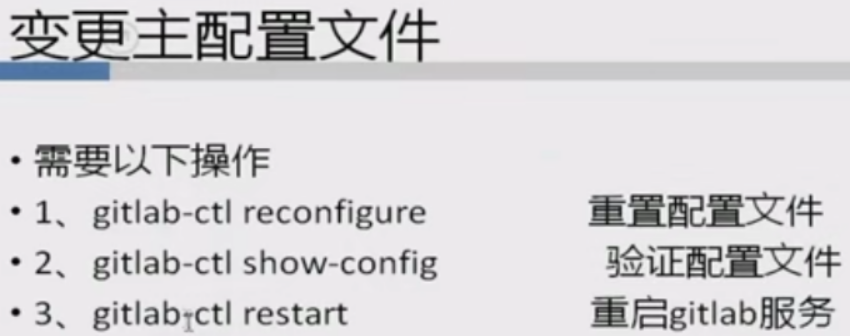
[root@host1 ~]# gitlab-ctl reconfigure (执行此命令使修改生效,此命令执行大概需要10分钟 左右时间 会比较长)
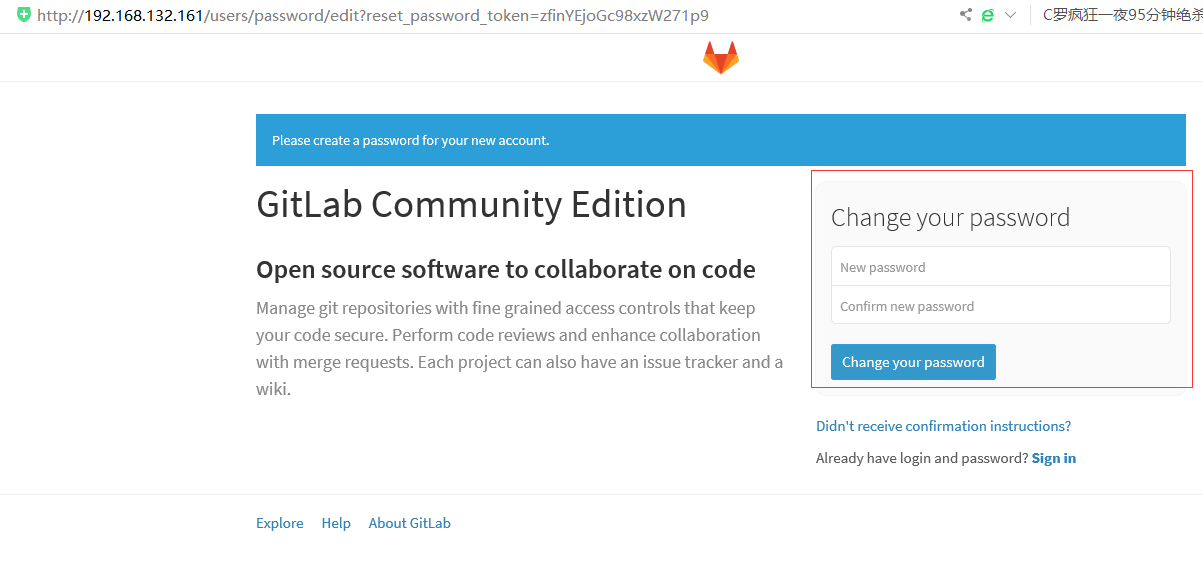
在浏览器里输入IP地址进行访问:http://192.168.132.161 ,有时候会报如下错误提示:一般都是由于内存太小导致,加大内存,最小2048MB内存,问题解决。
Whoops, GitLab is taking too much time to respond
加大内存问题解决后,再次输入本机ip地址访问成功如下图:需要设置密码,自定义即可!
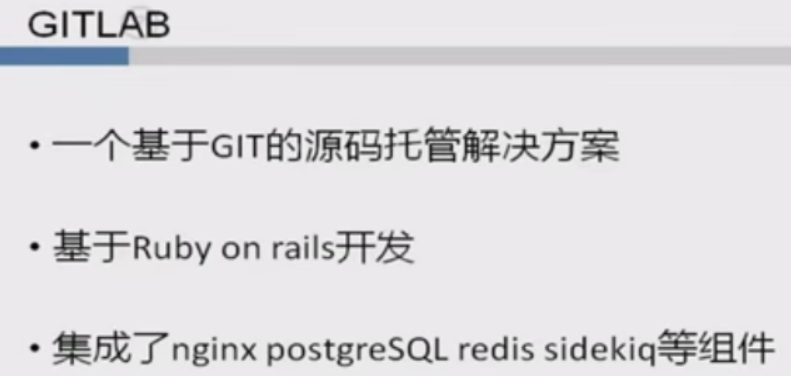
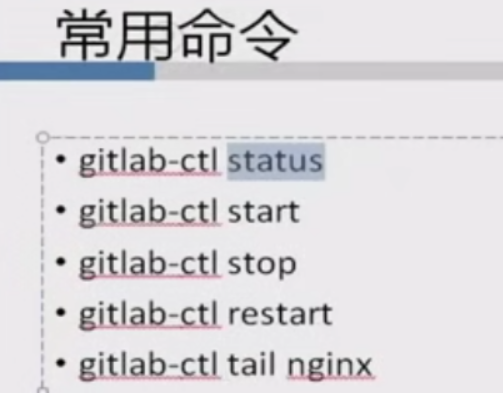
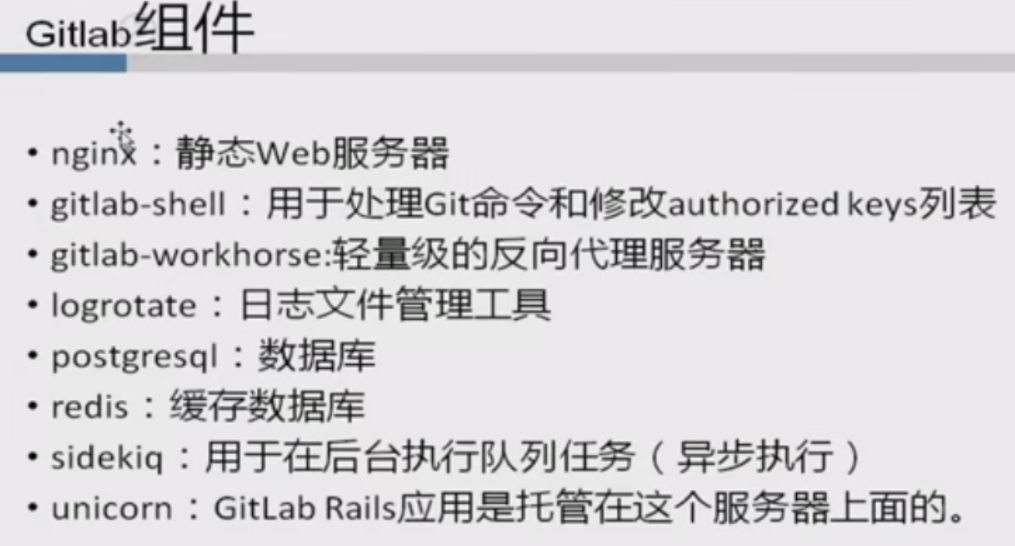
GITLAB介绍:

9. gitlab权限管理
配置管理-git研究(版本管理)的更多相关文章
- 微信小程序如何使用 Git 实现版本管理和协作开发
前言 在微信小程序开发的过程中,代码版本管理往往需要使用第三方工具进行管理.虽然微信Web开发工具提供了对Git文件版本状态的提示,但实际的使用体验依然不尽人意. 随着微信Web开发工具的更新,最新的 ...
- 实验一 GIT 代码版本管理
实验一 GIT 代码版本管理 实验目的: 1)了解分布式分布式版本控制系统的核心机理: 2) 熟练掌握git的基本指令和分支管理指令: 实验内容: 1)安装git 2)初始配置git ,git ...
- 实验一 GIT 代码版本管理
实验一 GIT 代码版本管理 实验目的: 1)了解分布式分布式版本控制系统的核心机理: 2)熟练掌握git的基本指令和分支管理指令: 实验内容: 1)安装git 2)初始配置git ,git ini ...
- 实验一Git代码版本管理
GIT代码版本管理 实验目的: 1)了解分布式分布式版本控制系统的核心机理: 2) 熟练掌握git的基本指令和分支管理指令: 实验内容: 1)安装git 2)初始配置git ,git init git ...
- 实验一  GIT 代码版本管理
实验一 GIT 代码版本管理 实验目的: 1)了解分布式分布式版本控制系统的核心机理: 2) 熟练掌握git的基本指令和分支管理指令: 实验内容: 1)安装git 2)初始配置git ,git ...
- 软件工程实验一 Git代码版本管理
实验一 GIT 代码版本管理 一.实验目的: 1)了解分布式分布式版本控制系统的核心机理: 2)熟练掌握git的基本指令和分支管理指令: 二.实验内容: 1)安装git: 2)初始配置git ,gi ...
- 使用Git进行版本管理
参考:http://www.runoob.com/git/git-tutorial.html 一.Git简介 1.Git 和 SVN 比较 (1)GIT是分布式的,SVN不是; (2)GIT把内容按元 ...
- 用好SVN与Git,版本管理都不是问题
介绍一下SVN SVN:代码控制器(版本控制器),主要是为了多人协同开发项目,管理代码.也可以管理个人代码.也叫程序界的”后悔药“. SVN(是subversion的简称)是近年来一款基于C/S架构的 ...
- 实验1 GIT代码版本管理
(一)实验目的: 1)了解分布式分布式版本控制系统的核心机理: 2) 熟练掌握git的基本指令和分支管理指令: (二)实验内容: 1)安装git 2)初始配置git ,git init git sta ...
随机推荐
- 误删除/boot ,如何修复
进入救援模式 1.chroot /mnt/sysimage 将路径修改为 /mnt/sysimage 2.mkdir /mnt/temp mount /dev/sr0 /mnt/temp 挂载光盘 ...
- Spring容器与SpringMVC容器的区别与联系
在spring整体框架的核心概念中,容器的核心思想是管理Bean的整个生命周期.但在一个项目中,Spring容器往往不止一个,最常见的场景就是在一个项目中引入Spring和SpringMVC这两个框架 ...
- oracle--LGWR
一,LGWR功能 日志写进程(日志写比数据写更重要),因为内存中的数据一断电就消 失,要做数据的回滚.前滚只能依靠日志文件.log buffer 只是缓冲日志写 二,触发机制 ) 提交命令:commi ...
- Jena Fuseki安装完成后不能添加数据库
问题描述:安装Jena成功后可以进入管理页面,无法通过界面选择和查询数据 解决方案: 进入 apache-jena-fuseki-3.12.0\run 修改 shiro.ini 配置文件 注释 /$/ ...
- .NET Core:过滤器
过滤器的作用是在 Action 方法执行前或执行后做一些加工处理.使用过滤器可以避免Action方法的重复代码.功能上更贴合业务的使用过滤器. 在Startup中的ConfigureServices方 ...
- 【javascript】判断是否为正整数
function isNormalInteger(str) { var n = Math.floor(Number(str)); return n !== Infinity && St ...
- 物联网典型场景之智能家电,使用JOSH技术带来的优势和机会~
很多人一直问,用JOSH技术如何改变智能家电,有没有真正的必要? 一部分人的观点:我可以用嵌入式C.汇编完成家电的程序,毕竟这些设备的程序很简单: 另一部分的人:智能家电互相的连接都一直有人在做啊,并 ...
- laravel框架中Job和事件event的解析
本篇文章给大家带来的内容是关于laravel框架中Job和事件event的解析,有一定的参考价值,有需要的朋友可以参考一下,希望对你有所帮助. 在做项目的时候,一直对Job和Event有个疑惑.感觉两 ...
- VS删除空白行
使用正则表达式, 搜索 (?<=\r\n)\r\n 替换空白
- sentry之一:sentry安装
Sentry 是一个开源的实时错误追踪系统,可以帮助开发者实时监控并修复异常问题.它主要专注于持续集成.提高效率并且提升用户体验.Sentry 分为服务端和客户端 SDK,前者可以直接使用它家提供的在 ...