
个性二维码开源专题<液化/圆角/效果>
基础方法:
ChangeFillShape
//修改填充形状

ChangeFillShape(...)
// 摘要:

        //     修改填充形状

        //

        // 参数:

        //   g:

        //     图形画板

        //

        //   Forebrush:

        //     填充色

        //

        //   rect:

        //     区域

        //

        //   en_fillshape:

        //     填充形状枚举

        //

        //   fillshpape:

        //     填充形状参数

        //

        //   Backbrush:

        //     背景色

        //

        //   isOutside:

        //     是否外修改

        public Graphics ChangeFillShape(Graphics g, Brush Forebrush, Rectangle rect, EN_FillShape en_fillshape, FillShape fillshpape, Brush Backbrush, bool isOutside = false);
//液化方法

InkPaint(...)
        //

        // 摘要:

        //     液化样式

        //

        // 参数:

        //   matrix:

        //     矩阵

        //

        //   i:

        //     i

        //

        //   j:

        //     j

        //

        //   rect:

        //     局域

        //

        //   radius:

        //     半径

        //

        //   isFore:

        //     填充样式(true:填充,false:背景)

        public FillShape InkPaint(bool[][] matrix, int i, int j, Rectangle rect, int radius, bool isFore);
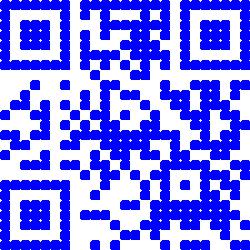
//圆角样式

            for (int i = ; i < matrix.Length; i++)

            {

                for (int j = ; j < matrix.Length; j++)

                {

                    rect = new Rectangle((j + this.SpacingW) * QrCodeEncoder.QRCodeScale, (i + this.SpacingH) * QrCodeEncoder.QRCodeScale, QrCodeEncoder.QRCodeScale, QrCodeEncoder.QRCodeScale);

                    if (matrix[j][i])

                    {

                        ChangeFillShape(g, new SolidBrush(Color.Blue), rect, EN_FillShape.FillRoundRectangle, new FillShape() { radius = , roundStyle = RoundStyle.All }, Backbrush);

                    }

                    else

                    {

                        ChangeFillShape(g, Backbrush, rect, EN_FillShape.FillRectangle, new FillShape(), Backbrush);

                    }

                }

            }
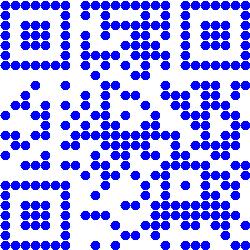
//修改radius 值
ChangeFillShape(g, new SolidBrush(Color.Blue), rect, EN_FillShape.FillRoundRectangle, new FillShape() { radius = , roundStyle = RoundStyle.All }, Backbrush);
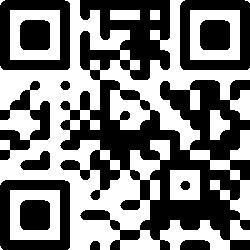
//液化样式

            for (int i = ; i < matrix.Length; i++)

            {

                for (int j = ; j < matrix.Length; j++)

                {

                    rect = new Rectangle((j + this.SpacingW) * QrCodeEncoder.QRCodeScale, (i + this.SpacingH) * QrCodeEncoder.QRCodeScale, QrCodeEncoder.QRCodeScale, QrCodeEncoder.QRCodeScale);

                    if (matrix[j][i])

                    {

                        //ChangeFillShape(g, Forebrush, rect, EN_FillShape.FillRectangle, new FillShape(), Forebrush);

                        FillShape _fillShape = new FillShape();

                        _fillShape = InkPaint(matrix, i, j, rect, , true);

                        ChangeFillShape(g, Forebrush, rect, EN_FillShape.FillRoundRectangle, _fillShape, Backbrush);

                    }

                    else

                    {

                        ChangeFillShape(g, Backbrush, rect, EN_FillShape.FillRectangle, new FillShape(), Backbrush);

                        //FillShape _fillShape = new FillShape();

                        //_fillShape = InkPaint(matrix, i, j, rect, 100, false);

                        //ChangeFillShape(g, Backbrush, rect, EN_FillShape.FillRoundRectangle, _fillShape, Forebrush);//注意:液化背景色传入填充色ForeBrush

                    }

                }

            }
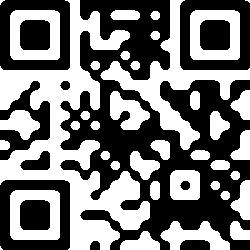
            for (int i = ; i < matrix.Length; i++)

            {

                for (int j = ; j < matrix.Length; j++)

                {

                    rect = new Rectangle((j + this.SpacingW) * QrCodeEncoder.QRCodeScale, (i + this.SpacingH) * QrCodeEncoder.QRCodeScale, QrCodeEncoder.QRCodeScale, QrCodeEncoder.QRCodeScale);

                    if (matrix[j][i])

                    {

                        //ChangeFillShape(g, Forebrush, rect, EN_FillShape.FillRectangle, new FillShape(), Forebrush);

                        FillShape _fillShape = new FillShape();

                        _fillShape = InkPaint(matrix, i, j, rect, , true);

                        ChangeFillShape(g, Forebrush, rect, EN_FillShape.FillRoundRectangle, _fillShape, Backbrush);

                    }

                    else

                    {

                        //ChangeFillShape(g, Backbrush, rect, EN_FillShape.FillRectangle, new FillShape(), Backbrush);

                        FillShape _fillShape = new FillShape();

                        _fillShape = InkPaint(matrix, i, j, rect, , false);

                        ChangeFillShape(g, Backbrush, rect, EN_FillShape.FillRoundRectangle, _fillShape, Forebrush);//注意:液化背景色传入填充色ForeBrush

                    }

                }

            }
个性二维码开源专题<液化/圆角/效果>,在此介绍完毕了,谢谢大家的观看与支持。
以下是开源地址,国外github,国内oschina.net
oschina.net:
http://git.oschina.net/cheng5x/Yc.QrCode
github:
https://github.com/cheng5x/YcQrCode
码晒客讨论QQ群:
28629273
个性二维码开源专题<液化/圆角/效果>的更多相关文章
- 个性二维码开源专题<后背景>
//设置图片资源 private Image img1; public override void SetParam() { base.SetParam(); //读取图片 string _image ...
- 个性二维码开源专题<前背景>
//设置图片资源 private Image imgAgo; public override void SetParam() { base.SetParam(); // 读取前背景 string _i ...
- 个性二维码开源专题<替换元素点>
基础方法:ChangeFillShape //修改填充形状 ChangeFillShape(...) // 摘要: // 修改填充形状 // // 参数: // g: // 图形画板 // // Fo ...
- 个性二维码开源专题<替换定位点>
基础方法: ChangeFillShape //修改填充形状 ChangeFillShape(...) // 摘要: // 修改填充形状 // // 参数: // g: // 图形画板 // // F ...
- 个性二维码开源专题<介绍篇>
由C#编写的个性二维码底层,已应用到 码晒客/疯狂创意二维码等项目上,并获得多项软件著作专利. 疯狂创意二维码 疯狂创意二维码是可用于生成风格独特的个性化二维码生成器,用户可以将目标信息输入到二维码生 ...
- 个性二维码开源专题<基础篇>
二维码原理介绍: 二维码为什么是黑白相间的?黑色表示二进制的“1”,白色表示二进制的“0” “我们之所以对二维码进行扫描能读出那么多信息,就是因为这些信息被编入了二维码之中.”黄海平说,“制作二维码输 ...
- Android二维码开源项目zxing用例简化和生成二维码、条形码
上一篇讲到:Android二维码开源项目zxing编译,编译出来后有一个自带的測试程序:CaptureActivity比較复杂,我仅仅要是把一些不用的东西去掉,用看起来更方便,二维码和条形码的流行性自 ...
- 你只要5行代码,拥有你的个性二维码,用Python生成动态二维码
如果想了解更多关于python的应用,可以私信我,或者点击下方链接自行获取,里面到资料都是免费的(http://t.cn/A6Zvjdun) 二维码满天飞,但是有没有想过Python也能制作出专属于自 ...
- 二维码开源库ZBar-吐槽篇
前不久在网上看到一篇文章<QR-Decoder-OV5640 二维码识别> ,是某开发板的教程.记得对应的开发板以前购买过,当初只是为了看OV5640的JPG的输出效果,结果由于公司奇葩的 ...
随机推荐
- js鼠标点击版tab切换
代码很简单,主要是布局需要用心研究下,使用时需要把css内注释去除 <!DOCTYPE html> <head> <meta http-equiv="Conte ...
- js节点属性
在文档对象模型 (DOM) 中,每个节点都是一个对象.DOM 节点有三个重要的属性 : 1. nodeName : 节点的名称 2. nodeValue :节点的值 3. nodeType :节点的类 ...
- WEB服务器、应用程序服务器、HTTP服务器区别
很清晰的解释了WEB服务器.应用程序服务器.HTTP服务器区别 转载自 http://www.cnblogs.com/zhaoyl/archive/2012/10/10/2718575.html WE ...
- redis基础使用
redis分linux,window两个版本分支. redis在window下的使用先下载相关包.下载地址:https://github.com/MSOpenTech/redis/releases 下 ...
- oracle中SQL根据生日日期查询年龄的方法
方法:SELECT Trunc(MONTHS_BETWEEN(SYSDATE,BIRTH_DATE)/12) FROM 某表 Trunc函数在这里对带有小数位数的数字取整数部分: SYSDATE为or ...
- sublime text3 输入中文的解决方法及注册
让它输入中文的原理就是给sublime text3给打上个补丁libsublime-imfix.so,这个补丁可以直接git回来,或者下载补丁的源码编译安装. Ubuntu可以直接按照下面的教程 su ...
- 终极优化_详解Win7旗舰版系统中可以关闭的服务
Win7旗舰版系统是一款功能强大的系统,不过对于很多用户很多功能却使用不上,而支持功能的很多服务也多少占用了系统资源,那么我们可以通过关闭一些不使用的服务来达到让win7系统运行速度加快的目的.下面小 ...
- PHP中,文件上传实例
PHP中,文件上传一般是通过move_uploaded_file()来实现的. bool move_uploaded_file ( string filename, string destinati ...
- SGU 319. Kalevich Strikes Back (线段树)
319. Kalevich Strikes Back Time limit per test: 0.5 second(s)Memory limit: 65536 kilobytes input: st ...
- java.io.Serializable 序列化问题
java.io.Serializable 序列化问题 Person.java package a.b.c; public class Person implements java.io.Seriali ...