实现自定义xib和storyboard的加载,
一:加载xib
1.分别创建xib,.h .m文件继承自UIView。 在xib上绑定类名。
或者创建文件的时候直接勾选xib
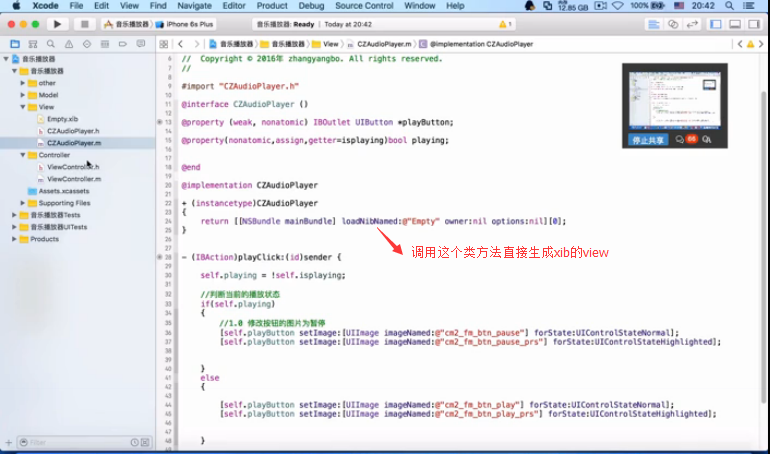
2.在控制器中调用类方法

jyq52787网盘/ios/潭州学院/iOS-音乐播放器--视频
二:加载storyboard
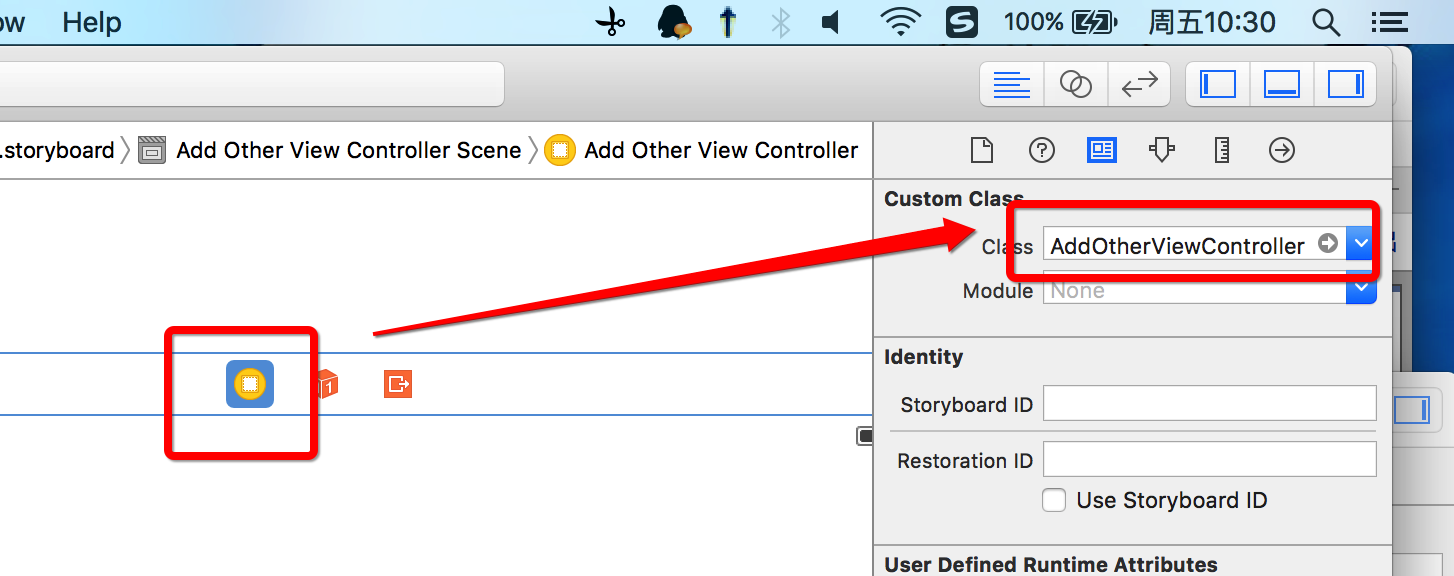
1.创建一个Controller,例如: AddOtherViewController : UIViewController
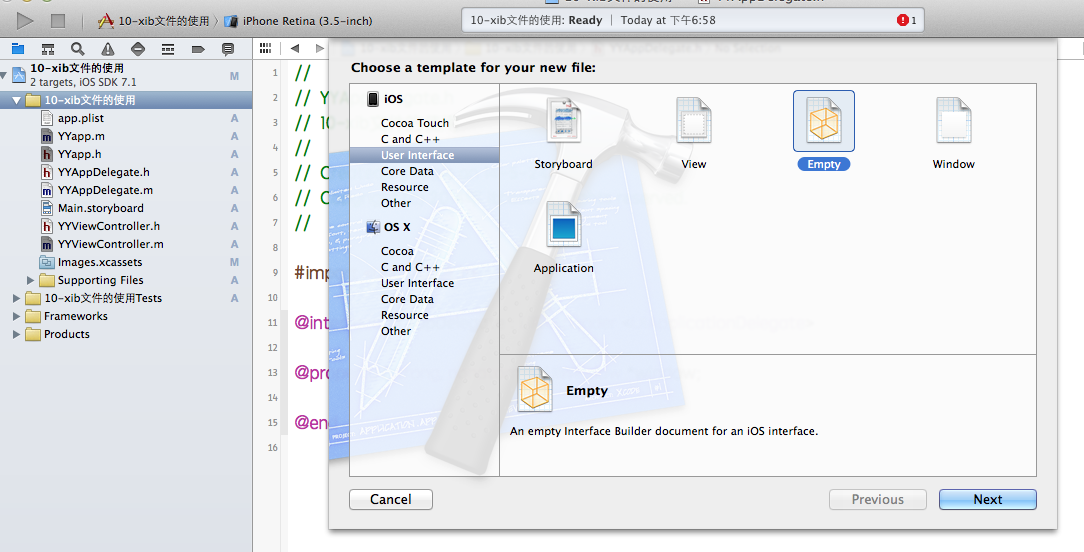
2.command+n 创建一个stroyboard,命名test

3.为storyboard,绑定类AddOtherViewController
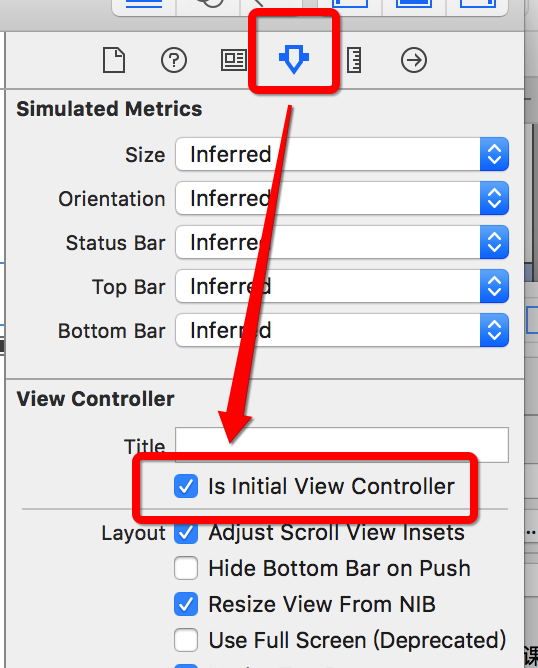
4.打上箭头,AddOtherViewController默认调用该storyboard
5.当从第一个Controller 单击跳转到该AddOtherViewController时:
-(void)touchesBegan:(NSSet<UITouch *> *)touches withEvent:(UIEvent *)event{

    UIStoryboard *sb = [UIStoryboard storyboardWithName:@"test" bundle:nil];

    AddOtherViewController *Vc = sb.instantiateInitialViewController;

    [self presentViewController:Vc animated:YES completion:nil];

}
转载:
一、简单介绍
xib和storyboard的比较,一个轻量级一个重量级。
共同点:
都用来描述软件界面
都用Interface Builder工具来编辑
不同点:
Xib是轻量级的,用来描述局部的UI界面
Storyboard是重量级的,用来描述整个软件的多个界面,并且能展示多个界面之间的跳转关系
二、xib的简单使用
1.建立xib文件
建立的xib文件命名为appxib.xib

2.对xib进行设置
根据程序的需要,这里把view调整为自由布局
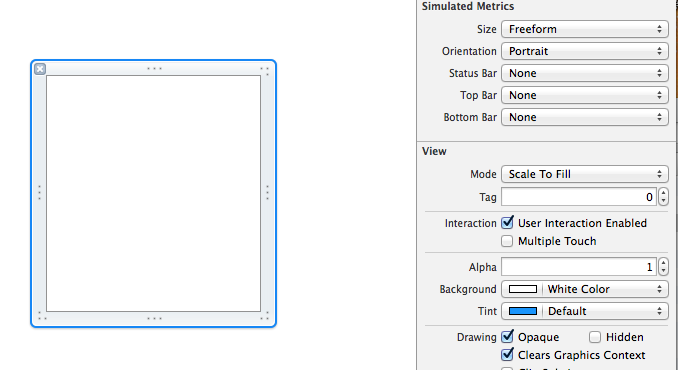
建立view模型(设置长宽等参数)
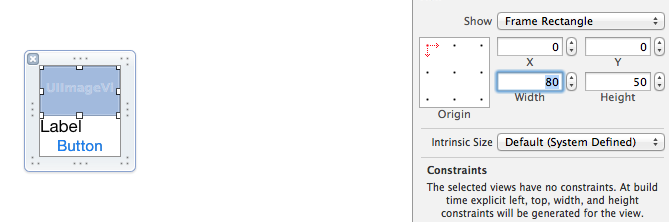
调整布局和内部的控件
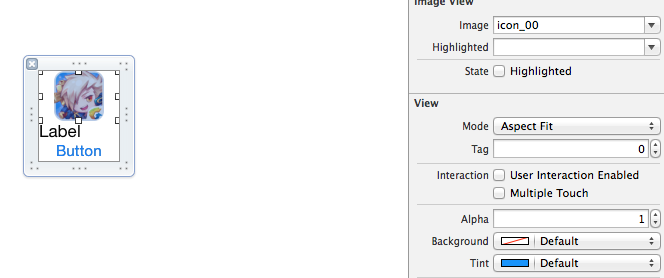
完成后的单个view

3.使用xib文件的代码示例
YYViewController.m文件代码如下:
 1 //

 2 //  YYViewController.m

 3 //  10-xib文件的使用

 4 //

 5 //  Created by apple on 14-5-24.

 6 //  Copyright (c) 2014年 itcase. All rights reserved.

 7 //

 8

 9 #import "YYViewController.h"

10 #import "YYapp.h"

11

12 @interface YYViewController ()

13 @property(nonatomic,strong)NSArray *app;

14 @end

15

16 @implementation YYViewController

17

18 //1.加载数据信息

19 -(NSArray *)app

20 {

21     if (!_app) {

22         NSString *path=[[NSBundle mainBundle]pathForResource:@"app.plist" ofType:nil];

23         NSArray *temparray=[NSArray arrayWithContentsOfFile:path];

24

25         //字典转模型

26         NSMutableArray *arrayM=[NSMutableArray array ];

27         for (NSDictionary *dict in temparray) {

28             [arrayM addObject:[YYapp appWithDict:dict]];

29         }

30         _app=arrayM;

31     }

32     return _app;

33 }

34

35 //创建界面原型

36 - (void)viewDidLoad

37 {

38     [super viewDidLoad];

39     NSLog(@"%d",self.app.count);

40

41     //九宫格布局

42     int totalloc=3;

43     CGFloat appviewW=80;

44     CGFloat appviewH=90;

45     CGFloat margin=(self.view.frame.size.width-totalloc*appviewW)/(totalloc+1);

46

47     int count=self.app.count;

48     for (int i=0; i<count; i++) {

49

50         int row=i/totalloc;

51         int loc=i%totalloc;

52         CGFloat appviewX=margin + (margin +appviewW)*loc;

53         CGFloat appviewY=margin + (margin +appviewH)*row;

54         YYapp *app=self.app[i];

55

56         //拿出xib视图

57        NSArray  *apparray= [[NSBundle mainBundle]loadNibNamed:@"appxib" owner:nil options:nil];

58         UIView *appview=[apparray firstObject];

59         //加载视图

60         appview.frame=CGRectMake(appviewX, appviewY, appviewW, appviewH);

61

62         UIImageView *appviewImg=(UIImageView *)[appview viewWithTag:1];

63         appviewImg.image=app.image;

64

65         UILabel *appviewlab=(UILabel *)[appview viewWithTag:2];

66         appviewlab.text=app.name;

67

68         UIButton *appviewbtn=(UIButton *)[appview viewWithTag:3];

69         [appviewbtn addTarget:self action:@selector(appviewbtnClick:) forControlEvents:UIControlEventTouchUpInside];

70         appviewbtn.tag=i;

71

72         [self.view addSubview:appview];

73     }

74 }

75

76 /**按钮的点击事件*/

77 -(void)appviewbtnClick:(UIButton *)btn

78 {

79     YYapp *apps=self.app[btn.tag];

80     UILabel *showlab=[[UILabel alloc]initWithFrame:CGRectMake(60, 450, 200, 20)];

81     [showlab setText:[NSString stringWithFormat: @"%@下载成功",apps.name]];

82     [showlab setBackgroundColor:[UIColor lightGrayColor]];

83     [self.view addSubview:showlab];

84     showlab.alpha=1.0;

85

86     //简单的动画效果

87     [UIView animateWithDuration:2.0 animations:^{

88         showlab.alpha=0;

89     } completion:^(BOOL finished) {

90         [showlab removeFromSuperview];

91     }];

92 }

93

94 @end
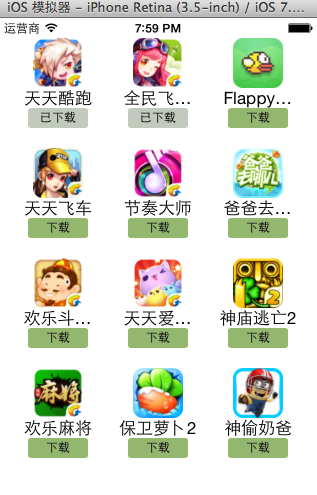
运行效果:
三、对xib进行连线示例
1.连线示例
新建一个xib对应的视图类,继承自Uiview

在xib界面右上角与新建的视图类进行关联

把xib和视图类进行连线
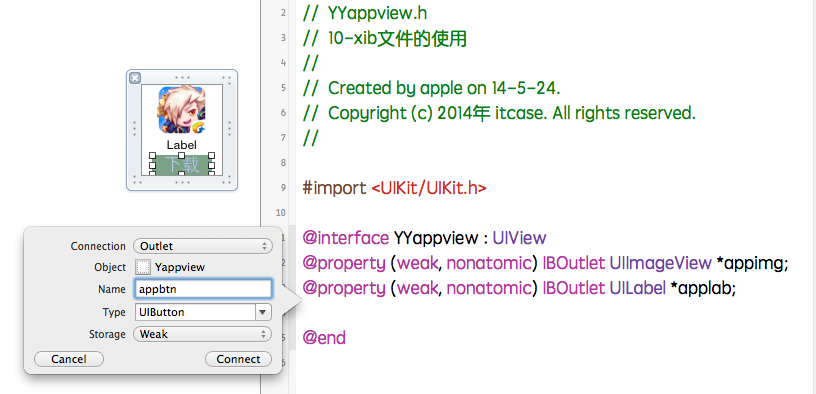
注意:在使用中把weak改成为强引用。否则...
2.连线后的代码示例
YYViewController.m文件代码如下:
 1 //

 2 //  YYViewController.m

 3 //  10-xib文件的使用

 4 //

 5 //  Created by apple on 14-5-24.

 6 //  Copyright (c) 2014年 itcase. All rights reserved.

 7 //

 8

 9 #import "YYViewController.h"

10 #import "YYapp.h"

11 #import "YYappview.h"

12

13 @interface YYViewController ()

14 @property(nonatomic,strong)NSArray *app;

15 @end

16

17 @implementation YYViewController

18

19 //1.加载数据信息

20 -(NSArray *)app

21 {

22     if (!_app) {

23         NSString *path=[[NSBundle mainBundle]pathForResource:@"app.plist" ofType:nil];

24         NSArray *temparray=[NSArray arrayWithContentsOfFile:path];

25

26         //字典转模型

27         NSMutableArray *arrayM=[NSMutableArray array ];

28         for (NSDictionary *dict in temparray) {

29             [arrayM addObject:[YYapp appWithDict:dict]];

30         }

31         _app=arrayM;

32     }

33     return _app;

34 }

35

36 //创建界面原型

37 - (void)viewDidLoad

38 {

39     [super viewDidLoad];

40     NSLog(@"%d",self.app.count);

41

42     //九宫格布局

43     int totalloc=3;

44     CGFloat appviewW=80;

45     CGFloat appviewH=90;

46     CGFloat margin=(self.view.frame.size.width-totalloc*appviewW)/(totalloc+1);

47

48     int count=self.app.count;

49     for (int i=0; i<count; i++) {

50

51         int row=i/totalloc;

52         int loc=i%totalloc;

53         CGFloat appviewX=margin + (margin +appviewW)*loc;

54         CGFloat appviewY=margin + (margin +appviewH)*row;

55         YYapp *app=self.app[i];

56

57         //拿出xib视图

58        NSArray  *apparray= [[NSBundle mainBundle]loadNibNamed:@"appxib" owner:nil options:nil];

59

60         //注意这里的类型名!

61         //UIView *appview=[apparray firstObject];

62         YYappview  *appview=[apparray firstObject];

63

64         //加载视图

65         appview.frame=CGRectMake(appviewX, appviewY, appviewW, appviewH);

66           [self.view addSubview:appview];

67

68         appview.appimg.image=app.image;

69         appview.applab.text=app.name;

70         appview.appbtn.tag=i;

71

72         [ appview.appbtn addTarget:self action:@selector(appviewbtnClick:) forControlEvents:UIControlEventTouchUpInside];

73

74     }

75 }

76

77 /**按钮的点击事件*/

78 -(void)appviewbtnClick:(UIButton *)btn

79 {

80     YYapp *apps=self.app[btn.tag];

81     UILabel *showlab=[[UILabel alloc]initWithFrame:CGRectMake(60, 450, 200, 20)];

82     [showlab setText:[NSString stringWithFormat: @"%@下载成功",apps.name]];

83     [showlab setBackgroundColor:[UIColor lightGrayColor]];

84     [self.view addSubview:showlab];

85     showlab.alpha=1.0;

86

87     //简单的动画效果

88     [UIView animateWithDuration:2.0 animations:^{

89         showlab.alpha=0;

90     } completion:^(BOOL finished) {

91         [showlab removeFromSuperview];

92     }];

93 }

94

95 @end
YYappview.h文件代码(已经连线)
#import <UIKit/UIKit.h>

@interface YYappview : UIView

@property (strong, nonatomic) IBOutlet UIImageView *appimg;

@property (strong, nonatomic) IBOutlet UILabel *applab;

@property (strong, nonatomic) IBOutlet UIButton *appbtn;

@end
实现自定义xib和storyboard的加载,的更多相关文章
- UIStoryboard类介绍(如何从Storyboard中加载View Controller)
如何从Storyboard中加载View Controller? 1. 首先了解下UIStoryboard类: @class UIViewController; @interface UIStoryb ...
- vue2 自定义全局组件(Loading加载效果)
vue2 自定义全局组件(Loading加载效果) github地址: https://github.com/ccyinghua/custom-global-component 一.构建项目 vue ...
- iOS之nib、xib及storyboard的区别及storyboard的加载过程
先讲述下nib, nib是3.0版本以前的产物,在终端下我们可以看到,NIB其实是一个文件夹,里面有可执行的二进制文件: 区分xib和storyboard的区别? 不同点: 1> 无论nib也好 ...
- 自定义view实现阻尼效果的加载动画
效果: > 需要知识: 1. 二次贝塞尔曲线 2. 动画知识 3. 基础自定义view知识 先来解释下什么叫阻尼运动 阻尼振动是指,由于振动系统受到摩擦和介质阻力或其他能耗而使振幅随时间逐渐衰减 ...
- 自定义动画(仿Win10加载动画)
一.源代码 源代码及demo 二.背景 先看看Win10的加载动画(找了很久才找到): CPA推广甲爪广告联盟满30日结 [点击进入] 甲爪广告联盟,提供各类高单价CPA广告 单价高 收益好 日付广告 ...
- Android中自定义ListView实现上拉加载更多和下拉刷新
ListView是Android中一个功能强大而且很常用的控件,在很多App中都有ListView的下拉刷新数据和上拉加载更多这个功能.这里我就简单记录一下实现过程. 实现这个功能的方法不止一个,Gi ...
- Vue自定义指令实现下拉加载:v-loadmore
和methods平级: directives: { loadmore: {//自定义指令: 下拉加载 bind(el, binding) { var p = 0; var t = 0; ...
- WebView 自定义错误界面,WebView 加载进度条,和Logding 效果
---恢复内容开始--- 下载地址,代码就不粘贴了 http://pan.baidu.com/s/1eQncg86 ---恢复内容结束--- 我没有判断是不是网络原因,各位自行判断吧,图片错误信息,及 ...
- SilverlightLoader使用托管代码创建自定义载入界面及动态加载XAP
Silverlight实现动态加载xap和Splash Screen.收藏! 内容来自 http://silverlightchina.net/html/tips/2010/0115/588.html
随机推荐
- WEB学习-CSS盒模型
盒子的区域 一个盒子中主要的属性就5个:width.height.padding.border.margin. width是“宽度”的意思,CSS中width指的是内容的宽度,而不是盒子的宽度. he ...
- ORACLE RMAN增量备份经典理解
http://blog.itpub.net/26118480/viewspace-1793548/
- T1079 回家 codevs
http://codevs.cn/problem/1079/ 时间限制: 1 s 空间限制: 128000 KB 题目等级 : 白银 Silver~死坑 题目描述 Description 现在是晚 ...
- openURL
在iOS开发中,经常需要调用其它App,如拨打电话.发送邮件等.UIApplication:openURL:方法是实现这一目的的 在iOS开发中,经常需要调用其它App,如拨打电话.发送邮件等.UIA ...
- 深度神经网络多任务学习(Multi-Task Learning in Deep Neural Networks)
https://cloud.tencent.com/developer/article/1118159 http://ruder.io/multi-task/ https://arxiv.org/ab ...
- LVM创建
LVM介绍 PV(Physical Volume) - 物理卷 物理卷在逻辑卷管理中处于最底层,它可以是实际物理硬盘上的分区,也可以是整个物理硬盘,也可以是raid设备 VG(Volume Group ...
- C语言宏定义技巧——多次包括头文件内容不同
1. 头文件定义例如以下: /* declears in "funcs.h" */ FUNC_1(ID_FUN1_001) FUNC_1(ID_FUN1_002) FUNC_2( ...
- unknownhostexception错误解决方案
关于java.net.UnknownHostException大家也许都比较熟悉,今天我来整理一下关于java.net.UnknownHostException的各种处理办法: 1.在Android项 ...
- php生成.php文件
<?php // -- test.php -- // //搜集资料 $str_tmp="<?php\r\n"; //得到php的起始符.$str_tmp将累加 $str ...
- Atlassian Confluence安装
前言 Confluence与Jira 由于线上jira和confluence之前互相关联,confluence的登录用户全部关联自jira的用户,confluence安装时会提示是否关联jira,由于 ...