
UICollectionView 很简单的写个瀑布流
你项目中要用到它吗?
可能会在你的项目中用到这玩意,最近也是要用就简单的写了一个 Demo。没多少代码,就不放Git了,下面会详细点的说说代码的,要还有什么问题的小伙伴可以直接Q我,也可以把Demo发给你,这里有Q可以找一下加我 多多交流,互相学习!
下面是简单的一个效果图,先给看看效果图!
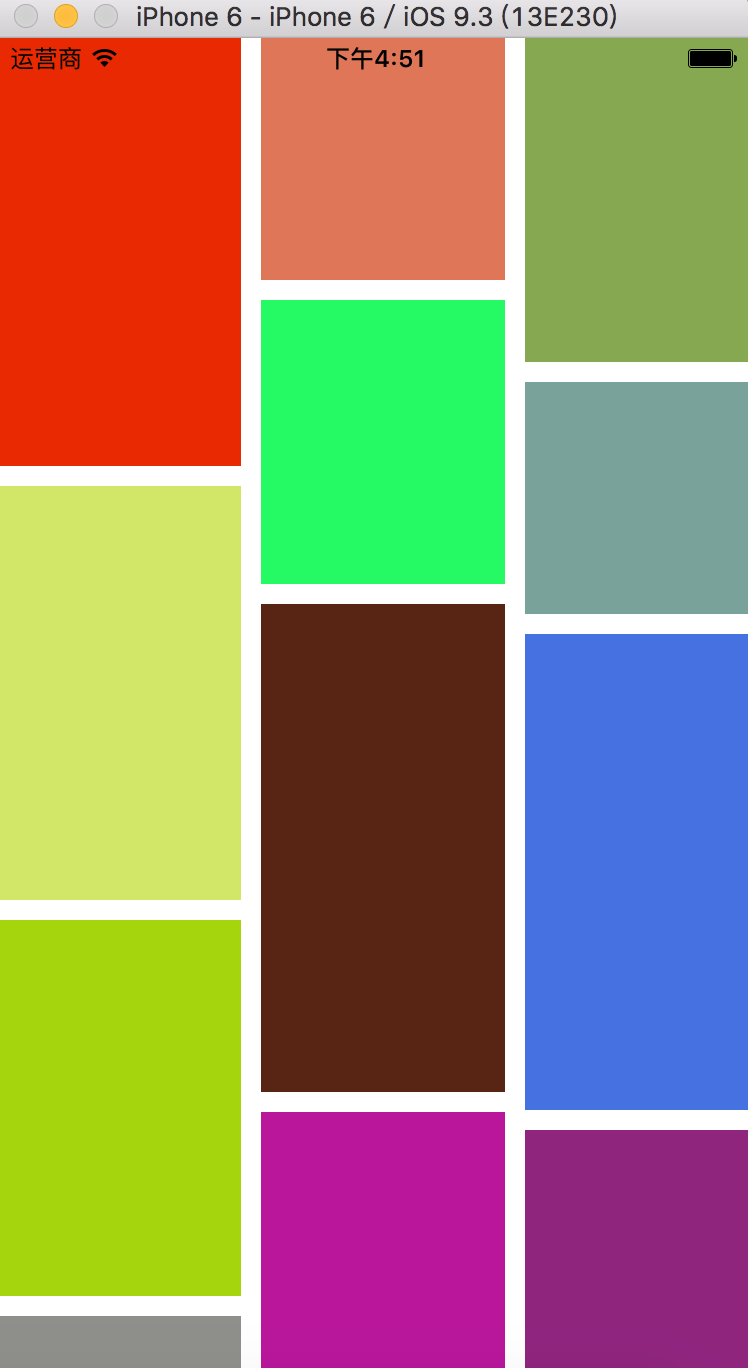
先说说控制器里面的代码,控制器里面就是我们的 UICollectionView 的一些基本的创建了。其实它和 UITableView 相比较的话,但从创建使用看的话,是挺相似的,但其实它真的比 UITableView 要强大好多!很值得大家去好好的学习学习!你要占我它的基本创建的话,可以参考 UITableView ,参考对比也有利于学习。
#import "ViewController.h"

#import "zxFlowLayout.h"

@interface ViewController  ()<UICollectionViewDelegate,UICollectionViewDataSource,UICollectionViewDelegateFlowLayout>

{

    NSString * cellId;

}

@property(nonatomic,strong) UICollectionView * collectionview;

@end

@implementation ViewController

- (void)viewDidLoad {

    [super viewDidLoad];

    // Do any additional setup after loading the view.

    cellId = @"zhangxucell";

    self.view.backgroundColor = [UIColor whiteColor];

    [self.view addSubview:self.collectionview];

    [_collectionview registerClass:[UICollectionViewCell class] forCellWithReuseIdentifier:cellId];

}

-(NSInteger)numberOfSectionsInCollectionView:(UICollectionView *)collectionView

{

    return 1;

}

- (NSInteger)collectionView:(UICollectionView *)collectionView numberOfItemsInSection:(NSInteger)section

{

    return 100;

}

// The cell that is returned must be retrieved from a call to -dequeueReusableCellWithReuseIdentifier:forIndexPath:

-(UICollectionViewCell *)collectionView:(UICollectionView *)collectionView cellForItemAtIndexPath:(NSIndexPath *)indexPath

{

    UICollectionViewCell *cell = [collectionView dequeueReusableCellWithReuseIdentifier:cellId forIndexPath:indexPath];

    cell.backgroundColor = [UIColor colorWithRed:arc4random()%255/255.0 green:arc4random()%255/255.0 blue:arc4random()%255/255.0 alpha:1];

    return cell;

}

-(UICollectionView * )collectionview

{

    if (!_collectionview) {

        zxFlowLayout * collectionLayout = [[zxFlowLayout alloc]init];

        [collectionLayout setScrollDirection:UICollectionViewScrollDirectionVertical];

        collectionLayout.itemcount = 100;

        _collectionview = [[UICollectionView alloc]initWithFrame:self.view.bounds collectionViewLayout:collectionLayout];

        _collectionview.delegate = self;

        _collectionview.dataSource = self;

        _collectionview.backgroundColor = [UIColor whiteColor];

    }

    return _collectionview;

}
上面是Demo的控制器部分,要是对 UICollectionView 不怎么熟悉的话,你可以看看 这篇博客。觉得写得很不错,推荐给大家去学习,里面的内容很详细!
上面的控制器说完了,就到重点了,也就是继承与 UICollectionViewFlowLayout 的 zxFlowLayout ,有一点大家注意一下,就是你在初始化UICollectionView 的时候, [UICollectionView alloc]initWithFrame:(CGRect) collectionViewLayout:(nonnull UICollectionViewLayout *) 这个方法中,UICollectionViewLayout 这里需要的参数看上去是 UICollectionViewLayout 类型的,其实你创建的时候是要用继承与它的 UICollectionViewFlowLayout 对象去初始化的,这也就解释了我们的zxFlowLayout 是继承与 UICollectionViewFlowLayout 的!!不然你是不会看到 cell 的。有朋友以前说过这个,就特别提醒一下下吧。
#import "zxFlowLayout.h"

@implementation zxFlowLayout

// 数组相关的属性在这里重写

// 在布局之前会调用的这个方法

-(void)prepareLayout

{

    _attArray = [[NSMutableArray alloc]init];

    /**

     *  重写父类方法,这个记得要加进去!

     */

    // typeof 是一个一元运算,放在一个运算数之前,运算数可以是任意类型。

    // typedef

    [super prepareLayout];

    // 设计 item的宽度 设计3列或者2列

    float WIDTH = ([UIScreen mainScreen].bounds.size.width - self.minimumInteritemSpacing - self.sectionInset.left - self.sectionInset.right )/3;

    //定义数组保存每一列的高度

    //这个数组的主要作用是保存每一列的总高度,这样在布局时,我们可以始终将下一个Item放在最短的列下面,初始化值全都定义成零

    CGFloat colHight[3]={0,0,0};

    // 遍历传过来的 cell 设置属性

    for (int i =0; i<_itemcount; i++) {

        NSIndexPath * indexpath = [NSIndexPath indexPathForItem:i inSection:0];

        UICollectionViewLayoutAttributes * attributes = [UICollectionViewLayoutAttributes layoutAttributesForCellWithIndexPath:indexpath];

        // 把高度控制在100 - 150 之间

        CGFloat Hight = arc4random()% 150 + 100;

        /**

         *   瀑布流是两行还是三行甚至再多行,你都可以在这里修改只是下面的判断就会相应的变化!

             我注释掉的是两行的!!!

         */

//        int width=0;

//        if (colHight[0]<colHight[1]) {

//

//            //将新的item高度加入到短的一列

//            colHight[0] = colHight[0]+Hight+self.minimumLineSpacing;

//            width=0;

//

//        }else{

//

//            colHight[1] = colHight[1]+Hight+self.minimumLineSpacing;

//            width=1;

//        }

        int width=0;

        if (i<3) {

                colHight[i] = colHight[i]+Hight+self.minimumLineSpacing;

                width = i;

        }

        else if ((colHight[0]<colHight[1]&&colHight[0]<colHight[2])||(colHight[0]<colHight[2]&&colHight[0]<colHight[1])) {

            //将新的item高度加入到短的一列

            colHight[0] = colHight[0]+Hight+self.minimumLineSpacing;

            width=0;

        }

        else if ((colHight[1]<colHight[0]&&colHight[1]<colHight[2])||(colHight[1]<colHight[2]&&colHight[1]<colHight[0]))

        {

            colHight[1] = colHight[1]+Hight+self.minimumLineSpacing;

            width=1;

        }

        else if ((colHight[2]<colHight[1]&&colHight[2]<colHight[0])||(colHight[2]<colHight[0]&&colHight[2]<colHight[1]))

        {

            colHight[2] = colHight[2]+Hight+self.minimumLineSpacing;

            width=2;

        }

        //设置item的位置

        attributes.frame = CGRectMake(self.sectionInset.left+(self.minimumInteritemSpacing+WIDTH)*width, colHight[width]-Hight-self.minimumLineSpacing, WIDTH, Hight);

        [_attArray addObject:attributes];

    }

//    设置itemSize来确保滑动范围的正确 这里是通过将所有的item高度平均化,计算出来的(以最高的列位标准)

//    if (colHight[0]>colHight[1]) {

//        self.itemSize = CGSizeMake(WIDTH, (colHight[0]-self.sectionInset.top)*2/_itemcount-self.minimumLineSpacing);

//    }else{

//        self.itemSize = CGSizeMake(WIDTH, (colHight[1]-self.sectionInset.top)*2/_itemcount-self.minimumLineSpacing);

//    }

//

    if (colHight[0]<colHight[1]<colHight[2]||colHight[0]<colHight[2]<colHight[1]) {

        self.itemSize = CGSizeMake(WIDTH, (colHight[0]-self.sectionInset.top)*2/_itemcount-self.minimumLineSpacing);

    }

    else if (colHight[1]<colHight[2]<colHight[0]||colHight[1]<colHight[0]<colHight[2])

    {

       self.itemSize = CGSizeMake(WIDTH, (colHight[1]-self.sectionInset.top)*2/_itemcount-self.minimumLineSpacing);

    }

    else{

        self.itemSize = CGSizeMake(WIDTH, (colHight[2]-self.sectionInset.top)*2/_itemcount-self.minimumLineSpacing);

    }

}

//-(UICollectionViewLayoutAttributes * )layoutAttributesForItemAtIndexPath:(NSIndexPath *)indexPath

//{

//    UICollectionViewLayoutAttributes * attributes = [UICollectionViewLayoutAttributes layoutAttributesForCellWithIndexPath:indexPath];

//

//    attributes.frame = CGRectMake(10, 10, (self.collectionView.frame.size.width-40)/3,100);

//

//    return attributes;

//}

// 返回设置了属性的数组

- (nullable NSArray<__kindof UICollectionViewLayoutAttributes *> *)layoutAttributesForElementsInRect:(CGRect)rect

{

    return _attArray;

}

// return an array layout attributes instances for all the views in the given rect

@end
上面是整个.m 文件。 .h 文件里面也就只有 itemcount 这一个属性了,这个属性其实在你控制器当中你刷新完数据之后就传过来。让它重新布局就OK了!挺简单的对吧。。
UICollectionView 很简单的写个瀑布流的更多相关文章
- vue 写一个瀑布流插件
效果如图所示: 采用了预先加载图片,再计算高度的办法..网络差的情况下,可能有点卡 新建 vue-water-easy.vue 组件文件 <template> <div class ...
- iOS开发:一个瀑布流的设计与实现(已实现缓存池功能,该功能使得瀑布流cell可以循环利用)
一个瀑布流的实现有三种方式: 继承自UIScrollView,仿写UITableView的dataSource和delegate,创造一个缓存池用来实现循环利用cell 写多个UITableview( ...
- jquery练习之瀑布流
最近有空简单学习了下瀑布流,写完后想和大家一起分享下,但我知道我的代码有很多缺陷不足,希望多多包涵.(纯属兴趣非专业学习人士) 众所周知,瀑布流大概分为2种,一种是浮动式的瀑布流,一种是定位式的瀑布流 ...
- OC-UICollectionView实现瀑布流
UICollectionView实现瀑布流 在iOS中可以实现瀑布流的目前已知的有2种方案: 使用UIScrollView自己封装一套,这种方案是应用于iOS6之前的,因为iOS6才出来UIColle ...
- ios图文混编瀑布流
ios图文混编瀑布流,利用UICollectionView 实现图文混编的瀑布流,支持section内容伸缩 http://www.huiyi8.com/pubuliu/
- iOS开发之窥探UICollectionViewController(三) --使用UICollectionView自定义瀑布流
上篇博客的实例是自带的UICollectionViewDelegateFlowLayout布局基础上来做的Demo, 详情请看<iOS开发之窥探UICollectionViewControlle ...
- IOS 瀑布流UICollectionView实现
IOS 瀑布流UICollectionView实现 在实现瀑布流之前先来看看瀑布流的雏形(此方法的雏形 UICollectionView) 对于UICollectionView我们有几点注意事项 它和 ...
- 用CHTCollectionViewWaterfallLayout写瀑布流
用CHTCollectionViewWaterfallLayout写瀑布流 实现的瀑布流效果图: 源码: WaterfallCell.h 与 WaterfallCell.m // // Waterfa ...
- 详细分享UICollectionView的自定义布局(瀑布流, 线性, 圆形…)
前言: 本篇文章不是分享collectionView的详细使用教程, 而是属于比较’高级’的collectionView使用技巧, 阅读之前, 我想你已经很熟悉collectionView的基本使用, ...
随机推荐
- 源码解析-knockout源码准备
准备包括心理和资源两方面. 心理 我看过一句话说,当你用一个框架时,不要忙着看一遍使用教程就开始写项目,先去看看框架原理. 这句话我深以为然.现今前端快速发展,很多前端攻城狮都很茫然:框架更新太快了, ...
- 打包程序时的证书问题(上传APP就出现Missing iOS Distribution signing indetity for)
现象: 解决办法: 1.删除本地钥匙串中的这个文件,注意“系统”中的同名文件也必须删除 2.进入http://www.apple.com/certificateauthority/ 下载新的(WWDR ...
- P4语言编程快速开始 实践二
参考:P4语言编程快速开始 上一篇系列博客:P4语言编程快速开始 实践二 Demo 2 本Demo所做的修改及实现的功能: 为simple_router添加一个计数器(counter),该计数器附加( ...
- node.js 下依赖Express 实现post 4种方式提交参数
上面这个图好有意思啊,哈哈, v8威武啊.... 在2014年的最后一天和大家分享关于node.js 如何提交4种格式的post数据. 上上一篇说到了关于http协议里定义的4种常见数据的post方法 ...
- java实现FFT变换(转)
源:java实现FFT变换 /************************************************************************* * Compilati ...
- VS2013 opencv2.4.8
[转]http://my.phirobot.com/blog/2014-02-opencv_configuration_in_vs.html vs2010+opencv2.4.0:http://www ...
- My数据库和Ms数据库的区别
mssql 是微软的那个 SQL Server,运行于windows2000,2003等平台 mysql 是由瑞典mySQL AB 公司开发,目前属于Oracle旗下公司.可运行在windows平台. ...
- CentOS下成功修复了Windows的grub引导
(转载) 以CentOS7和Windows为双系统,且后安装CentOS时,会出现开机没有Windows引导的问题.下图,倒数第二行可以看到Windows引导项: 修复运行终端(terminal),键 ...
- MySQL的"旁门左道"用法总结
不断更新. 一.显示当前MySQL服务的版本:1是直接在查询窗口select version();2是show variables like 'version';
- 我用Cocos2d-x模拟《Love Live!学院偶像祭》的Live场景(三)
[前言和思路整理] 千呼万唤Shi出来啊(好像也没人呼唤),最近公司项目紧,闲暇时间少更得慢,请见谅. 上一章我们分析并实现了打击物件类BeatObject,和它的父节点BeatObjectColum ...