Android -- 仿小红书欢迎界面
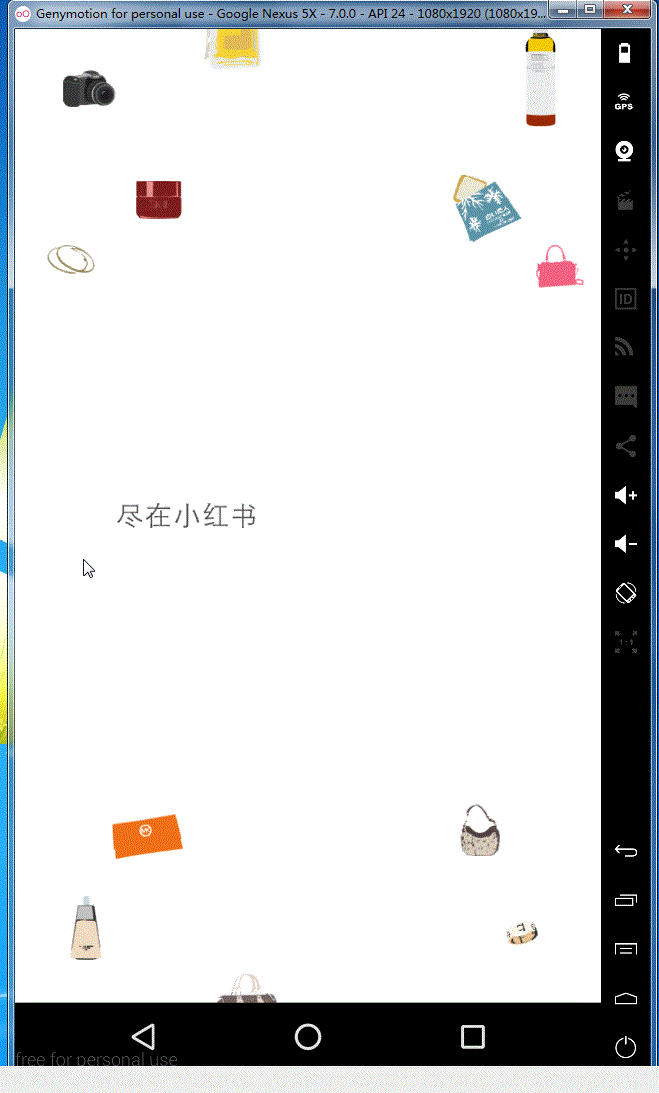
1,觉得小红书的欢迎界面感觉很漂亮,就像来学习学习一下来实现类似于这种效果 原效果图如下:

2,根据效果我们来一点点分析
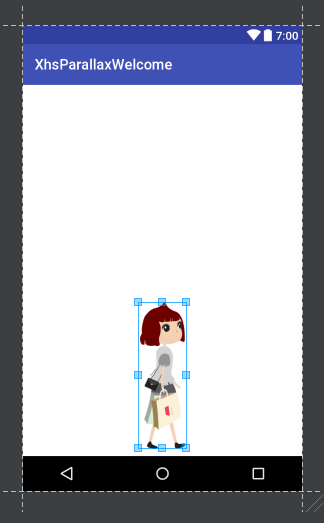
第一步:首先看一下我们的主界面布局文件视图效果如下:
main_activity.xml文件代码如下:
<?xml version="1.0" encoding="utf-8"?>

<RelativeLayout xmlns:android="http://schemas.android.com/apk/res/android"

                android:layout_width="fill_parent"

                android:layout_height="fill_parent"

                android:background="@color/white"

                android:orientation="vertical" >

    <com.qianmo.xiaohongshuwelcome.parallaxpager.ParallaxContainer

        android:id="@+id/parallax_container"

        android:layout_width="match_parent"

        android:layout_height="match_parent"/>

    <ImageView

        android:id="@+id/iv_man"

        android:layout_width="67dp"

        android:layout_height="202dp"

        android:layout_alignParentBottom="true"

        android:layout_centerHorizontal="true"

        android:layout_marginBottom="10dp"

        android:background="@drawable/intro_item_manrun_1"

        android:visibility="visible" />

</RelativeLayout>
可以看到我们主界面的布局文件主要是两个控件,一个是包含上面小人行走效果的ImageView,然后是一个自定义ParallaxContainer控件,这个自定义控件的具体是什么我们先不要管,后面再和大家来慢慢解释
第二步:看一下我们主界面的MainActivity的代码
MainActivity.java
package com.qianmo.xiaohongshuwelcome;

import android.app.Activity;

import android.content.ActivityNotFoundException;

import android.content.Intent;

import android.net.Uri;

import android.os.Bundle;

import android.view.View;

import android.view.Window;

import android.view.WindowManager;

import android.widget.ImageView;

import com.qianmo.xiaohongshuwelcome.parallaxpager.ParallaxContainer;

/**

 * @author zhongdaxia 2014-12-15

 */

public class MainActivity extends Activity {

    ImageView iv_man;

    ImageView rl_weibo;

    ParallaxContainer parallaxContainer;

    @Override

    protected void onCreate(Bundle savedInstanceState) {

        super.onCreate(savedInstanceState);

        //获取当前窗体

        final Window window = getWindow();

        window.setFlags(WindowManager.LayoutParams.FLAG_FULLSCREEN, WindowManager.LayoutParams.FLAG_FULLSCREEN);

        setContentView(R.layout.activity_main);

        /**

         * 动画支持11以上sdk,11以下默认不显示动画

         * 若需要支持11以下动画,也可导入https://github.com/JakeWharton/NineOldAndroids

         */

        if (android.os.Build.VERSION.SDK_INT > 10) {

            iv_man = (ImageView) findViewById(R.id.iv_man);

            parallaxContainer = (ParallaxContainer) findViewById(R.id.parallax_container);

            if (parallaxContainer != null) {

                parallaxContainer.setImage(iv_man);

                parallaxContainer.setLooping(false);

                iv_man.setVisibility(View.VISIBLE);

                parallaxContainer.setupChildren(getLayoutInflater(),

                        R.layout.view_intro_1, R.layout.view_intro_2,

                        R.layout.view_intro_3, R.layout.view_intro_4,

                        R.layout.view_intro_5, R.layout.view_intro_6 ,R.layout.view_login);

            }

        }

        else{

            setContentView(R.layout.view_login);

        }

    }

}
我们看到代码很简单,主要是这几句有用的代码:
  if (parallaxContainer != null) {

                parallaxContainer.setImage(iv_man);

                parallaxContainer.setLooping(false);

                iv_man.setVisibility(View.VISIBLE);

                parallaxContainer.setupChildren(getLayoutInflater(),

                        R.layout.view_intro_1, R.layout.view_intro_2,

                        R.layout.view_intro_3, R.layout.view_intro_4,

                        R.layout.view_intro_5, R.layout.view_intro_6 ,R.layout.view_login);

  }
① 将我们小人走路的那个ImageView添加到自定义控件ParallaxContainer中
② 将我们每一个的布局文件set到ParallaxContainer控件中去
这里给出R.layout.view_intro_1.xml文件代码,其他的类似,就不给出来了(这里的x_in、x_out、y_in等属性注意一下)
<?xml version="1.0" encoding="utf-8"?>

<RelativeLayout xmlns:android="http://schemas.android.com/apk/res/android"

    xmlns:app="http://schemas.android.com/apk/res-auto"

    android:layout_width="fill_parent"

    android:layout_height="fill_parent" >

    <ImageView

        android:id="@+id/iv_0"

        android:layout_width="103dp"

        android:layout_height="19dp"

        android:layout_centerInParent="true"

        android:src="@drawable/intro1_item_0"

        app:x_in="1.2"

        app:x_out="1.2" />

    <ImageView

        android:id="@+id/iv_1"

        android:layout_width="181dp"

        android:layout_height="84dp"

        android:layout_alignParentLeft="true"

        android:layout_alignParentTop="true"

        android:layout_marginLeft="13dp"

        android:layout_marginTop="60dp"

        android:src="@drawable/intro1_item_1"

        app:x_in="0.8"

        app:x_out="0.8" />

    <ImageView

        android:id="@+id/iv_2"

        android:layout_width="143dp"

        android:layout_height="58dp"

        android:layout_alignParentRight="true"

        android:layout_alignParentTop="true"

        android:layout_marginTop="109dp"

        android:src="@drawable/intro1_item_2"

        app:x_in="1.1"

        app:x_out="1.1" />

    <ImageView

        android:id="@+id/iv_3"

        android:layout_width="48dp"

        android:layout_height="48dp"

        android:src="@drawable/intro1_item_3"

        app:x_in="0.8"

        app:x_out="0.8"

        app:a_in="0.8"

        app:a_out="0.8"

        android:layout_below="@+id/iv_0"

        android:layout_toRightOf="@+id/iv_5"

        android:layout_toEndOf="@+id/iv_5"

        android:layout_marginLeft="21dp"

        android:layout_marginStart="21dp"

        android:layout_marginTop="12dp"/>

    <ImageView

        android:id="@+id/iv_4"

        android:layout_width="fill_parent"

        android:layout_height="128dp"

        android:layout_alignParentBottom="true"

        android:layout_marginBottom="29dp"

        android:background="@drawable/intro1_item_4"

        app:a_in="0.8"

        app:a_out="0.8"

        app:x_in="0.8"

        app:x_out="0.8" />

    <ImageView

        android:id="@+id/iv_5"

        android:layout_width="260dp"

        android:layout_height="18dp"

        android:layout_alignParentBottom="true"

        android:layout_alignParentLeft="true"

        android:layout_marginBottom="16dp"

        android:layout_marginLeft="15dp"

        android:src="@drawable/intro1_item_5"

        app:a_in="0.9"

        app:a_out="0.9"

        app:x_in="0.9"

        app:x_out="0.9" />

    <ImageView

        android:id="@+id/iv_6"

        android:layout_width="24dp"

        android:layout_height="116dp"

        android:layout_alignParentBottom="true"

        android:layout_alignParentLeft="true"

        android:layout_marginBottom="35dp"

        android:layout_marginLeft="46dp"

        android:src="@drawable/intro1_item_6"

        app:x_in="0.6"

        app:x_out="0.6" />

    <ImageView

        android:id="@+id/iv_7"

        android:layout_width="45dp"

        android:layout_height="40dp"

        android:layout_alignParentBottom="true"

        android:layout_alignParentLeft="true"

        android:layout_marginBottom="23dp"

        android:layout_marginLeft="76dp"

        android:src="@drawable/intro1_item_7"

        app:a_in="0.3"

        app:a_out="0.3"

        app:x_in="0.5"

        app:x_out="0.5" />

</RelativeLayout>
第三步:好了现在我们一定很好奇ParallaxContainer里面的内容,那我们从上面的方法慢慢去看,首先看一下ParallaxContainer中的setImage()方法,代码如下:
    ImageView iv;

    //将小人图片添加进来

    public void setImage(ImageView iv) {

        this.iv = iv;

    }
貌似没有什么,只是将它赋值给成员变量iv,我们接着看下一个setUpChildren()方法
    //添加子view

    public void setupChildren(LayoutInflater inflater, int... childIds) {

        if (getChildCount() > 0) {

            throw new RuntimeException("setupChildren should only be called once when ParallaxContainer is empty");

        }

        //创建打气筒

        ParallaxLayoutInflater parallaxLayoutInflater = new ParallaxLayoutInflater(

                inflater, getContext());

        //将所有的view添加到本控件上去

        for (int childId : childIds) {

            View view = parallaxLayoutInflater.inflate(childId, this);

            viewlist.add(view);

        }

        //添加视觉view

        pageCount = getChildCount();

        for (int i = 0; i < pageCount; i++) {

            View view = getChildAt(i);

            addParallaxView(view, i);

        }

        //更新ViewPagerAdapter的数量

        updateAdapterCount();

        //创建viewpager

        viewPager = new ViewPager(getContext());

        viewPager.setLayoutParams(new LayoutParams(LayoutParams.MATCH_PARENT, LayoutParams.MATCH_PARENT));

        viewPager.setId(R.id.parallax_pager);

        //给viewpager添加滑动监听

        attachOnPageChangeListener();

        //设置适配器

        viewPager.setAdapter(adapter);

        //将viewpager添加到主控件中

        addView(viewPager, 0);

    }
让我们一行行代码慢慢分析
if (getChildCount() > 0) {

            throw new RuntimeException("setupChildren should only be called once when ParallaxContainer is empty");

 }
 //创建打气筒

        ParallaxLayoutInflater parallaxLayoutInflater = new ParallaxLayoutInflater(

                inflater, getContext());
首先看一下这段代码只是if判断是否已经调用过setUpChildren()方法,没什么重要的,在看创建ParallaxLayoutInflater打气筒对象,我们来看看ParallaxLayoutInflater的具体代码,没什么重要的,只是里面有一个ParallaxFactory类我们没见过,留心一下!
package com.qianmo.xiaohongshuwelcome.parallaxpager;

import android.content.Context;

import android.view.LayoutInflater;

public class ParallaxLayoutInflater extends LayoutInflater {

  protected ParallaxLayoutInflater(LayoutInflater original, Context newContext) {

    super(original, newContext);

    setUpLayoutFactory();

  }

  private void setUpLayoutFactory() {

    if (!(getFactory() instanceof ParallaxFactory)) {

      setFactory(new ParallaxFactory(this, getFactory()));

    }

  }

  @Override

  public LayoutInflater cloneInContext(Context newContext) {

    return new ParallaxLayoutInflater(this, newContext);

  }

}
再看下面一段代码,主要是将所有的布局文件添加到viewList集合中去,并填充到我们的布局中,我们继续往下看
//将所有的view添加到本控件上去

        for (int childId : childIds) {

            View view = parallaxLayoutInflater.inflate(childId, this);

            viewlist.add(view);

        }
下面一段代码主要是看拿到对应所有的子view,关键是我们的addParallaxView()方法,具体代码如下:
 //添加视觉view

        pageCount = getChildCount();

        for (int i = 0; i < pageCount; i++) {

            View view = getChildAt(i);

            addParallaxView(view, i);

        }
/**

     * 添加视觉view方法

     *

     * @param view

     * @param pageIndex

     */

    private void addParallaxView(View view, int pageIndex) {

        //通过递归方法拿到最小单元的view

        if (view instanceof ViewGroup) {

            ViewGroup viewGroup = (ViewGroup) view;

            for (int i = 0, childCount = viewGroup.getChildCount(); i < childCount; i++) {

                addParallaxView(viewGroup.getChildAt(i), pageIndex);

            }

        }

        //创建视觉差view绑定,并添加到集合中去

        ParallaxViewTag tag = (ParallaxViewTag) view.getTag(R.id.parallax_view_tag);

        if (tag != null) {

            tag.index = pageIndex;

            parallaxViews.add(view);

        }

    }
通过递归将每个布局文件中的最小单元view保存到parallaxView集合中去,但是等等,这里我们又发现了一个新的类ParallaxViewTag,让我们来具体代码
package com.qianmo.xiaohongshuwelcome.parallaxpager;

public class ParallaxViewTag {

  //绑定每一个view对应的是哪一个下标的

  protected int index;

  //x轴进入的速度

  protected float xIn;

  protected float xOut;

  protected float yIn;

  protected float yOut;

  protected float alphaIn;

  protected float alphaOut;

}
貌似很简单,xIn、xOut貌似很熟悉和我们之前的布局文件属性app:x_in等属性对应了, 这样我们就懂了,这个类是相当于一个tag类,用于记录我们设置的特殊一些属性,然是我们这里有一个疑问,下面这个代码是get到tag,那我们是在哪里set里面的属性呢?
ParallaxViewTag tag = (ParallaxViewTag) view.getTag(R.id.parallax_view_tag);
这时候我们要看看我们前面提到过的一个陌生类ParallaxFactory,看一下具体代码
package com.qianmo.xiaohongshuwelcome.parallaxpager;

import android.content.Context;

import android.content.res.TypedArray;

import android.util.AttributeSet;

import android.view.LayoutInflater;

import android.view.View;

import com.qianmo.xiaohongshuwelcome.R;

public class ParallaxFactory implements LayoutInflater.Factory {

    private final LayoutInflater.Factory factory;

    private ParallaxLayoutInflater mInflater;

    private static final String[] sClassPrefixList = {

            "android.widget.",

            "android.webkit.",

            "android.view."

    };

    public ParallaxFactory(ParallaxLayoutInflater inflater, LayoutInflater.Factory factory) {

        mInflater = inflater;

        this.factory = factory;

    }

    @Override

    public View onCreateView(String name, Context context, AttributeSet attrs) {

        View view = null;

        if (context instanceof LayoutInflater.Factory) {

            view = ((LayoutInflater.Factory) context).onCreateView(name, context, attrs);

        }

        if (factory != null && view == null) {

            view = factory.onCreateView(name, context, attrs);

        }

        if (view == null) {

            view = createViewOrFailQuietly(name, context, attrs);

        }

        if (view != null) {

            onViewCreated(view, context, attrs);

        }

        return view;

    }

    protected View createViewOrFailQuietly(String name, Context context, AttributeSet attrs) {

        if (name.contains(".")) {

            return createViewOrFailQuietly(name, null, context, attrs);

        }

        for (final String prefix : sClassPrefixList) {

            final View view = createViewOrFailQuietly(name, prefix, context, attrs);

            if (view != null) {

                return view;

            }

        }

        return null;

    }

    protected View createViewOrFailQuietly(String name, String prefix, Context context,

                                           AttributeSet attrs) {

        try {

            return mInflater.createView(name, prefix, attrs);

        } catch (Exception ignore) {

            return null;

        }

    }

    /**

     * 主要是在viewCreated的时候将tag和view绑定起来

     *

     * @param view

     * @param context

     * @param attrs

     */

    protected void onViewCreated(View view, Context context, AttributeSet attrs) {

        int[] attrIds =

                {R.attr.a_in, R.attr.a_out, R.attr.x_in, R.attr.x_out, R.attr.y_in, R.attr.y_out,};

        TypedArray a = context.obtainStyledAttributes(attrs, attrIds);

        if (a != null) {

            if (a.length() > 0) {

                ParallaxViewTag tag = new ParallaxViewTag();

                tag.alphaIn = a.getFloat(0, 0f);

                tag.alphaOut = a.getFloat(1, 0f);

                tag.xIn = a.getFloat(2, 0f);

                tag.xOut = a.getFloat(3, 0f);

                tag.yIn = a.getFloat(4, 0f);

                tag.yOut = a.getFloat(5, 0f);

                view.setTag(R.id.parallax_view_tag, tag);

            }

            a.recycle();

        }

    }

}
主要看onViewCreated()方法,可以看到,这里我们将对应的每个属性的值都set到了我们ParallaxViewTag中,我们接着看下面的代码,调用updateAdapterCount()方法让适配器去更新adapter的数量,这里我们可以看到适配器是继承PagerAdapter类,用于ViewPager的适配器,这里使用LinkedList来存储View,这个方法很好,赞一下
//更新ViewPagerAdapter的数量

        updateAdapterCount();

//具体代码

//被调用的时候好像是0

    private void updateAdapterCount() {

        adapter.setCount(isLooping ? Integer.MAX_VALUE : pageCount);

    }

//下面是adapter的具体代码

package com.qianmo.xiaohongshuwelcome.parallaxpager;

import android.content.Context;

import android.support.v4.view.PagerAdapter;

import android.view.View;

import android.view.ViewGroup;

import java.util.LinkedList;

import static android.view.ViewGroup.LayoutParams;

import static android.view.ViewGroup.LayoutParams.MATCH_PARENT;

public class ParallaxPagerAdapter extends PagerAdapter {

  private int count = 0;

  private final Context context;

  private final LinkedList<View> recycleBin = new LinkedList<View>();

  public ParallaxPagerAdapter(Context context) {

    this.context = context;

  }

  public void setCount(int count) {

    this.count = count;

  }

  @Override public int getCount() {

    return count;

  }

  @Override public Object instantiateItem(ViewGroup container, int position) {

    View view;

    if (!recycleBin.isEmpty()) {

      view = recycleBin.pop();

    } else {

      view = new View(context);

      view.setLayoutParams(new LayoutParams(MATCH_PARENT, MATCH_PARENT));

    }

    container.addView(view);

    return view;

  }

  @Override public void destroyItem(ViewGroup container, int position, Object object) {

    View view = (View) object;

    container.removeView(view);

    recycleBin.push(view);

  }

  @Override public boolean isViewFromObject(View view, Object object) {

    return view.equals(object);

  }

}
我们继续往下看,后面的就是创建viewpager对象,并addview到主控件上,在attachOnPagerChangeListener()方法中添加viewpager的滑动监听
        /创建viewpager

        viewPager = new ViewPager(getContext());

        viewPager.setLayoutParams(new LayoutParams(LayoutParams.MATCH_PARENT, LayoutParams.MATCH_PARENT));

        viewPager.setId(R.id.parallax_pager);

        //给viewpager添加滑动监听

        attachOnPageChangeListener();

        //设置适配器

        viewPager.setAdapter(adapter);

        //将viewpager添加到主控件中

        addView(viewPager, 0);
这里我们在onPageScrollStateChanged()方法判断是否开启下面小人行走的动画,通过onPageScrolled()方法监听滑动的具体偏移量,通过view.setTranslationX()方法来改变对应的属性
protected void attachOnPageChangeListener() {

        mCommonPageChangeListener = new ViewPager.OnPageChangeListener() {

            /**

             * 此方法是在状态改变的时候调用,其中arg0这个参数

             有三种状态(0,1,2)。arg0 ==1的时辰默示正在滑动,arg0==2的时辰默示滑动完毕了,arg0==0的时辰默示什么都没做。

             * @param state

             */

            @Override

            public void onPageScrollStateChanged(int state) {

                Log.v(TAG, "onPageScrollStateChanged" + state);

                iv.setBackgroundResource(R.drawable.man_run);

                final AnimationDrawable animationDrawable = (AnimationDrawable) iv.getBackground();

                switch (state) {

                    case 0:

                        //处于展示阶段

                        finishAnim(animationDrawable);

                        break;

                    case 1:

                        //正在滑动

                        isEnd = false;

                        animationDrawable.start();

                        break;

                    case 2:

                        //滑动完毕

                        finishAnim(animationDrawable);

                        break;

                }

            }

            //判断是否还是在左边

            boolean isleft = false;

            /**

             *  onPageScrolled(int arg0,float arg1,int arg2)    ,当页面在滑动的时候会调用此方法,在滑动被停止之前,此方法回一直得到调用。其中三个参数的含义分别为:

             * @param pageIndex 当前页面,及你点击滑动的页面

             * @param offset 当前页面偏移的百分比

             * @param offsetPixels 当前页面偏移的像素位置

             */

            @Override

            public void onPageScrolled(int pageIndex, float offset, int offsetPixels) {

//				Log.v(TAG, "onPageScrolled" + pageIndex + "  offset" + offset + "   offsetPixels" + offsetPixels);

                if (offsetPixels < 10) {

                    isleft = false;

                }

                if (pageCount > 0) {

                    pageIndex = pageIndex % pageCount;

                }

                if (pageIndex == 3) {

                    if (isleft) {

                    } else {

                        iv.setX(iv.getLeft() - offsetPixels);

                    }

                }

                ParallaxViewTag tag;

                for (View view : parallaxViews) {

                    tag = (ParallaxViewTag) view.getTag(R.id.parallax_view_tag);

                    if (tag == null) {

                        continue;

                    }

                    if ((pageIndex == tag.index - 1 || (isLooping && (pageIndex == tag.index

                            - 1 + pageCount)))

                            && containerWidth != 0) {

                        // make visible

                        view.setVisibility(VISIBLE);

                        // slide in from right

                        view.setTranslationX((containerWidth - offsetPixels) * tag.xIn);

                        // slide in from top

                        view.setTranslationY(0 - (containerWidth - offsetPixels) * tag.yIn);

                        // fade in

                        view.setAlpha(1.0f - (containerWidth - offsetPixels) * tag.alphaIn / containerWidth);

                    } else if (pageIndex == tag.index) {

                        // make visible

                        view.setVisibility(VISIBLE);

                        // slide out to left

                        view.setTranslationX(0 - offsetPixels * tag.xOut);

                        // slide out to top

                        view.setTranslationY(0 - offsetPixels * tag.yOut);

                        // fade out

                        view.setAlpha(1.0f - offsetPixels * tag.alphaOut / containerWidth);

                    } else {

                        view.setVisibility(GONE);

                    }

                }

            }

            @Override

            public void onPageSelected(int position) {

                Log.v(TAG, "onPageSelected" + position);

                currentPosition = position;

            }

        };

        viewPager.setOnPageChangeListener(mCommonPageChangeListener);

    }
4,这里基本上就把源码分析完了,so,既然分析完别人的源码了下面就是结合到自己项目中去用了,当我们,想要实现一个翻页从顶部斜飞入的view,那我们的布局文件代码可以如下:
<?xml version="1.0" encoding="utf-8"?>

<RelativeLayout xmlns:android="http://schemas.android.com/apk/res/android"

                xmlns:app="http://schemas.android.com/apk/res-auto"

                android:layout_width="fill_parent"

                android:layout_height="fill_parent"

                android:background="@color/transparent">

    <ImageView

        android:id="@+id/iv_2"

        android:layout_width="wrap_content"

        android:layout_height="wrap_content"

        android:layout_alignParentTop="true"

        android:layout_centerHorizontal="true"

        android:layout_marginLeft="133dp"

        android:layout_marginTop="39dp"

        android:src="@drawable/ic_launcher"

        app:x_in="1"

        app:x_out="1"

        app:y_in="0.6"

        app:y_out="0.9"/>

    <ImageView

        android:id="@+id/iv_11"

        android:layout_width="44dp"

        android:layout_height="47dp"

        android:layout_alignParentBottom="true"

        android:layout_centerHorizontal="true"

        android:layout_marginBottom="66dp"

        android:layout_marginLeft="140dp"

        android:src="@drawable/ic_launcher"

        app:x_in="1"

        app:x_out="1"

        app:y_in="-1.3"

        app:y_out="-1.3"/>

</RelativeLayout>
来看一下我们的效果:
这是Github下载地址,由于要源码的同学可以去下载一下,See You Next Time !!!
Android -- 仿小红书欢迎界面的更多相关文章
- 转-Android仿微信气泡聊天界面设计
微信的气泡聊天是仿iPhone自带短信而设计出来的,不过感觉还不错可以尝试一下仿着微信的气泡聊天做一个Demo,给大家分享一下!效果图如下: 气泡聊天最终要的是素材,要用到9.png文件的素材,这样气 ...
- Android仿微信气泡聊天界面设计
微信的气泡聊天是仿iPhone自带短信而设计出来的,不过感觉还不错可以尝试一下仿着微信的气泡聊天做一个Demo,给大家分享一下!效果图如下: 气泡聊天最终要的是素材,要用到9.png文件的素材,这样气 ...
- android仿新浪引导界面
最近在研究如何做出仿微信,仿新浪等应用,第一次安装使用的使用展示应用程序的新特性和用法. 实现功能:左右手势滑屏 底部小圆点随当前显示页跳动 浮动按钮显示.当触屏事件发生显示,否则就渐渐消失 先转个文 ...
- Android仿今日头条手界面
public class MyIndicator extends HorizontalScrollView implements ViewPager.OnPageChangeListener { pr ...
- android 仿QQ气泡聊天界面
1.现在的QQ,微信等一些APP的聊天界面都是气泡聊天界面,左边是接收到的消息,右边是发送的消息, 这个效果其实就是一个ListView在加载它的Item的时候,分别用了不同的布局xml文件. 2.效 ...
- 仿360手机卫士界面效果android版源码
仿360手机卫士界面效果android版,这个今天一大早在源码天堂的那个网站上看到了一个那个网站最新更新的一个源码,所以就分享给大学习一下吧,布局还挺不错的,而且也很简单的,我就不把我修改的那个分享出 ...
- Android 仿PhotoShop调色板应用(三) 主体界面绘制
版权声明:本文为博主原创文章,未经博主允许不得转载. Android 仿PhotoShop调色板应用(三) 主体界面绘制 关于PhotoShop调色板应用的实现我总结了两个最核心的部分: 1 ...
- Android 仿Win8的metro的UI界面(上)
转载请标明出处:http://blog.csdn.net/lmj623565791/article/details/23441455 昨晚没事手机下载了一些APP,发现现在仿win8的主界面越来越多, ...
- Android 仿PhotoShop调色板应用(四) 不同区域颜色选择的颜色生成响应
版权声明:本文为博主原创文章,未经博主允许不得转载. Android 仿PhotoShop调色板应用(四) 不同区域颜色选择的颜色生成响应 上一篇讲过了主体界面的绘制,这里讲解调色板应用中的另外一 ...
随机推荐
- iOS开发中@property的属性weak nonatomic strong readonly等介绍
@property与@synthesize是成对出现的,可以自动生成某个类成员变量的存取方法.在Xcode4.5以及以后的版本,@synthesize可以省略. 1.atomic与nonatomica ...
- JQuery之 serialize() 及serializeArray() 实例介绍
这两个方法都是jq封装的,主要用于form表单. serialize(); 1.创建一个标准url编码显示的文本字符转: 2.操作的对象是表单元素结合的jq对象: serializeArray(); ...
- 蓝桥网试题 java 基础练习 回文数
--------------------------------------------------------------------- 没必要枚举出所有四位数 四位数里是回文的数都有一个特性,是什 ...
- 一个可以提高开发效率的Git命令-- Cherry-Pick
在实际的项目开发中(使用Git版本控制),在所难免会遇到没有切换分支开发.需要在另一个分支修改bug然后合并到当前分支的情况.之前遇到这种第一反应就是将分支合并过去来解决问题.如果你那些提交当中也穿插 ...
- ContextMenu控件引用以及不用v4包的方法
最近想撸个APP出来玩玩,本想用Yalantis出的SideMenu,结果因为依赖问题放弃了,改用他们家的ContextMenu. 如果你用了v4包 那么问题就比较简单了,直接打开项目中app中的bu ...
- linux下读取系统内存的demo
#include <stdio.h> #define KIBIBYTE_SIZE 1024LL #define MEBIBYTE_SIZE 1048576LL #define GIBIBY ...
- 分布式架构--Dubbo项目实战学习文档
安装Dubbo注册中心(Zookeeper-3.4.6) 安装Dubbo管理控制台 Tomcat中部署web应用 ---- Dubbo服务消费者Web应用war包的部署 Dubbo监控中心的介绍与简易 ...
- openstack安装文档
#########################################openstack m版本部署安装################################## 控制节点.网络 ...
- java线程之生产者消费者
看了毕向东老师的生产者消费者,就照着视频参考运行了一下,感觉还好 这个值得学习的是条理特别清晰: ProducterConsumerDemo.java中,一个资源类Resources,生产者消费者都可 ...
- gridcontrol中LayoutView层叠图片效果
1.效果图 2.如上图效果,为比较常见的一种需求,一堆物品图片.有时候需要给不同物品标记,图中左上角就是一张标记性图片.在devexpress里面实现起来也比较容易. 3.部分代码: class Pi ...