
spring boot整合servlet、filter、Listener等组件方式
filter是过滤的意思:在web开发中,是请求会先到过滤器,然后由过滤器再转发到具体的借口上去,此时过滤器就可以对捕捉到的请求作出适当的逻辑了。
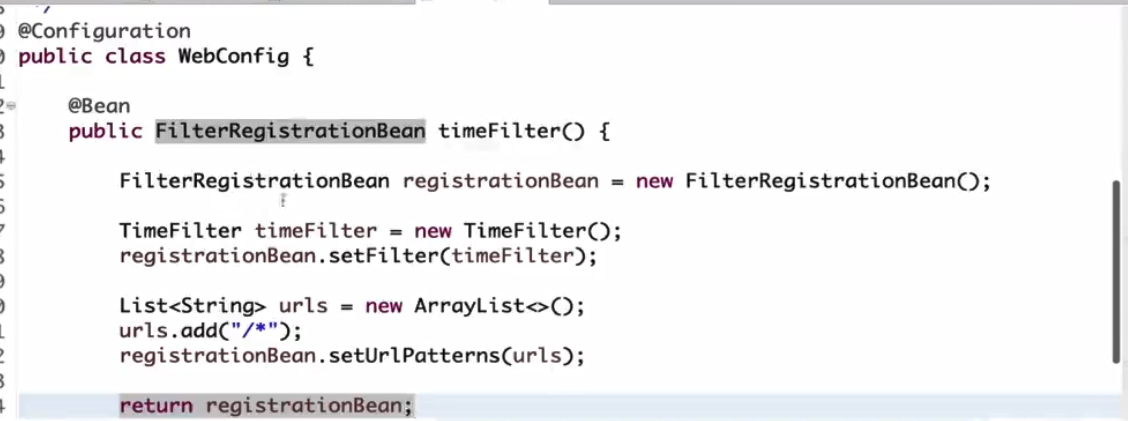
一般如果用第三方的filter但是此filter又不是专门服务于spring开发环境,此时就不会被扫描到,因此需要加个@Configuration注解,有了此注解spring会在启动之初就去加载该filter这和以前在spring.xml中配置创建类是一样的效果,urls是指定要过滤那些请求,没有指定的则直接去访问不需要过滤器。
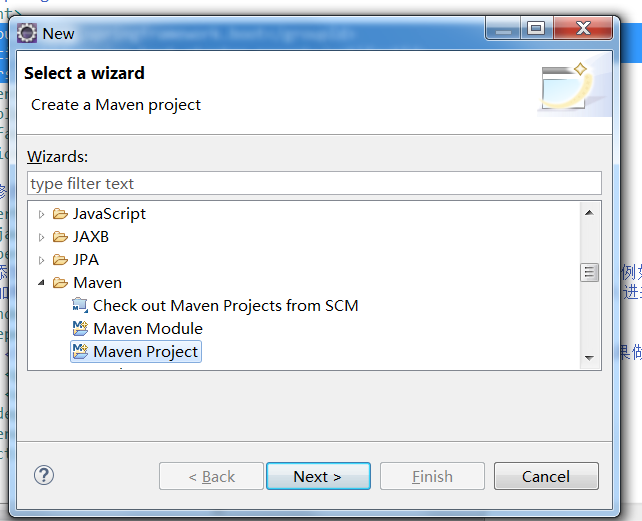
创建一个maven项目,然后此项目继承一个父项目:org.springframework.boot
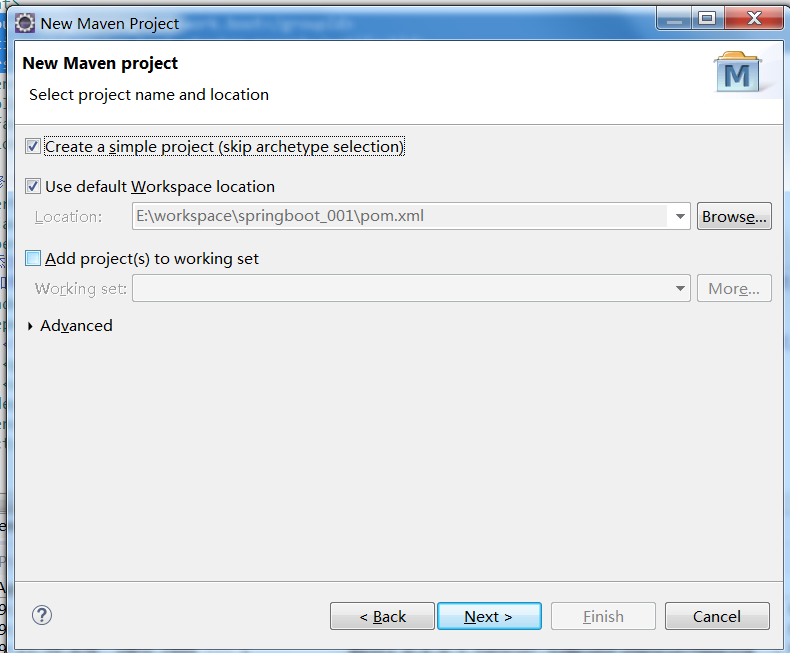
1.创建一个maven项目:
2.点击next后配置父项目及版本号
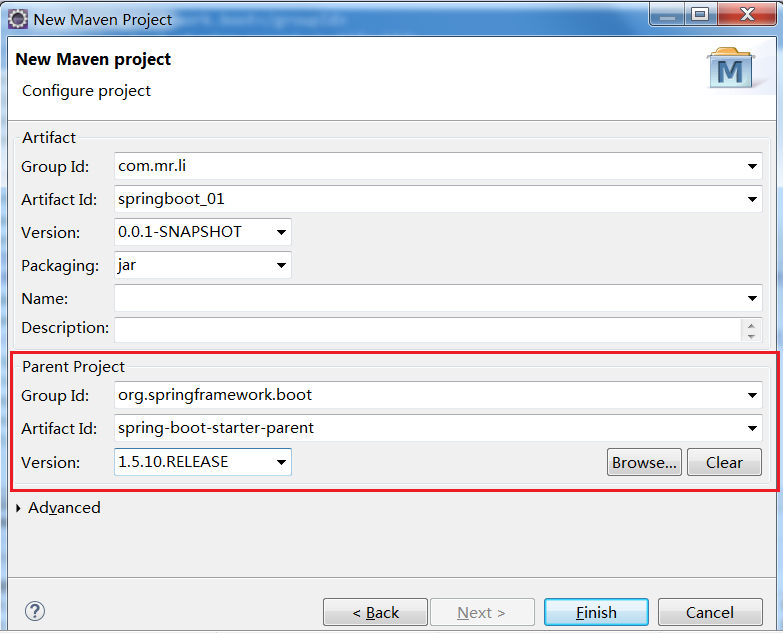
3.点击finish后就可查看pom.xml文件中已经有父级项目了。
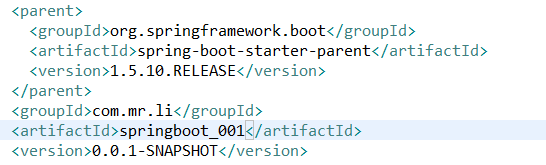
好了,创建项目演示已经做完,现在粘贴整个各个组件的代码:说明在注释中
1.启动类:
package com.mr.li;

import org.springframework.boot.SpringApplication;

import org.springframework.boot.autoconfigure.SpringBootApplication;

import org.springframework.boot.web.servlet.FilterRegistrationBean;

import org.springframework.boot.web.servlet.ServletComponentScan;

import org.springframework.boot.web.servlet.ServletListenerRegistrationBean;

/**

 * 启动类:

 * 1.@springBootApplication:表示此类是spring boot的启动类.

 * 2.@ServletComponentScan:此注解的意思是在spring boot启动时,主动去扫描所有的Servlet类,filter类....

 * @author Administrator

 *

 */

import org.springframework.boot.web.servlet.ServletRegistrationBean;

import org.springframework.context.annotation.Bean;

import com.mr.li.filter.MyFilter2;

import com.mr.li.listener.MyListener2;

import com.mr.li.servlet.MyServlet;

@SpringBootApplication

@ServletComponentScan

public class Application {

    public static void main(String[] args) {

        //此方法是spring boot启动时必须调用的一个静态方法,第一个参数是启动类的模板,第二个参数就是main方法中的参数。

        SpringApplication.run(Application.class, args);

    }

    //方法名叫什么无所谓:在启动类中创建一个新的filter

    @Bean

    public ServletRegistrationBean getServletRegistrationBean() {

        ServletRegistrationBean bean = new ServletRegistrationBean(new MyServlet(), "/hhhh");

        return bean;

    }

    //过滤器方式二:在启动类中创建一个新的filter对象,加载到spring容器中,然后但凡以他配置的过滤的后缀名结束的请求都会过滤掉,

    @Bean

    public FilterRegistrationBean getFilterRegistrationBean() {

        FilterRegistrationBean bean = new FilterRegistrationBean(new MyFilter2());

        bean.addUrlPatterns("/hhhh","/my");

        return bean;

    }

    //注册Listener监听器方式二:启动类中方法注册Listener类。

    @Bean

    public ServletListenerRegistrationBean<MyListener2> getListenerRegistrationBean(){

        ServletListenerRegistrationBean<MyListener2> bean = new ServletListenerRegistrationBean<MyListener2>(new MyListener2());

        return bean;

    }

}
2.整合servlet
package com.mr.li.servlet;

import java.io.IOException;

import javax.servlet.ServletException;

import javax.servlet.annotation.WebServlet;

import javax.servlet.http.HttpServlet;

import javax.servlet.http.HttpServletRequest;

import javax.servlet.http.HttpServletResponse;

/**

 * spring boot整合Servlet:

  * 在spring boot中演示:正常的web项目下的Servlet编写方式。现在在spring boot中编写是当前这种方式的,简化了非常多。

  * 其中

 * 1.@WebServlet注解中my和/my相当于以前web.xml中配置的servlet标签和servlet-mapping标签的所有内容。

         相当于web.xml中的:

        <servlet>

            <servlet-name>my</servlet-name>

            <servlet-class>com.mr.li.servlet.MyServlet</servlet-class>

        </servlet>

        <servlet-mapping>

            <servlet-name>my</servlet-name>

            <url-pattern>/my</url-pattern>

        </servlet-mapping>

 */

@WebServlet(name = "my", urlPatterns = "/my")

public class MyServlet extends HttpServlet{

    private static final long serialVersionUID = 8908779617494799833L;

    @Override

    protected void service(HttpServletRequest req, HttpServletResponse resp) throws ServletException, IOException {

        System.out.println("访问到MyServlet");

//        resp.setCharacterEncoding("UTF-8");

        resp.getWriter().write("你好,世界");

    }

}
3.整合filter方式一:
package com.mr.li.filter;

import java.io.IOException;

import javax.servlet.Filter;

import javax.servlet.FilterChain;

import javax.servlet.FilterConfig;

import javax.servlet.ServletException;

import javax.servlet.ServletRequest;

import javax.servlet.ServletResponse;

import javax.servlet.annotation.WebFilter;

/**

 * spring boot整合filter方式一:

 * 编写Filter,是Servlet的拦截器,指定某个请求到达此请求(一般是servlet)之前就将一些条件过滤掉

 * 相当于web.xml中的:

 * <filter>

 *      <filter-name>MyFilter</filter-name>

 *      <filter-class>com.mr.li.filter.MyFilter</filter-class>

 * </filter>

 * <filter-mapping>

 *      <filter-name>MyFilter</filter-name>

 *      <url-parrern>/my</url-parrern>

 * </filter-mapping>

 *  本filter的名字叫:MyFilter

 *  拦截:/my 结尾的请求

 * @author Administrator

 *

 */

@WebFilter(filterName = "MyFilter", urlPatterns = {"/my"})

public class MyFilter implements Filter {

    @Override

    public void init(FilterConfig filterConfig) throws ServletException {

        System.out.println("filter初始化了");

    }

    @Override

    public void doFilter(ServletRequest request, ServletResponse response, FilterChain chain)

            throws IOException, ServletException {

        System.out.println("进入:MyFilter");

        chain.doFilter(request, response);//放行

        System.out.println("离开:MyFilter");

    }

    @Override

    public void destroy() {

        System.out.println("filter销毁了");

    }

}
4.整合filter方式2:方法注册,注册方法在启动类中,这里只提供对象
package com.mr.li.filter;

import java.io.IOException;

import javax.servlet.Filter;

import javax.servlet.FilterChain;

import javax.servlet.FilterConfig;

import javax.servlet.ServletException;

import javax.servlet.ServletRequest;

import javax.servlet.ServletResponse;

/**

 * spring boot整合filter方式二:在启动类中调用

 */

public class MyFilter2 implements Filter {

    @Override

    public void init(FilterConfig filterConfig) throws ServletException {

        System.out.println("filter222初始化了");

    }

    @Override

    public void doFilter(ServletRequest request, ServletResponse response, FilterChain chain)

            throws IOException, ServletException {

        System.out.println("进入:MyFilter222");

        chain.doFilter(request, response);//放行

        System.out.println("离开:MyFilter222");

    }

    @Override

    public void destroy() {

        System.out.println("filter销毁了");

    }

}
5.整合Listener方式一:
package com.mr.li.listener;

import javax.servlet.ServletContextEvent;

import javax.servlet.ServletContextListener;

import javax.servlet.annotation.WebListener;

/**

 * spring boot整合Listener监听器方式一:配置监听器,主要看针对哪个去配置监听器,这里配置的监听器主要是针对Servlet配置的监听器。

 * 此配置相当于web.xml中:

 *<listener-calss>com.mr.li.listener.MyListener</listener-calss>

 */

@WebListener

public class MyListener implements ServletContextListener {

    @Override

    public void contextInitialized(ServletContextEvent sce) {

        System.out.println("Listener监听器开始工作了。。。init。。。。。");

    }

    @Override

    public void contextDestroyed(ServletContextEvent sce) {

    }

}
6.整合Listener方式二:整合方法在启动类中,这里只提供对象
package com.mr.li.listener;

import javax.servlet.ServletContextEvent;

import javax.servlet.ServletContextListener;

/**

 * spring boot整合Listener监听器方式二:通过在启动类中的方法注册Listener监听器。

 * 此配置相当于web.xml中:

 *<listener-calss>com.mr.li.listener.MyListener</listener-calss>

 */

public class MyListener2 implements ServletContextListener {

    @Override

    public void contextInitialized(ServletContextEvent sce) {

        System.out.println("Listener2222监听器开始工作了。。。init。。。。。");

    }

    @Override

    public void contextDestroyed(ServletContextEvent sce) {

    }

}
7.controller
package com.mr.li.controller;

import java.util.HashMap;

import java.util.Map;

import org.springframework.stereotype.Controller;

import org.springframework.web.bind.annotation.RequestMapping;

import org.springframework.web.bind.annotation.ResponseBody;

/**

 * 单独演示Controller

 *

 */

@Controller

public class HelloWorld {

    @RequestMapping("/show")

    @ResponseBody

    public Map<String, Object> show(){

        Map<String, Object> map = new HashMap<String, Object>();

        map.put("hello", "world");

        return map;

    }

}
8.pom.xml
<project xmlns="http://maven.apache.org/POM/4.0.0" xmlns:xsi="http://www.w3.org/2001/XMLSchema-instance" xsi:schemaLocation="http://maven.apache.org/POM/4.0.0 http://maven.apache.org/xsd/maven-4.0.0.xsd">

  <modelVersion>4.0.0</modelVersion>

  <!-- spring boot项目需要继承父项目,现为2.1.4版本的父项目 -->

  <parent>

    <groupId>org.springframework.boot</groupId>

    <artifactId>spring-boot-starter-parent</artifactId>

    <version>1.5.10.RELEASE</version>

  </parent>

  <groupId>com.mr.li</groupId>

  <artifactId>springboot_001</artifactId>

  <version>0.0.1-SNAPSHOT</version>

  <!-- 修改jdk版本 -->

  <properties>

      <java.version>1.7</java.version>

  </properties>

  <!-- 添加启动器:spring boot启动器中包含各个项目所需要的jar包,总共有44个启动器,例如web,jdbc,redis...想要使用哪个技术

  就要添加哪个启动器。启动器是各个技术的组件,想用哪个技术就将哪个技术的启动器加入进来,这样此服务器就会拥有哪个技术的组件 -->

  <dependencies>

       <dependency>

           <!-- web启动器:此启动器中包含:tomcat + spring mvc的所有jar包,所以如果做web项目就必须有此启动器 -->

        <groupId>org.springframework.boot</groupId>

        <artifactId>spring-boot-starter-web</artifactId>

     </dependency>

  </dependencies>

</project>
具体的项目结构如下:
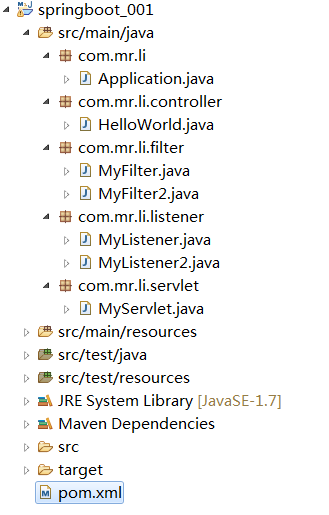
*如果jdk不对就项目右键 -> maven -> updata Project... 一下
*访问的url:http: //localhost:8080/my 这里是访问的servlet , controller一样可以访问,将my换为show即可
spring boot整合servlet、filter、Listener等组件方式的更多相关文章
- Spring Boot整合Servlet,Filter,Listener,访问静态资源
目录 Spring Boot整合Servlet(两种方式) 第一种方式(通过注解扫描方式完成Servlet组件的注册): 第二种方式(通过方法完成Servlet组件的注册) Springboot整合F ...
- spring boot 2.x 系列 —— spring boot 整合 servlet 3.0
文章目录 一.说明 1.1 项目结构说明 1.2 项目依赖 二.采用spring 注册方式整合 servlet 2.1 新建过滤器.监听器和servlet 2.2 注册过滤器.监听器和servlet ...
- Spring Boot 整合Servlet
冷知识,几乎用不到 在spring boot中使用Servlet有两种实现方法: 方法一: 正常创建servlet,然后只用注解@ServletComponentScan package clc.us ...
- Spring Boot整合Servlet、Filter、Listener
整合 Servlet 方式一: 编写 servlet package com.bjsxt.controller; import javax.servlet.ServletException; ...
- SpringBoot整合WEB开发--(九)整合Servlet,Filter,Listener
简介: 如果需要整合第三方框架时,可能还是不得不使用Servlet,Filter,Listener,Springboot中也有提供支持. @WebServlet("/my") pu ...
- 【Spring Boot学习之三】Spring Boot整合数据源
环境 eclipse 4.7 jdk 1.8 Spring Boot 1.5.2 一.Spring Boot整合Spring JDBC 1.pom.xml <project xmlns=&quo ...
- JavaWeb三大组件(Servlet,Filter,Listener 自己整理,初学者可以借鉴一下)
JavaWeb三大组件(Servlet,Filter,Listener 自己整理,初学者可以借鉴一下) Reference
- Spring Boot 整合 Web 开发
这一节我们主要学习如何整合 Web 相关技术: Servlet Filter Listener 访问静态资源 文件上传 文件下载 Web三大基本组件分别是:Servlet,Listener,Filte ...
- Spring Boot 注册 Servlet 的三种方法,真是太有用了!
本文栈长教你如何在 Spring Boot 注册 Servlet.Filter.Listener. 你所需具备的基础 什么是 Spring Boot? Spring Boot 核心配置文件详解 Spr ...
随机推荐
- Confluence 6 在初始化配置时候的问题
提交一个 服务器请求(support request) 然后在你的服务请求中同时提供下面的信息. 下载一个 LDAP 浏览器,你可以通过这个确定你的 LDAP 服务器配置正确.Atlassian 推荐 ...
- swift项目初始化并添加忽略文件Swift.ignore
1 先去GitHub上去把最新的忽略文件下载下载 https://github.com/github/gitignore 2 然后找到Swift.gitignore 把里面的 pod 前面的# 删除 ...
- 兼容性很好的纯css圆角
<!DOCTYPE HTML> <html lang="en-US"> <head> <meta charset="UTF-8& ...
- selenium关于断言的使用
基本介绍: Selenium工具专门为WEB应用程序编写的一个验收测试工具. Selenium的核心:browser bot,是用JAVASCRIPT编写的. Selenium工具有4种:Seleni ...
- MySQL----数据库练习
一.多对多的正反向查询 class Class(models.Model): name = models.CharField(max_length=32,verbose_name="班级名& ...
- poj3162 树形dp|树的直径 + 双单调队列|线段树,好题啊
题解链接:https://blog.csdn.net/shiqi_614/article/details/8105149 用树形dp是超时的,, /* 先求出每个点可以跑的最长距离dp[i][0|1] ...
- vue中引入css文件
两种方式引入css文件,一种是直接在main.js中引入(也可以在其他的.vue文件中的<script></script>标签中),即下面这种写法: import 'eleme ...
- Python if __name__ == '__main__':(以主程序形式执行)
在外部调用某个模块时,可能会将只能在本模块执行的代码给执行了,有没有什么办法让某些特定的代码指定只能在自身运行时才执行被调用时不执行呢?使用if __name__ == '__main__':. 示例 ...
- C++ 内链接 外链接
编译的时候(假如编译器是VS),是以源文件cpp文件为单位,编译成一个个的obj文件,然后再通过链接器把不同的obj文件链接起来.如果一些变量或函数的定义是内连接的话,链接器链接的时候就不会拿它们去与 ...
- Not running in a hosted service or the Development Fabric
今天尝试在azure上发布网站后,无法正常访问 本地调试也提示: Not running in a hosted service or the Development Fabric 谷歌百度半天… 最 ...