AutoMapper快速上手
一.什么是AutoMapper
AutoMapper是一个简单的对象映射框架(OOM),对象映射原理是把一种类型的输入对象转换为不同类型的输出对象,通俗讲就是通过一些约束讲一种类型中数据自动映射到另一数据类型中
二.AutoMapper的好处
以前的时候我们将DTO对象转换为Model对象或者将Model对象转换为DTO对象时,我们必须将每一个属性都手动映射
 //源数据对象

var source = new Source

{

     Id = ,

     Name = "张三"

};

//目标数据对象

var target = new Target

{

     Id = source.Id,

     Name = source.Name

};
这样情况如果属性过多会导致浪费大量的时间在对象转换中,于是各种OOM框架应时而生,而AutoMapper便是其一,AutoMapper其优势在于易用性与强大型,AutoMapper除了基本的对象映射之外还可以对进行配置各种需要的映射关系(不同属性名称之间的映射,映射之间的类型转换,支持嵌套映射,支持泛型等),AutoMapper最新版本为6.2.2,而AutoMapper在6.2.0版本中又发生了一次巨大改变,使得开发者能更加简单的使用AutoMapper进行工作。下面是AutoMapper的一个简单示例。
//初始化AutoMapper

Mapper.Initialize(config => { });

//源数据对象

var source = new Source

{

    Id = ,

    Name = "张三"

};

//映射

var target = Mapper.Map<Source, Target>(source);

Console.WriteLine(target.Id);

Console.WriteLine(target.Name);

可以看到我们只需要简单的使用便可以完成两个对象之间的属性映射,开发中极大的省去了枯燥的属性转换.
三,AutoMapper的性能
AutoMapper做为一个被广泛使用的OOM框架,其底层使用的是表达式树来进行映射,所以在性能方面还是比较突出的,下面是我做的一个性能测试
//初始化AutoMapper

Mapper.Initialize(config => { });

//源数据对象

IList<Source> sourceList = new List<Source>();

for (int i = ; i < ; i++)

{//创建1万个对象进行映射

     sourceList.Add(new Source

    {

        Id = i,

        Name = "张三" + i

    });

}

Stopwatch watch = new Stopwatch();

watch.Start();

//映射

var targetList = Mapper.Map<IList<Source>, IList<Target>>(sourceList);

watch.Stop();

Console.WriteLine("映射1万个对象的时间为:"+watch.ElapsedMilliseconds);

可以看到映射了1万个对象只花费了191毫秒.虽然说对象属性越多映射所下所花费的时间会越长,但是这个性能已经极为OK了
四.AutoMaper的使用
AutoMapper作为一个易用性极强并且简便的OOM,在使用方面做到了非常简便,尤其在6.2.0版本之后,基本不需要做什么配置,即可完成映射。这里也是以6.2.0版本来做示例
- 1. 引入AutoMapper
AutoMapper类库直接可以从NuGit包中引用
install-package automapper -v 6.2.
2.初始化
映射类型
/// <summary>

/// 源类型

/// </summary>

class Source

{

    public int Id { get; set; }

    public String SName { get; set; }

    public String  DateTime { get; set; }

    public int Age { get; set; }

}

/// <summary>

/// 目标类型

/// </summary>

class Target

{

    public int Id { get; set; }

    public String TName { get; set; }

    public String DateTime { get; set; }

    public int Age { get; set; }

}
/// <summary>

/// 源类型

/// </summary>

class Source

{

    public int Id { get; set; }

    public String SName { get; set; }

    public String  DateTime { get; set; }

    public int Age { get; set; }

}

/// <summary>

/// 目标类型

/// </summary>

class Target

{

    public int Id { get; set; }

    public String TName { get; set; }

    public String DateTime { get; set; }

    public int Age { get; set; }

}
Mapper.Initialize()方法执行AutoMapper的初始化操作,此操作在一个应用程序中只能执行一次.在初始化方法中可以初始化映射中的任何操作
注意:6.20版本之前必须在在配置中设置CreateMap才能映射,6.2.0版本开始如果不进行配置其它则可以省略,但是如果省略CreateMap后默认会以Target类型为基准,如果Target类型有未映射的属性,就会出现异常,加上CreateMap后就无异常,所以推荐手动加上映射配置,以防异常
2.映射
var source = new Source { Id = , SName = "张三", Age = , DateTime = "2018-4-23" };

//执行映射

var target = Mapper.Map<Source, Target>(source);

Console.WriteLine(target.Id);

Console.WriteLine(target.TName);

Console.WriteLine(target.Age);

Console.WriteLine(target.DateTime);
Mapper.Map<S,T> 执行映射方法 S为源类型,T为目标类型,参数为源类型,

其中属性TName因为没找到同名属性,所以并没有映射成功,另外发现源类型中DateTime字符串也成功映射成为目标类型的DateTime,自动类型转换。自动类型转换是6.2.0版本才加入的,在之前需要在配置中进行配置
3.反向映射
在AutoMapper中有一个方法配置是可以配置可以反向映射的, ReverseMap().
//初始化AutoMapper

Mapper.Initialize(config =>

{

    //Initialize方法为AutoMapper初始化方法

    //6.2.0版本后如果不需要额外的配置,则CreateMap可省略,但6.2.0版本之前不可省略【不过不建议省略】

    //ReverseMap方法可以实现反向映射

    config.CreateMap<Source, Target>().ReverseMap();

});
var source = new Source { Id = , SName = "张三", Age = , DateTime = "2018-4-23" };

//执行映射

var target = Mapper.Map<Source, Target>(source);

Console.WriteLine(target.Id);

Console.WriteLine(target.TName);

Console.WriteLine(target.Age);

Console.WriteLine(target.DateTime);

Console.WriteLine();

//反向映射

var reverSource = Mapper.Map<Target, Source>(target);

Console.WriteLine(reverSource.Id);

Console.WriteLine(reverSource.SName);

Console.WriteLine(reverSource.Age);

Console.WriteLine(reverSource.DateTime);
注意:ReverseMap也可以不加,但是那样就跟没有配置一样,所以在目标类型中属性没有全部映射完毕情况会出异常,所以还是建议手动配置
4属性名称不一致之间的映射
属性名称不一致之间的映射需要在初始化时进行配置相应属性名称
//初始化AutoMapper

Mapper.Initialize(config =>

{

    //Initialize方法为AutoMapper初始化方法

    //6.2.0版本后如果不需要额外的配置,则CreateMap可省略,但6.2.0版本之前不可省略【不过不建议省略】

    config.CreateMap<Source, Target>()

    //ForMember可以配置一系列的配置信息

    //参数1:目标类型属性的表达式

    //参数2:执行操作的选择   AutoMapper定义了一系列的配置选择供开发者使用

    .ForMember(dest=>dest.TName,options=>options.MapFrom(sou=>sou.SName));

});
var source = new Source { Id = , Age = , DateTime = "2018-4-23" };

//执行映射

var target = Mapper.Map<Source, Target>(source);

Console.WriteLine(target.Id);

Console.WriteLine(target.TName);

Console.WriteLine(target.Age);

Console.WriteLine(target.DateTime);
此时目标类型的TName即可映射成功

5.空值替换
AutoMapper中允许设置一个备用值来代替源类型中的空值
//初始化AutoMapper

Mapper.Initialize(config =>

{

    //Initialize方法为AutoMapper初始化方法

    //6.2.0版本后如果不需要额外的配置,则CreateMap可省略,但6.2.0版本之前不可省略【不过不建议省略】

    config.CreateMap<Source, Target>()

    //ForMember可以配置一系列的配置信息

    //参数1:目标类型属性的表达式

    //参数2:执行操作的选择   AutoMapper定义了一系列的配置选择供开发者使用

    .ForMember(dest => dest.TName, options => options.MapFrom(sou => sou.SName))

    //NullSubstitute是空值替换的配置操作

    .ForMember(dest => dest.TName, options => options.NullSubstitute("备用值"));

});
执行映射
var source = new Source { Id = , Age = , DateTime = "2018-4-23" };

//执行映射

var target = Mapper.Map<Source, Target>(source);

6.映射之前与之后操作
AutoMapper可以在映射前后定义一系列的逻辑操作,,使用到的两个方法是BeforeMap和AfterMap
//初始化AutoMapper

Mapper.Initialize(config =>

{

    //Initialize方法为AutoMapper初始化方法

    //6.2.0版本后如果不需要额外的配置,则CreateMap可省略,但6.2.0版本之前不可省略【不过不建议省略】

    config.CreateMap<Source, Target>()

    //ForMember可以配置一系列的配置信息

    //参数1:目标类型属性的表达式

    //参数2:执行操作的选择   AutoMapper定义了一系列的配置选择供开发者使用

    .ForMember(dest => dest.TName, options => options.MapFrom(sou => sou.SName))//映射之前操作【将源类型Age值+10】

     //BeforMap和AfterMap需要一个Action<TSource,TDestination>参数

     .BeforeMap((sou, dest) =>

     {

          sou.Age += ;

     })

     //映射之后操作【将目标类型Age值+10】

     .AfterMap((sou, dest) =>

     {

          dest.Age += ;

      });

});
执行映射
var source = new Source { Id = , Age = , DateTime = "2018-4-23" };
//执行映射
var target = Mapper.Map<Source, Target>(source);
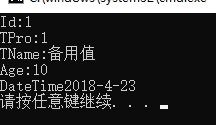
Console.WriteLine("Id:"+target.Id);
Console.WriteLine("TName:"+target.TName);
Console.WriteLine("Age:"+target.Age);
Console.WriteLine("DateTime"+target.DateTime);

7.条件映射
AutoMapper中可以设置条件映射,即满足指定条件才允许映射,条件映射使用的方法是Condition
//初始化AutoMapper

Mapper.Initialize(config =>

{

    //Initialize方法为AutoMapper初始化方法

    //6.2.0版本后如果不需要额外的配置,则CreateMap可省略,但6.2.0版本之前不可省略【不过不建议省略】

    config.CreateMap<Source, Target>()

    //设置属性的映射条件【Age不大于10即不映射】

    .ForMember(dest => dest.Age, options => options.Condition(sou => sou.Age > ));

    });
var source = new Source { Id = , Age = , DateTime = "2018-4-23" };

//执行映射

var target = Mapper.Map<Source, Target>(source);
可以看到Age属性并没有进行映射

8.泛型类型映射
AutoMapper中可以直接支持开放泛型类型映射,所以不需要创建封闭泛型类型
映射实体模型
    /// <summary>

    /// 源类型

    /// </summary>

    class Source<T>

    {

        public int Id { get; set; }

        public String SName { get; set; }

        public T SPro { get; set; }

        public String  DateTime { get; set; }

        public int Age { get; set; }

    }

    /// <summary>

    /// 目标类型

    /// </summary>

    class Target<T>

    {

        public int Id { get; set; }

        public String TName { get; set; }

        public T TPro { get; set; }

        public String DateTime { get; set; }

        public int Age { get; set; }

   }
映射配置
//初始化AutoMapper

Mapper.Initialize(config =>

{

   //Initialize方法为AutoMapper初始化方法

   //6.2.0版本后如果不需要额外的配置,则CreateMap可省略,但6.2.0版本之前不可省略【不过不建议省略】//泛型类型的映射,AutoMapper允许直接支持开放类型

   config.CreateMap(typeof(Source<>), typeof(Target<>))

      //泛型中配置条件【由于是开放类型,所以只能使用属性名称字符串】

      .ForMember("TName", options => options.MapFrom("SName"))

      //空值替换

      .ForMember("TName", options => options.NullSubstitute("备用值"))

      .ForMember("TPro", option => option.MapFrom("SPro"));

});
var source = new Source<String> { Id = ,SPro="", Age = , DateTime = "2018-4-23" };

//执行映射

var target = Mapper.Map<Source<String>, Target<int>>(source);

Console.WriteLine("Id:"+target.Id);

Console.WriteLine("TPro:"+target.TPro);

Console.WriteLine("TName:"+target.TName);

Console.WriteLine("Age:"+target.Age);

Console.WriteLine("DateTime"+target.DateTime);
并且可以看到,AutoMapper泛型类型映射时支持类型转换
9.嵌套类型映射
映射实体模型
  /// <summary>

    /// 源类型

    /// </summary>

    class Source

    {

        public int Id { get; set; }

        public InnerSource InnerSource { get; set; }

    }

    /// <summary>

    /// 目标类型

    /// </summary>

    class Target

    {

        public int Id { get; set; }

        //例1

        //public InnerSource InnerTarget { get; set; }

        //例2

        //public InnerTarget InnerTarget { get; set; }

    }

    /// <summary>

    /// 内部源类型

    /// </summary>

    class InnerSource

    {

        public int InnerId { get; set; }

        public String InnerName { get; set; }

    }

    /// <summary>

    /// 内部目标类型

    /// </summary>

    class InnerTarget

    {

        public int InnerId { get; set; }

        public String InnerName { get; set; }

    }
AutoMapper嵌套类型映射其实就是相当于2对类型的映射.所以配置跟前面配置是一样的.
如果目标类型中的嵌套类型跟源类型中的嵌套类型是同一类型,如目标类型中例1,那么就直接可以映射,
//初始化AutoMapper

Mapper.Initialize(config =>

{

     //Initialize方法为AutoMapper初始化方法

     //6.2.0版本后如果不需要额外的配置,则CreateMap可省略,但6.2.0版本之前不可省略【不过不建议省略】

     config.CreateMap<Source, Target>()

     .ForMember(dest => dest.InnerTarget, options => options.MapFrom(sou => sou.InnerSource));

});

var source = new Source { Id = ,InnerSource = new InnerSource { InnerId=,InnerName="内部名称"} };

//执行映射

var target = Mapper.Map<Source, Target>(source);

Console.WriteLine("Id:"+target.Id);         Console.WriteLine("InnerTarget.Id:"+target.InnerTarget.InnerId);

Console.WriteLine("InnerTarget.InnerName:" + target.InnerTarget.InnerName);
如果目标类型中嵌套类型与源类型的嵌套类型不是同一类型,如例2,只需配置一下嵌套类型的映射即可.
//初始化AutoMapper

Mapper.Initialize(config =>

{

     //Initialize方法为AutoMapper初始化方法

     //6.2.0版本后如果不需要额外的配置,则CreateMap可省略,但6.2.0版本之前不可省略【不过不建议省略】

     //ReverseMap方法可以实现反向映射

     //配置嵌套类型映射

     config.CreateMap<InnerSource, InnerTarget > ();

     config.CreateMap<Source, Target>()

               .ForMember(dest => dest.InnerTarget, options => options.MapFrom(sou => sou.InnerSource));

});
注意:嵌套类型的映射也可以不配置,但是不配置如果目标类型属性没有全部映射完成,也是会报异常.所以并不推荐
10.继承映射
映射实体模型
  /// <summary>

    /// 源类型

    /// </summary>

    class Source

    {

        public int Id { get; set; }

        public String Name { get; set; }

    }

    /// <summary>

    /// 目标类型

    /// </summary>

    class Target

    {

        public int Id { get; set; }

        public String Name { get; set; }

    }

    /// <summary>

    /// 子类源类型

    /// </summary>

    class SonSource:Source

    {

        public int SonId { get; set; }

        public String SonName { get; set; }

    }

    /// <summary>

    /// 子类目标类型

    /// </summary>

    class SonTarget:Target

    {

        public int SonId { get; set; }

        public String SonName { get; set; }

    }
AutoMapper支持以多态形式继承映射,继承映射以Include(父填子) 或InculdeBase(子填父)。
//初始化AutoMapper

Mapper.Initialize(config =>

{

      //Initialize方法为AutoMapper初始化方法

      //6.2.0版本后如果不需要额外的配置,则CreateMap可省略,但6.2.0版本之前不可省略【不过不建议省略】

      config.CreateMap<Source, Target>()

       //配置派生类的映射【此处是父填子示例,子填父也同理】

                .Include<SonSource, SonTarget>();

        //配置映射【派生类必须配置】

        config.CreateMap<SonSource, SonTarget>();

});
执行映射
//源对象
IList<Source> sourceList = new List<Source>
{
new Source{Id=,Name="Source1"},
new SonSource{SonId=,SonName="SonSource1",Id=,Name="Source2"},
new Source{Id=,Name="Source3"},
};
//映射
var targetList = Mapper.Map<IList<Source>, IList<Target>>(sourceList);
foreach (var item in targetList)
{
//转换为子类
SonTarget son = item as SonTarget;
if (null != son)
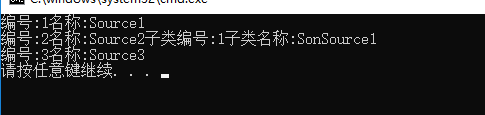
Console.WriteLine("编号:" + son.Id + "名称:" + son.Name + "子类编号:" + son.SonId + "子类名称:" + son.SonName);
else
Console.WriteLine("编号:" + item.Id + "名称:" + item.Name);
}
11.无须配置的Helper类
此类只能简单的进行配置,无法实现复杂变化,不过一般使用则无需配置【此类出处:https://home.cnblogs.com/u/xiadao521/】
/// <summary>

    /// 对象映射

    /// </summary>

    public static class Extensions

    {

        /// <summary>

        /// 同步锁

        /// </summary>

        private static readonly object Sync = new object();

        /// <summary>

        /// 将源对象映射到目标对象

        /// </summary>

        /// <typeparam name="TSource">源类型</typeparam>

        /// <typeparam name="TDestination">目标类型</typeparam>

        /// <param name="source">源对象</param>

        /// <param name="destination">目标对象</param>

        public static TDestination MapTo<TSource, TDestination>(this TSource source, TDestination destination)

        {

            return MapTo<TDestination>(source, destination);

        }

        /// <summary>

        /// 将源对象映射到目标对象

        /// </summary>

        /// <typeparam name="TDestination">目标类型</typeparam>

        /// <param name="source">源对象</param>

        public static TDestination MapTo<TDestination>(this object source) where TDestination : new()

        {

            return MapTo(source, new TDestination());

        }

        /// <summary>

        /// 将源对象映射到目标对象

        /// </summary>

        private static TDestination MapTo<TDestination>(object source, TDestination destination)

        {

            if (source == null)

                throw new ArgumentNullException(nameof(source));

            if (destination == null)

                throw new ArgumentNullException(nameof(destination));

            var sourceType = GetType(source);

            var destinationType = GetType(destination);

            var map = GetMap(sourceType, destinationType);

            if (map != null)

                return Mapper.Map(source, destination);

            lock (Sync)

            {

                map = GetMap(sourceType, destinationType);

                if (map != null)

                    return Mapper.Map(source, destination);

                InitMaps(sourceType, destinationType);

            }

            return Mapper.Map(source, destination);

        }

        /// <summary>

        /// 获取类型

        /// </summary>

        private static Type GetType(object obj)

        {

            var type = obj.GetType();

            if ((obj is System.Collections.IEnumerable) == false)

                return type;

            if (type.IsArray)

                return type.GetElementType();

            var genericArgumentsTypes = type.GetTypeInfo().GetGenericArguments();

            if (genericArgumentsTypes == null || genericArgumentsTypes.Length == )

                throw new ArgumentException("泛型类型参数不能为空");

            return genericArgumentsTypes[];

        }

        /// <summary>

        /// 获取映射配置

        /// </summary>

        private static TypeMap GetMap(Type sourceType, Type destinationType)

        {

            try

            {

                return Mapper.Configuration.FindTypeMapFor(sourceType, destinationType);

            }

            catch (InvalidOperationException)

            {

                lock (Sync)

                {

                    try

                    {

                        return Mapper.Configuration.FindTypeMapFor(sourceType, destinationType);

                    }

                    catch (InvalidOperationException)

                    {

                        InitMaps(sourceType, destinationType);

                    }

                    return Mapper.Configuration.FindTypeMapFor(sourceType, destinationType);

                }

            }

        }

        /// <summary>

        /// 初始化映射配置

        /// </summary>

        private static void InitMaps(Type sourceType, Type destinationType)

        {

            try

            {

                var maps = Mapper.Configuration.GetAllTypeMaps();

                Mapper.Initialize(config => {

                    ClearConfig();

                    foreach (var item in maps)

                        config.CreateMap(item.SourceType, item.DestinationType);

                    config.CreateMap(sourceType, destinationType);

                });

            }

            catch (InvalidOperationException)

            {

                Mapper.Initialize(config => {

                    config.CreateMap(sourceType, destinationType);

                });

            }

        }

        /// <summary>

        /// 清空配置

        /// </summary>

        private static void ClearConfig()

        {

            var typeMapper = typeof(Mapper).GetTypeInfo();

            var configuration = typeMapper.GetDeclaredField("_configuration");

            configuration.SetValue(null, null, BindingFlags.Static, null, CultureInfo.CurrentCulture);

        }

        /// <summary>

        /// 将源集合映射到目标集合

        /// </summary>

        /// <typeparam name="TDestination">目标元素类型,范例:Sample,不要加List</typeparam>

        /// <param name="source">源集合</param>

        public static List<TDestination> MapToList<TDestination>(this System.Collections.IEnumerable source)

        {

            return MapTo<List<TDestination>>(source);

        }

    }
AutoMapper快速上手的更多相关文章
- 【Python五篇慢慢弹】快速上手学python
快速上手学python 作者:白宁超 2016年10月4日19:59:39 摘要:python语言俨然不算新技术,七八年前甚至更早已有很多人研习,只是没有现在流行罢了.之所以当下如此盛行,我想肯定是多 ...
- 快速上手Unity原生Json库
现在新版的Unity(印象中是从5.3开始)已经提供了原生的Json库,以前一直使用LitJson,研究了一下Unity用的JsonUtility工具类的使用,发现使用还挺方便的,所以打算把项目中的J ...
- [译]:Xamarin.Android开发入门——Hello,Android Multiscreen快速上手
原文链接:Hello, Android Multiscreen Quickstart. 译文链接:Hello,Android Multiscreen快速上手 本部分介绍利用Xamarin.Androi ...
- [译]:Xamarin.Android开发入门——Hello,Android快速上手
返回索引目录 原文链接:Hello, Android_Quickstart. 译文链接:Xamarin.Android开发入门--Hello,Android快速上手 本部分介绍利用Xamarin开发A ...
- 快速上手seajs——简单易用Seajs
快速上手seajs——简单易用Seajs 原文 http://www.cnblogs.com/xjchenhao/p/4021775.html 主题 SeaJS 简易手册 http://yslo ...
- Git版本控制Windows版快速上手
说到版本控制,之前用过VSS,SVN,Git接触不久,感觉用着还行.写篇博文给大家分享一下使用Git的小经验,让大家对Git快速上手. 说白了Git就是一个控制版本的工具,其实没想象中的那么复杂,咱在 ...
- Objective-C快速上手
最近在开发iOS程序,这篇博文的内容是刚学习Objective-C时做的笔记,力图达到用最短的时间了解OC并使用OC.Objective-C是OS X 和 iOS平台上面的主要编程语言,它是C语言的超 ...
- Netron开发快速上手(二):Netron序列化
Netron是一个C#开源图形库,可以帮助开发人员开发出类似Visio的作图软件.本文继前文”Netron开发快速上手(一)“讨论如何利用Netron里的序列化功能快速保存自己开发的图形对象. 一个用 ...
- Netron开发快速上手(一):GraphControl,Shape,Connector和Connection
版权所有,引用请注明出处:<<http://www.cnblogs.com/dragon/p/5203663.html >> 本文所用示例下载FlowChart.zip 一个用 ...
随机推荐
- html之多行文本textarea 及下拉框select(12)
1.多行文本 多行文本使用textarea标签,默认值需要写在中间,和input标签不同,name属性用于后台获取数据(request.POST.get(meno)) <body> < ...
- Jenkins Jenkins结合GIT Maven持续集成环境配置
Jenkins结合GIT Maven持续集成环境配置 by:授客 QQ:1033553122 安装Git插件 1 安装Git客户端 1 安装JAVA JDK及MAVEN 2 Jenkins JDK ...
- Android项目实战(四十九):Andoird 7.0+相机适配
解决方案类似: Android项目实战(四十):Andoird 7.0+ 安装APK适配 解决方法: 一.在AndroidManifest.xml 文件中添加 四大组件之一的 <provider ...
- OkHttp3源码详解(五) okhttp连接池复用机制
1.概述 提高网络性能优化,很重要的一点就是降低延迟和提升响应速度. 通常我们在浏览器中发起请求的时候header部分往往是这样的 keep-alive 就是浏览器和服务端之间保持长连接,这个连接是可 ...
- <API自动化测试>Centos-Newman
一.介绍: 在测试和开发中,有一款API测试工具一直占据着武林盟主的地位,那就是声名远播的Google公司的Postman. Postman原先是Chrome浏览器的一个插件,后面发展成了一个应用程序 ...
- (转载)SPARKR,对RDD操作的介绍
原以为,用sparkR不能做map操作, 搜了搜发现可以. lapply等同于map, 但是不能操作spark RDD. spark2.0以后, sparkR增加了 dapply, dapplycol ...
- 前端AntD框架的upload组件上传图片时遇到的一些坑
前言 本次做后台管理系统,采用的是 AntD 框架.涉及到图片的上传,用的是AntD的 upload 组件. 前端做文件上传这个功能,是很有技术难度的.既然框架给我们提供好了,那就直接用呗.结果用的时 ...
- MS SQL CASE WHEN 的用法
前言 由于经常使用 case when 的2种情况方式,如果=1 则*** 否则 *** 结束.久而久之,都以为只能这么用,都忘记了Case WHEN 的用法. 示例 , ...
- [20190329]探究sql语句相关mutexes补充2.txt
[20190329]探究sql语句相关mutexes补充2.txt --//昨天测试sql语句相关mutexes,看看如果出现多个子光标的情况. 1.环境:SCOTT@book> @ ver1P ...
- javascript中(function($){...})(jQuery)写法是什么意思
这里实际上是匿名函数function(arg){...}这就定义了一个匿名函数,参数为arg 而调用函数 时,是在函数后面写上括号和实参的,由于操作符的优先级,函数本身也需要用括号,即:(functi ...