react-native中的style
在 React Native 中,你并不需要学习什么特殊的语法来定义样式。我们仍然是使用 JavaScript 来写样式。
所有的核心组件都接受名为style的属性。这些样式名基本上是遵循了 web 上的 CSS 的命名,
只是按照 JS 的语法要求使用了驼峰命名法,例如将background-color改为backgroundColor。
style属性可以是一个普通的 JavaScript 对象。这是最简单的用法,因而在示例代码中很常见。
你还可以传入一个数组——在数组中位置居后的样式对象比居前的优先级更高,
这样你可以间接实现样式的继承。

import React, { Component } from 'react';

import { AppRegistry, StyleSheet, Text, View } from 'react-native';

export default class LotsOfStyles extends Component {

  render() {

    return (

      <View>

        <Text style={styles.red}>just red</Text>

        <Text style={styles.bigBlue}>just bigBlue</Text>

        <Text style={[styles.bigBlue, styles.red]}>bigBlue, then red</Text>

        <Text style={[styles.red, styles.bigBlue]}>red, then bigBlue</Text>

      </View>

    );

  }

}

const styles = StyleSheet.create({

  bigBlue: {

    color: 'blue',

    fontWeight: 'bold',

    fontSize: 30,

  },

  red: {

    color: 'red',

  },

});
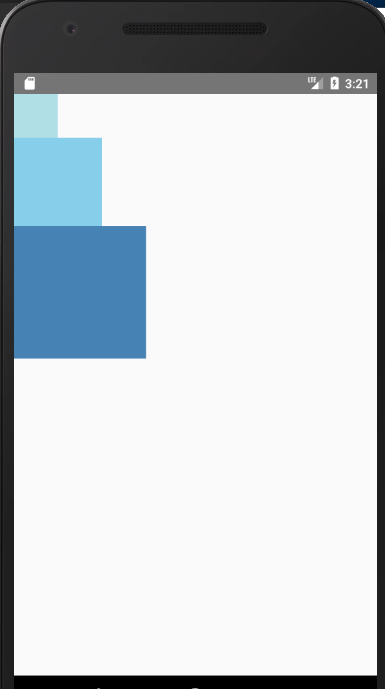
指定宽高
最简单的给组件设定尺寸的方式就是在样式中指定固定的width和height。
React Native 中的尺寸都是无单位的,表示的是与设备像素密度无关的逻辑像素点。
import React, { Component } from 'react';

import { AppRegistry, View } from 'react-native';

export default class FixedDimensionsBasics extends Component {

  render() {

    return (

      <View>

        <View style={{width: 50, height: 50, backgroundColor: 'powderblue'}} />

        <View style={{width: 100, height: 100, backgroundColor: 'skyblue'}} />

        <View style={{width: 150, height: 150, backgroundColor: 'steelblue'}} />

      </View>

    );

  }

}
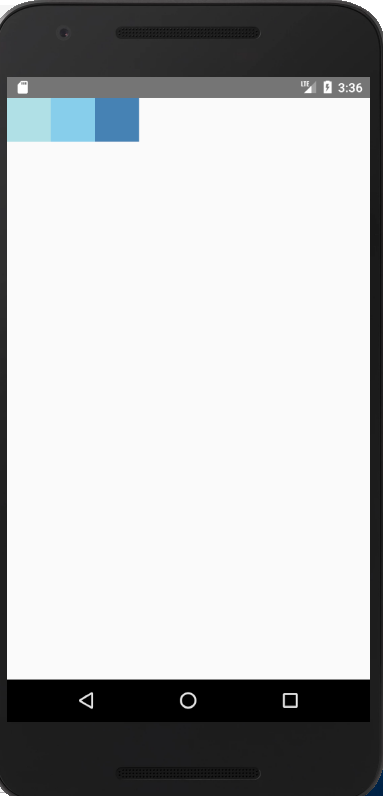
弹性(Flex)宽高
在组件样式中使用flex可以使其在可利用的空间中动态地扩张或收缩。一般而言我们会使用flex:1来指定某
个组件扩张以撑满所有剩余的空间。如果有多个并列的子组件使用了flex:1,则这些子组件会平分父容器中
剩余的空间。如果这些并列的子组件的flex值不一样,则谁的值更大,谁占据剩余空间的比例就更大
(即占据剩余空间的比等于并列组件间flex值的比)。
值得注意的事情是:
组件能够撑满剩余空间的前提是其父容器的尺寸不为零。如果父容器既没有固定的width和height,
也没有设定flex,则父容器的尺寸为零。其子组件如果使用了flex,也是无法显示的。
import React, { Component } from 'react';

import { AppRegistry, View } from 'react-native';

export default class FlexDirectionBasics extends Component {

  render() {

    return (

        <View style={{flex: 1, flexDirection: 'row'}}>

          <View style={{width: 50, height: 50, backgroundColor: 'powderblue'}} />

          <View style={{width: 50, height: 50, backgroundColor: 'skyblue'}} />

          <View style={{width: 50, height: 50, backgroundColor: 'steelblue'}} />

        </View>

      )

   }

}
使用Flexbox布局
我们在 React Native 中使用 flexbox 规则来指定某个组件的子元素的布局。Flexbox 可以在不同屏幕尺寸上提供一致的布局结构。
一般来说,使用flexDirection、alignItems和 justifyContent三个样式属性就已经能满足大多数布局需求。
React Native 中的 Flexbox 的工作原理和 web 上的 CSS 基本一致,当然也存在少许差异。
首先是默认值不同:flexDirection的默认值是column而不是row,而flex也只能指定一个数字值。
Flex Direction
在组件的style中指定flexDirection可以决定布局的主轴。子元素是应该沿着水平轴(row)方向排列,
还是沿着竖直轴(column)方向排列呢?默认值是竖直轴(column)方向。
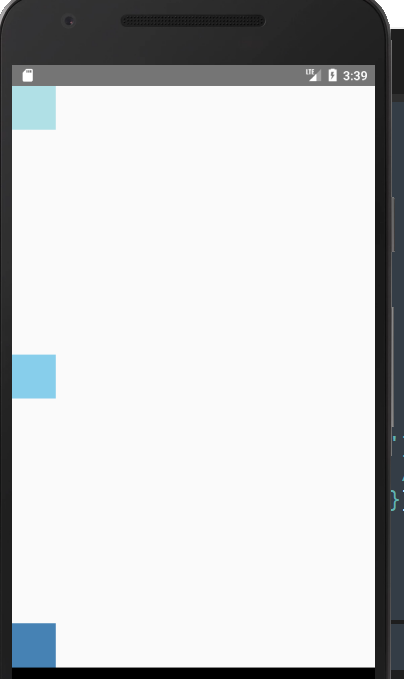
Justify Content
在组件的 style 中指定justifyContent可以决定其子元素沿着主轴的排列方式。子元素是应该靠近主
轴的起始端还是末尾段分布呢?亦或应该均匀分布?对应的这些可选项有:flex-start、center、flex-end、
space-around、space-between以及space-evenly。
import React, { Component } from 'react';

import { AppRegistry, View } from 'react-native';

export default class JustifyContentBasics extends Component {

  render() {

    return (

      // 尝试把`justifyContent`改为`center`看看

      // 尝试把`flexDirection`改为`row`看看

      <View style={{

        flex: 1,

        flexDirection: 'column',

        justifyContent: 'space-between',

      }}>

        <View style={{width: 50, height: 50, backgroundColor: 'powderblue'}} />

        <View style={{width: 50, height: 50, backgroundColor: 'skyblue'}} />

        <View style={{width: 50, height: 50, backgroundColor: 'steelblue'}} />

      </View>

    );

  }

};
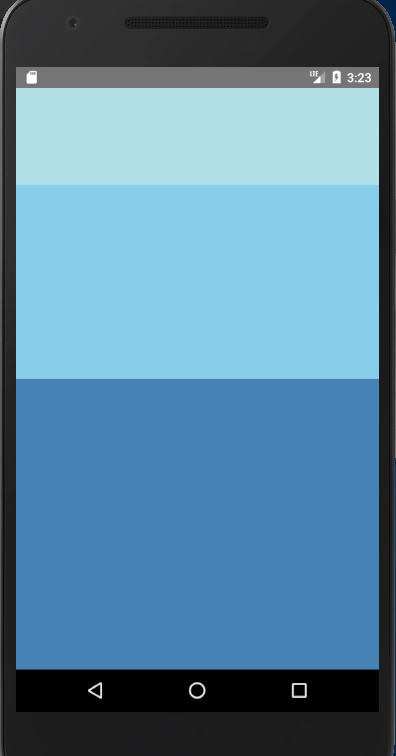
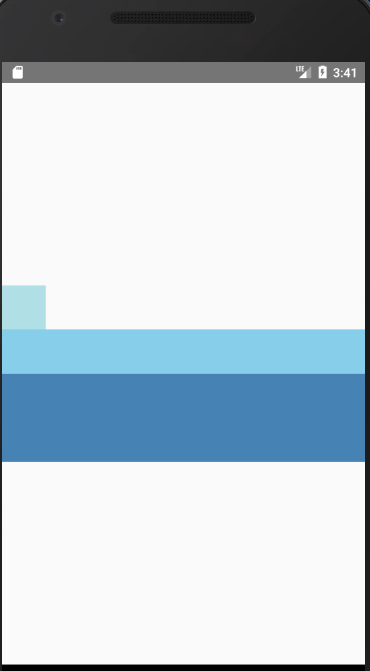
Align Items
在组件的 style 中指定alignItems可以决定其子元素沿着次轴(与主轴垂直的轴,比如若主轴方向为row,则次轴方向为column)
的排列方式。子元素是应该靠近次轴的起始端还是末尾段分布呢?亦或应该均匀分布?
对应的这些可选项有:flex-start、center、flex-end以及stretch。
注意:要使stretch选项生效的话,子元素在次轴方向上不能有固定的尺寸。
以下面的代码为例:只有将子元素样式中的width: 50去掉之后,alignItems: 'stretch'才能生效。
import React, { Component } from 'react';

import { AppRegistry, View } from 'react-native';

export default class AlignItemsBasics extends Component {

  render() {

    return (

      // 尝试把`alignItems`改为`flex-start`看看

      // 尝试把`justifyContent`改为`flex-end`看看

      // 尝试把`flexDirection`改为`row`看看

      <View style={{

        flex: 1,

        flexDirection: 'column',

        justifyContent: 'center',

        alignItems: 'stretch',

      }}>

        <View style={{width: 50, height: 50, backgroundColor: 'powderblue'}} />

        <View style={{height: 50, backgroundColor: 'skyblue'}} />

        <View style={{height: 100, backgroundColor: 'steelblue'}} />

      </View>

    );

  }

};
本质就是flex布局
更多布局知识见这篇文档:https://reactnative.cn/docs/layout-props/
react-native中的style的更多相关文章
- React Native 中 CSS 的使用
首先声明,此文原作者为黎 跃春 React Native中CSS 内联样式 对象样式 使用Stylesheet.Create 样式拼接 导出样式对象 下面的代码是index.ios.js中的代码: / ...
- React Native中的网络请求fetch和简单封装
React Native中的网络请求fetch使用方法最为简单,但却可以实现大多数的网络请求,需要了解更多的可以访问: https://segmentfault.com/a/1190000003810 ...
- [转] 「指尖上的魔法」 - 谈谈 React Native 中的手势
http://gold.xitu.io/entry/55fa202960b28497519db23f React-Native是一款由Facebook开发并开源的框架,主要卖点是使用JavaScrip ...
- react native中使用echarts
开发平台:mac pro node版本:v8.11.2 npm版本:6.4.1 react-native版本:0.57.8 native-echarts版本:^0.5.0 目标平台:android端收 ...
- 在React Native中,使用fetch网络请求 实现get 和 post
//在React Native中,使用fetch实现网络请求 /* fetch 是一个封装程度更高的网络API, 使用了Promise * Promise 是异步编程的一种解决方案 * Promise ...
- react native中state和ref的使用
react native中state和ref的使用 因props是只读的,页面中需要交互的情况我们就需要用到state. 一.如何使用state 1:初始化state 第一种方式: construct ...
- React Native中加载指示器组件ActivityIndicator使用方法
这里讲一下React Native中的一个组件——ActivityIndicator,这是一个加载指示器,俗称菊花,很常见的,效果如下所示: 可以看到图中有两个加载指示器,一大一小,这是尺寸不是我设置 ...
- 在 React Native 中使用 Redux 架构
前言 Redux 架构是 Flux 架构的一个变形,相对于 Flux,Redux 的复杂性相对较低,而且最为巧妙的是 React 应用可以看成由一个根组件连接着许多大大小小的组件的应用,Redux 也 ...
- React Native中组件的props和state
一.组件的属性(props)和状态(state) 1.属性(props) 它是组件的不可变属性(组件自己不可以自己修改props). 组件自身定义了一组props作为对外提供的接口,展示一个组件时只需 ...
- [RN] React Native 中使用 stickyHeaderIndices 实现 ScrollView 的吸顶效果
React Native中,ScrollView组件可以使用 stickyHeaderIndices 轻松实现 sticky 效果. 例如下面代码中: <ScrollView showsVert ...
随机推荐
- maven 中的pom中的 dependencyManagement 和 dependencies
参考:maven pom.xml 中 dependencyManagement和dependencies详解 现在的项目基本上都是使用多module来管理的,这就涉及到一个问题,多module之间如何 ...
- 老男孩python学习自修第二十三天【多线程】
1. 线程的创建与运行 #!/usr/bin/env python # _*_ coding:UTF-8 _*_ from threading import Thread def foo(param1 ...
- vs code安装
vs code是一款文本编辑器,开源,是前端界的vs,而Dreamweaver适合入门. user版本的一些系统分区文件夹无法创建,可能存在语言显示问题.一般用户建议使用system版. 下载链接:h ...
- vue axios 封装(二)
封装二: http.js import axios from 'axios' import storeHelper from './localstorageHelper' // 全局设置 const ...
- vue 使用技巧总结 18.11
前言: 在大概学完 vue 整体框架后,有幸接触到花裤衩大神写的 vue-elementUI-admin 模板框架,把这个模板框架当作 demo,跟着 code 一遍,最大的收获是在以逻辑简单的模板熟 ...
- How to convert mkv to mp4 lossless
ffmpeg -i example.mkv -vcodec copy -acodec copy example.mp4
- Unable to resolve target 'android-15'
SDK 15没有加载造成的,在SDK Manager.exe下安装以下文件 Android SDK Tools (25.2.5) Android SDK Platform-tools (28.0.1) ...
- Jenkins+PowerShell持续集成环境搭建(六)参数化构建
参数化构建可以应用于动态绑定源码地址等情况. 勾选“This build is parameterized”: 如果需要动态绑定源码地址,参考: 配置完成后构建项目变成:
- Nginx 针对上游服务器缓存
L:99 nginx缓存 : 定义存放缓存的载体 proxy_cache 指令 Syntax: proxy_cache zone | off; Default: proxy_cache off; Co ...
- 数据库SQL SELECT查询的工作原理
一般开发员只会应用SQL的四条经典语句:select,insert,delete,update.但是我从来没有研究过它们的工作原理,这篇我想说一说select在数据库中的工作原理. B/S架构中最经典 ...