jap_spring
jar包
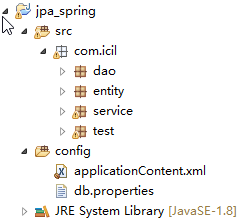
applicationContent.xml
<?xml version="1.0" encoding="UTF-8"?>

<beans xmlns="http://www.springframework.org/schema/beans"

    xmlns:xsi="http://www.w3.org/2001/XMLSchema-instance"

    xmlns:context="http://www.springframework.org/schema/context"

    xmlns:tx="http://www.springframework.org/schema/tx"

    xsi:schemaLocation="http://www.springframework.org/schema/beans http://www.springframework.org/schema/beans/spring-beans.xsd

        http://www.springframework.org/schema/context http://www.springframework.org/schema/context/spring-context-4.0.xsd

        http://www.springframework.org/schema/tx http://www.springframework.org/schema/tx/spring-tx-4.0.xsd">

    <!-- 配置自动扫描的包 -->

    <context:component-scan base-package="com.icil"></context:component-scan>

    <!-- 配置 C3P0 数据源 -->

    <context:property-placeholder location="classpath:db.properties"/>

    <bean id="dataSource"

        class="com.mchange.v2.c3p0.ComboPooledDataSource">

        <property name="user" value="${jdbc.user}"></property>

        <property name="password" value="${jdbc.password}"></property>

        <property name="driverClass" value="${jdbc.driverClass}"></property>

        <property name="jdbcUrl" value="${jdbc.jdbcUrl}"></property>

        <!-- 配置其他属性 -->

    </bean>

    <!-- 配置 EntityManagerFactory -->

    <bean id="entityManagerFactory"

        class="org.springframework.orm.jpa.LocalContainerEntityManagerFactoryBean">

        <property name="dataSource" ref="dataSource"></property>

        <!-- 配置 JPA 提供商的适配器. 可以通过内部 bean 的方式来配置 -->

        <property name="jpaVendorAdapter">

            <bean class="org.springframework.orm.jpa.vendor.HibernateJpaVendorAdapter"></bean>

        </property>

        <!-- 配置实体类所在的包 -->

        <property name="packagesToScan" value="com.icil.entity"></property>

        <!-- 配置 JPA 的基本属性. 例如 JPA 实现产品的属性 -->

        <property name="jpaProperties">

            <props>

                <prop key="hibernate.show_sql">true</prop>

                <prop key="hibernate.format_sql">true</prop>

                <prop key="hibernate.hbm2ddl.auto">update</prop>

            </props>

        </property>

    </bean>

    <!-- 配置 JPA 使用的事务管理器 -->

    <bean id="transactionManager"

        class="org.springframework.orm.jpa.JpaTransactionManager">

        <property name="entityManagerFactory" ref="entityManagerFactory"></property>

    </bean>

    <!-- 配置支持基于注解是事务配置 -->

    <tx:annotation-driven transaction-manager="transactionManager"/>

</beans>
db.properties
jdbc.user=root

jdbc.password=2323

jdbc.driverClass=com.mysql.jdbc.Driver

jdbc.jdbcUrl=jdbc:mysql:///jpa
enntity user
package com.icil.entity;

import javax.persistence.Column;

import javax.persistence.Entity;

import javax.persistence.GeneratedValue;

import javax.persistence.Id;

import javax.persistence.Table;

@Table(name="tb_user")

@Entity

public class User {

    private Integer id;

    private String lastName;

    private String email;

    private int age;

    public User() {

        super();

    }

    public User(Integer id, String lastName, String email, int age) {

        super();

        this.id = id;

        this.lastName = lastName;

        this.email = email;

        this.age = age;

    }

    @GeneratedValue

    @Id

    public Integer getId() {

        return id;

    }

    public void setId(Integer id) {

        this.id = id;

    }

    @Column(name="last_name")

    public String getLastName() {

        return lastName;

    }

    public void setLastName(String lastName) {

        this.lastName = lastName;

    }

    public String getEmail() {

        return email;

    }

    public void setEmail(String email) {

        this.email = email;

    }

    public int getAge() {

        return age;

    }

    public void setAge(int age) {

        this.age = age;

    }

}
Dao
package com.icil.dao;

import javax.persistence.EntityManager;

import javax.persistence.PersistenceContext;

import org.springframework.stereotype.Repository;

import com.icil.entity.User;

@Repository

public class UserDaoImpl implements UserDao {

    //获取一个与当前事务关联的EntityManager 对象,

    //并且通过@persistenceContent 注释标记成员变量

    @PersistenceContext

    private EntityManager  entityManager;

    @Override

    public void insert(User user) {

        entityManager.persist(user);

    }

}
unity test
package com.icil.test;

import org.junit.Test;

import org.springframework.context.ApplicationContext;

import org.springframework.context.support.ClassPathXmlApplicationContext;

import com.icil.entity.User;

import com.icil.service.UserService;

import com.mchange.v2.c3p0.ComboPooledDataSource;

public class jpaTest {

    private  ApplicationContext applicationContext=null;

      {

        applicationContext=    new  ClassPathXmlApplicationContext("applicationContent.xml");

        UserService userService = applicationContext.getBean(UserService.class);

    }

    @Test

    public void test1(){

        ComboPooledDataSource bean = applicationContext.getBean(ComboPooledDataSource.class);

        System.out.println(bean.getJdbcUrl());

    }

    //测试UserService

    @Test

    public void test2(){

        UserService userService = applicationContext.getBean(UserService.class);

        User user1 = new User(null, "AA", "aa@123.com", 21);

        User user2 = new User(null, "BB", "bb@123.com", 22);

        userService.insert(user1, user2);

    }

}
整合maven 的pom 文件
jap_spring的更多相关文章
随机推荐
- C# 处理DateTime算法,取某月第1天及最后一天
代码如下所示: /// <summary> /// 取得某月的第一天 /// </summary> /// <param name="datetime" ...
- Hibernate有五大核心接口,分别是:Session Transaction Query SessionFactoryConfiguration
Session接口: Session接口 Session 接口对于Hibernate 开发人员来说是一个最重要的接口.然而在Hibernate中,实例化的Session是一个轻量级的类,创建和销毁它都 ...
- MySQL--MODIFY COLUMN和ALTER COLUMN
=================================================== 在修改列时,可以使用ALTER TABLE MODIFY COLUMN 和ALTER TABL ...
- mysql 变量名称的使用不当的一个错误
对于开发来说重要的是按照规范进行开发. 昨天自己在进行开发测试的时候,编写mysql 的一个存储过程 ,代码是比较简单的 就是根据名称查询对应的数据并返回 DELIMITER // CREATE PR ...
- C#编程之IList<T>、List<T>、ArrayList、IList, ICollection、IEnumerable、IEnumerator、IQueryable 和 IEnumerable的区别
额...今天看了半天Ilist<T>和List<T>的区别,然后惊奇的发现使用IList<T>还是List<T>对我的项目来说没有区别... 在C#中 ...
- Java性能分析之线程栈详解与性能分析
Java性能分析之线程栈详解 Java性能分析迈不过去的一个关键点是线程栈,新的性能班级也讲到了JVM这一块,所以本篇文章对线程栈进行基础知识普及以及如何对线程栈进行性能分析. 基本概念 线程堆栈也称 ...
- 在 php 7.3 中 switch 语句中使用 continue
在 php 7.3 中 switch 语句中使用 continue 在 php 7.3 的 switch 中使用 continue 会出现警告.1 2 3 while ($foo) { switch ...
- zsh 使用
使用ctrl+r,弹出搜索框: bck-i-search: mac os 系统默认的终端为bash,切换该终端为zsh,可以用以下命令: chsh -s /bin/zsh 如过要切回默认终端bash, ...
- Joyoi公路乘车(原tyvj1015)
题目:http://www.joyoi.cn/problem/tyvj-1015 水题.连优化都不用. #include<iostream> #include<cstdio> ...
- 【appium】根据xpath定位元素
1. 背景 本文尝试使用的试验对象是SDK自带的NotePad应用实例,假设已经有两个Notes分别是“note1”和“note2”添加到Notepad上面,我们要做的就是尝试用xpath的方法来定位 ...