
一、Core授权(基于cookie)
一、Core的授权
配置
打开项目中的Startup.cs文件,找到ConfigureServices方法,我们通常在这个方法里面做依赖注入的相关配置。添加如下代码:
public void ConfigureServices(IServiceCollection services)

{

    services.AddAuthentication(CookieAuthenticationDefaults.AuthenticationScheme)

        .AddCookie(CookieAuthenticationDefaults.AuthenticationScheme, o =>

            {

                o.LoginPath = new PathString("/Account/Login");

                o.AccessDeniedPath = new PathString("/Error/Forbidden");

            });

}
这段代码的大概意思就是,添加授权支持,并添加使用Cookie的方式,配置登录页面和没有权限时的跳转页面。
再找到Configure方法,添加 app.UseAuthentication(),使用授权:
public void Configure(IApplicationBuilder app, IHostingEnvironment env, ILoggerFactory loggerFactory)

{

    app.UseAuthentication();

}
登录
添加一个Controller,如AccountController,再添加一个Action,如 Login,所配置的路由,要与上面的配置对应,不然跳转登录时会跳错页面。
用户提交用户名和密码,登录代码大致如下:
[HttpPost]

public async Task <IActionResult> Login(string userName, string password, string ReturnUrl)

{

    var user = _userService.Login(userName, password);

    if (user != null)

    {

        user.AuthenticationType = CookieAuthenticationDefaults.AuthenticationScheme;

        var identity = new ClaimsIdentity(user);

        identity.AddClaim(new Claim(ClaimTypes.Name, user.UserID));

        await HttpContext.SignInAsync(CookieAuthenticationDefaults.AuthenticationScheme, new ClaimsPrincipal(identity));

        if (ReturnUrl.IsNullOrEmpty())

        {

            return RedirectToAction("Index", "Dashboard");

        }

        return Redirect(ReturnUrl);

    }

    ViewBag.Errormessage = "登录失败,用户名密码不正确";

    return View();

}
这里要注意的是 AuthenticationType 所设置的Scheme一定要与前面的配置一样,这样对应的登录授权才会生效。
二、使用登录身份
登录的目录,就是希望有些页面或者资源只有登录以后才可访问。使用AuthorizeAttribute来做限制。在需要做限制的Controller上加上[Authorize]特性来做限制。
[Authorize]

public class ThemeController

{

}
这样这个Controller下的所有的Action都必需要登录后才可访问。如果希望其中某些Action可以不用登录也可访问,可以添加例外:
[AllowAnonymous]

public ActionResult Index()

{

    return View();

}
到这里一个最基础的登录就完成了。
在Web项目中,通常会遇到一个问题,后端管理员和前台用户。这两个用户都是可登录的,在 .net core 2.0,这个将很容易实现。
三、多用户登录
添加一个登录方案(Scheme)
CookieAuthenticationDefaults.AuthenticationScheme,这是系统已经定义好的一个默认的登录方案,添加一个新的来实现一个不同的身份登录。代码如下:
public class CustomerAuthorizeAttribute : AuthorizeAttribute

{

    public const string CustomerAuthenticationScheme = "CustomerAuthenticationScheme";

    public CustomerAuthorizeAttribute()

    {

        this.AuthenticationSchemes = CustomerAuthenticationScheme;

    }

}
添加使用这个新的方案,在Startup.cs文件下:
public void ConfigureServices(IServiceCollection services)

{

    services.AddAuthentication(CookieAuthenticationDefaults.AuthenticationScheme)

        .AddCookie(CookieAuthenticationDefaults.AuthenticationScheme, o =>

            {

                o.LoginPath = new PathString("/Account/Login");

                o.AccessDeniedPath = new PathString("/Error/Forbidden");

            })

            .AddCookie(CustomerAuthorizeAttribute.CustomerAuthenticationScheme, option =>

            {

                option.LoginPath = new PathString("/Account/Signin");

                option.AccessDeniedPath = new PathString("/Error/Forbidden");

            });

}
添加新的登录方案,并配置一个新的登录页面,登录的方法和刚才是一样,只是AuthenticationType使用了新的方案。
[HttpPost]

public async Task <IActionResult> Login(string userName, string password, string ReturnUrl)

{

    var user = _userService.Login(userName, password);

    if (user != null)

    {

        user.AuthenticationType = CustomerAuthorizeAttribute.CustomerAuthenticationScheme;

        var identity = new ClaimsIdentity(user);

        identity.AddClaim(new Claim(ClaimTypes.Name, user.UserID));

        await HttpContext.SignInAsync(CustomerAuthorizeAttribute.CustomerAuthenticationScheme, new ClaimsPrincipal(identity));

        if (ReturnUrl.IsNullOrEmpty())

        {

            return RedirectToAction("Index", "Dashboard");

        }

        return Redirect(ReturnUrl);

    }

    ViewBag.Errormessage = "登录失败,用户名密码不正确";

    return View();

}
验证登录状态
使用方法和之前的差不多,换成新的CustomerAuthorizeAttribute就行了
[CustomerAuthorize]

public class CustomerController

{

}
CustomerAuthorizeAttribute这个类,不是必需的,只是为了方便使用而写,其实完全可以只定义一个新的方案(Scheme)就行了。
谁才是HttpContext.User?
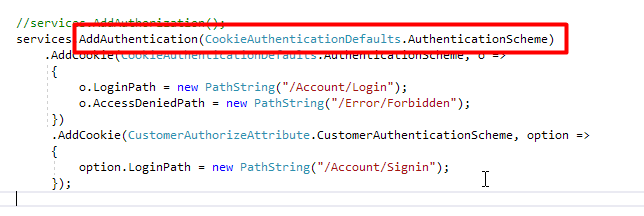
登录了多个用户,那么谁才是HttpContext.User呢?如果你的Controller或者Action上有使用AuthorizeAttribute,那这个Attribute使用的登录方案是哪个,则这个HttpContext.User对应的就是那个方案的登录用户。如果没有使用,则AddAuthentication()方法默认指它的方案(Scheme)所登录的用户,就是这个HttpContext.User了。
如何获取对应方案的登录用户呢?使用HttpContext.AuthenticateAsync
var auth = await HttpContext.AuthenticateAsync(CustomerAuthorizeAttribute.CustomerAuthenticationScheme);

if (auth.Succeeded)

{

    auth.Principal.Identity...

}
退出登录
这个就简单了,指定方案退出就可以了。
public async Task Logout(string returnurl)

{

    await HttpContext.SignOutAsync(CookieAuthenticationDefaults.AuthenticationScheme);

    return Redirect(returnurl ?? "~/");

}
一、Core授权(基于cookie)的更多相关文章
- .Net Core MVC 基于Cookie进行用户认证
在打代码之前先说一下思路. 登录的的时候服务端生成加密的字符串(用户名.id.当前时间)并且存入客户端cookie中,服务端的缓存中.对客户端的每次请求进行拦截,解密保存在cookie中的加密字符串. ...
- Asp.Net Core 2.0 项目实战(10) 基于cookie登录授权认证并实现前台会员、后台管理员同时登录
1.登录的实现 登录功能实现起来有哪些常用的方式,大家首先想到的肯定是cookie或session或cookie+session,当然还有其他模式,今天主要探讨一下在Asp.net core 2.0下 ...
- net core体系-web应用程序-4asp.net core2.0 项目实战(1)-12基于cookie登录授权认证并实现前台会员、后台管理员同时登录
1.登录的实现 登录功能实现起来有哪些常用的方式,大家首先想到的肯定是cookie或session或cookie+session,当然还有其他模式,今天主要探讨一下在Asp.net core 2.0下 ...
- ASP.NET Core WebApi基于JWT实现接口授权验证
一.ASP.Net Core WebApi JWT课程前言 我们知道,http协议本身是一种无状态的协议,而这就意味着如果用户向我们的应用提供了用户名和密码来进行用户认证,那么下一次请求时,用户还要再 ...
- ASP.NET Core Authentication系列(四)基于Cookie实现多应用间单点登录(SSO)
前言 本系列前三篇文章分别从ASP.NET Core认证的三个重要概念,到如何实现最简单的登录.注销和认证,再到如何配置Cookie 选项,来介绍如何使用ASP.NET Core认证.感兴趣的可以了解 ...
- 理解ASP.NET Core - 基于Cookie的身份认证(Authentication)
注:本文隶属于<理解ASP.NET Core>系列文章,请查看置顶博客或点击此处查看全文目录 概述 通常,身份认证(Authentication)和授权(Authorization)都会放 ...
- Asp.Net Core基于Cookie实现同域单点登录(SSO)
在同一个域名下有很多子系统 如:a.giant.com b.giant.com c.giant.com等 但是这些系统都是giant.com这个子域. 这样的情况就可以在不引用其它框架的情况下, ...
- 实践剖析.NET Core如何支持Cookie和JWT混合认证、授权
前言 为防止JWT Token被窃取,我们将Token置于Cookie中,但若与第三方对接,调用我方接口进行认证.授权此时仍需将Token置于请求头,通过实践并联系理论,我们继续开始整活!首先我们实现 ...
- ASP.NET Core WebApi基于Redis实现Token接口安全认证
一.课程介绍 明人不说暗话,跟着阿笨一起玩WebApi!开发提供数据的WebApi服务,最重要的是数据的安全性.那么对于我们来说,如何确保数据的安全将会是需要思考的问题.在ASP.NET WebSer ...
- .NET CORE 授权
.NET CORE 授权 一.三种方式授权 不论使用NET CORE框架的何种授权都必须引入中间件,因为它实现了在管道中对当前请求的鉴权和授权的验证,在Startup中的Configure中首先加入鉴 ...
随机推荐
- 如何消除 com.netflix.discovery.shared.transport.TransportException: Cannot execute request on any known server
在application.properties中添加以下两句话: eureka.client.register-with-eureka=falseeureka.client.fetch-registr ...
- 1.2.1 Maven到底是什么鬼
解释之前,提1个小问题. 1.1.假如你正在Eclipse下开发两个Java项目,姑且把它们称为A.B,其中A项目中的一些功能依赖于B项目中的某些类,那么如何维系这种依赖关系的呢? 很简单,这不就是跟 ...
- unity3d卡在loading的解决方法
解决方案: 关闭U3D,打开电脑的网络适配器把网给掐掉,打开U3D后会提示Workoffline 点击这个即可,然后再把网给起起来就可以了
- sql 查询某一列最大的数据
select colm1,Max(colm2),max(colm3) from table where condition group by colm1
- 学习SASS
这几天白老师叫我们css的扩展技术,有什么LESS,还有SASS(我还以为是SAS...QAQ),LESS由于功能比较简单,用的也比较少所以我们重点学习了SASS.简单地说SASS是一种CSS的开发工 ...
- centos7.5 安装python3.7
一,官网下载最新版python安装包 二,解压并编译安装 ,解决依赖关系 yum -y install epel-release libffi-devel zlib* ,解压编译 .tgz cd Py ...
- tagged和untagged
tagged和untagged遵循以下五条原则 1. Tagged数据帧 Tagged数据帧 Untagged数据帧 Untagged数据帧 in out in out Tagged端口 原样 ...
- mariadb数据库增删改查
1.常用数据类型 1)整数:int, bit 2)小数:decimal #decimal(5,2)表示共有五位数,保留两位小数 3)字符串:varchar, char 4)日期时间:date, ...
- Centos(64位)安装Hbase详细步骤
HBase是一个分布式的.面向列的开源数据库,该技术来源于 Fay Chang 所撰写的Google论文“Bigtable:一个结构化数据的分布式存储系统”.就像Bigtable利用了Google文件 ...
- Flask的 sqlalchemy 操作要点
1.filter和filter_by的区别 filter,使用复杂的过滤条件,一般用两个等号进行匹配 filter,使用简单的过滤条件,一般用一个等号进行匹配 Answer.query.filter( ...