SSM框架整合的详细过程(含每一步的分析及代码)。实质上是SpringMVC与mybatis的整合,应为spring与SpringMVC不需要整合。
为了更好的学习 springmvc和mybatis整合开发的方法,需要将springmvc和mybatis进行整合。
整合目标:控制层采用springmvc、持久层使用mybatis实现。
1.1 需求
实现商品查询列表,从mysql数据库查询商品信息。
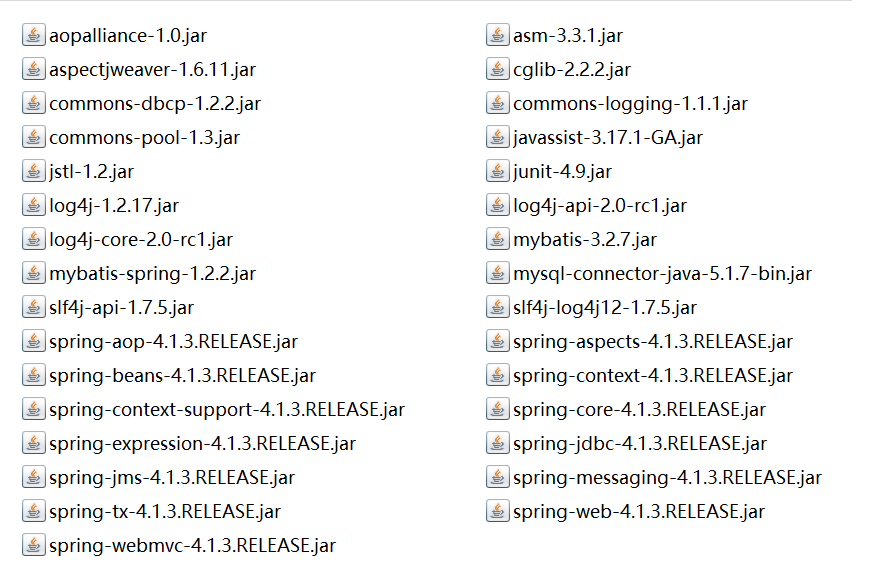
1.2 jar包
包括:spring(包括springmvc)、mybatis、mybatis-spring整合包、数据库驱动、第三方连接池。
1.3 工程搭建
1.3.1 整合思路
Dao层:
1、SqlMapConfig.xml,空文件即可。需要文件头。
2、applicationContext-dao.xml。
a) 数据库连接池
b) SqlSessionFactory对象,需要spring和mybatis整合包下的。
c) 配置mapper文件扫描器。
Service层:
1、applicationContext-service.xml包扫描器,扫描@service注解的类。
2、applicationContext-trans.xml配置事务。
表现层:
Springmvc.xml
1、包扫描器,扫描@Controller注解的类。
2、配置注解驱动。
3、视图解析器
Web.xml
配置前端控制器。
1.3.2 SqlMapConfig.xml
在工程的config包下创建SqlMapConfig.xml
<?xml version="1.0" encoding="UTF-8" ?>

<!DOCTYPE configuration

PUBLIC "-//mybatis.org//DTD Config 3.0//EN"

"http://mybatis.org/dtd/mybatis-3-config.dtd">

<configuration>

</configuration>
1.3.3 ApplicationContext-dao.xml
在工程的config包下创建ApplicationContext-dao.xml。配置数据源、配置SqlSessionFatory、Mapper扫描器。
<?xml version="1.0" encoding="UTF-8"?>

<beans xmlns="http://www.springframework.org/schema/beans"

    xmlns:context="http://www.springframework.org/schema/context"

    xmlns:p="http://www.springframework.org/schema/p"

    xmlns:aop="http://www.springframework.org/schema/aop"

    xmlns:tx="http://www.springframework.org/schema/tx"

    xmlns:xsi="http://www.w3.org/2001/XMLSchema-instance"

    xsi:schemaLocation="http://www.springframework.org/schema/beans http://www.springframework.org/schema/beans/spring-beans-4.0.xsd

    http://www.springframework.org/schema/context http://www.springframework.org/schema/context/spring-context-4.0.xsd

    http://www.springframework.org/schema/aop http://www.springframework.org/schema/aop/spring-aop-4.0.xsd http://www.springframework.org/schema/tx http://www.springframework.org/schema/tx/spring-tx-4.0.xsd

    http://www.springframework.org/schema/util http://www.springframework.org/schema/util/spring-util-4.0.xsd">

    <!-- 加载配置文件 -->

    <context:property-placeholder location="classpath:db.properties"/>

    <!-- 数据库连接池 -->

    <bean id="dataSource" class="org.apache.commons.dbcp.BasicDataSource"

        destroy-method="close">

        <property name="driverClassName" value="${jdbc.driver}"/>

        <property name="url" value="${jdbc.url}"/>

        <property name="username" value="${jdbc.username}"/>

        <property name="password" value="${jdbc.password}"/>

        <property name="maxActive" value="10"/>

        <property name="maxIdle" value="5"/>

    </bean>

    <!-- mapper配置 -->

    <!-- 让spring管理sqlsessionfactory 使用mybatis和spring整合包中的 -->

    <bean id="sqlSessionFactory" class="org.mybatis.spring.SqlSessionFactoryBean">

        <!-- 数据库连接池 -->

        <property name="dataSource" ref="dataSource"/>

        <!-- 加载mybatis的全局配置文件 -->

        <property name="configLocation" value="classpath:SqlMapConfig.xml"/>

    </bean>

    <!-- 配置Mapper扫描器 -->

    <bean class="org.mybatis.spring.mapper.MapperScannerConfigurer">

        <property name="basePackage" value="com.huida.dao"/>

    </bean>

</beans>
db.properties
jdbc.driver=com.mysql.jdbc.Driver

jdbc.url=jdbc:mysql://localhost:3306/springmvc?characterEncoding=utf-8

jdbc.username=root

jdbc.password=root
1.3.4 ApplicationContext-service.xml
在工程的config包下创建ApplicationContext-service.xml。
<?xml version="1.0" encoding="UTF-8"?>

<beans xmlns="http://www.springframework.org/schema/beans"

    xmlns:context="http://www.springframework.org/schema/context"

    xmlns:p="http://www.springframework.org/schema/p"

    xmlns:aop="http://www.springframework.org/schema/aop"

    xmlns:tx="http://www.springframework.org/schema/tx"

    xmlns:xsi="http://www.w3.org/2001/XMLSchema-instance"

    xsi:schemaLocation="http://www.springframework.org/schema/beans http://www.springframework.org/schema/beans/spring-beans-4.0.xsd

    http://www.springframework.org/schema/context http://www.springframework.org/schema/context/spring-context-4.0.xsd

    http://www.springframework.org/schema/aop http://www.springframework.org/schema/aop/spring-aop-4.0.xsd http://www.springframework.org/schema/tx http://www.springframework.org/schema/tx/spring-tx-4.0.xsd

    http://www.springframework.org/schema/util http://www.springframework.org/schema/util/spring-util-4.0.xsd">

    <!-- 扫描器 -->

    <context:component-scan base-package="com.huida.service"/>

</beans>
1.3.5 ApplicationContext-trans.xml
在工程的config包下创建ApplicationContext-trans.xml。
<?xml version="1.0" encoding="UTF-8"?>

<beans xmlns="http://www.springframework.org/schema/beans"

    xmlns:context="http://www.springframework.org/schema/context"

    xmlns:p="http://www.springframework.org/schema/p"

    xmlns:aop="http://www.springframework.org/schema/aop"

    xmlns:tx="http://www.springframework.org/schema/tx"

    xmlns:xsi="http://www.w3.org/2001/XMLSchema-instance"

    xsi:schemaLocation="http://www.springframework.org/schema/beans http://www.springframework.org/schema/beans/spring-beans-4.0.xsd

    http://www.springframework.org/schema/context http://www.springframework.org/schema/context/spring-context-4.0.xsd

    http://www.springframework.org/schema/aop http://www.springframework.org/schema/aop/spring-aop-4.0.xsd http://www.springframework.org/schema/tx http://www.springframework.org/schema/tx/spring-tx-4.0.xsd

    http://www.springframework.org/schema/util http://www.springframework.org/schema/util/spring-util-4.0.xsd">

    <!-- 事务管理器 -->

    <bean id="transactionManager"

        class="org.springframework.jdbc.datasource.DataSourceTransactionManager">

        <!-- 数据源 -->

        <property name="dataSource" ref="dataSource"/>

    </bean>

    <!-- 通知:用来进行功能增强的。增删改必须加事务通知 -->

    <tx:advice id="txAdvice" transaction-manager="transactionManager">

        <tx:attributes>

            <!-- 传播行为 -->

            <tx:method name="save*" propagation="REQUIRED"/>

            <tx:method name="insert*" propagation="REQUIRED"/>

            <tx:method name="delete*" propagation="REQUIRED"/>

            <tx:method name="update*" propagation="REQUIRED"/>

            <tx:method name="find*" propagation="SUPPORTS" read-only="true"/>

            <tx:method name="get*" propagation="SUPPORTS" read-only="true"/>

        </tx:attributes>

    </tx:advice>

    <!-- 切面 -->

    <aop:config>

        <aop:advisor advice-ref="txAdvice"

            pointcut="execution(* com.huida.service.*.*(..))"/>

    </aop:config>

</beans>
1.3.6 SpringMvc.xml
在工程的config包下创建ApplicationContext-SpringMvc.xml。
<?xml version="1.0" encoding="UTF-8"?>

<beans xmlns="http://www.springframework.org/schema/beans"

    xmlns:xsi="http://www.w3.org/2001/XMLSchema-instance"

    xmlns:p="http://www.springframework.org/schema/p"

    xmlns:context="http://www.springframework.org/schema/context"

    xmlns:dubbo="http://code.alibabatech.com/schema/dubbo"

    xmlns:mvc="http://www.springframework.org/schema/mvc"

    xsi:schemaLocation="http://www.springframework.org/schema/beans http://www.springframework.org/schema/beans/spring-beans-4.0.xsd

        http://www.springframework.org/schema/mvc http://www.springframework.org/schema/mvc/spring-mvc-4.0.xsd

        http://code.alibabatech.com/schema/dubbo http://code.alibabatech.com/schema/dubbo/dubbo.xsd

        http://www.springframework.org/schema/context http://www.springframework.org/schema/context/spring-context-4.0.xsd">

    <!-- 扫描带Controller注解的类 -->

    <context:component-scan base-package="com.huida.controller"/>

    <!-- 加载注解驱动 -->

    <mvc:annotation-driven/>

    <!-- 视图解析器 -->

    <bean class="org.springframework.web.servlet.view.InternalResourceViewResolver">

        <property name="viewClass"

            value="org.springframework.web.servlet.view.JstlView"/>

        <!-- jsp前缀 -->

        <property name="prefix" value="/WEB-INF/jsp/"/>

        <!-- jsp后缀 -->

        <property name="suffix" value=".jsp"/>

    </bean>

</beans>
1.3.7 web.xml
<?xml version="1.0" encoding="UTF-8"?>

<web-app xmlns:xsi="http://www.w3.org/2001/XMLSchema-instance" xmlns="http://java.sun.com/xml/ns/javaee" xsi:schemaLocation="http://java.sun.com/xml/ns/javaee http://java.sun.com/xml/ns/javaee/web-app_2_5.xsd" id="WebApp_ID" version="2.5">

  <display-name>ssm</display-name>

  <!--  springMVC的前端控制器 -->

 <!-- servlet在第一次访问的时候创建 -->

  <servlet>

      <servlet-name>SpringMvc</servlet-name>

      <servlet-class>org.springframework.web.servlet.DispatcherServlet</servlet-class>

     <!-- 引入核心配置文件的路径 -->

     <init-param>

         <param-name>contextConfigLocation</param-name>

         <param-value>classpath:SpringMvc.xml</param-value>

     </init-param>

     <!-- 如果没有指定springMVC的核心配置文件,那么默认去找/WEB-INF/+<servlet-name>+"-servlet.xml"配置文件 -->

     <!-- tomcat启动的时候就加载这个Servlet -->

     <load-on-startup>1</load-on-startup>

  </servlet>

  <servlet-mapping>

      <servlet-name>SpringMvc</servlet-name>

      <url-pattern>*.action</url-pattern>

  </servlet-mapping>

  <!-- 加载spring监听器-->

  <context-param>

      <param-name>contextConfigLocation</param-name>

      <param-value>classpath:ApplicationContext-*.xml</param-value>

  </context-param>

  <listener>

      <listener-class>org.springframework.web.context.ContextLoaderListener</listener-class>

  </listener>

  <welcome-file-list>

    <welcome-file>index.html</welcome-file>

    <welcome-file>index.htm</welcome-file>

    <welcome-file>index.jsp</welcome-file>

    <welcome-file>default.html</welcome-file>

    <welcome-file>default.htm</welcome-file>

    <welcome-file>default.jsp</welcome-file>

  </welcome-file-list>

</web-app>
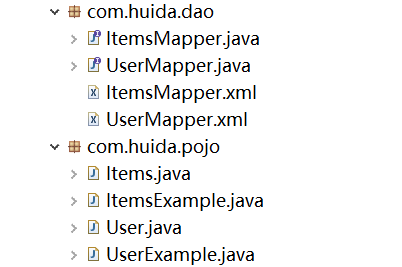
1.4 Dao
mybatis逆向工程。
1.5 Service
1、Service由spring管理
2、spring对Service进行事务控制。

1.5.1 ItemService接口
package com.huida.service;

import java.util.List;

import com.huida.pojo.Items;

public interface ItemService {

    public List<Items> list();

}
1.5.2 ItemServiceImpl实现类
package com.huida.service;

import java.util.List;

import org.springframework.beans.factory.annotation.Autowired;

import org.springframework.stereotype.Service;

import com.huida.dao.ItemsMapper;

import com.huida.pojo.Items;

import com.huida.pojo.ItemsExample;

@Service

public class ItemServiceImpl implements ItemService {

    /*

     * @Autowired与@Resource的区别:单实现类使用@Autowired

     * 如果是多实现类使用@Resource指定地址

     */

    @Autowired

    private ItemsMapper itemsMapper;

    @Override

    public List<Items> list() {

        //调用dao层

        //如果不需要条件,直接将example对象new出来即可

        ItemsExample example =new ItemsExample();

        List<Items> list=itemsMapper.selectByExampleWithBLOBs(example);

        return list;

    }

}
1.6 Controller

ItemsController为:
package com.huida.controller;

import java.util.List;

import org.springframework.beans.factory.annotation.Autowired;

import org.springframework.stereotype.Controller;

import org.springframework.web.bind.annotation.RequestMapping;

import org.springframework.web.servlet.ModelAndView;

import com.huida.pojo.Items;

import com.huida.service.ItemService;

@Controller

public class ItemsController {

    @Autowired

    private ItemService itemService;

    @RequestMapping("/list")

    public ModelAndView itemList(){

        //调用业务层

        List<Items> list=itemService.list();

        ModelAndView modelAndView=new ModelAndView();

        modelAndView.addObject("itemList",list);

        modelAndView.setViewName("itemList");

        return modelAndView;

    }

}
1.7 在WEB-INF/jsp目录下创建itemList.jsp访问页面
<%@ page language="java" contentType="text/html; charset=UTF-8"

    pageEncoding="UTF-8"%>

<%@ taglib uri="http://java.sun.com/jsp/jstl/core" prefix="c" %>

<%@ taglib uri="http://java.sun.com/jsp/jstl/fmt"  prefix="fmt"%>

<!DOCTYPE html PUBLIC "-//W3C//DTD HTML 4.01 Transitional//EN" "http://www.w3.org/TR/html4/loose.dtd">

<html>

<head>

<meta http-equiv="Content-Type" content="text/html; charset=UTF-8">

<title>查询商品列表</title>

</head>

<body>

    <form

        action="${pageContext.request.contextPath }/item/queryitem.action"

        method="post">

        查询条件:

        <table width="100%" border=1>

            <tr>

                <td><input type="submit" value="查询" /></td>

            </tr>

        </table>

        商品列表:

        <table width="100%" border=1>

            <tr>

                <td>商品名称</td>

                <td>商品价格</td>

                <td>生产日期</td>

                <td>商品描述</td>

                <td>操作</td>

            </tr>

            <c:forEach items="${itemList }" var="item">

                <tr>

                    <td>${item.name }</td>

                    <td>${item.price }</td>

                    <td><fmt:formatDate value="${item.createtime}"

                            pattern="yyyy-MM-dd HH:mm:ss" /></td>

                    <td>${item.detail }</td>

                    <td><a

                        href="${pageContext.request.contextPath }/itemEdit.action?id=${item.id}">修改</a></td>

                </tr>

            </c:forEach>

        </table>

    </form>

</body>

</html>
1.8 测试
访问:http://localhost:8080/ssm/item.action

SSM框架整合的详细过程(含每一步的分析及代码)。实质上是SpringMVC与mybatis的整合,应为spring与SpringMVC不需要整合。的更多相关文章
- Springboot 整合 MyBatisPlus[详细过程]
Springboot 整合 MyBatisPlus[详细过程] 提要 这里已经将Springboot环境创建好 这里只是整合MyBatis过程 引入Maven依赖 添加MyBatisPlus启动依赖, ...
- idea搭建简单ssm框架的最详细教程(新)
为开发一个测试程序,特搭建一个简单的ssm框架,因为网上看到很多都是比较老旧的教程,很多包都不能用了,eclipes搭建并且其中还附带了很多的其他东西,所以特此记录一下mac中idea搭建过程. 另: ...
- 关于springboot整合的详细过程
Spring-boot http://tengj.top/2017/04/24/springboot0/
- maven整合ssm框架
1.创建maven web工程 创建完成后,项目结构如下 2.项目配置文件 在pom.xml中添加SSM框架相关jar包的依赖关系,pom.xml代码如下 <?xml version=" ...
- 《实战突击:PHP项目开发案例整合(第2版)(含DVD光盘1张)》
<实战突击:PHP项目开发案例整合(第2版)(含DVD光盘1张)> 基本信息 作者: 徐康明 辛洪郁 出版社:电子工业出版社 ISBN:9787121221378 上架时间:2014 ...
- 史上最详细的IDEA优雅整合Maven+SSM框架(详细思路+附带源码)
目录 前言: 1. 搭建整合环境 2.Spring框架代码的编写 3.SpringMVC框架代码的编写 4. Spring整合SpringMVC的框架 5.MyBatis框架代码的编写 6. Spri ...
- [转]SSM框架——详细整合教程(Spring+SpringMVC+MyBatis)
原文地址:http://blog.csdn.net/zhshulin/article/details/37956105#comments 使用SSM(Spring.SpringMVC和Mybatis) ...
- 【转】SSM框架——详细整合教程(Spring+SpringMVC+MyBatis)
原文地址:http://blog.csdn.net/zhshulin/article/details/37956105 使用SSM(Spring.SpringMVC和Mybatis)已经有三个多月了, ...
- Maven整合SSM框架——详细整合教程(Spring+SpringMVC+MyBatis)
使用SSM(Spring.SpringMVC和Mybatis)已经有三个多月了,项目在技术上已经没有什么难点了,基于现有的技术就可以实现想要的功能,当然肯定有很多可以改进的地方.之前没有记录SSM整合 ...
随机推荐
- Winform开发常用控件之DataGridView的简单数据绑定——自动绑定
DataGridView控件可谓是Winform开发的重点控件,对于数据的呈现和操作非常方便,DataGridView可谓是既简单又复杂.简单在于其已经集成了很多方法,复杂在于可以使用其实现复杂的数据 ...
- HDU 1358
http://acm.hdu.edu.cn/showproblem.php?pid=1358 求某个前缀的周期,用Next求循环节的题目 #include <iostream> #incl ...
- Qt 编译完后指定输出路径
make install INSTALL_ROOT=/home/hotot/qt4rls
- CentOS6下yum升级安装mysql
CentOS6默认版本的mysql是5.1.73,当前主流版本一般为mysql-5.6,需要安装该版本的话可以执行以下操作 1.1.卸载旧版mysql 1)备份数据 # 直接删除老版本的相关文件可能会 ...
- Hadoop_10_shuffle01_Hadoop中的Shuffle详解【来源网络】
原文网址:http://blog.itpub.net/30316686/viewspace-2057204/ 详细的了解Shuffle过程,能更好的对hadoop集群进行优化. Map ...
- FastAdmin Bootstrap-Table 关于客户端模式(由 计算所有页的的总数引发的思考)
Bootstrap-Table 关于客户端模式(由 计算所有页的的总数引发的思考) 昨天群里有小伙伴询问 Bootstrap-Table 有没有计算所有页的总数. [吐槽]★隔壁老王-杭州 @F4NN ...
- redis位图
<?php function frstr($str){ return str_pad($str,8,'0',STR_PAD_LEFT); } $php=''; $p= frstr(decbin( ...
- eclipse调试时增加jvm参数
下面的程中我们限制Java 堆的大小为20MB,不可扩展(将堆的最小值-Xms 参数与最大值-Xmx 参数设置为一样即可避免堆自动扩展),通过参数-XX:+HeapDumpOnOutOfMemoryE ...
- 集群(heartbeat)搭建
HA 即(high available cluster)高可用集群,又称双机热备,保证关键性业务的不间断提供服务. 如:两台机器A和B,正常情况A提供服务,B待命闲置:一但A宕机或服务宕掉,自动切换至 ...
- Microsoft SQL Server on Linux破解 2G内存限制
首先,贴上微软官方安装方法,大家按照官方的操作就行. 微软官方安装方法 相信很多同学遇到一个问题就是: sqlservr: This program requires a machine with a ...