Centos:mysql的安装和使用:yum方式
1、安装:
安装客户端
sudo yum install mysql
安装服务器
sudo yum install mysql-server
2、配置:查看配置文件
cat /etc/my.cnf
3、启动:
启动脚本:cat /etc/init.d/mysqld
sudo service mysqld start/stop/status/restart/reload/force-reload/condrestart
初次启动信息:多了启动初始化的一些工作
Initializing MySQL database: WARNING: The host '10-57-19-59' could not be looked up with resolveip.
This probably means that your libc libraries are not 100 % compatible
with this binary MySQL version. The MySQL daemon, mysqld, should work
normally with the exception that host name resolving will not work.
This means that you should use IP addresses instead of hostnames
when specifying MySQL privileges !
Installing MySQL system tables...
OK
Filling help tables...
OK
To start mysqld at boot time you have to copy
support-files/mysql.server to the right place for your system
PLEASE REMEMBER TO SET A PASSWORD FOR THE MySQL root USER !
To do so, start the server, then issue the following commands:
/usr/bin/mysqladmin -u root password 'new-password'
/usr/bin/mysqladmin -u root -h 10-57-19-59 password 'new-password'
Alternatively you can run:
/usr/bin/mysql_secure_installation
which will also give you the option of removing the test
databases and anonymous user created by default. This is
strongly recommended for production servers.
See the manual for more instructions.
You can start the MySQL daemon with:
cd /usr ; /usr/bin/mysqld_safe &
You can test the MySQL daemon with mysql-test-run.pl
cd /usr/mysql-test ; perl mysql-test-run.pl
Please report any problems with the /usr/bin/mysqlbug script!
[ OK ]
Starting mysqld: [ OK ]
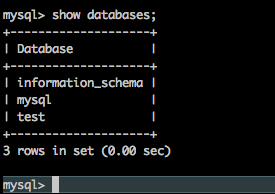
未初始化前,mysql -h127.0.0.1 -uroot登录后的表如下,root账号都默认密码为空
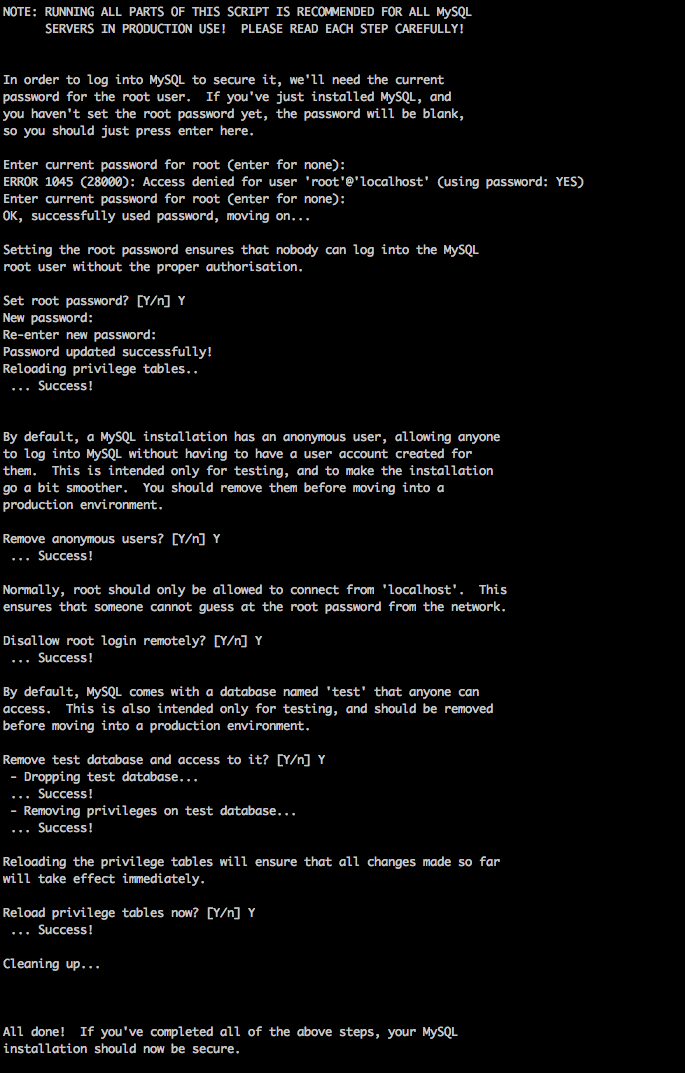
执行如下命令进行安装设置:
sudo mysql_secure_installation
设置root密码,禁止远程用户使用root账号登录,删除测试表test,删除匿名用户,重新设置表的权限
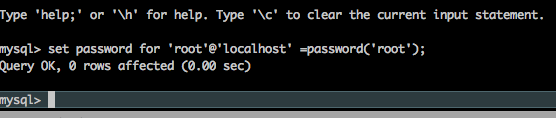
重新设置密码:password 'root'为新密码;-proot为旧密码
sudo mysqladmin -u root -h127.0.0.1 -proot password 'root'
把在所有数据库的所有表的所有权限赋值给位于所有IP地址的root用户。
mysql> grant all privileges on *.* to root@'%' identified by 'password';
如果是新用户而不是root,则要先新建用户
mysql>create user 'username'@'%' identified by 'password';
此时就可以进行远程连接了。

Centos:mysql的安装和使用:yum方式的更多相关文章
- centos mysql 编译安装
centos mysql 编译安装 1.安装 创建MySQL用户 sudo useradd mysql 下载MySQL的源码包,我们这里使用的时5.5.18 安装依赖 sudo yum -y inst ...
- 重要参考文档---MySQL 8.0.29 使用yum方式安装,开启navicat远程连接,搭建主从,读写分离(需要使用到ProxySQL,此文不讲述这个)
yum方式安装 echo "删除系统默认或之前可能安装的其他版本的 mysql" for i in $(rpm -qa|grep mysql);do rpm -e $i --nod ...
- CentOS7下常用安装服务软件yum方式的介绍
简介:介绍yum软件包的管理并配置本地yum源 yum安装:基于 C/S 架构,yum安装称之为傻瓜式安装 yum安装优点:方便快捷,不用考虑包依赖,自动下载软件包. yum安装缺点:人为无法干预,无 ...
- Centos 7 手把手教你使用YUM方式安装并配置Nginx+php7-fpm+MySQL
需要准备的内容 一台纯净系统的服务器 远程连接服务器的工具 (我这里使用Xshell) 安装nginx 链接上服务器后执行 yum install nginx 这里需要输入y 后回车,开始安装ngi ...
- CentOS虚拟机不能联网状况下yum方式从本地安装软件包(转载的)
大家都知道yum是linux下一个非常好用的软件安装/卸载软件,它方便操作,而且最厉害的是可以解决令人头疼的包依赖关系.但是若是你的linux不能联网,若想使用yum安装软件,可以依照下面的方法. 1 ...
- CentOS虚拟机不能联网状况下yum方式从本地安装软件包
大家都知道yum是linux下一个非常好用的软件安装/卸载软件,它方便操作,而且最厉害的是可以解决令人头疼的包依赖关系.但是若是你的linux不能联网,若想使用yum安装软件,可以依照下面的方法. 1 ...
- linux(centos6.8 64位)下安装mysql5.7(yum方式)
下载mysql源安装包 # wget http:.noarch.rpm 安装mysql源包 #yum localinstall mysql57.noarch.rpm 检查mysql源是否安装成功 # ...
- Centos6安装MySQL5.7(yum方式)
1. 下载并安装用来配置mysql的yum源的rpm包 # 下载 wget http://repo.mysql.com/mysql57-community-release-el6-10.noarch. ...
- 在CentOS 7上安装常用的YUM源
参考地址:https://blog.csdn.net/u010048823/article/details/51298183 以epel源为例子,来讲解如何添加额外的YUM源. Extra Packa ...
- CentOS 5.8 安装python 和 yum
centos 5.8 资源路径: http://vault.centos.org/5.8/os/x86_64/CentOS/ rpm -Uvh http://vault.centos.org/5.8 ...
随机推荐
- HDU 4320 Arcane Numbers 1 (数论)
A - Arcane Numbers 1 Time Limit:1000MS Memory Limit:32768KB 64bit IO Format:%I64d & %I64 ...
- set .net principle
var ticket = new FormsAuthenticationTicket(1, username, DateTime.Now, DateTime.Now.AddMinutes(FormsA ...
- magento目录了解
对magento目录的了解:
- [bzoj3994][SDOI2015]约数个数和-数论
Brief Description 计算\(\sum_{i\leqslant n}\sum_{j\leqslant m}\sigma_0(ij)\). Algorithm Design 首先证明一个结 ...
- string与double的互相转换
#include <iostream> #include <string> #include <sstream> string DoubleToString(dou ...
- [ Mongodb ] 问题总汇
1. Mongodb备份 [root@localhost ~]# mongodump -h /users 2. Mongodb恢复 [root@localhost ~]# mongorestore - ...
- mysql的expain(zz)
两张表,T1和T2,都只有一个字段,id int.各插入1000条记录,运行如下语句: explain SELECT t1.id,t2.id FROM t1 INNER JOIN t2 ON t1.i ...
- ACM-ICPC北京赛区(2017)网络赛2【后缀数组+Java//不会】
#1579 : Reverse Suffix Array 时间限制:1000ms 单点时限:1000ms 内存限制:256MB 描述 There is a strong data structure ...
- [JSOI2008]Star War
星球之间互相直接或间接地连接帝国开始使用死星有计划地摧毁反抗军占领的星球给出星球间隧道的连通情况,已经帝国打击的顺序要求以尽量快的速度求出每一次打击之后反抗军占据的星球的联通快的个数(若两个星球,直接 ...
- 洛谷——P1604 B进制星球
P1604 B进制星球 题目背景 进制题目,而且还是个计算器~~ 题目描述 话说有一天,小Z乘坐宇宙飞船,飞到一个美丽的星球.因为历史的原因,科技在这个美丽的星球上并不很发达,星球上人们普遍采用B(2 ...