Springboot21 整合redis、利用redis实现消息队列
1 前提准备
1.1 创建一个springboot项目
技巧01:本博文基于springboot2.0创建
1.2 安装redis
1.2.1 linux版本
1.2.2 windows版本
到redis官网下载windows版本的压缩包后,解压即可
1.3 redis使用
本博文以window版本为例子,linux版本请参见
1.3.1 开启服务端
》进入到解压后的redis根目录
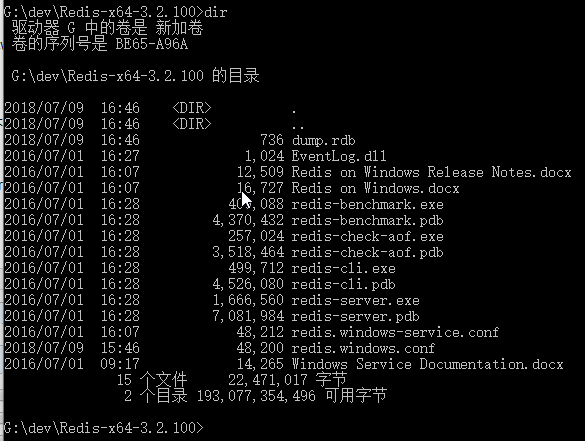
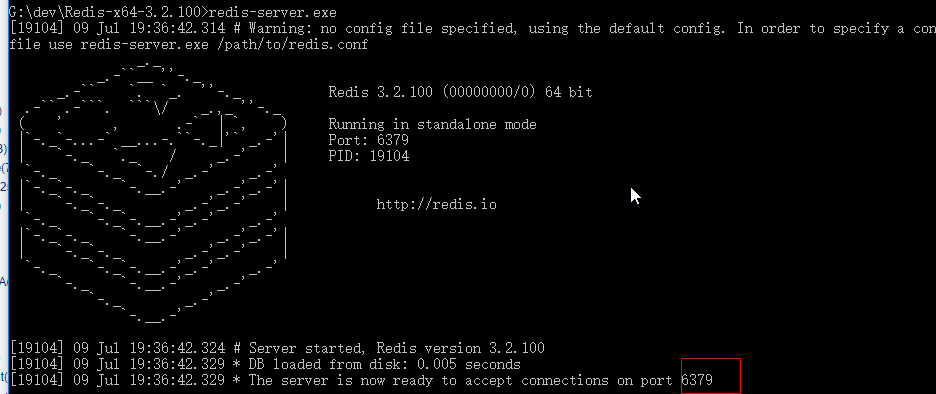
》执行 redis-server.exe
1.3.2 开启客户端
进入到redis解压目录 -> 执行 redis-cli.exe

1.3.3 测试redis服务端和客户端的通信
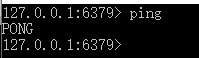
在redis客户端执行 ping,如果返回了 PONG 就表明redis前后端通信正常
1.3.4 关闭
客户端和服务端都用 Ctrl + C 就可以关闭了
2 SpringBoot 集成 Redis
2.1 创建一个SpringBoot项目
技巧01:创建时引入 spring-boot-starter-web 和 spring-boot-starter-data-redis
<?xml version="1.0" encoding="UTF-8"?>

<project xmlns="http://maven.apache.org/POM/4.0.0" xmlns:xsi="http://www.w3.org/2001/XMLSchema-instance"

    xsi:schemaLocation="http://maven.apache.org/POM/4.0.0 http://maven.apache.org/xsd/maven-4.0.0.xsd">

    <modelVersion>4.0.0</modelVersion>

    <groupId>cn.xiangxu</groupId>

    <artifactId>redis_pub_sub</artifactId>

    <version>0.0.1-SNAPSHOT</version>

    <packaging>jar</packaging>

    <name>redis_pub_sub</name>

    <description>Demo project for Spring Boot</description>

    <parent>

        <groupId>org.springframework.boot</groupId>

        <artifactId>spring-boot-starter-parent</artifactId>

        <version>2.0.3.RELEASE</version>

        <relativePath/> <!-- lookup parent from repository -->

    </parent>

    <properties>

        <project.build.sourceEncoding>UTF-8</project.build.sourceEncoding>

        <project.reporting.outputEncoding>UTF-8</project.reporting.outputEncoding>

        <java.version>1.8</java.version>

    </properties>

    <dependencies>

        <dependency>

            <groupId>org.springframework.boot</groupId>

            <artifactId>spring-boot-starter-data-redis</artifactId>

        </dependency>

        <!--<dependency>-->

            <!--<groupId>org.springframework.boot</groupId>-->

            <!--<artifactId>spring-boot-starter-data-redis-reactive</artifactId>-->

        <!--</dependency>-->

        <dependency>

            <groupId>org.springframework.boot</groupId>

            <artifactId>spring-boot-starter-web</artifactId>

        </dependency>

        <dependency>

            <groupId>org.springframework.boot</groupId>

            <artifactId>spring-boot-devtools</artifactId>

            <optional>true</optional>

        </dependency>

        <!-- https://mvnrepository.com/artifact/org.projectlombok/lombok -->

        <dependency>

            <groupId>org.projectlombok</groupId>

            <artifactId>lombok</artifactId>

            <version>1.18.0</version>

        </dependency>

        <dependency>

            <groupId>org.springframework.boot</groupId>

            <artifactId>spring-boot-starter-test</artifactId>

            <scope>test</scope>

        </dependency>

    </dependencies>

    <build>

        <plugins>

            <plugin>

                <groupId>org.springframework.boot</groupId>

                <artifactId>spring-boot-maven-plugin</artifactId>

                <configuration>

                    <fork>true</fork>

                </configuration>

            </plugin>

        </plugins>

    </build>

</project>
pom.xml
2.2 配置redis服务器
技巧01:springboot的启动包已经给我们配置好了redis相关的配置类,所以我们只需要在配置文件中对redis服务器进行相关的配置即可

2.3 使用redis服务器
坑01:外部的redis客户端在连接redis服务器时需要关闭redis服务器的守护进程,否则会出现连接失败;修改redis.conf配置文件即可,windows版本的redis配置文件在根目录下的 redis.windows.conf 中;将配置文件中protected-mode 配置值从 yes 改为 no 即可。
技巧01:因为springboot已经为我们配置好了一切,所以我们直接调用 RedisTemplate 或者 StringRedisTemplate 的相关API就可以对redis服务器进行相关的操作了
》依赖注入 RedisTemplate 或者 StringRedisTemplate
》利用依赖注入的 RedisTemplate 或者 StringRedisTemplate 对象进行操作即可
package cn.xiangxu.redis_pub_sub.web;

import lombok.extern.slf4j.Slf4j;

import org.junit.Test;

import org.junit.runner.RunWith;

import org.springframework.beans.factory.annotation.Autowired;

import org.springframework.boot.test.context.SpringBootTest;

import org.springframework.data.redis.core.RedisTemplate;

import org.springframework.test.context.junit4.SpringRunner;

import static org.junit.Assert.*;

@RunWith(SpringRunner.class)

@SpringBootTest

@Slf4j

public class TestControllerTest {

    /**

     * 依赖注入RedisTemplate,直接利用RedisTemplate操作redis即可

     */

    @Autowired

    private RedisTemplate<String, String> redisTemplate;

    @Test

    public void test01(){

        log.info("Hello Boy");

        // 设置数据

        redisTemplate.opsForValue().set("age", "33");

        // 获取数据

        String result = redisTemplate.opsForValue().get("name");

        System.out.println(result.toString());

//        System.out.println(redisTemplate.getClientList());;

    }

}
3 SpringBoot 利用 Redis 实现队列的效果
3.1 流程介绍
3.2 源代码
package cn.xiangxu.redis_pub_sub.domain;

import lombok.extern.slf4j.Slf4j;

import org.springframework.beans.factory.annotation.Autowired;

import java.util.concurrent.CountDownLatch;

/**

 * @author 王杨帅

 * @create 2018-07-09 16:13

 * @desc

 **/

@Slf4j

public class Receiver {

    private CountDownLatch latch;

    @Autowired

    public Receiver(CountDownLatch latch) {

        this.latch = latch;

    }

    public void receiveMessage(String message) {

        log.info("Received <" + message + ">");

        latch.countDown();

    }

}
package cn.xiangxu.redis_pub_sub;

import cn.xiangxu.redis_pub_sub.domain.Receiver;

import lombok.extern.slf4j.Slf4j;

import org.springframework.boot.SpringApplication;

import org.springframework.boot.autoconfigure.SpringBootApplication;

import org.springframework.context.ApplicationContext;

import org.springframework.context.annotation.Bean;

import org.springframework.data.redis.connection.RedisConnectionFactory;

import org.springframework.data.redis.core.StringRedisTemplate;

import org.springframework.data.redis.listener.PatternTopic;

import org.springframework.data.redis.listener.RedisMessageListenerContainer;

import org.springframework.data.redis.listener.adapter.MessageListenerAdapter;

import java.util.concurrent.CountDownLatch;

@SpringBootApplication

@Slf4j

public class RedisPubSubApplication {

    /*

     * Redis消息监听器容器

     * 这个容器加载了RedisConnectionFactory和消息监听器

     */

    @Bean

    RedisMessageListenerContainer container(RedisConnectionFactory connectionFactory,

                                            MessageListenerAdapter listenerAdapter){

        RedisMessageListenerContainer container = new RedisMessageListenerContainer();

        container.setConnectionFactory(connectionFactory);

        container.addMessageListener(listenerAdapter, new PatternTopic("sprinboot-redis-messaage"));

        return container;

    }

    /*

     * 将Receiver注册为一个消息监听器,并指定消息接收的方法(receiveMessage)

     * 如果不指定消息接收的方法,消息监听器会默认的寻找Receiver中的handleMessage这个方法作为消息接收的方法

     */

    @Bean

    MessageListenerAdapter listenerAdapter(Receiver receiver){

        return new MessageListenerAdapter(receiver, "receiveMessage");

    }

    /*

     * Receiver实例

     */

    @Bean

    Receiver receiver(CountDownLatch latch){

        return new Receiver(latch);

    }

    @Bean

    CountDownLatch latch(){

        return new CountDownLatch(1);

    }

    /*

     * Redis Template 用来发送消息

     */

    @Bean

    StringRedisTemplate template(RedisConnectionFactory connectionFactory){

        return new StringRedisTemplate(connectionFactory);

    }

    public static void main(String[] args) {

        ApplicationContext ctx = SpringApplication.run(RedisPubSubApplication.class, args);

        StringRedisTemplate template = ctx.getBean(StringRedisTemplate.class);

//      CountDownLatch latch = ctx.getBean(CountDownLatch.class);

        log.info("Sending message......");

        template.convertAndSend("sprinboot-redis-messaage", "Hello, SpringBoot redis message!!!!");

//      latch.wait();

//        System.exit(0);

    }

}
3.3 效果测试
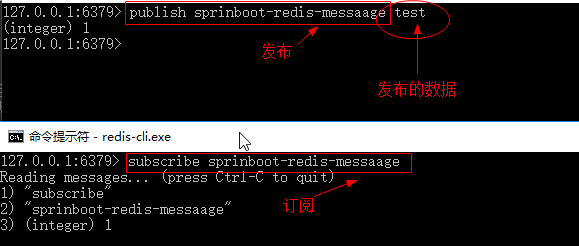
3.3.1 利用redis服务器中的客户端测试发布订阅效果
3.3.2 启动springBoot项目
在redis服务器中发布的消息会自动打印到控制台上

Springboot21 整合redis、利用redis实现消息队列的更多相关文章
- (七)整合 Redis集群 ,实现消息队列场景
整合 Redis集群 ,实现消息队列场景 1.Redis集群简介 1.1 RedisCluster概念 2.SpringBoot整合Redis集群 2.1 核心依赖 2.2 核心配置 2.3 参数渲染 ...
- 利用System V消息队列实现回射客户/服务器
一.介绍 在学习UNIX网络编程 卷1时,我们当时可以利用Socket套接字来实现回射客户/服务器程序,但是Socket编程是存在一些不足的,例如: 1. 服务器必须启动之时,客户端才能连上服务端,并 ...
- SpringBoot2.0 整合 Redis集群 ,实现消息队列场景
本文源码:GitHub·点这里 || GitEE·点这里 一.Redis集群简介 1.RedisCluster概念 Redis的分布式解决方案,在3.0版本后推出的方案,有效地解决了Redis分布式的 ...
- redis分布式锁和消息队列
最近博主在看redis的时候发现了两种redis使用方式,与之前redis作为缓存不同,利用的是redis可设置key的有效时间和redis的BRPOP命令. 分布式锁 由于目前一些编程语言,如PHP ...
- RabbitMQ,Apache的ActiveMQ,阿里RocketMQ,Kafka,ZeroMQ,MetaMQ,Redis也可实现消息队列,RabbitMQ的应用场景以及基本原理介绍,RabbitMQ基础知识详解,RabbitMQ布曙
消息队列及常见消息队列介绍 2017-10-10 09:35操作系统/客户端/人脸识别 一.消息队列(MQ)概述 消息队列(Message Queue),是分布式系统中重要的组件,其通用的使用场景可以 ...
- Redis学习笔记~实现消息队列比MSMQ更方便
什么是队列:简单的说就是数据存储到一个空间里(可以是内存,也可以是物理文件),先存储的数据对象,先被取出来,这与堆栈正好相反,消息队列也是这样,将可能出现高并发的数据进行队列存储,并按着入队的顺序依次 ...
- Redis实现简单的消息队列
1.问:什么是消息队列? 答:是一个消息的链表,是一个异步处理的数据处理引擎. 2.问:有什么好处? 答:不仅能够提高系统的负荷,还能够改善因网络阻塞导致的数据缺失. 3.问:用途有哪些? 答:邮件 ...
- redis实现有序的消息队列
redis是什么东西就不多说了,网上文章一搜一大堆. 首先来说一下我要实现的功能: 类似一个消息中转站吧,如果有人要发送消息,先将消息发到我这里来,然后我这边进行转发,为的就是有一个统一的管理和修改时 ...
- Redis与RabbitMQ作为消息队列的比较
简要介绍 RabbitMQ RabbitMQ是实现AMQP(高级消息队列协议)的消息中间件的一种,最初起源于金融系统,用于在分布式系统中存储转发消息,在易用性.扩展性.高可用性等方面表现不俗.消息中间 ...
- 使用Redis Stream来做消息队列和在Asp.Net Core中的实现
写在前面 我一直以来使用redis的时候,很多低烈度需求(并发要求不是很高)需要用到消息队列的时候,在项目本身已经使用了Redis的情况下都想直接用Redis来做消息队列,而不想引入新的服务,kafk ...
随机推荐
- 利用struts2的json返回方式来控制jquery.validate的remote框架,进行表单验证
- cocos2d-x android8.0 视频层遮挡问题
cocos里默认情况下视频层是在cocos 层的上面,如果希望把视频层放在cocos的下面的话, android8.0以下,把Cocos2dxVideoHelper.java里的 videoView. ...
- 深入理解java虚拟机-第12章Java内存模型与线程
第12章 Java内存模型与线程 Java内存模型 主内存与工作内存: java内存模型规定了所有的变量都在主内存中,每条线程还有自己的工作内存. 工作内存中保存了该线程使用的主内存副本拷贝,线程对 ...
- 解决Maven报Plugin execution not covered by lifecycle configuration问题
问题: 在eclipse neon 中引入maven项目时,弹出两个错误,一个是jacco-maven-plugin,一个是项目中的插件ota-schema-plugin 如果忽略这两个错误,点击fi ...
- FastAdmin 导出 Excel 相关资料收集 (2018-08-14)
FastAdmin 导出 Excel 相关资料收集 导出 Excel 文件时身份证号变成科学计数法怎么办? https://forum.fastadmin.net/thread/1346 姊妹篇 Fa ...
- Oracle GoldenGate理论
1Oracle GoldenGate处理方法和支持的数据库Oracle GoldenGate在多样和异构的基础IT平台中,可以在事务级别上进行数据交换和数据操作.在保证交易完整性和最小的开销的条件下, ...
- FPGA噪声干扰
在FPGA高速AD采集设计中,PCB布线差会产生干扰.今天小编为大家介绍一些布线解决方案. 1.信号线的等长 以SDRAM或者DDRII为例,数据线,命令线,地址线以及时钟线最好等长,误差不要超过50 ...
- java代码多线程实现如下
总结:我的比赛得了最差的奖,老师提都没提,所以,我应该有自知之明,你并不是他最喜欢的学生 import java.util.Scanner; //利用多线程实现输入等待…… public class ...
- 求 s=a+aa+ aaa+ aaaa +aaaaa+........的值,a是从键盘输入的,项数也为键盘输入
总结:这道题目.主要是那个位数,需要*10, while(i<f){ x+=y;//决定位数上的那个数 sum+=x//求和 y*10=y;//决定位数 } package com.b; imp ...
- POJ 2823 Sliding Window(单调队列入门题)
Sliding Window Time Limit: 12000MS Memory Limit: 65536K Total Submissions: 67218 Accepted: 190 ...