Mybatis中的@SelectKey注解
一、创建Maven项目
在pom.xml中,添加mybatis依赖,mysql-jdbc依赖,把编译版本改为1.8
你问,为啥mybatis不会自动依赖mysql-jdbc,需要手动写明?答:因为mysql驱动是通过字符串动态加载的,这是一种“动态依赖”,Maven只能推导出“静态依赖”。“动态依赖”是一种更加灵活的依赖。
Maven默认的Java版本是1.6,无法使用lambda表达式(1.8)和钻石运算符(1.7)。
代码片段:pom.xml
<?xml version="1.0" encoding="UTF-8"?>

<project xmlns="http://maven.apache.org/POM/4.0.0"

         xmlns:xsi="http://www.w3.org/2001/XMLSchema-instance"

         xsi:schemaLocation="http://maven.apache.org/POM/4.0.0 http://maven.apache.org/xsd/maven-4.0.0.xsd">

    <modelVersion>4.0.0</modelVersion>

    <groupId>wyf</groupId>

    <artifactId>xqweb</artifactId>

    <version>1.0-SNAPSHOT</version>

    <dependencies>

        <!-- https://mvnrepository.com/artifact/org.mybatis/mybatis -->

        <dependency>

            <groupId>org.mybatis</groupId>

            <artifactId>mybatis</artifactId>

            <version>3.4.4</version>

        </dependency>

        <!-- https://mvnrepository.com/artifact/org.springframework/spring-jdbc -->

        <!-- https://mvnrepository.com/artifact/mysql/mysql-connector-java -->

        <dependency>

            <groupId>mysql</groupId>

            <artifactId>mysql-connector-java</artifactId>

            <version>6.0.6</version>

        </dependency>

    </dependencies>

    <build>

        <plugins>

            <plugin>

                <groupId>org.apache.maven.plugins</groupId>

                <artifactId>maven-compiler-plugin</artifactId>

                <configuration>

                    <source>1.8</source>

                    <target>1.8</target>

                    <encoding>utf8</encoding>

                </configuration>

            </plugin>

        </plugins>

    </build>

</project>
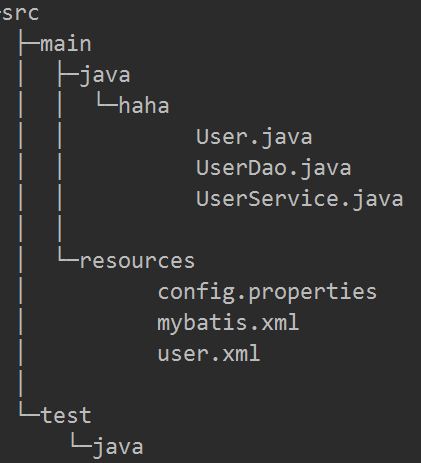
创建好了pom.xml,就可以开始编码了。最终的目录结构如下,下面让我们来一步一步创建文件。
二、配置Mybatis
代码片段:mybatis.xml
<?xml version="1.0" encoding="UTF-8" ?>

<!DOCTYPE configuration

        PUBLIC "-//mybatis.org//DTD Config 3.0//EN"

        "http://mybatis.org/dtd/mybatis-3-config.dtd">

<configuration>

    <properties resource="config.properties">

    </properties>

    <environments default="development">

        <environment id="development">

            <transactionManager type="JDBC"/>

            <dataSource type="POOLED">

                <property name="driver" value="${driver}"/>

                <property name="url" value="${url}"/>

                <property name="username" value="${username}"/>

                <property name="password" value="${password}"/>

            </dataSource>

        </environment>

    </environments>

    <mappers>

        <mapper class="haha.UserDao"/>

        <mapper resource="user.xml"/>

    </mappers>

</configuration>
代码片段:config.properties
username=root

password=haha

driver=com.mysql.jdbc.Driver

url=jdbc:mysql://localhost:3306/test?serverTimezone=Asia/Shanghai
把配置信息跟mybatis.xml分开的好处是:更清晰。mybatis属于代码区,config.properties改起来比较简单。
三、创建实体类User
User有三个属性:name,age和id,重写toString()方法便于调试。
package haha;

public class User {

String name;

Integer age;

Integer id;

public User(){}

public User(String name,int age){

   this.name=name;

   this.age=age;

}

public String getName() {

   return name;

}

public void setName(String name) {

   this.name = name;

}

public Integer getAge() {

   return age;

}

public void setAge(Integer age) {

   this.age = age;

}

public Integer getId() {

   return id;

}

public void setId(Integer id) {

   this.id = id;

}

@Override

public String toString() {

   return String.format("(id:%d,name:%s,age:%d)", id, name, age);

}

}
相应的,在数据库中建立一个表user
CREATE TABLE `user` (

  `id` int(11) NOT NULL AUTO_INCREMENT,

  `name` varchar(10) DEFAULT NULL,

  `age` int(11) DEFAULT NULL,

  PRIMARY KEY (`id`)

) ENGINE=InnoDB AUTO_INCREMENT=119 DEFAULT CHARSET=utf8mb4
四、实现UserDao接口
UserDao接口有两个功能:插入、查询全部。
package haha;

import org.apache.ibatis.annotations.Insert;

import org.apache.ibatis.annotations.Param;

import org.apache.ibatis.annotations.Select;

import org.apache.ibatis.annotations.SelectKey;

import java.util.List;

public interface UserDao {

@Insert("insert into user(name,age) value(#{name},#{age})")

int insert_withoutPrimaryKey(@Param("name") String name, @Param("age") int age);

int insert_useGeneratedKey(@Param("user") User user);

int insert_selectKey(@Param("user") User user);

@Insert("insert into user(name,age) value(#{user.name},#{user.age})")

@SelectKey(statement = "select last_insert_id()", keyProperty = "user.id", before = false, resultType = int.class)

int insert_selectKeyAnotation(@Param("user") User user);

@Select("select*from user")

List<User> getAll();

}
Mybatis写SQL语句有两种方式:1、使用注解;2、使用xml
对于比较长的SQL语句放在xml中,对于比较短的SQL语句放在注解中
在上面定义的UserDao中,insert_userGeneratedKey()和insert_selectKey()两个函数没有给出对应的SQL语句,需要在xml文件中进行定义。
代码片段:user.xml
<?xml version="1.0" encoding="UTF-8" ?>

<!DOCTYPE mapper PUBLIC "-//mybatis.org//DTD Mapper 3.0//EN" "http://mybatis.org/dtd/mybatis-3-mapper.dtd">

<mapper namespace="haha.UserDao">

    <insert id="insert_useGeneratedKey" parameterType="haha.User"

            useGeneratedKeys="true" keyProperty="user.id">

        insert into user set id=#{user.id},name=#{user.name},age=#{user.age}

    </insert>

    <insert id="insert_selectKey" parameterType="haha.User">

        <selectKey keyProperty="user.id" keyColumn="id" order="AFTER" resultType="int">

            SELECT last_insert_id()

        </selectKey>

        insert into user(name,age) VALUE (#{user.name},#{user.age})

    </insert>

</mapper>
五、万事俱备,只欠东风
编写一个UserService类测试一下
package haha;

import org.apache.ibatis.io.Resources;

import org.apache.ibatis.session.SqlSession;

import org.apache.ibatis.session.SqlSessionFactory;

import org.apache.ibatis.session.SqlSessionFactoryBuilder;

import java.io.IOException;

import java.io.InputStream;

import java.util.List;

public class UserService {

public static void main(String[] args) throws IOException {

   String resource = "mybatis.xml";

   InputStream inputStream = Resources.getResourceAsStream(resource);

   SqlSessionFactoryBuilder builder = new SqlSessionFactoryBuilder();

   SqlSessionFactory factory = builder.build(inputStream);

   SqlSession session = factory.openSession();

   UserDao dao = session.getMapper(UserDao.class);

   //使用默认主键

   int affectedRows = dao.insert_withoutPrimaryKey("张三", 25);

   System.out.println(affectedRows);

   //使用useGeneratedKey,将主键注入到user.id中

   User u = new User("张三", 17);

   affectedRows = dao.insert_useGeneratedKey(u);

   System.out.println(affectedRows + " " + u.getId());

   //使用selectKey执行在插入之前或之后执行查询语句

   affectedRows = dao.insert_selectKey(u);

   System.out.println(affectedRows + " " + u.getId());

   //使用selectKey注解的方式

   affectedRows = dao.insert_selectKeyAnotation(u);

   System.out.println(affectedRows + " " + u.getId());

   session.commit();

   List<User> a = dao.getAll();

   a.forEach(System.out::println);

}

}
六、insert()函数返回值
如下代码,insert()函数的返回值为int类型,表示affectedRows,即受影响的行数,如果成功插入返回1,如果不成功插入,返回0。对于一切写操作(insert,update,delete),返回值都是affectedRows。
@Insert("insert into user(name,age) value(#{name},#{age})")

int insert(@Param("name") String name, @Param("age") int age);
七、关于@SelectKey
关于insert()有一种需求很常见:如何确定插入数据的主键。对于MySQL中的自增类型主键,无需提供主键可以直接插入。还是以insert()函数为例,这个SQL语句没有提供主键,主键是自增类型可以自动生成。
@Insert("insert into user(name,age) value(#{name},#{age})")

int insert(@Param("name") String name, @Param("age") int age);
下面介绍一个重要注解@SelctKey(statement="SQL语句",keyProperty="将SQL语句查询结果存放到keyProperty中去",before="true表示先查询再插入,false反之",resultType=int.class)
其中:
- statement是要运行的SQL语句,它的返回值通过resultType来指定
- before表示查询语句statement运行的时机
- keyProperty表示查询结果赋值给代码中的哪个对象,keyColumn表示将查询结果赋值给数据库表中哪一列
- keyProperty和keyColumn都不是必需的,有没有都可以
- before=true,插入之前进行查询,可以将查询结果赋给keyProperty和keyColumn,赋给keyColumn相当于更改数据库
- befaore=false,先插入,再查询,这时只能将结果赋给keyProperty
- 赋值给keyProperty用来“读”数据库,赋值给keyColumn用来写数据库
- selectKey的两大作用:1、生成主键;2、获取刚刚插入数据的主键。
- 使用selectKey,并且使用MySQL的last_insert_id()函数时,before必为false,也就是说必须先插入然后执行last_insert_id()才能获得刚刚插入数据的ID。
注意:
- 该注解相当于XML配置中的
<selectKey>的标签 - 与注解
@Insert,@InsertProvider,@Updateor@UpdateProvider搭配使用。在其他方法上将被忽略。 - 如果你指定了一个
@SelectKey注解,然后Mybatis将忽略任何生成的key属性通过设置@Options,或者配置属性。 - 属性: statement是要执行的sql语句的字符串数组, keyProperty是需要更新为新值的参数对象属性, before可以是true或者false分别代表sql语句应该在执行insert之前或者之后, resultType是keyProperty的Java类型, statementType是语句的类型,取Statement, PreparedStatement和CallableStatement对应的STATEMENT, PREPARED或者CALLABLE其中一个,默认是PREPARED。
1、举一个before=true的例子,新插入数据的id是当前表中行的个数
当before=true,可以通过SQL语句来填充insert语句中的某个参数,这个参数的名称可以通过keyProperty来指明。
@Insert("insert into user value(#{id},#{name},#{age})")

@SelectKey(statement="select count(1)from user", keyProperty="id", before=true, resultType=int.class)

int insert(@Param("name") String name, @Param("age") int age);
这个函数返回值是affectedRows,也就是插入成功返回1,插入失败返回0。
以上这段代码有一个大大的隐患,万万不能用在生产环境中。这个隐患就是:不能通过count()来确定id,多线程情况下有可能产生冲突。解决方案:可以使用UUID作为主键。
2、before=false的情况
注意keyProperty不能使基本类型,因为那样赋值之后就找不到了(相当于传值)
注解的方式
@Insert("insert into user(name,age) value(#{user.name},#{user.age})")

@SelectKey(statement = "select last_insert_id()", keyProperty = "user.id", before = false, resultType = int.class)

int insert_selectKeyAnotation(@Param("user") User user);
XML的方式
    <insert id="insert_selectKey" parameterType="haha.User">

        <selectKey keyProperty="user.id" keyColumn="id" order="AFTER" resultType="int">

            SELECT last_insert_id()

        </selectKey>

        insert into user(name,age) VALUE (#{user.name},#{user.age})

    </insert>
3、在Oracle中使用SelectKey生成主键,通常是“先查询得到主键,再进行插入”
DUAL表是Oracle中的神奇的表
使用序列作为主键
<insert id="insertSelective" parameterType="com.zehin.vpaas.base.domain.SfyHazardAnalysis">

<selectKey resultType="java.lang.Integer" order="BEFORE" keyProperty="hazardId">

        SELECT SEQUENCE_1.NEXTVAL FROM DUAL

</selectKey>

insert into SFY_HAZARD_ANALYSIS

<trim prefix="(" suffix=")" suffixOverrides=",">

    HAZARD_ID,

    <if test="hazardTime != null"> HAZARD_TIME,</if>

    <if test="hazardTitle != null"> HAZARD_TITLE, </if>

    <if test="hazardMeasure != null"> HAZARD_MEASURE, </if>

    <if test="buildId != null"> BUILD_ID, </if>

</trim>

<trim prefix=" values(" suffix=")" suffixOverrides=",">

    #{hazardId,jdbcType=INTEGER},

    <if test="hazardTime != null">#{hazardTime,jdbcType=VARCHAR},</if>

    <if test="hazardTitle != null"> #{hazardTitle,jdbcType=VARCHAR},  </if>

    <if test="hazardMeasure != null"> #{hazardMeasure,jdbcType=VARCHAR},  </if>

    <if test="buildId != null"> #{buildId,jdbcType= INTEGER}, </if>

</trim>

lt;/insert>
使用GUID作为主键
<insert id="insertUser" parameterType="com.danny.mybatis.po.User">

<selectKey keyProperty="userId" order="BEFORE" resultType="java.lang.Integer">

select SYS_GUID() as userId from DUAL

 </selectKey>

insert into T_USER(userId,userName,birthday,sex,address) values (#{userId},#{userName},#{birthday},#{sex},#{address}) </insert>
4、使用useGeneratedKeys
<insert id="insert" parameterType="Spares"

        useGeneratedKeys="true" keyProperty="id">

        insert into spares(spares_id,spares_name,

            spares_type_id,spares_spec)

        values(#{id},#{name},#{typeId},#{spec})

    </insert>
    <insert id="insertUser" useGeneratedKeys="true" keyColumn="id">

        insert into user(name,age) VALUE (#{name},#{age})

    </insert>
八、获取刚刚插入数据的主键
除了使用selectKey的方式获取刚刚插入数据的主键,还有以下方案:
1、如果是MySQL,可以用select last_insert_id()语句获取新插入数据的主键。
2、如果主键类型是UUID,可以直接在代码中生成主键进行插入,这样就不需要从数据库中读取主键了,主动权掌握在代码手中。
九、参考资料
Mybatis官方文档
CSDN偶尔记一下:mybatis如何获取oracle新插入数据记录的主键?
Mybatis中的@SelectKey注解的更多相关文章
- SpringBoot 集成MyBatis 中的@MapperScan注解
SpringBoot 集成MyBatis 中的@MapperScan注解 2018年08月17日 11:41:02 文火慢炖 阅读数:398更多 个人分类: 环境搭建 在SpringBoot中集成My ...
- mybatis中使用selectKey,返回结果一直是1
转:https://www.cnblogs.com/caizhen/p/9186608.html mybatis中使用selectKey,返回结果一直是1,结合这个问题,笔记一下selectKey标签 ...
- MyBatis中的@Mapper注解及配套注解使用详解(上)
前言: 从mybatis3.4.0开始加入了@Mapper注解,目的就是为了不再写mapper映射文件(那个xml写的是真的蛋疼...).很恶心的一个事实是源码中并没有对于这个注解的详细解释 现在我们 ...
- Mybatis中的@Param注解
前言 今天在使用Mybatis时遇到一个问题,主要出错原因在于Mybatis的@Param注解,如果我不在参数前面加上@Param注解,数据库操作就会报错,如下: @Param作用 @Param注解的 ...
- Mybatis中的@Param注解(自己没试过)
@Param是MyBatis所提供的(org.apache.ibatis.annotations.Param),作为Dao层的注解,作用是用于传递参数,从而可以与SQL中的的字段名相对应//https ...
- mybatis中:selectKey返回最近插入记录的id
<insert id="insert" parameterType="com.lls.model.Employee"> <!-- select ...
- MyBatis中的@Mapper注解 @Mappe与@MapperScan关系
从mybatis3.4.0开始加入了@Mapper注解,目的就是为了不再写mapper映射文件 现在项目中的配置 public interface DemoMapper{ int deleteByPr ...
- Springmvc和Mybatis中常用的注解
使用注解来构造IoC容器 用注解来向Spring容器注册Bean.需要在applicationContext.xml中注册<context:component-scan base-package ...
- Mybatis中的@param注解的用法
用注解来简化xml配置的时候,@Param注解的作用是给参数命名,参数命名后就能根据名字得到参数值,正确的将参数传入sql语句中 下午在写转账操作时,dao接口中的方法 @Update(update ...
随机推荐
- UCN(User-Centric Networks,用户中心网络)
UCN(User-Centric Networks,以用户为中心的网络)是下一代移动通信网络(5G)的发展方向,目前尚处于初级发展阶段.2016年11月,IEEE SDN研究组(聚焦研发SDN.NFV ...
- OpenCV学习(40) 人脸识别(4)
在人脸识别模式类中,还实现了一种基于LBP直方图的人脸识别方法.LBP图的原理参照:http://www.cnblogs.com/mikewolf2002/p/3438698.html 在 ...
- C/C++ 语言获取文件大小
在C语言中测试文件的大小,主要使用二个标准函数. 1.fseek 函数原型:int fseek ( FILE * stream, long int offset, int origin ); 参数说明 ...
- JAVASCRIPT加密方法,JS加密解密综述(7种)
一:最简单的加密解密 对于JAVASCRIPT函数escape()和unescape()想必是比较了解啦(很多网页加密在用它们),分别是编码和解码字符串,比如例子代码 用escape()函数加密后变为 ...
- 数据库操作语句类型(DQL、DML、DDL、DCL)简介
SQL语言共分为四大类:数据查询语言DQL,数据操纵语言DML,数据定义语言DDL,数据控制语言DCL. 1. 数据查询语言DQL数据查询语言DQL基本结构是由SELECT子句,FROM子句,WHER ...
- Cognos开发图表乱码问题
在此之前提到过在利用TR建模导入IQD数据源的时候遇到乱码的一种解决方案: http://www.cnblogs.com/wxjnew/p/3374029.html 今天说的是在RS中开发新报表的时候 ...
- [Unity-6] GameObject有时候渲染不出来
问题描写叙述:在做游戏的过程中遇到了这样一个问题.一个怪物,假设让他出如今屏幕的中央是没问题的,可是让他出如今屏幕的边缘的位置发现他没有出现. 问题原因:经过检查发现,我给这个GameObject加入 ...
- 【树莓派】制作树莓派所使用的img镜像(一)
最近一直在折腾树莓派,前几天装了10台设备,最近又来了15台开发板子.基本每台设备都需要进行如下操作: 1.安装树莓派OS,并配置键盘.时区.语言编码格式等: 2.新增组.用户.配置静态IP地址: 3 ...
- OPENCV 常用函数
1.cvCloneImage: IplImage* cvCloneImage( const IplImage* image ); 在使用函数之前,不用特地开辟内存,即该函数会自己开一段内存,然后复制好 ...
- MISRA 2004 VS MISRA 2012