Spring注解驱动开发(二)-----生命周期、属性赋值
bean的生命周期
bean的生命周期:
bean创建---初始化----销毁的过程
容器管理bean的生命周期;
我们可以自定义初始化和销毁方法;容器在bean进行到当前生命周期的时候来调用我们自定义的初始化和销毁方法-----一共四种方式
构造(对象创建)
单实例:在容器启动的时候创建对象
多实例:在每次获取的时候创建对象

初始化:
对象创建完成,并赋值好,调用初始化方法。。。
销毁:
单实例:容器关闭的时候
多实例:容器不会管理这个bean;容器不会调用销毁方法;
指定方式
1、指定初始化和销毁方法;
通过@Bean指定init-method和destroy-method;
MainConfigOfLifeCycle:
package com.atguigu.config;

import org.springframework.context.ApplicationListener;

import org.springframework.context.annotation.Bean;

import org.springframework.context.annotation.ComponentScan;

import org.springframework.context.annotation.Configuration;

import org.springframework.context.annotation.Scope;

import com.atguigu.bean.Car;

@Configuration

public class MainConfigOfLifeCycle {

    @Bean(initMethod="init",destroyMethod="detory")

    public Car car(){

        return new Car();

    }

}
car:
package com.atguigu.bean; import org.springframework.stereotype.Component; @Component
public class Car { public Car(){
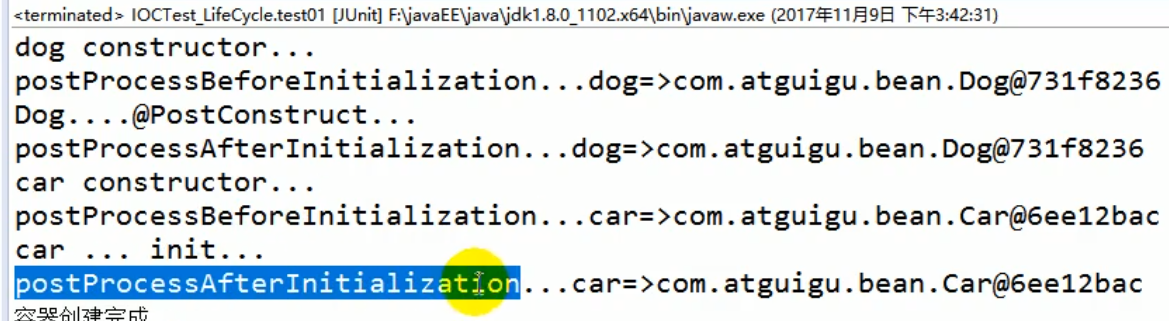
System.out.println("car constructor...");
} public void init(){
System.out.println("car ... init...");
} public void detory(){
System.out.println("car ... detory...");
} }
2、通过让Bean实现InitializingBean(定义初始化逻辑),DisposableBean(定义销毁逻辑);
Cat:
package com.atguigu.bean;

import org.springframework.beans.factory.DisposableBean;

import org.springframework.beans.factory.InitializingBean;

import org.springframework.stereotype.Component;

@Component

public class Cat implements InitializingBean,DisposableBean {

    public Cat(){

        System.out.println("cat constructor...");

    }

    @Override

    public void destroy() throws Exception {

        // TODO Auto-generated method stub

        System.out.println("cat...destroy...");

    }

    @Override

    public void afterPropertiesSet() throws Exception {

        // TODO Auto-generated method stub

        System.out.println("cat...afterPropertiesSet...");

    }

}
MainConfigOfLifeCycle
@ComponentScan("com.atguigu.bean")

@Configuration

public class MainConfigOfLifeCycle {

}
3、可以使用JSR250;
@PostConstruct:在bean创建完成并且属性赋值完成;来执行初始化方法
@PreDestroy:在容器销毁bean之前通知我们进行清理工作
Dog:
package com.atguigu.bean;

import javax.annotation.PostConstruct;

import javax.annotation.PreDestroy;

import org.springframework.beans.BeansException;

import org.springframework.beans.factory.annotation.Autowired;

import org.springframework.context.ApplicationContext;

import org.springframework.context.ApplicationContextAware;

import org.springframework.stereotype.Component;

@Component

public class Dog {

    public Dog(){

        System.out.println("dog constructor...");

    }

    //对象创建并赋值之后调用

    @PostConstruct

    public void init(){

        System.out.println("Dog....@PostConstruct...");

    }

    //容器移除对象之前

    @PreDestroy

    public void detory(){

        System.out.println("Dog....@PreDestroy...");

    }

}
MainConfigOfLifeCycle:
@ComponentScan("com.atguigu.bean")

@Configuration

public class MainConfigOfLifeCycle {

}
4、BeanPostProcessor【interface】:bean的后置处理器;
在bean初始化前后进行一些处理工作;
postProcessBeforeInitialization:在初始化之前工作
postProcessAfterInitialization:在初始化之后工作
MyBeanPostProcessor:
package com.atguigu.bean;

import org.springframework.beans.BeansException;

import org.springframework.beans.factory.config.BeanPostProcessor;

import org.springframework.stereotype.Component;

/**

 * 后置处理器:初始化前后进行处理工作

 * 将后置处理器加入到容器中

 * @author lfy

 */

@Component

public class MyBeanPostProcessor implements BeanPostProcessor {

    @Override

    public Object postProcessBeforeInitialization(Object bean, String beanName) throws BeansException {

        // TODO Auto-generated method stub

        System.out.println("postProcessBeforeInitialization..."+beanName+"=>"+bean);

        return bean;

    }

    @Override

    public Object postProcessAfterInitialization(Object bean, String beanName) throws BeansException {

        // TODO Auto-generated method stub

        System.out.println("postProcessAfterInitialization..."+beanName+"=>"+bean);

        return bean;

    }

}
在bean初始化(调用构造方法)之后----->调用postProcessBeforeInitialization()----->@PostConstruct -----> InitializingBean -----> init-methodinit()方法----->postProcessAfterInitialization()
BeanPostProcessor原理
执行顺序
-----BeanPostProcessor.postProcessBeforeInitialization
|-----初始化:对象创建完成,并赋值好,调用初始化方法。。。
-----BeanPostProcessor.postProcessAfterInitialization
执行流程(BeanPostProcessor原理)
1、populateBean(beanName, mbd, instanceWrapper);-----给bean进行属性赋值
2、initializeBean
{
applyBeanPostProcessorsBeforeInitialization(wrappedBean, beanName);
invokeInitMethods(beanName, wrappedBean, mbd);-----执行自定义初始化
applyBeanPostProcessorsAfterInitialization(wrappedBean, beanName);
}
注:遍历得到容器中所有的BeanPostProcessor;挨个执行beforeInitialization,
一但返回null,跳出for循环,不会执行后面的BeanPostProcessor.postProcessorsBeforeInitialization
spring底层对BeanPostProcessor的使用
1、ApplicationContextAware-----实现ApplicationContextAware接口后,就可以将ApplicationContext对象通过setApplicationContext()注入。
package com.atguigu.bean;

import org.springframework.beans.BeansException;

import org.springframework.context.ApplicationContext;

import org.springframework.context.ApplicationContextAware;

import org.springframework.stereotype.Component;

@Component

public class Dog implements ApplicationContextAware {

    private ApplicationContext applicationContext;

    @Override

    public void setApplicationContext(ApplicationContext applicationContext) throws BeansException {

        this.applicationContext = applicationContext;

    }

}
属性赋值
@Value赋值
1、MainConfigOfPropertyValues
package com.atguigu.config;

import org.springframework.context.annotation.Bean;

import org.springframework.context.annotation.Configuration;

import org.springframework.context.annotation.PropertySource;

import com.atguigu.bean.Person;

//使用@PropertySource读取外部配置文件中的k/v保存到运行的环境变量中;加载完外部的配置文件以后使用${}取出配置文件的值

@PropertySource(value={"classpath:/person.properties"})

@Configuration

public class MainConfigOfPropertyValues {

    @Bean

    public Person person(){

        return new Person();

    }

}
2、Person
package com.atguigu.bean;

import org.springframework.beans.factory.annotation.Value;

public class Person {

    //使用@Value赋值;

    //1、基本数值

    //2、可以写SpEL; #{}

    //3、可以写${};取出配置文件【properties】中的值(在运行环境变量里面的值)

    @Value("张三")

    private String name;

    @Value("#{20-2}")

    private Integer age;

    @Value("${person.nickName}")

    private String nickName;

    public String getNickName() {

        return nickName;

    }

    public void setNickName(String nickName) {

        this.nickName = nickName;

    }

    public String getName() {

        return name;

    }

    public void setName(String name) {

        this.name = name;

    }

    public Integer getAge() {

        return age;

    }

    public void setAge(Integer age) {

        this.age = age;

    }

    public Person(String name, Integer age) {

        super();

        this.name = name;

        this.age = age;

    }

    public Person() {

        super();

    }

    @Override

    public String toString() {

        return "Person [name=" + name + ", age=" + age + ", nickName=" + nickName + "]";

    }

}
3、person.properties
person.nickName=李四
注:对于在classpath路径下的配置文件,也可以通过如下方式获取属性。配置文件的值都会加载到environment环境变量中,可以直接从环境变量中取值。

Spring注解驱动开发(二)-----生命周期、属性赋值的更多相关文章
- 【Spring注解驱动开发】使用InitializingBean和DisposableBean来管理bean的生命周期,你真的了解吗?
写在前面 在<[Spring注解驱动开发]如何使用@Bean注解指定初始化和销毁的方法?看这一篇就够了!!>一文中,我们讲述了如何使用@Bean注解来指定bean初始化和销毁的方法.具体的 ...
- 【spring 注解驱动开发】spring对象的生命周期
尚学堂spring 注解驱动开发学习笔记之 - 生命周期 生命周期 1.生命周期-@Bean指定初始化和销毁方法 2.生命周期-InitializingBean和DisposableBean 3.生命 ...
- 【Spring注解驱动开发】如何使用@Value注解为bean的属性赋值,我们一起吊打面试官!
写在前面 在之前的文章中,我们探讨了如何向Spring的IOC容器中注册bean组件,讲解了有关bean组件的生命周期的知识.今天,我们就来一起聊聊@Value注解的用法. 项目工程源码已经提交到Gi ...
- 【Spring注解驱动开发】二狗子让我给他讲讲@EnableAspectJAutoProxy注解
写在前面 最近,二狗子入职了新公司,新入职的那几天确实有点飘.不过慢慢的,他发现他身边的人各个身怀绝技啊,有Spring源码的贡献者,有Dubbo源码的贡献者,有MyBatis源码的贡献者,还有研究A ...
- 【spring 注解驱动开发】spring ioc 原理
尚学堂spring 注解驱动开发学习笔记之 - Spring容器创建 Spring容器创建 1.Spring容器创建-BeanFactory预准备 2.Spring容器创建-执行BeanFactory ...
- 0、Spring 注解驱动开发
0.Spring注解驱动开发 0.1 简介 <Spring注解驱动开发>是一套帮助我们深入了解Spring原理机制的教程: 现今SpringBoot.SpringCloud技术非常火热,作 ...
- 【Spring注解驱动开发】如何使用@Bean注解指定初始化和销毁的方法?看这一篇就够了!!
写在前面 在[String注解驱动开发专题]中,前面的文章我们主要讲了有关于如何向Spring容器中注册bean的知识,大家可以到[String注解驱动开发专题]中系统学习.接下来,我们继续肝Spri ...
- 【Spring注解驱动开发】BeanPostProcessor在Spring底层是如何使用的?看完这篇我懂了!!
写在前面 在<[String注解驱动开发]面试官再问你BeanPostProcessor的执行流程,就把这篇文章甩给他!>一文中,我们详细的介绍了BeanPostProcessor的执行流 ...
- 【Spring注解驱动开发】自定义TypeFilter指定@ComponentScan注解的过滤规则
写在前面 Spring的强大之处不仅仅是提供了IOC容器,能够通过过滤规则指定排除和只包含哪些组件,它还能够通过自定义TypeFilter来指定过滤规则.如果Spring内置的过滤规则不能够满足我们的 ...
随机推荐
- php数据结构课程---7、队列实战
php数据结构课程---7.队列实战 一.总结 一句话总结: 注意条件:注意循环的条件(比如while循环打印队列元素时),注意if的条件 把问题想清楚:比如链表操作初次插入元素和后面再插,效果是不一 ...
- Android Support Library详细介绍
网上对Android Support Library中各个依赖包介绍的中文资料太少了,结合官方文档和有限的参考资料做了一次总结,有描述得不对的地方还请指正. 一.主工程.依赖包.jar包.androi ...
- python 安装bs4
1, 下载地址https://www.crummy.com/software/BeautifulSoup/#Download ------------------------------------- ...
- WPF基础之Grid面板
一.显示 Grid的线条,设置ShowGridLiens="True".
- php非法输入数据类型
1.空白输入 2.超长输入(如大于256个字符) 3.特殊字符(如·!@#¥%……&*()—=|.:‘:<>;'"<>?.,) 4.控制字符(如\r\n等) ...
- 函数的作用域、作用域链以及return关键字
1.作用域 全局作用域:在函数外部使用var关键字定义的变量 局部作用域:在函数内部使用var关键字定义的变量 特点 (1)局部变量无法直接影响全局变量 (2)在局部作用域中可以使用全局作用 ...
- CF891D Sloth
题意:给你一棵树,你选择删掉一条边,再加上一条边(也要保证为树),问最后树上的节点能够两两完美匹配的加删边方案数? n<=5e5. 标程: #include<cstdio> #inc ...
- 【BZOJ3223】【luoguP3391】文艺平衡树
description 您需要写一种数据结构(可参考题目标题),来维护一个有序数列,其中需要提供以下操作:翻转一个区间,例如原有序序列是5 4 3 2 1,翻转区间是[2,4]的话,结果是5 2 3 ...
- 创建vue项目及引入插件
部署开发环境 安装淘宝镜像 npm install -g cnpm --registry=https://registry.npm.taobao.org 安装webpack cnpm install ...
- day06 tar命令使用,vim简单操作以及linux开机过程
上节课复习: cat: 查看全部文件内容 head: 从头查看文件内容,默认为前10行 tail: tail -f //动态查看文件是否增加内容 >> 追加 > 覆盖 more: 百 ...