springboot security 安全
spring security几个概念
“认证”(Authentication) 是建立一个他声明的主体的过程(一个“主体”一般是指用户,设备或一些可以在你的应用程序中执行动作的其他系统) 。
“授权”(Authorization)指确定一个主体是否允许在你的应用程序执行一个动作的过程。为了抵达需要授权的店,主体的身份已经有认证过程建立。
这个概念是通用的, 而不仅仅在Spring Security中 , 在Shiro中也是一样的.
Spring Security的 Web&安全几个关键点
1. 登陆/注销
HttpSecurity配置登陆、注销功能
2. Thymeleaf提供的SpringSecurity标签支持
需要引入thymeleaf-extras-springsecurity4
sec:authentication=“name” 获得当前用户的用户名
sec:authorize=“hasRole(‘ADMIN’)” 当前用户必须拥有ADMIN权限时才会显示标签内容
3. remember me
表单添加remember-me的checkbox
配置启用remember-me功能
4. CSRF(Cross-site request forgery)跨站请求伪造
HttpSecurity启用csrf功能,会为表单添加_csrf的值,提交携带来预防CSRF;
我们仅需引入spring-boot-starter-security模块,进行少量的配置,即可实现强大的安全管理。
security中几个重要的类如下:
WebSecurityConfigurerAdapter:自定义Security策略

AuthenticationManagerBuilder:自定义认证策略

@EnableWebSecurity:开启WebSecurity模式 (在@Controller注解的类上追加)
SpringSecurity在SpringBoot中使用
springsecurity在什么都不配的情况下,默认帐号是user, 密码在启动日志中随机生成uuid,如下形式
-- ::52.852  INFO  --- [           main] b.a.s.AuthenticationManagerConfiguration :

Using default security password: bc4c813c-b8f9-4cdb-9ca9-b406d3492da9
pom.xml添加依赖
        <!--在thymeleaf中使用认证标签需要的额外依赖-->

        <dependency>

            <groupId>org.thymeleaf.extras</groupId>

            <artifactId>thymeleaf-extras-springsecurity4</artifactId>

            <version>3.0.2.RELEASE</version>

        </dependency>
配置MySecurityConfig.java
官方说明自定义SecurityConfig替换默认配置参考链接: https://docs.spring.io/spring-security/site/docs/5.2.0.BUILD-SNAPSHOT/reference/htmlsingle/#oauth2resourceserver-sansboot
protected void configure(HttpSecurity http) {

    http

        .authorizeRequests()

            .anyRequest()

       .authenticated()

            .and()

           .oauth2ResourceServer()

            .jwt();

}
自定义MySecurityConfig.java
@EnableWebSecurity //该注解本身就包含@Configuration

public class MySecurityConfig extends WebSecurityConfigurerAdapter {

    @Override

    protected void configure(HttpSecurity http) throws Exception {

        //super.configure(http);

        //定制授权规则

        http.authorizeRequests().antMatchers("/").permitAll().

                antMatchers("/level1/**").hasRole("VIP1").

                antMatchers("/level2/**").hasRole("VIP2").

                antMatchers("/level3/**").hasRole("VIP3");

    }

}
配置自动生成的登录页
开启自动配置的 /login 登录页面,如果不配置, 那么无授权时会报403 Access is denied错误,且页面也不知道跳哪,因为还没有开启自动配置的login登录页面
,默认使用的是/login 和 /login?error, 现在改成/userlogin,会经过KungfuController的 @GetMapping("/userlogin")注解的方法.
也可以配置登录页及登录时的帐号密码字段是什么等.
http.formLogin().loginPage("/login").usernameParameter("username").passwordParameter("password");
配置登出界面
开启自动配置的注销功能,默认访问/logout表示注销,会清空session及cookie,注销成功后返回/login?logout页面
http.logout().logoutSuccessUrl("/");//自定义注销成功后跳转到/页面
配置认证规则
/**

 * 定义认证规则,管理帐号/密码

 *

 * @param auth

 * @throws Exception

 */

@Override

protected void configure(AuthenticationManagerBuilder auth) throws Exception {

    //auth.jdbcAuthentication(); //一般用jdbc

    //学习用内存认证

    auth.inMemoryAuthentication()

            .withUser("bobo").password("123456").roles("VIP1")

            .and().withUser("sisi").password("123456").roles("VIP1", "VIP2")

            .and().withUser("xixi").password("123456").roles("VIP1", "VIP2", "VIP3");

}
在pom.xml中引入thymeleaf依赖的springSecurity标签的插件
<!--在thymeleaf中使用认证标签需要的额外依赖-->

<dependency>

    <groupId>org.thymeleaf.extras</groupId>

    <artifactId>thymeleaf-extras-springsecurity4</artifactId>

    <version>3.0.2.RELEASE</version>

</dependency>
html标签体中引入security规范
<html xmlns:th="http://www.thymeleaf.org" xmlns:sec="http://www.thymeleaf.org/thymeleaf-extras-springsecurity4">
thymeleaf中显示用户信息
<div sec:authorize="isAuthenticated()">

    <h2> 您好 , <span sec:authentication="name"></span> 您的角色是 <span sec:authentication="principal.authorities"></span>

    </h2>

</div>
thymeleaf中显示判断是否有权限
<div sec:authorize="hasRole('VIP1')">

        <h3>普通武功秘籍</h3>

        <ul>

            <li><a th:href="@{/level1/1}">罗汉拳</a></li>

            <li><a th:href="@{/level1/2}">武当长拳</a></li>

            <li><a th:href="@{/level1/3}">全真剑法</a></li>

        </ul>

    </div>
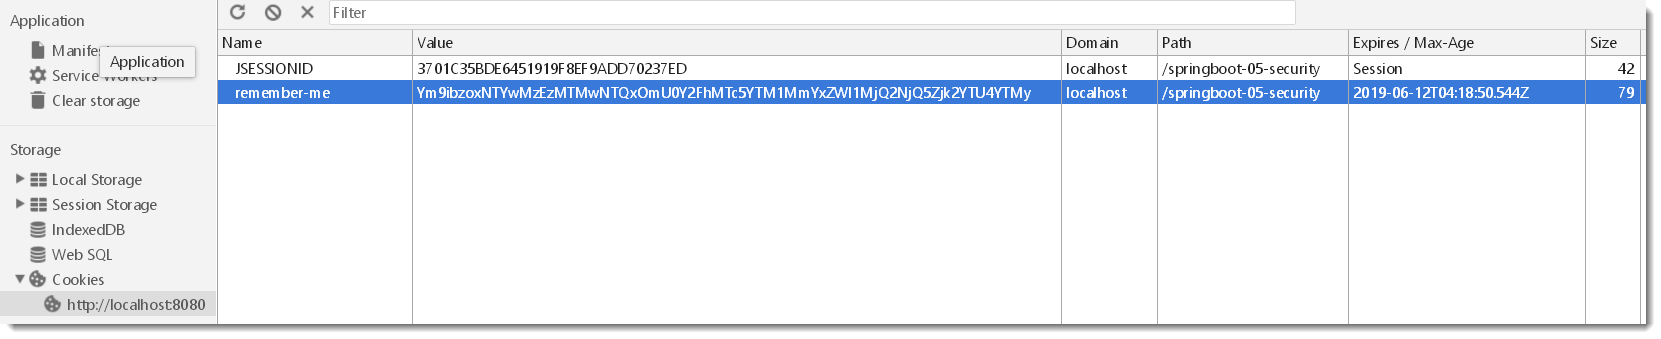
开启记住我功能
开启记住我功能登录成功,会从服务器返回添加名为remember-me的cookie指令, 以后访问页面都会带上该cookie, 只要服务器通过检查就可以免登录了,默认14天后失效
http.rememberMe().rememberMeParameter("remember-me");
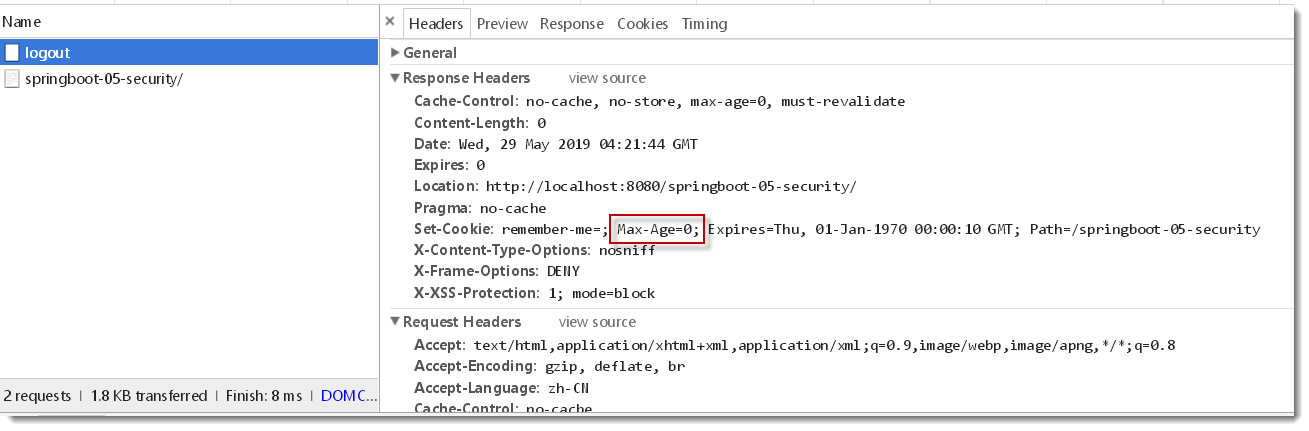
此时使用/logout会一并清除名为remember-me的cookie , 因为/logout请求在header头中携带了Max-Age=0参数
自定义登录页,使用/userlogin
        //默认使用的是/login 和 /login?error, 现在改成/userlogin,会经过KungfuController的 @GetMapping("/userlogin")注解的方法

        http.formLogin().loginPage("/userlogin");//.usernameParameter("username").passwordParameter("password");
默认get形式的/login来到登录页, post形式的/login用来表单登录.
当自定义了登录页面/userlogin后,那么get形式的/userlogin来到登录页, post形式的/userlogin用来表单登录. 见源码注释说明如下:

最终项目结构

核心配置类MySecurityConfig.java内容
package com.example.security.config;

import org.springframework.context.annotation.Configuration;

import org.springframework.security.config.annotation.authentication.builders.AuthenticationManagerBuilder;

import org.springframework.security.config.annotation.web.builders.HttpSecurity;

import org.springframework.security.config.annotation.web.configuration.EnableWebSecurity;

import org.springframework.security.config.annotation.web.configuration.WebSecurityConfigurerAdapter;

import org.springframework.security.config.annotation.web.configurers.ExpressionUrlAuthorizationConfigurer;

@EnableWebSecurity //该注解本身就包含@Configuration

public class MySecurityConfig extends WebSecurityConfigurerAdapter {

    @Override

    protected void configure(HttpSecurity http) throws Exception {

        //super.configure(http);

        //定制授权规则

        http.authorizeRequests().antMatchers("/").permitAll().

                antMatchers("/level1/**").hasRole("VIP1").

                antMatchers("/level2/**").hasRole("VIP2").

                antMatchers("/level3/**").hasRole("VIP3");

        //参见 HttpSecurity 类的    public FormLoginConfigurer<HttpSecurity> formLogin() 方法注解

        //开启自动配置的 /login 登录页面,如果不配置, 那么无授权时会报403 Access is denied错误,且页面也不知道跳哪,因为还没有开启自动配置的login登录页面

        //默认使用的是/login 和 /login?error, 现在改成/userlogin,会经过KungfuController的 @GetMapping("/userlogin")注解的方法

        http.formLogin().loginPage("/userlogin");//.usernameParameter("username").passwordParameter("password");

        //开启自动配置的注销功能,默认访问/logout表示注销,会清空session及cookie,注销成功后返回/login?logout页面

        http.logout().logoutSuccessUrl("/");//自定义注销成功后跳转到/页面

        //开启记住我功能登录成功,会从服务器返回添加名为remember-me的cookie指令, 以后访问页面都会带上该cookie, 只要服务器通过检查就可以免登录了,默认14天后失效

        http.rememberMe().rememberMeParameter("remember-me");

    }

    /**

     * 定义认证规则,管理帐号/密码

     *

     * @param auth

     * @throws Exception

     */

    @Override

    protected void configure(AuthenticationManagerBuilder auth) throws Exception {

        //auth.jdbcAuthentication(); //一般用jdbc

        //学习用内存认证

        auth.inMemoryAuthentication()

                .withUser("bobo").password("123456").roles("VIP1")

                .and().withUser("sisi").password("123456").roles("VIP1", "VIP2")

                .and().withUser("xixi").password("123456").roles("VIP1", "VIP2", "VIP3");

    }

}
直接关闭所有Security的所有拦截功能
http.headers().frameOptions().disable().and().authorizeRequests().antMatchers("/**", "/login*").permitAll(); // 所有用户都可以访问
http.csrf().disable().authorizeRequests().anyRequest().permitAll().and().logout().permitAll(); //禁用security的 csrf功能
SpringSecurity默认是禁止接收POST请求的,而GET是默认可以的,官网给出两个解决方案:1是发送请求时带上CSRF的token,2是不推荐的做法(把SpringSecurity的CSRF功能关掉),不然很有可能是get请求正常, 但post请求报403 forbidden
springboot security版本差异
帐号密码配置差异(亲测)
在security 4版本中(springboot1.5中使用), application.yml中简易帐号密码配置如下,没有spring:
security:

  user:

    name: bobo

    password:
而在security 5版本中(springboot2开始使用), application.yml中帐号密码配置如下, 多了一层spring:
spring:

  security:

    user:

      name: bobo

      password:
禁用security
pom.xml中如果存在以下依赖
<dependency>

           <groupId>org.springframework.boot</groupId>

           <artifactId>spring-boot-starter-security</artifactId>

</dependency>
启动时控制台会随机生成登录密码, 打印如下:
Using generated security password: -34f3-444c--7243038d0af9
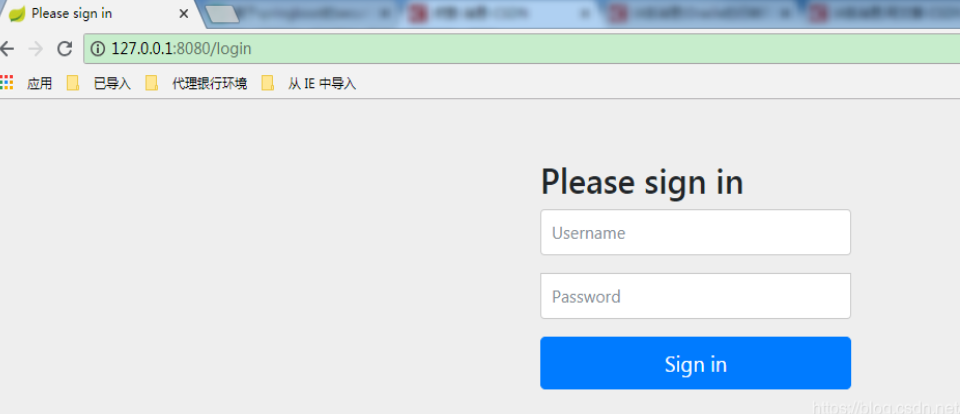
请求接口时会跳到登录页 Please sign in
禁用spring security两种方法, 配置类或启动类上加上如下(二选一)
@EnableAutoConfiguration(exclude = {SecurityAutoConfiguration.class}) 或者 @SpringBootApplication(exclude = {SecurityAutoConfiguration.class })
登录问题
Spring Security在登录验证中增加额外数据(如验证码)==>https://www.cnblogs.com/phoenix-smile/p/5666686.html
spring security前台登录如何传递多个参数要后台验证==>https://bbs.csdn.net/topics/390493958 (在username里用_分割啊哈哈哈)
$$$$$$$$$$spring security controller层实现登陆==>https://blog.csdn.net/qq_34675369/article/details/91499798
我的项目git地址
https://gitee.com/KingBoBo/springboot-05-security
最好的教程
在SpringBoot 中使用Security安全框架==>https://blog.csdn.net/qwe86314/article/details/89509765
相关系列 文章
SpringBoot 整合 oauth2(三)实现 token 认证==>https://www.jianshu.com/p/19059060036b
SpringBoot 整合 Security(一)实现用户认证并判断返回json还是view==>https://www.jianshu.com/p/18875c2995f1
SpringBoot 整合 Security(二)实现验证码登录==>https://www.jianshu.com/p/9d08c767b33e
springboot security 安全的更多相关文章
- Springboot security cas整合方案-实践篇
承接前文Springboot security cas整合方案-原理篇,请在理解原理的情况下再查看实践篇 maven环境 <dependency> <groupId>org.s ...
- Springboot security cas源码陶冶-ExceptionTranslationFilter
拦截关键的两个异常,对异常进行处理.主要应用异常则跳转至cas服务端登录页面 ExceptionTranslationFilter#doFilter-逻辑入口 具体操作逻辑如下 public void ...
- Springboot security cas源码陶冶-CasAuthenticationFilter
Springboot security cas整合方案中不可或缺的校验Filter类或者称为认证Filter类,其内部包含校验器.权限获取等,特开辟新地啃啃 继承结构 - AbstractAuthen ...
- Springboot security cas整合方案-原理篇
前言:网络中关于Spring security整合cas的方案有很多例,对于Springboot security整合cas方案则比较少,且有些仿制下来运行也有些错误,所以博主在此篇详细的分析cas原 ...
- SpringBoot security关闭验证
SpringBoot security关闭验证 springboot2.x security关闭验证https://www.cnblogs.com/guanxiaohe/p/11738057.html ...
- springboot+security整合(3)自定义鉴权
说明 springboot 版本 2.0.3源码地址:点击跳转 系列 springboot+security 整合(1) springboot+security 整合(2) springboot+se ...
- springboot+security整合(2)自定义校验
说明 springboot 版本 2.0.3源码地址:点击跳转 系列 springboot+security 整合(1) springboot+security 整合(2) springboot+se ...
- springboot+security整合(1)
说明 springboot 版本 2.0.3源码地址:点击跳转 系列 springboot+security 整合(1) springboot+security 整合(2) springboot+se ...
- SpringBoot + Security实现权限控制
网上找了好几个,因为各种原因不太行,下面这个亲测可行 参考:https://blog.csdn.net/u012702547/article/details/54319508 基于SpringBoot ...
随机推荐
- javascript的Touch事件
js的touch事件,一般用于移动端的触屏滑动 $(function(){document.addEventListener("touchmove", _touch, false) ...
- 分享非常漂亮的WPF界面框架源码及插件化实现原理
在上文<分享一个非常漂亮的WPF界面框架>中我简单的介绍了一个界面框架,有朋友已经指出了,这个界面框架是基于ModernUI来实现的,在该文我将分享所有的源码,并详细描述如何基于Mod ...
- Java学习笔记 - 类方法与代码块的执行顺序
类的初始化顺序 使用一个简单的父子类例子来做示范,代码执行顺序在代码后有标注. class Parent { public static String p_StaticField = "父类 ...
- JasperReport填充报表6
任何报告工具的主要目的是为了生产出高品质的文档.举报填充过程有助于报告工具通过操纵数据集来实现这一目标.需要报表填充过程的主要输入是: 报表模板:这是实际的JasperReport文件 报告参数:这些 ...
- hive启动一些错误记录
java.lang.RuntimeException: Unable to instantiate org.apache.hadoop.hive.ql.metadata.SessionHiveMeta ...
- WebConfig配置文件
<?xml version="1.0"?> <!--注意: 除了手动编辑此文件以外,您还可以使用 Web 管理工具来配置应用程序的设置.可以使用 Visual S ...
- Leetcode485.Max Consecutive Ones最大连续1的个数
给定一个二进制数组, 计算其中最大连续1的个数. 示例 1: 输入: [1,1,0,1,1,1] 输出: 3 解释: 开头的两位和最后的三位都是连续1,所以最大连续1的个数是 3. 注意: 输入的数组 ...
- 谷歌浏览器flash被禁用解决方法
谷歌浏览器访问设置:chrome://settings/content/flash 把要启动flash插件的网址添加进去
- 国内在Amazon fireTV或者fire平板下载应用(netflix\hulu\YouTube)的方法
1.首先需要vpn翻墙至U.S. 2.需要一个美国亚马逊账户,并设置收货地址 (Manage Your Fire & Kindle 1-Click Payment Settings ),如果只 ...
- 【html、CSS、javascript-2】CSS基础
CSS CSS是Cascading Style Sheets的简称,中文称为层叠样式表,用来控制网页数据的表现,可以使网页的表现与数据内容分离. 一 css的四种引入方式 1.行内式 ...