SpringMVC实现上传下载功能
配置资源(jar包)
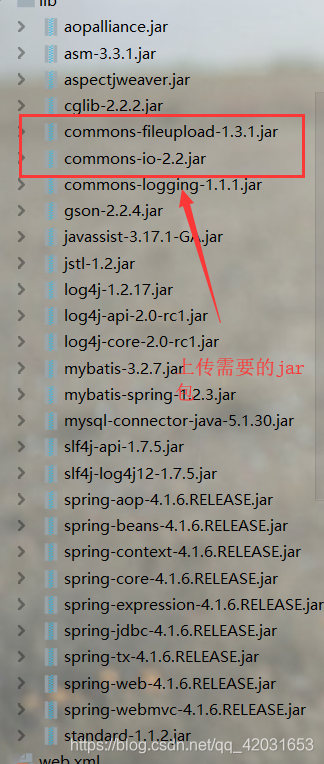
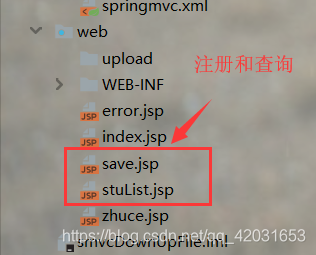
将前端页面整理好:
写核心的几个配置文件(applicationContext+wed.xml+jdbc.properties+log4j+springMVC.xml)
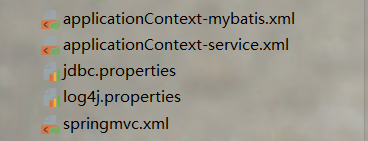
都是在src目录下:
applicationContext-mybatis.xml(配置和mybatis关联的文件)
<?xml version="1.0" encoding="UTF-8"?>

<beans xmlns="http://www.springframework.org/schema/beans"

       xmlns:xsi="http://www.w3.org/2001/XMLSchema-instance"

       xmlns:aop="http://www.springframework.org/schema/aop"

       xmlns:context="http://www.springframework.org/schema/context"

       xmlns:tx="http://www.springframework.org/schema/tx"

       xsi:schemaLocation="http://www.springframework.org/schema/beans

        http://www.springframework.org/schema/beans/spring-beans.xsd

        http://www.springframework.org/schema/aop

        http://www.springframework.org/schema/aop/spring-aop.xsd

        http://www.springframework.org/schema/context

        http://www.springframework.org/schema/context/spring-context.xsd

        http://www.springframework.org/schema/tx

        http://www.springframework.org/schema/tx/spring-tx.xsd">

    <context:property-placeholder location="classpath:jdbc.properties"></context:property-placeholder>

    <!--连接数据库-->

    <bean id="ds" class="org.springframework.jdbc.datasource.DriverManagerDataSource">

        <property name="driverClassName" value="${driver1}"/>

        <property name="url" value="${url1}"/>

        <property name="username" value="root"/>

        <property name="password" value="root"/>

    </bean>

    <!--获得sqlsession-->

    <bean id="factory" class="org.mybatis.spring.SqlSessionFactoryBean">

        <property name="dataSource" ref="ds"/>

        <property name="typeAliasesPackage" value="com.bjsxt.pojo"/>

    </bean>

    <!--扫描mapper文件-->

    <bean id="mapper" class="org.mybatis.spring.mapper.MapperScannerConfigurer">

        <property name="sqlSessionFactoryBeanName" value="factory"/>

        <property name="basePackage" value="com.bjsxt.mapper"/>

    </bean>

</beans>
applicationContext-service.xml(配置service层):
<!--扫描业务层注解-->

    <context:component-scan base-package="com.bjsxt.service.impl"></context:component-scan>
如果需要进行事务操作:
<!--配置声明事务-->

    <bean id="TransactionManager" class="org.springframework.jdbc.datasource.DataSourceTransactionManager">

        <property name="dataSource" ref="ds"></property>

    </bean>

    <!--扫描事务注解-->

    <tx:annotation-driven></tx:annotation-driven>
web.xml
<?xml version="1.0" encoding="UTF-8"?>

<web-app xmlns="http://xmlns.jcp.org/xml/ns/javaee"

         xmlns:xsi="http://www.w3.org/2001/XMLSchema-instance"

         xsi:schemaLocation="http://xmlns.jcp.org/xml/ns/javaee http://xmlns.jcp.org/xml/ns/javaee/web-app_4_0.xsd"

         version="4.0">

    <servlet>

        <servlet-name>mvc</servlet-name>

        <servlet-class>org.springframework.web.servlet.DispatcherServlet</servlet-class>

        <init-param>

            <param-name>contextConfigLocation</param-name>

            <param-value>classpath:springmvc.xml</param-value>

        </init-param>

    </servlet>

    <servlet-mapping>

        <servlet-name>mvc</servlet-name>

        <!--处理jsp都可以使用-->

        <url-pattern>/</url-pattern>

    </servlet-mapping>

    <context-param>

        <param-name>contextConfigLocation</param-name>

        <param-value>classpath:applicationContext-*.xml</param-value>

    </context-param>

    <!--配置监听器-->

    <listener>

        <listener-class>org.springframework.web.context.ContextLoaderListener</listener-class>

    </listener>

</web-app>
MVC分层:
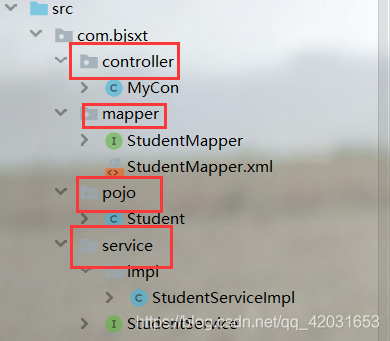
控制层(controller):
由于是为了测试上传下载的功能,我并没有将功能对应的控制层分开写,就写了一个文件,用注解去访问
package com.bjsxt.controller;

import com.bjsxt.pojo.Student;

import com.bjsxt.service.StudentService;

import org.apache.commons.io.IOUtils;

import org.springframework.beans.factory.annotation.Autowired;

import org.springframework.stereotype.Controller;

import org.springframework.web.bind.annotation.RequestMapping;

import org.springframework.web.multipart.MultipartFile;

import javax.servlet.ServletOutputStream;

import javax.servlet.http.HttpServletRequest;

import javax.servlet.http.HttpServletResponse;

import java.awt.font.MultipleMaster;

import java.io.*;

import java.util.List;

import java.util.UUID;

@Controller

public class MyCon {

    @Autowired

    StudentService ss;

    //下载图片操作

    @RequestMapping("download")

    public void download(String filename, String filetype, HttpServletRequest req, HttpServletResponse resp) throws IOException {

        //获取服务器的图片路径

        String realPath = req.getServletContext().getRealPath("/upload");

        //获取图片的名称和类型 String filename,String filetype

        File file=new File(realPath+"/"+filename);

        //将文件写入

        InputStream inputStream=new FileInputStream(file);

        //设置属性下载到本地

        //1.设置长度

        resp.setContentLength((int)file.length());

        //2.设置类型

        resp.setContentType(filetype);

        //3.设置响应头

        resp.setHeader("Content-Disposition","attachment;filename="+filename);

        //将读取的文件写入本地

        OutputStream outputStream = resp.getOutputStream();

        IOUtils.copy(inputStream,outputStream);

        //关闭流

        outputStream.close();

        inputStream.close();

    }

    @RequestMapping("filee")

    public String filee(String uname, String pwd, MultipartFile fil) throws IOException {

        System.out.println(uname+":"+pwd);

        System.out.println(fil.getName()+"---"+fil.getSize()+"---"+fil.getContentType()+"---"+fil.getOriginalFilename());

        fil.transferTo(new File("F:/img/"+fil.getOriginalFilename()));

        return "redirect:/index.jsp";

    }

    @RequestMapping("insertStu")

    public String insertStu(String name,int age,Double score, MultipartFile filename, HttpServletRequest req) throws IOException {

        /*System.out.println(uname+":"+pwd);

        System.out.println(fil.getName()+"---"+fil.getSize()+"---"+fil.getContentType()+"---"+fil.getOriginalFilename());*/

       /* if (fil.getSize()>2*1024){

            req.setAttribute("error","最大的上传文件是2kb");

            return "forward:/zhuce.jsp";

       }*/

        String realPath = req.getServletContext().getRealPath("/upload");

        /*为了防止文件名相同,覆盖原文件*/

        String uuid = UUID.randomUUID().toString();

        //截取图片的后缀名

        String filname = filename.getOriginalFilename().substring(filename.getOriginalFilename().lastIndexOf("."));

        String fname=uuid+filname;

        File file=new File(realPath);

        if (!file.exists()){

            file.mkdirs();

        }

        //文件上传完毕

        filename.transferTo(new File(file,fname));

        Student student=new Student();

        student.setAge(age);

            student.setFilename(fname);

        student.setName(name);

        student.setScore(score);

        student.setFiletype(filename.getContentType());

        //调用业务层

        int addstu = ss.addstu(student);

        if (addstu>0){

            //插入成功

            return "redirect:/findall";

        }else {

            //插入失败

            req.setAttribute("error","插入失败");

            return "forward:/save.jsp";

        }

    }

    @RequestMapping("findall")

    public String findall(HttpServletRequest req){

        List<Student> students = ss.finall();

        req.setAttribute("students",students);

        return "forward:/stuList.jsp";

    }

}
Mapper接口:
package com.bjsxt.mapper;

import com.bjsxt.pojo.Student;

import java.util.List;

public interface StudentMapper {

    int insetstu(Student student);

    List<Student> selAll();

}
Mapper.xml:
<?xml version="1.0" encoding="UTF-8" ?>

<!DOCTYPE mapper

        PUBLIC "-//mybatis.org//DTD Mapper 3.0//EN"

        "http://mybatis.org/dtd/mybatis-3-mapper.dtd">

<mapper namespace="com.bjsxt.mapper.StudentMapper">

    <insert id="insetstu" parameterType="student" >

        insert into student values(default,#{name},#{age},#{score},#{filename},#{filetype})

    </insert>

    <select id="selAll" resultType="Student">

        select * from student

    </select>

</mapper>
Service接口:
package com.bjsxt.service;

import com.bjsxt.pojo.Student;

import java.util.List;

public interface StudentService {

    public int addstu(Student student);

    public List<Student> finall();

}
Service实现类
package com.bjsxt.service.impl;

import com.bjsxt.mapper.StudentMapper;

import com.bjsxt.pojo.Student;

import com.bjsxt.service.StudentService;

import org.springframework.beans.factory.annotation.Autowired;

import org.springframework.stereotype.Service;

import java.util.List;

@Service("ssi")

public class StudentServiceImpl implements StudentService {

    @Autowired

    StudentMapper studentMapper;

    @Override

    public int addstu(Student student) {

        int insetstu = studentMapper.insetstu(student);

        return insetstu;

    }

    @Override

    public List<Student> finall() {

        List<Student> students = studentMapper.selAll();

        return students;

    }

}
pojo实体类:
package com.bjsxt.pojo;

import java.io.Serializable;

public class Student implements Serializable {

    private  int id;

    private  String name;

    private  int age;

    private  double score;

    private  String filename;

    private  String filetype;

    public Student(int id, String name, int age, double score, String filename, String filetype) {

        this.id = id;

        this.name = name;

        this.age = age;

        this.score = score;

        this.filename = filename;

        this.filetype = filetype;

    }

    public Student() {

    }

    public int getId() {

        return id;

    }

    public void setId(int id) {

        this.id = id;

    }

    public String getName() {

        return name;

    }

    public void setName(String name) {

        this.name = name;

    }

    public int getAge() {

        return age;

    }

    public void setAge(int age) {

        this.age = age;

    }

    public double getScore() {

        return score;

    }

    public void setScore(double score) {

        this.score = score;

    }

    public String getFilename() {

        return filename;

    }

    public void setFilename(String filename) {

        this.filename = filename;

    }

    public String getFiletype() {

        return filetype;

    }

    public void setFiletype(String filetype) {

        this.filetype = filetype;

    }

    @Override

    public String toString() {

        return "Student{" +

                "id=" + id +

                ", name='" + name + '\'' +

                ", age=" + age +

                ", score=" + score +

                ", filename='" + filename + '\'' +

                ", filetype='" + filetype + '\'' +

                '}';

    }

}
实现效果:

SpringMVC实现上传下载功能的更多相关文章
- springmvc文件上传下载简单实现案例(ssm框架使用)
springmvc文件上传下载实现起来非常简单,此springmvc上传下载案例适合已经搭建好的ssm框架(spring+springmvc+mybatis)使用,ssm框架项目的搭建我相信你们已经搭 ...
- SpringMVC文件上传下载(单文件、多文件)
前言 大家好,我是bigsai,今天我们学习Springmvc的文件上传下载. 文件上传和下载是互联网web应用非常重要的组成部分,它是信息交互传输的重要渠道之一.你可能经常在网页上传下载文件,你可能 ...
- JavaWeb实现文件上传下载功能实例解析
转:http://www.cnblogs.com/xdp-gacl/p/4200090.html JavaWeb实现文件上传下载功能实例解析 在Web应用系统开发中,文件上传和下载功能是非常常用的功能 ...
- 【转】Android 服务器之SFTP服务器上传下载功能
原文网址:http://blog.csdn.net/tanghua0809/article/details/47056327 本文主要是讲解Android服务器之SFTP服务器的上传下载功能,也是对之 ...
- 【转】Android 服务器之SFTP服务器上传下载功能 -- 不错
原文网址:http://blog.csdn.net/tanghua0809/article/details/47056327 本文主要是讲解Android服务器之SFTP服务器的上传下载功能,也是对之 ...
- JavaWeb实现文件上传下载功能实例解析 (好用)
转: JavaWeb实现文件上传下载功能实例解析 转:http://www.cnblogs.com/xdp-gacl/p/4200090.html JavaWeb实现文件上传下载功能实例解析 在Web ...
- SpringMVC文件上传下载
在Spring MVC的基础框架搭建起来后,我们测试了spring mvc中的返回值类型,如果你还没有搭建好springmvc的架构请参考博文->http://www.cnblogs.com/q ...
- SpringMVC 文件上传下载
目录 文件上传 MultipartFile对象 文件下载 上传下载示例 pom.xml增加 创建uploadForm.jsp 创建uploadForm2.jsp 创建userInfo.jsp spri ...
- java中文上传下载功能实现(自己测试项目)
1.新建maven项目打war包 2.搭建springMVC框架 web.xml文件配置 <?xml version="1.0" encoding="UTF-8&q ...
随机推荐
- Linux PXE自动化安装centos6,centos7系统
1.PXE是什么? pxe是Preboot Excution Environment的缩写,是intel公司研发,基于client/server的网络模式,支持远程主机通过网络从远端服务器下载镜,并由 ...
- 『嗨威说』算法设计与分析 - PTA 程序存储问题 / 删数问题 / 最优合并问题(第四章上机实践报告)
本文索引目录: 一.PTA实验报告题1 : 程序存储问题 1.1 实践题目 1.2 问题描述 1.3 算法描述 1.4 算法时间及空间复杂度分析 二.PTA实验报告题2 : 删数问题 2.1 实践题目 ...
- Springboot 自动配置浅析
Introduction 我们知道,SpringBoot之所以强大,就是因为他提供了各种默认的配置,可以让我们在集成各个组件的时候从各种各样的配置文件中解放出来. 拿一个最普通的 web 项目举例.我 ...
- Golang stackError 补充go错误定位能力
用过go的都知道,go的error实现很简单,errors.New实现的error类并不存储堆栈数据,这导致一个问题,就是多次error return后,或panic后recover了,找不到触发异常 ...
- 020.掌握Pod-Pod基础使用
一 Pod定义详解 1.1 完整Pod定义文件 apiVersion: v1 #必选,版本号,例如v1,版本号必须可以用 kubectl api-versions 查询到 kind: Pod #必选, ...
- CentOS7下安装带用户认证的squid服务器(无防火墙)
1 安装squid服务: yum install squid 安装htpasswd : yum install httpd-tools 2 配置squid配置文件 #该定义需在 ...
- nyoj 4 ASCII码排序
ASCII码排序 时间限制:3000 ms | 内存限制:65535 KB | 难度:2 描述 输入三个字符(可以重复)后,按各字符的ASCII码从小到大的顺序输出这三个字符. 输入 第一 ...
- nyoj 40-公约数和公倍数(gcd)
40-公约数和公倍数 内存限制:64MB 时间限制:1000ms Special Judge: No accepted:30 submit:47 题目描述: 小明被一个问题给难住了,现在需要你帮帮忙. ...
- ssm 不能将查询的结果返回到界面的一个原因
* 在controller类中,应先定义一个ArrayList的集合即就是: List<Product> defaultProductList = new ArrayList(); // ...
- python:time模块
(鱼c)time模块详解http://bbs.fishc.com/forum.php?mod=viewthread&tid=51326&extra=page%3D1%26filter% ...