Flutter — IDE Shortcuts for Faster Development
https://medium.com/flutter-community/flutter-ide-shortcuts-for-faster-development-2ef45c51085b
If you’re new to Flutter development then you must be cribbing about the nested structures, how hard it is to add or remove widgets from the middle of the code or how hard it is to find where one widget ends and another begins. Then, you spend your whole day matching opening brackets to their closing ones, or at least trying to. You’re not alone, we’ve all been there. It took time for us to figure out the shortcuts, but maybe you won’t have to go through that because I’m at your service; and I’ve curated all those shortcuts that allow for faster and smoother development in Flutter.
PS. All of these shortcuts work for Android Studio and IntelliJ in Windows. Are you coming from iOS? Maybe this article will help.
Creating a new Stateless or Stateful widget
Guess what? You don’t have to manually write your widget classes and override the build functions. The IDE can do it for you!
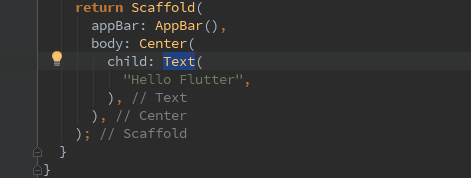
Just type stless to create a Stateless Widget like this:
Or stful to create Stateful widget:

What if you already created a Stateless Widget and added lots of children, but then realized you’re going to need a State after all? Should you make a new StatefulWidgetand then manually transfer all of your code over to it? You don’t have to!
You can just place your cursor on the StatelessWidget, press Alt + Enterand click on Convert to StatefulWidget . All the boilerplate code will be created for you, automatically.
Yay!
More magical things you can do with Alt+Enter
Alt + Enteris the magic wand you use for faster development in Flutter. You can click on any widget , press Alt + Enterand see what options you have for that particular widget . I.E.:
Add a Padding Around a Widget
Let’s say you have a widget that’s not a Container, so it doesn’t have a padding property. You want to give some padding but you’re afraid of messing up your widget structure. With our magic wand, you can add your Padding without messing anything up:
Just press Alt + Enter on the widget that needs a padding around it, and click on Add Padding And now you can modify the default padding to be whatever you want.
Center a Widget
This isn’t anything too extraordinary. It just centers your widget in the available space. This does not work inside a Column or Row.
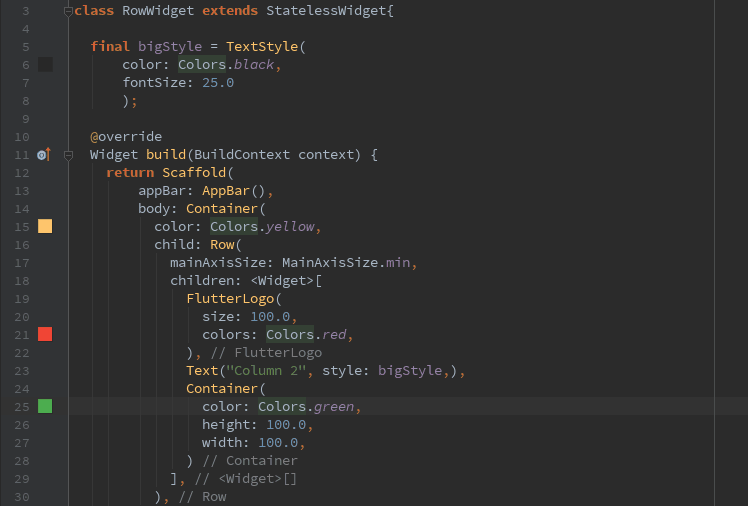
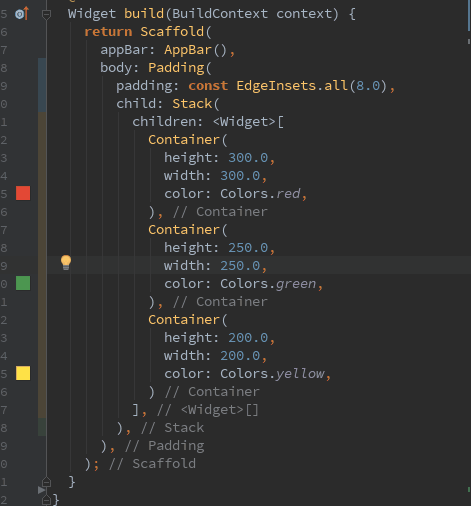
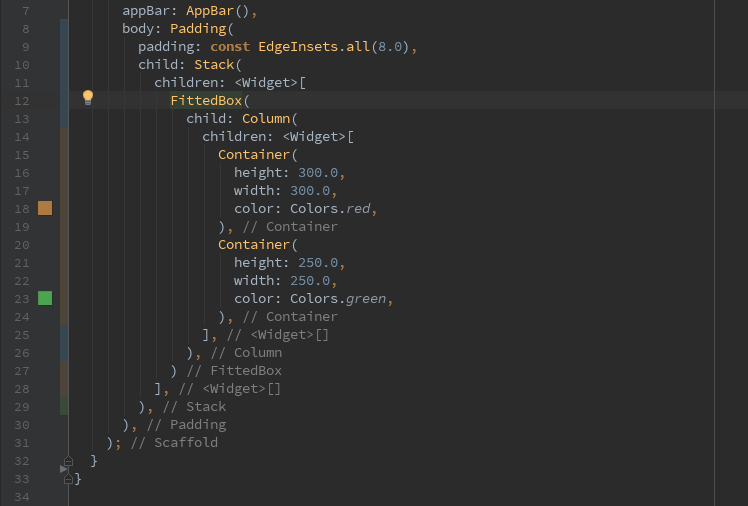
Wrap with a Container, Column, Row or any other Widget
You can use the same approach to wrap your widget with a Container . So now, the newContainer becomes your Widget’s parent.
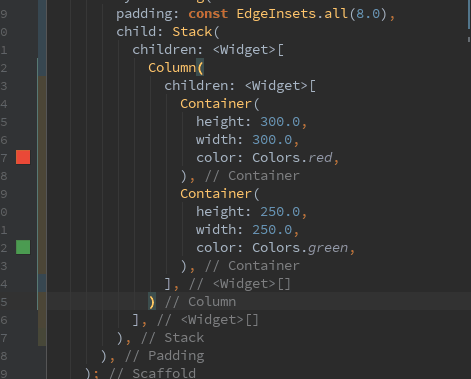
Or, you can even wrap multiple widgets with a Column or Row in just one click!
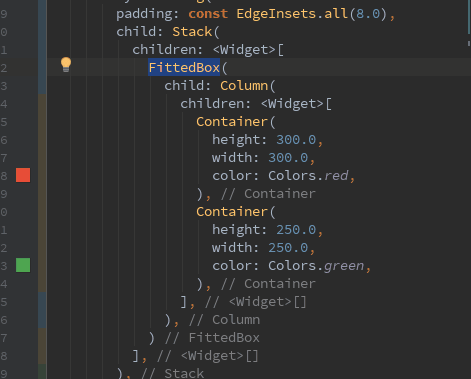
Or wrap them with any other widget:
You can even wrap them with a StreamBuilder if you have the latest version of the Flutter plugin. Thanks Bhavik Makwana for telling me about it.

Don’t like a widget? Remove it with the Magic Wand.
Yes, removing a widget is just as easy as adding a new one.
Easily copy-paste or cut-paste a line of code
You can easily cut/copy a line of code, just by keeping your cursor at the end of the line, and pressing Ctrl+X or Ctrl+C and paste it like you normally do ( Ctrl+V )

Ctrl+X

Ctrl+C
Thanks to Sanal Kv who taught me this in the comments. :)
See the Source Code for Your Widget
That’s the best thing about an open source framework. If you want to know what’s going on behind the scenes of an amazing widget or a class, then you can just put your cursor on it and press Ctrl + B . It will act as a link, taking you straight to your Widget’s source code where you can read everything about it. Flutter also uses comments to explain a lot of its code, making for great documentation.
Check Your Widget’s Properties Without Leaving the File or Tab
If you want to check what amazing things your widget can do without leaving your file and digging into the docs, just press Ctrl+Shift+I to get a quick look at the Widget’s constructor.
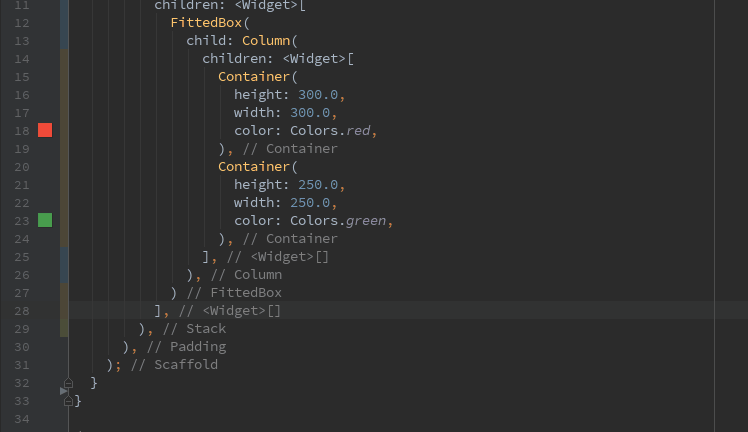
Quickly Select an Entire Widget
A lot of times we need to extract/remove an entire widget and we try to manually select them:
If it is a really large widget, then figuring out which closing bracket belongs to which Widget can be pretty confusing and we don’t want to mess up our entire structure.
At times like these, I like to use this super helpful shortcut.
Just click on the widget you want to extract and press Ctrl+W. The entire Widget is selected for you without your cursor moving an inch.

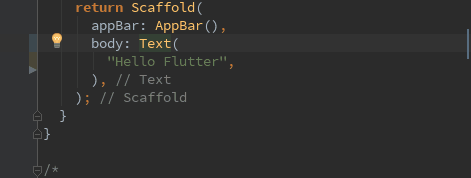
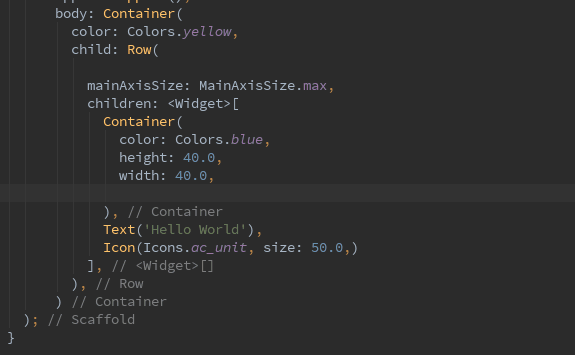
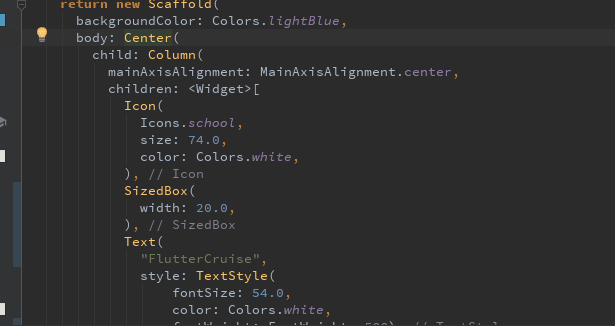
Fix the Code Structure
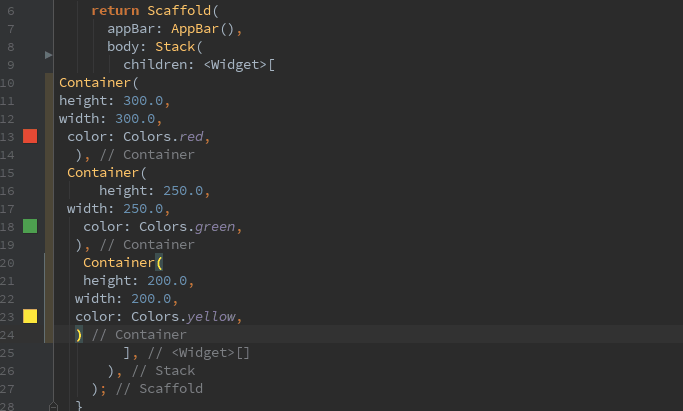
Sometimes your code will just be a mess. Kind of like this:
For people like me who get a little of OCD looking at code that doesn’t have proper indentation, this can be a nightmare.
Now, most IDEs have this feature, (though may not be the same key combination). Just press Ctrl+Alt+L to fix your indentation and reformat code.
Smooth
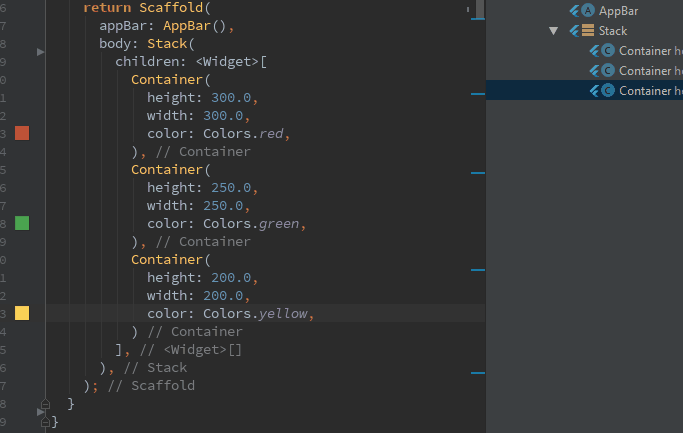
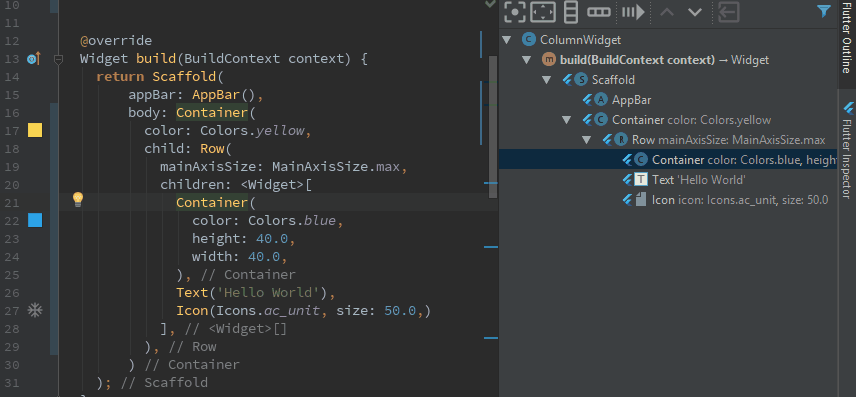
See an Outline of Your UI
Most of our Widgets don’t have just one child in their tree. They have trees of children that have their own children and plenty more. If your Widget has children nested as little as four deep, then it can get pretty hard to understand the structure of the code just by scrolling through it. Thankfully, we have Flutter Outline to come to our rescue!
You can find Flutter Outline on the extreme right of your IDE; it’s one of the vertical tabs and is located just above the Flutter Inspector. When you open it up, it looks like this:
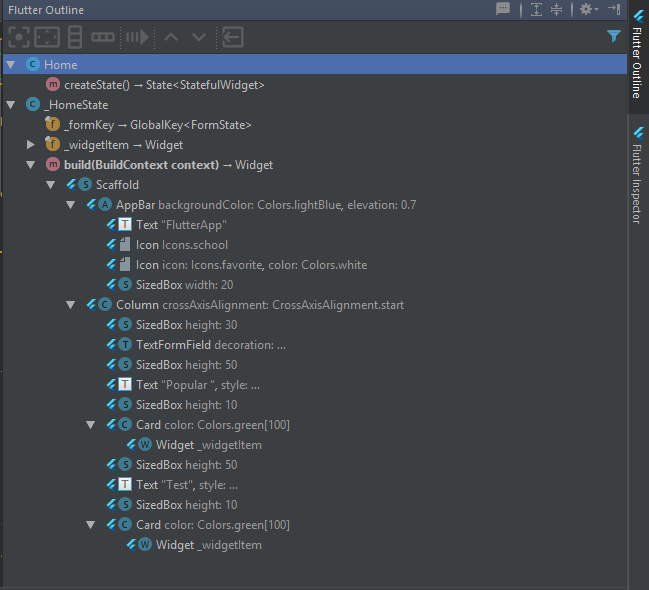
Now, you can clearly see which Widget is where, how they’re arranged within the UI and which widgets have other children widgets. Easy peasy!
Extract code into a method
Flutter Outline is a pretty useful tool. You can do most of the things you did with Alt + Enter, like wrap with a Column and Center a Widget, but there are even more awesome things available under the Flutter Outline tab! One of them is the Extract Method button.
Fourth button here
If you feel like you’re writing a Widget that’s getting too long and should probably be a custom Widget, then instead of manually shifting the code into a metho, you can just use this tool to do the magic for you!
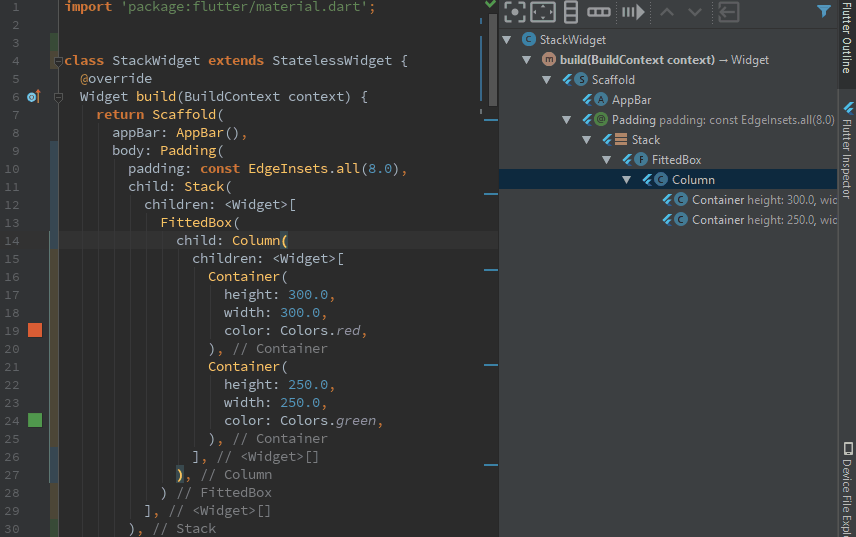
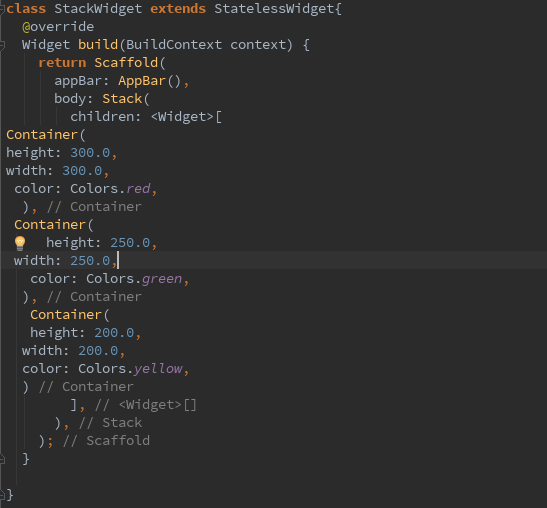
Move Widget Up and Down
Another crazy thing you can do with Flutter Outline is if you have multiple children in a widget, you can easily rearrange their order:
You can also move just one line up or down by pressing Shift+Alt+Up / Down
Thanks to Filip Hracek for this tip.
Refactor Renaming
This is a pretty basic tool that most IDE’s have. This lets you rename a method, Widget, class or file name and it makes sure that references to it are renamed as well. Just use Shift + F6 and type in the new name:

Remove Unused Imports
So you’re working on a project and you imported lots of files, but over time your code gets optimized more and more. Eventually, you might not need a lot of those imports anymore. Now you are ready to push your code to production, but you need to clean it up and remove all those unused imports. Maybe you normally remove them manually, but since I’m here to make your life easier, here’s a pretty-pretty keyboard combination:Ctrl+Alt+O

I can’t remember anything, Pooja
And if you are like Filip Hracek here who sometimes forgets his shortcuts, we have this important magic spell for you. Just Ctrl+Shift+A and type in the shortcut you need.
That’s all the shortcuts I know for now. Be sure to check back often for more tips, tricks, and other great stuff!
For everyone looking for the VSCode version of this article, here’s one by Ganesh .s.p.
Flutter — IDE Shortcuts for Faster Development的更多相关文章
- [Flutter] Windows平台Flutter开发环境搭建(Andorid Studio)
前两天网友在群里说起了Flutter,就了解了一下,在手机上跑了它的demo,直接就被打动了. 虽然网上有很多教程,但真正开始的时候,还是会碰到很多坑.下面详细的讲解Flutter + Android ...
- flutter 1.5 in action
flutter 1.5 in action https://flutter.dev/docs/get-started/flutter-for/react-native-devs https://flu ...
- 无限可能 | Flutter 2 重点更新一览
我们非常高兴在本周发布了 Flutter 2.自 Flutter 1.0 发布至今已有两年多的时间,在如此短暂的时间内,我们解决了 24,541 个 issue,合并了来自 765 个贡献者的 17, ...
- 【老孟Flutter】Flutter 2的新功能
老孟导读:昨天期待已久的 Flutter 2.0 终于发布了, Flutter Web和Null安全性趋于稳定,Flutter桌面安全性逐渐转向Beta版! 原文链接:https://medium.c ...
- Flutter 不一样的跨平台解决方案
本文主要介绍Flutter相关的东西,包括Fuchsia.Dart.Flutter特性.安装以及整体架构等内容. 1. 简介 Flutter作为谷歌最近推出的跨平台开发框架,一经推出便吸引了不少注意. ...
- Open Tools API :IDE Main Menus
http://www.davidghoyle.co.uk/WordPress/?p=777 http://www.davidghoyle.co.uk/WordPress/?page_id=1110 h ...
- [Flutter] Creating, Importing & Using Dynamic Widgets from Other Files in a Flutter Application
In this lesson we’ll learn how to import widgets we’ve created in other files & use them in our ...
- IDE介绍以及Eclipse的简单使用
一.IDE介绍 ① 什么是IDE? 1. IDE全称是”Integrated Development Environment”,中文称为“集成开发环境”; 2.是用于提供程序开发环境的应用程序, ...
- Flutter 初探 -
flutter 安装 经过许久的关注,及最近google算是真正地推行flutter时,加上掘金小册也有相应的教程,我知道自己得跟着这一波潮流学习了,不然迟早会面临着小程序的危(大家都会了就你不会), ...
随机推荐
- .Net Core 发送https请求/.net core 调用数字证书 使用X509Certificate2
.Net Core 发送https请求 .net core 调用数字证书 使用X509Certificate2 .NET下面的 .netfromwork使用和asp.net core下使用方式不一样 ...
- DesktopSharing<转>
https://github.com/PHZ76/DesktopSharing/tree/e1543975576e6c4fc5c2404b2f4c9c99c0350bd3 git:https://gi ...
- MyBatis(九):Mybatis Java API批量操作(增、删、改、查)
最近工作中用到了mybatis的Java API方式进行开发,顺便也整理下该功能的用法,接下来会针对基本部分进行学习: 1)Java API处理一对多.多对一的用法: 2)增.删.改.查的用法: 3) ...
- Java一行代码
1.整数格式化成0X 的形式字符串 String hour=String.format("%02d", txtWaringTime.getCurrentHour()); Strin ...
- continue & tag in GO
Go语言中 continue 语句可以结束当前循环,开始下一次的循环迭代过程,仅限在 for 循环内使用,在 continue 语句后添加标签时,表示开始标签对应的循环,例如: package mai ...
- LeetCode 257. Binary Tree Paths(二叉树根到叶子的全部路径)
Given a binary tree, return all root-to-leaf paths. Note: A leaf is a node with no children. Example ...
- WPF Button LinkButton 绑定多个值 Template
效果如下: 代码如下: <Button Click="InventoryDetail_OnClick" Template="{StaticResource Inve ...
- conda进行python环境隔离
1.环境隔离的问题 在使用python时,常常遇到的问题: pip安装库A,依赖库B-2.1版本 pip安装库C,以来库B-3.1版本,安装会提示库B的版本冲突错误. 这种情况下就需要做环境隔离 co ...
- 报错:pymysql.err.InternalError: (1054, "Unknown column 'AType' in 'field list'")
报错背景: 报错前sql代码展示: List = ['] # sql = "insert into test(id, name) value ("+"'"+ L ...
- qt 获取汉字拼音首字母
#include "mainwindow.h"#include "ui_mainwindow.h"#include <QDebug>#include ...