springmvc笔记(来自慕课网)
1.准备工作:springmvc相关的jar包.
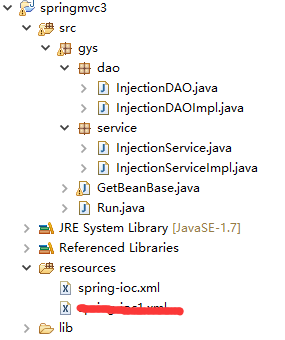
2.这里我们先用eclipse来操作.
首先看一个接口编程,后面的所有知识点都是通过这个接口编程引出的.

OneInterface.java
 package gys;

 public interface OneInterface {

     String hello(String world);

 }
OneInterfaceImpl.java
 package gys;

 public class OneInterfaceImpl implements OneInterface{

     @Override

     public String hello(String world) {

         return "从接口返回的是:"+world;

     }

 }
Run.java
package gys;

public class Run{

    public static void main(String[] args) {

        OneInterface oif=new OneInterfaceImpl();

        System.out.println(oif.hello("思思博士"));

    }

}
这个地方可以通过接口的形式跑起来了.
下面看看使用springmc方式如何来跑起来这个项目
因为我们不是web项目,没有通过配置web.xml来配置,读取springmvc配置文件.
只能手写读取配置文件.

getBeanBase.java
 package gys;

 import org.springframework.context.support.ClassPathXmlApplicationContext;

 //创建springmvc容器,获取配置文件中的bean.

 public class GetBeanBase {

     private ClassPathXmlApplicationContext context;

     private String springXmlpath;

     public GetBeanBase(){};

     public GetBeanBase(String springXmlPath){

         this.springXmlpath=springXmlPath;

     }

     public void start(){

         if(springXmlpath.equals("")||springXmlpath==null||springXmlpath.isEmpty()){

             springXmlpath="classpath*:spring-*.xml";

         }

         try {

             //创建spring容器

             context=new ClassPathXmlApplicationContext(springXmlpath.split("[,\\s]+"));

             context.start();

         } catch (Exception e) {

             e.printStackTrace();

         }

     }

     public void end(){

         context.destroy();

     }

     @SuppressWarnings("unchecked")

     protected <T extends Object> T getBen(String beanId){

         return (T) context.getBean(beanId);

     }

     protected <T extends Object> T GetBeanBase(Class<T> clazz){

         return context.getBean(clazz);

     }

 }
spring-ioc.xml
 <?xml version="1.0" encoding="UTF-8"?>

 <beans xmlns="http://www.springframework.org/schema/beans" xmlns:xsi="http://www.w3.org/2001/XMLSchema-instance" xmlns:p="http://www.springframework.org/schema/p" xmlns:context="http://www.springframework.org/schema/context"

     xmlns:mvc="http://www.springframework.org/schema/mvc" xmlns:tx="http://www.springframework.org/schema/tx" xmlns:aop="http://www.springframework.org/schema/aop"

     xsi:schemaLocation="

         http://www.springframework.org/schema/beans

         http://www.springframework.org/schema/beans/spring-beans.xsd

         http://www.springframework.org/schema/context

         http://www.springframework.org/schema/context/spring-context.xsd

         http://www.springframework.org/schema/mvc

         http://www.springframework.org/schema/mvc/spring-mvc-3.2.xsd

         http://www.springframework.org/schema/tx

         http://www.springframework.org/schema/tx/spring-tx.xsd

         http://www.springframework.org/schema/aop

         http://www.springframework.org/schema/aop/spring-aop.xsd">

         <bean id="oneInterface" class="gys.OneInterfaceImpl"></bean>

 </beans>
Run.java
 package gys;

 public class Run extends GetBeanBase{

     public Run(){

         super("classpath*:spring-ioc.xml");

         start();

     }

     public void testHello(){

         OneInterface oneInterface=super.getBen("oneInterface");

         System.out.println(oneInterface.hello("传入的参数"));

         end();

     }

     public static void main(String[] args) {

         Run run=new Run();

         run.testHello();

     }

 }
通过这个方式也是可以做到同样的输出.这里的GetBeanBase在后面很多地方使用.
spring注入:在启动Spring容器加载bean配置的时候,完成对变量的赋值行为
常用的两种注入方式:
设置注入
构造注入
1.设置注入:
InjectionDao.java
package gys.dao;

public interface InjectionDAO {

    void save(String info);

}
InjectionDAOImpl.java
package gys.dao;

public class InjectionDAOImpl implements InjectionDAO{

    @Override

    public void save(String info) {

        System.out.println("保存数据:"+info);

    }

}
InjectionService.java
package gys.service;

public interface InjectionService {

    public void save(String info);

}
InjectionServiceImpl.java
 package gys.service;

 import gys.dao.InjectionDAO;

 public class InjectionServiceImpl implements InjectionService{

     private InjectionDAO injectionDAO;

     //设置注入,这里的set方法spring会自动调用,无需手动调用

     public void setInjectionDAO(InjectionDAO injectionDAO) {

         this.injectionDAO = injectionDAO;

     }

     @Override

     public void save(String info) {

         System.out.println("service接受参数:"+info);

         info=info+":"+this.hashCode();

         injectionDAO.save(info);

     }

 }
spring-ioc.xml
 <?xml version="1.0" encoding="UTF-8"?>

 <beans xmlns="http://www.springframework.org/schema/beans" xmlns:xsi="http://www.w3.org/2001/XMLSchema-instance" xmlns:p="http://www.springframework.org/schema/p" xmlns:context="http://www.springframework.org/schema/context"

     xmlns:mvc="http://www.springframework.org/schema/mvc" xmlns:tx="http://www.springframework.org/schema/tx" xmlns:aop="http://www.springframework.org/schema/aop"

     xsi:schemaLocation="

         http://www.springframework.org/schema/beans

         http://www.springframework.org/schema/beans/spring-beans.xsd

         http://www.springframework.org/schema/context

         http://www.springframework.org/schema/context/spring-context.xsd

         http://www.springframework.org/schema/mvc

         http://www.springframework.org/schema/mvc/spring-mvc-3.2.xsd

         http://www.springframework.org/schema/tx

         http://www.springframework.org/schema/tx/spring-tx.xsd

         http://www.springframework.org/schema/aop

         http://www.springframework.org/schema/aop/spring-aop.xsd">

     <!-- 设置注入 -->

     <bean id="injectionService" class="gys.service.InjectionServiceImpl">

     <!--InjectionServiceImpl类中必须有一个属性name,类型是ref,springmvc会自动调用这个属性的set方法. -->

         <property name="injectionDAO" ref="injectionDAO"></property>

     </bean>

     <bean id="injectionDAO" class="gys.dao.InjectionDAOImpl"></bean>

 </beans>
Run.java
 package gys;

 import gys.service.InjectionService;

 public class Run extends GetBeanBase{

     public Run(){

         super("classpath*:spring-ioc.xml");

         start();

     }

     public void testSetter(){

         InjectionService service=super.getBen("injectionService");

         service.save("这是要保存的数据");

         end();

     }

     public static void main(String[] args) {

         Run run=new Run();

         run.testSetter();

     }

 }
2.构造注入:
对上面的代码做一下改变:
InjectionServiceImpl.java
 package gys.service;

 import gys.dao.InjectionDAO;

 public class InjectionServiceImpl implements InjectionService{

     private InjectionDAO injectionDAO;

     //构造器注入

     public InjectionServiceImpl(InjectionDAO injectionDAO){

         this.injectionDAO=injectionDAO;

     }

     @Override

     public void save(String info) {

         System.out.println("service接受参数:"+info);

         info=info+":"+this.hashCode();

         injectionDAO.save(info);

     }

 }
spring-ioc.xml
 <?xml version="1.0" encoding="UTF-8"?>

 <beans xmlns="http://www.springframework.org/schema/beans" xmlns:xsi="http://www.w3.org/2001/XMLSchema-instance" xmlns:p="http://www.springframework.org/schema/p" xmlns:context="http://www.springframework.org/schema/context"

     xmlns:mvc="http://www.springframework.org/schema/mvc" xmlns:tx="http://www.springframework.org/schema/tx" xmlns:aop="http://www.springframework.org/schema/aop"

     xsi:schemaLocation="

         http://www.springframework.org/schema/beans

         http://www.springframework.org/schema/beans/spring-beans.xsd

         http://www.springframework.org/schema/context

         http://www.springframework.org/schema/context/spring-context.xsd

         http://www.springframework.org/schema/mvc

         http://www.springframework.org/schema/mvc/spring-mvc-3.2.xsd

         http://www.springframework.org/schema/tx

         http://www.springframework.org/schema/tx/spring-tx.xsd

         http://www.springframework.org/schema/aop

         http://www.springframework.org/schema/aop/spring-aop.xsd">

     <!-- 构造注入 -->

     <bean id="injectionService" class="gys.service.InjectionServiceImpl">

     <!--在类InjectionServiceImpl中有一个属性name,还必须必须有一个构造器,这个构造器的参数是name值   类型是ref -->

         <constructor-arg name="injectionDAO" ref="injectionDAO" />

     </bean>

     <bean id="injectionDAO" class="gys.dao.InjectionDAOImpl"></bean>

 </beans>
Run.java
 package gys;

 import gys.service.InjectionService;

 public class Run extends GetBeanBase{

     public Run(){

         super("classpath*:spring-ioc.xml");

         start();

     }

     public void testCons(){

         InjectionService service=super.getBen("injectionService");

         service.save("这是要保存的数据");

         end();

     }

     public static void main(String[] args) {

         Run run=new Run();

         run.testCons();

     }

 }
下班了,未完待续......
springmvc笔记(来自慕课网)的更多相关文章
- jq1.6版本前后,attr()和prop()的区别,来自慕课网的回答
jQuery 1.6之前 ,.attr()方法在取某些 attribute 的值时,会返回 property 的值,这就导致了结果的不一致.从 jQuery 1.6 开始, .prop()方法 方法返 ...
- 网站优化之-SEO在网页制作中的应用(信息来自慕课网课程笔记)
一.SEO基本介绍. 1.搜索引擎工作原理. 2.seo简介:SEarch Engine Optimization,搜索引擎优化.为了提升网页在搜索引擎自然搜索结果中的收录数量及排序位置而做的优化行为 ...
- PHP性能优化学习笔记--PHP周边性能优化--来自慕课网Pangee http://www.imooc.com/learn/205
PHP一般运行于Linux服务器中,周边主要包括:Linux运行环境.文件存储.数据库.缓存.网络 常见PHP场景的开销次序: 读写内存<<读写数据库(使用内存作为缓存.异步处理)< ...
- PHP性能优化学习笔记--语言级性能优化--来自慕课网Pangee http://www.imooc.com/learn/205
使用ab进行压力测试 ab -n行数 -c并发数 url 重点关注下面两点: 1.Request per secend : 每秒可接收的请求数 2.Time per request : 每次请求所耗费 ...
- 安卓开发_慕课网_Fragment实现Tab(App主界面)
学习内容来自“慕课网” 这里用Fragment来实现APP主界面 思路: 底部横向排列4个LinearLayout,每个LinearLayout包含一个图片按钮和一个文字 1.默认显示第一个功能(微信 ...
- 安卓开发_慕课网_ViewPager与FragmentPagerAdapter实现Tab实现Tab(App主界面)
学习内容来自“慕课网” ViewPager与FragmentPagerAdapter实现Tab 将这两种实现Tab的方法结合起来.效果就是可以拖动内容区域来改变相应的功能图标亮暗 思路: Fragme ...
- 安卓开发_慕课网_ViewPager实现Tab(App主界面)
学习内容来自“慕课网” 网站上一共有4种方法来实现APP主界面的TAB方法 这里学习第一种 ViewPager实现Tab 布局文件有7个, 主界面acitivity.layout <Linear ...
- es6 Object.assign ECMAScript 6 笔记(六) ECMAScript 6 笔记(一) react入门——慕课网笔记 jquery中动态新增的元素节点无法触发事件解决办法 响应式图像 弹窗细节 微信浏览器——返回操作 Float 的那些事 Flex布局 HTML5 data-* 自定义属性 参数传递的四种形式
es6 Object.assign 目录 一.基本用法 二.用途 1. 为对象添加属性 2. 为对象添加方法 3. 克隆对象 4. 合并多个对象 5. 为属性指定默认值 三.浏览器支持 ES6 O ...
- react入门——慕课网笔记
一. jsx 1. 被称为语法糖:糖衣语法,计算机语言中添加的某种语法,对语言的功能没有影响,更方便程序员使用,增加程序的可读性,降低出错的可能性 类似的还有(coffeescript,typescr ...
随机推荐
- cacti 添加
一,为已有host添加新的监控图 (基于snmp) 在console控制台下点击“New Graphs”,选择要添加监控图的主机.在Graph Templates中选择一个Graph模板,本例选择SN ...
- webpack需要全局安装,才能使用webpack命令
webpack全局安装,具体项目中才能使用webpack命令: npm install webpack -g
- jquery显示隐藏toggle
<!DOCTYPE html PUBLIC "-//W3C//DTD XHTML 1.0 Transitional//EN" "http://www.w3.org/ ...
- CentOS 6.6 yum 方式安装sunversion 服务器
检查已安装版本 #检查是否安装了低版本的SVN[root@localhost /]# rpm -qa subversion #如果存储旧版本,卸载旧版本SVN[root@localhost modul ...
- js下的sleep实现
function sleep(d){ for(var t = Date.now();Date.now() - t <= d;); } sleep(5000); //当前方法暂停5秒
- Spring入门学习(一)
SpringMVC基础平台补充(2016.03.03) 如果想要开发SpringMVC,那么前期依次安装好:JDK(jdk-8u74-windows-x64,安装后配置环境变量JAVA_HOME和CL ...
- 修改webftp,在线文件管理
项目中要添加一个文件管理功能,允许用户维护自己的静态HTML文件. 在网上找了一个现成的在线PHP文件管理工具:webftp 下载地址:http://down.chinaz.com/soft/3067 ...
- MySQL使用Union创建视图报错
mysql> select * from test_main; +----+-------+ | id | value | +----+-------+ | 1 | ONE | | 2 ...
- Saltstack系列4:Saltstack之Grains组件
grains说明 grains是Saltstack最重要的组件之一,grains的作用是手机被控主机的基本信息,这些信息通常都是一些静态类的数据,包括CPU.内核.操作系统.虚拟化等,在服务器端可以根 ...
- erlang实现ssh
借鉴自http://blog.csdn.net/the__one/article/details/6567443和http://blog.yufeng.info/archives/1509 单命令启动 ...