创建REST服务应用程序
Web服务类别有两种,一种是基于SOAP协议的服务,另一种是基于HTTP协议的REST架构风格的服务。REST服务的数据格式有两种:XML 和 JSON,REST服务已被大量应用于移动互联网中。
本文将简要介绍创建一个REST服务应用程序以及使用它(仅仅是个示例,没有做代码优化)。
一、创建REST服务
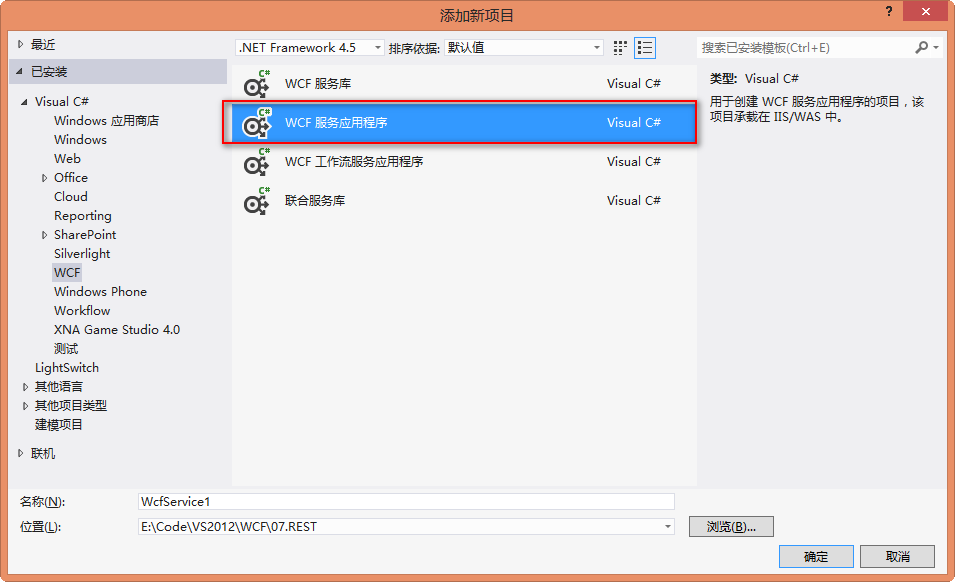
1.新建一个空的解决方案,添加“WCF服务应用程序”
2.添加一个服务契约接口:IStudentService.cs,代码如下:
using System;

using System.Collections.Generic;

using System.Linq;

using System.Text;

using System.Threading.Tasks;

using System.ServiceModel;

using System.Runtime.Serialization;

namespace RESTService

{

    /// <summary>

    /// 服务契约:对学生信息进行增删改查

    /// </summary>

    [ServiceContract]

    public interface IStudentService

    {

        [OperationContract]

        string GetStuName(string id);

        [OperationContract]

        Student GetStu(string id);

        [OperationContract]

        bool UpdateStuAge(Student stu);

        [OperationContract]

        bool AddStu(Student stu);

        [OperationContract]

        bool DeleteStu(Student stu);

    }

    /// <summary>

    /// 数据契约

    /// </summary>

    [DataContract]

    public class Student

    {

        [DataMember]

        public string ID { get; set; }

        [DataMember]

        public string Name { get; set; }

        [DataMember]

        public int Age { get; set; }

    }

}
3.添加REST服务:StudentService.svc,如图:

该服务类实现上述服务契约接口,代码如下:
using System;

using System.Collections.Generic;

using System.Linq;

using System.Runtime.Serialization;

using System.ServiceModel;

using System.ServiceModel.Activation;

using System.ServiceModel.Web;

using System.Text;

namespace RESTService

{

    [ServiceBehavior(InstanceContextMode = InstanceContextMode.Single)]

    [AspNetCompatibilityRequirements(RequirementsMode = AspNetCompatibilityRequirementsMode.Allowed)]

    public class StudentService : IStudentService

    {

        // 要使用 HTTP GET,请添加 [WebGet] 特性。(默认 ResponseFormat 为 WebMessageFormat.Json)

        // 要创建返回 XML 的操作,

        //     请添加 [WebGet(ResponseFormat=WebMessageFormat.Xml)],

        //     并在操作正文中包括以下行:

        //         WebOperationContext.Current.OutgoingResponse.ContentType = "text/xml";

        private static List<Student> _listStu;

        public StudentService()

        {

            _listStu = new List<Student>

            {

                new Student{ID="",Name="Jim",Age=},

                new Student{ID="",Name="Tom",Age=}

            };

        }

        [WebGet(UriTemplate = "REST/GetName/{id}", ResponseFormat = WebMessageFormat.Json)]

        public string GetStuName(string id)

        {

            Student stu = this.GetStu(id);

            if (stu == null)

            {

                return "不存在此学生!";

            }

            else

            {

                return stu.Name;

            }

        }

        [WebGet(UriTemplate = "REST/Get/{id}", ResponseFormat = WebMessageFormat.Json)]

        public Student GetStu(string id)

        {

            Student stu = _listStu.Find(s => s.ID == id);

            return stu;

        }

        [WebInvoke(UriTemplate = "REST/Update/", Method = "POST", ResponseFormat = WebMessageFormat.Json, BodyStyle = WebMessageBodyStyle.Bare)]

        public bool UpdateStuAge(Student stu)

        {

            Student stu2 = this.GetStu(stu.ID);

            if (stu2 == null)

            {

                return false;

            }

            else

            {

                _listStu.Remove(stu2);

                _listStu.Add(stu);

                return true;

            }

        }

        [WebInvoke(UriTemplate = "REST/Add/", Method = "PUT", ResponseFormat = WebMessageFormat.Json, BodyStyle = WebMessageBodyStyle.Bare)]

        public bool AddStu(Student stu)

        {

            if (_listStu == null)

            {

                _listStu = new List<Student>();

            }

            _listStu.Add(stu);

            return true;

        }

        [WebInvoke(UriTemplate = "REST/Delete/", Method = "DELETE", ResponseFormat = WebMessageFormat.Json, BodyStyle = WebMessageBodyStyle.Bare)]

        public bool DeleteStu(Student stu)

        {

            Student stu2 = this.GetStu(stu.ID);

            if (stu2 == null)

            {

                return false;

            }

            else

            {

                _listStu.Remove(stu2);

                return true;

            }

        }

    }

}
4.WebConfig文件内容:
<?xml version="1.0" encoding="utf-8"?>

<configuration>

  <appSettings>

    <add key="aspnet:UseTaskFriendlySynchronizationContext" value="true" />

  </appSettings>

  <system.web>

    <compilation debug="true" targetFramework="4.5" />

    <httpRuntime targetFramework="4.5"/>

  </system.web>

  <system.serviceModel>

    <services>

      <service name="RESTService.StudentService">

        <endpoint address="" behaviorConfiguration="RESTService.StudentServiceAspNetAjaxBehavior"

          binding="webHttpBinding" contract="RESTService.IStudentService" />

      </service>

    </services>

    <behaviors>

      <endpointBehaviors>

        <behavior name="RESTService.StudentServiceAspNetAjaxBehavior">

          <!--<enableWebScript />-->

          <webHttp helpEnabled="true"/>

        </behavior>

      </endpointBehaviors>

      <serviceBehaviors>

        <behavior name="">

          <serviceMetadata httpGetEnabled="true" httpsGetEnabled="true" />

          <serviceDebug includeExceptionDetailInFaults="true" />

        </behavior>

      </serviceBehaviors>

    </behaviors>

    <protocolMapping>

        <add binding="basicHttpsBinding" scheme="https" />

    </protocolMapping>

    <serviceHostingEnvironment aspNetCompatibilityEnabled="true"

      multipleSiteBindingsEnabled="true" />

  </system.serviceModel>

  <system.webServer>

    <modules runAllManagedModulesForAllRequests="true"/>

    <!--

        若要在调试过程中浏览 Web 应用程序根目录,请将下面的值设置为 True。

        在部署之前将该值设置为 False 可避免泄露 Web 应用程序文件夹信息。

      -->

    <directoryBrowse enabled="true"/>

  </system.webServer>

</configuration>
5.在浏览器中查看REST服务信息

在浏览器地址栏的url后面输入help,即可查看该服务提供了哪些操作

二、调用REST服务
1.为了演示方便,本例采用WinForm应用程序调用REST服务(当然你也可以使用Android,IOS,IPad,WP等等其他客户端进行测试),界面效果如图:

2.后台代码:
using System;

using System.Collections.Generic;

using System.ComponentModel;

using System.Data;

using System.Drawing;

using System.Linq;

using System.Net;

using System.Text;

using System.Threading.Tasks;

using System.Windows.Forms;

using System.Runtime.Serialization.Json;

using RESTService;

using System.IO;

namespace RESTClient

{

    public partial class Form1 : Form

    {

        public Form1()

        {

            InitializeComponent();

        }

        /// <summary>

        /// Json 反序列化

        /// </summary>

        /// <typeparam name="T"></typeparam>

        /// <param name="jsonString"></param>

        /// <returns></returns>

        public static T JsonDeserialize<T>(string jsonString)

        {

            DataContractJsonSerializer serializer = new DataContractJsonSerializer(typeof(T));

            MemoryStream ms = new MemoryStream(Encoding.UTF8.GetBytes(jsonString));

            T obj = (T)serializer.ReadObject(ms);

            return obj;

        }

        /// <summary>

        /// Json 反序列化

        /// </summary>

        /// <typeparam name="T"></typeparam>

        /// <param name="ms"></param>

        /// <returns></returns>

        public static T JsonDeserialize<T>(Stream ms)

        {

            DataContractJsonSerializer serializer = new DataContractJsonSerializer(typeof(T));

            T obj = (T)serializer.ReadObject(ms);

            return obj;

        }

        /// <summary>

        /// Json 序列化

        /// </summary>

        /// <typeparam name="T"></typeparam>

        /// <param name="t"></param>

        /// <returns></returns>

        public static string JsonSerializer<T>(T t)

        {

            DataContractJsonSerializer serializer = new DataContractJsonSerializer(typeof(T));

            using (MemoryStream ms = new MemoryStream())

            {

                serializer.WriteObject(ms, t);

                return Encoding.UTF8.GetString(ms.ToArray());

            }

        }

        /// <summary>

        /// GET 操作

        /// </summary>

        /// <param name="sender"></param>

        /// <param name="e"></param>

        private void btnGet_Click(object sender, EventArgs e)

        {

            string uri = string.Format("http://localhost:4563/StudentService.svc/rest/get/{0}", this.txtID.Text.Trim());

            HttpWebRequest wr = (HttpWebRequest)WebRequest.Create(uri);

            wr.Method = "GET";

            HttpWebResponse resp = (HttpWebResponse)wr.GetResponse();

            if (resp.ContentLength <= )

            {

                MessageBox.Show("不存在此学生!");

                this.txtID.Text = "";

                this.txtName.Text = "";

                this.txtAge.Text = "";

            }

            else

            {

                Stream ms = resp.GetResponseStream();

                Student stu = JsonDeserialize<Student>(ms);

                this.txtID.Text = stu.ID;

                this.txtName.Text = stu.Name;

                this.txtAge.Text = stu.Age.ToString();

            }

        }

        /// <summary>

        /// POST 操作

        /// </summary>

        /// <param name="sender"></param>

        /// <param name="e"></param>

        private void btnPost_Click(object sender, EventArgs e)

        {

            string uri = string.Format("http://localhost:4563/StudentService.svc/rest/update/");

            Student stu = new Student();

            stu.ID = this.txtID.Text.Trim();

            stu.Name = this.txtName.Text.Trim();

            stu.Age = Convert.ToInt32(this.txtAge.Text.Trim());

            byte[] bs = Encoding.UTF8.GetBytes(JsonSerializer<Student>(stu));

            HttpWebRequest wr = (HttpWebRequest)WebRequest.Create(uri);

            wr.Method = "POST";

            wr.ContentLength = bs.Length;

            wr.ContentType = "application/json";

            using (Stream reqStream = wr.GetRequestStream())

            {

                reqStream.Write(bs, , bs.Length);

            }

            HttpWebResponse resp = (HttpWebResponse)wr.GetResponse();

            using (Stream respStream = resp.GetResponseStream())

            {

                StreamReader sr = new StreamReader(respStream);

                string result = sr.ReadToEnd();

                if (result == "true")

                {

                    MessageBox.Show("更新成功!");

                }

                else

                {

                    MessageBox.Show("更新失败!");

                }

            }

        }

        /// <summary>

        /// PUT 操作

        /// </summary>

        /// <param name="sender"></param>

        /// <param name="e"></param>

        private void btnPut_Click(object sender, EventArgs e)

        {

            string uri = string.Format("http://localhost:4563/StudentService.svc/rest/add/");

            Student stu = new Student();

            stu.ID = this.txtID.Text.Trim();

            stu.Name = this.txtName.Text.Trim();

            stu.Age = Convert.ToInt32(this.txtAge.Text.Trim());

            byte[] bs = Encoding.UTF8.GetBytes(JsonSerializer<Student>(stu));

            HttpWebRequest wr = (HttpWebRequest)WebRequest.Create(uri);

            wr.Method = "PUT";

            wr.ContentLength = bs.Length;

            wr.ContentType = "application/json";

            using (Stream reqStream = wr.GetRequestStream())

            {

                reqStream.Write(bs, , bs.Length);

            }

            HttpWebResponse resp = (HttpWebResponse)wr.GetResponse();

            using (Stream respStream = resp.GetResponseStream())

            {

                StreamReader sr = new StreamReader(respStream);

                string result = sr.ReadToEnd();

                if (result == "true")

                {

                    MessageBox.Show("添加成功!");

                }

                else

                {

                    MessageBox.Show("添加失败!");

                }

            }

        }

        /// <summary>

        /// DELETE 操作

        /// </summary>

        /// <param name="sender"></param>

        /// <param name="e"></param>

        private void btnDelete_Click(object sender, EventArgs e)

        {

            string uri = string.Format("http://localhost:4563/StudentService.svc/rest/delete/");

            Student stu = new Student();

            stu.ID = this.txtID.Text.Trim();

            byte[] bs = Encoding.UTF8.GetBytes(JsonSerializer<Student>(stu));

            HttpWebRequest wr = (HttpWebRequest)WebRequest.Create(uri);

            wr.Method = "DELETE";

            wr.ContentLength = bs.Length;

            wr.ContentType = "application/json";

            using (Stream reqStream = wr.GetRequestStream())

            {

                reqStream.Write(bs, , bs.Length);

            }

            HttpWebResponse resp = (HttpWebResponse)wr.GetResponse();

            using (Stream respStream = resp.GetResponseStream())

            {

                StreamReader sr = new StreamReader(respStream);

                string result = sr.ReadToEnd();

                if (result == "true")

                {

                    MessageBox.Show("删除成功!");

                }

                else

                {

                    MessageBox.Show("删除失败!");

                }

            }

        }

    }

}
创建REST服务应用程序的更多相关文章
- SharePoint Search之(一):创建Search服务应用程序
计划写一个关于怎样使用SharePoint Search的系列,包括下面几个方面: (一)创建Search Service Application (二)持续爬网(continues crawl) ( ...
- .NET创建一个即是可执行程序又是Windows服务的程序
不得不说,.NET中安装服务很麻烦,即要创建Service,又要创建ServiceInstall,最后还要弄一堆命令来安装和卸载. 今天给大家提供一种方式,直接使用我们的程序来安装/卸载服务,并且可以 ...
- C#/.NET基于Topshelf创建Windows服务的守护程序作为服务启动的客户端桌面程序不显示UI界面的问题分析和解决方案
本文首发于:码友网--一个专注.NET/.NET Core开发的编程爱好者社区. 文章目录 C#/.NET基于Topshelf创建Windows服务的系列文章目录: C#/.NET基于Topshelf ...
- vscode源码分析【四】程序启动的逻辑,最初创建的服务
第一篇: vscode源码分析[一]从源码运行vscode 第二篇:vscode源码分析[二]程序的启动逻辑,第一个窗口是如何创建的 第三篇:vscode源码分析[三]程序的启动逻辑,性能问题的追踪 ...
- vs 2010创建Windows服务定时timer程序
vs 2010创建Windows服务定时timer程序: 版权声明:本文为搜集借鉴各类文章的原创文章,转载请注明出处: http://www.cnblogs.com/2186009311CFF/p/ ...
- C# 创建Windows Service(Windows服务)程序
本文介绍了如何用C#创建.安装.启动.监控.卸载简单的Windows Service 的内容步骤和注意事项. 一.创建一个Windows Service 1)创建Windows Service项目 2 ...
- ASP.NET MVC 5 03 - 安装MVC5并创建第一个应用程序
不知不觉 又逢年底, 穷的钞票 所剩无几. 朋友圈里 各种装逼, 抹抹眼泪 MVC 继续走起.. 本系列纯属学习笔记,如果哪里有错误或遗漏的地方,希望大家高调指出,当然,我肯定不会低调改正的.(开个小 ...
- 用C#创建Windows服务(Windows Services)
用C#创建Windows服务(Windows Services) 学习: 第一步:创建服务框架 创建一个新的 Windows 服务项目,可以从Visual C# 工程中选取 Windows 服务(W ...
- .Net创建windows服务入门
本文主要记录学习.net 如何创建windows服务. 1.创建一个Windows服务程序 2.新建安装程序 3.修改service文件 代码如下 protected override void On ...
随机推荐
- sprintf函数减少字符串拼接错误
$return_string=""; foreach($cat_list as $value){ $return_string .= sprintf('<dd>< ...
- php设计模式之Proxy(代理模式)和Facade(外观)设计模式
Proxy(代理模式)和Facade(外观)设计模式它们均为更复杂的功能提供抽象化的概念,但这两种实现抽象化的过程大不相同 Proxy案例中,所有的方法和成员变量都来自于目标对象,必要时,该代理能够对 ...
- sublime配置问题
sublime本身功能有限,我们需要装上一些插件使其变得强大.sublime在各个操作系统下都可以运行,但在linux下运行需要注意中文输入的问题. 下面我主要介绍一下常用插件.配置的建议以及在lin ...
- Ubuntu通过APT配置开发环境
apt-get install vim apt-get install ssh apt-get install apache2 apt-get install redis-server apt-get ...
- STM32F0xx_GPIO配置详细过程
前言 对于初学STM32的人来说,很多基础的知识没有掌握,这些基础知识就成为阻挡他们入门的门槛.因此,今天也把基础的知识分享出来,带领那些还没有迈过这个门槛的人入门. 今天总结“GPIO配置详细”,以 ...
- jqGrid(2)
jqGrid使用方法: 原文地址:http://blog.csdn.net/y0ungroc/article/details/12008879 1. 下载文件 1. 下载jqGrid的软件包, ...
- python批量导出导入MySQL用户的方法
这篇文章主要介绍了 数据库迁移(A -> B),需要把用户也迁移过去,而用户表(mysql.user)有上百个用户.有2种方法进行快速迁移: 1,在同版本的条件下,直接备份A服务器的mysql数 ...
- ruby 程序中的文字编码
1,问题 在写一个统计代码行数的脚本时遇到一个问题: 代码: file_name = "code.rb"c = 0File.foreach(file_name) do |x| ne ...
- 测试C#代码执行时间
这个测试方法不是太精确,不过在同等环境下 可以测试下C#代码逻辑的执行性能吧 网上Copy来的. System.Diagnostics.Stopwatch stopwatch = new System ...
- 算法系列9《MD5》
MD5即Message-Digest Algorithm 5(信息-摘要算法5),用于确保信息传输完整一致.是计算机广泛使用的杂凑算法之一(又译摘要算法.哈希算法),主流编程语言普遍已有MD5实现. ...