如何在Web应用中添加一个JavaScript Excel查看器
前言
在现代的Web应用开发中,Excel文件的处理和展示是一项常见的需求。为了提供更好的用户体验和功能,经常需要在Web应用中添加一个JavaScript Excel查看器,小编今天将为大家展示如何借助葡萄城公司的纯前端表格控件——SpreadJS来创建一个Excel查看器。
项目结构
本项目将由三个文件构成:一个HTML文件、一个JavaScript文件以及一个CSS文件。
1.引入SpreadJS
(1)本地文件引入
SpreadJS可以从我们的网站下载并导入到程序中。下载后,我们可以解压ZIP包并将JS和CSS文件复制到代码包中,特别是这些文件。
- gc.spread.sheets.all.xx.x.x.min.js
- gc.spread.sheets.io.xx.x.x.min.js
- gc.spread.sheets.excel2013white.xx.x.x.css
将它们放入我们程序的文件夹后,我们可以在代码中引用它们:
<link rel="stylesheet" type="text/css" href="./styles/gc.spread.sheets.excel2013white.css">

<script src="./scripts/gc.spread.sheets.all.min.js" type="text/javascript"></script>

<script src="./scripts/gc.spread.sheets.charts.min.js" type="text/javascript"></script>

<script src="./scripts/gc.spread.sheets.shapes.min.js" type="text/javascript"></script>

<script src="./scripts/gc.spread.sheets.io.min.js" type="text/javascript"></script>
下载的示例中,默认就是这种方式,不需要作出修改。
(2)NPM引用
另一种方式是通过NPM的方式有引用SpreadJS。可以用如下命令安装依赖:
npm install @grapecity/spread-sheets @grapecity/spread-sheets-io @grapecity/spread-sheets-charts @grapecity/spread-sheets-shapes
然后,就可以在代码中这样引用这些文件:
<link rel= "stylesheet" type= "text/css" href= "./node_modules/@grapecity/spread-sheets/styles/gc.spread.sheets.excel2013white.css" >

<script src="./node_modules/ @grapecity/spread-sheets/dist/gc.spread.sheets.all.min.js" type="text/javascript"></script>

<script src="./node_modules/@grapecity/spread-sheets-io /dist/gc.spread.sheets.io.min.js" type="text/javascript"></script>

<script src="./node_modules/@grapecity/spread-sheets-charts/dist/gc.spread .sheets.charts.min.js" type="text/javascript"></script>

<script src="./node_modules/@grapecity/spread-sheets-shapes/dist/gc.spread.sheets.shapes.min .js" type="text/javascript"></script>
2.创建HTML内容
一旦引用了这些文件,我们就可以组合HTML页面和CSS样式。对于样式,已经提前创建好了:
body {

    position: absolute;

    top: 0;

    bottom: 0;

    left: 0;

    right: 0;

}

.sample-tutorial {

    position: relative;

    height: 100%;

    overflow: hidden;

}

.sample-container {

    width: calc(100% - 280px);

    height: 100%;

    float: left;

}

.sample-spreadsheets {

    width: 100%;

    height: calc(100% - 25px);

    overflow: hidden;

}

.options-container {

    float: right;

    width: 280px;

    height: 100%;

    box-sizing: border-box;

    background: #fbfbfb;

    overflow: auto;

}

.sample-options {

    z-index: 1000;

}

.inputContainer {

    width: 100%;

    height: auto;

    border: 1px solid #eee;

    padding: 6px 12px;

    margin-bottom: 10px;

    box-sizing: border-box;

}

.settingButton {

    color: #fff;

    background: #82bc00;

    outline: 0;

    line-height: 1.5715;

    position: relative;

    display: inline-block;

    font-weight: 400;

    white-space: nowrap;

    text-align: center;

    height: 32px;

    padding: 4px 15px;

    font-size: 14px;

    border-radius: 2px;

    user-select: none;

    cursor: pointer;

    border: 1px solid #82bc00;

    box-sizing: border-box;

    margin-bottom: 10px;

    margin-top: 10px;

}

.settingButton:hover {

    color: #fff;

    border-color: #88b031;

    background: #88b031;

}

.settingButton:disabled {

    background: #e2dfdf;

    border-color: #ffffff;

}

.options-title {

    font-weight: bold;

    margin: 4px 2px;

}

#selectedFile {

    display: none;

}

select, input[type="text"], input[type="number"] {

    display: inline-block;

    margin-left: auto;

    width: 120px;

    font-weight: 400;

    outline: 0;

    line-height: 1.5715;

    border-radius: 2px;

    border: 1px solid #F4F8EB;

    box-sizing: border-box;

}

.passwordIpt {

    margin-top: 10px;

    height: 25px;

}

.passwordIpt[warning="true"] {

    border-color: red;

}

.passwordIpt[warning="true"]::placeholder {

    color: red;

    opacity: 0.8;

}

@keyframes shake {

    0% { transform: translate(1px, 1px) rotate(0deg); }

    10% { transform: translate(-1px, -2px) rotate(-1deg); }

    20% { transform: translate(-3px, 0px) rotate(1deg); }

    30% { transform: translate(3px, 2px) rotate(0deg); }

    40% { transform: translate(1px, -1px) rotate(1deg); }

    50% { transform: translate(-1px, 2px) rotate(-1deg); }

    60% { transform: translate(-3px, 1px) rotate(0deg); }

    70% { transform: translate(3px, 1px) rotate(-1deg); }

    80% { transform: translate(-1px, -1px) rotate(1deg); }

    90% { transform: translate(1px, 2px) rotate(0deg); }

    100% { transform: translate(1px, 1px) rotate(0deg); }

}

#warningBox {

    color: red;

}
接下来,我们可以添加这个网页需要的按钮和UI,主要包括:
- SpreadJS的容器
- 状态栏
- 导入区域
- 密码输入框
- 文件选择按钮
- 导入按钮
- 导出区域
- 密码输入框
- 导出按钮
添加HTML标签时,我们可以对每个元素使用合适的样式:
<body>

    <div class="sample-tutorial">

        <div class="sample-container">

            <div id="ss" class="sample-spreadsheets"></div>

            <div id="statusBar"></div>

        </div>

        <div class="options-container">

            <div class="option-row">

                <div class="inputContainer">

                    <div class="options-title">Import:</div>

                    <input class="passwordIpt" id="importPassword" type="password" placeholder="Password" disabled>

                    <br>

                    <div id="warningBox"></div>

                    <input id="selectedFile" type="file" accept=".xlsx" />

                    <button class="settingButton" id="selectBtn">Select</button>

                    <button class="settingButton" id="importBtn" disabled>Import</button>

                </div>

                <div class="inputContainer">

                    <div class="options-title">Export:</div>

                    <input class="passwordIpt" id="exportPassword" type="password" placeholder="Password">

                    <br>

                    <button class="settingButton" id="exportBtn">Export</button>

                </div>

            </div>

        </div>

    </div>

</body>
3.初始化
现在已经准备好了HTML内容和SpreadJS引用,可以开始初始化SpreadJS实例并在app.js文件中添加Excel导入的代码了。
window.onload = function () {

  let spread = new GC.Spread.Sheets.Workbook(document.getElementById("ss"));

}
4.添加按钮和功能
为了实现这个应用的目标,可以添加以下变量:
const $ = selector => document.querySelector(selector);

const listen = (host, type, handler) => host.addEventListener(type, handler);
在window.onload函数中创建变量,引用不同的HTML元素:
const importPassword = $('#importPassword');

const selectBtn = $('#selectBtn');

const fileSelect = $('#selectedFile');

const importBtn = $('#importBtn');

const warningBox = $('#warningBox');

const exportPassword = $('#exportPassword');

const exportBtn = $('#exportBtn');
为文件选择按钮和按钮输入框添加事件和监听函数以及密码错误的提示:
listen(selectBtn, "click", () => fileSelect.click());

const fileSelectedHandler = () => {

    importPassword.disabled = false;

    importBtn.disabled = false;

}

listen(fileSelect, 'change', fileSelectedHandler);

const wrongPasswordHandler = message => {

    importPassword.setAttribute('warning', true);

    importPassword.style.animation = "shake 0.5s";

    setTimeout(() => importPassword.style.animation = "", 500);

    warningBox.innerText = message;

    importPassword.value = '';

};

listen(importPassword, 'focus', () => {

    warningBox.innerText = '';

    importPassword.removeAttribute('warning');

});
5.导入Excel文件
现在可以写导入Excel文件到SpreadJS实例的代码了。因为我们可能会导入被密码保护的文件,因此在调用SpreadJS的import函数时需要考虑到这一点。我们可以在写import时添加事件处理程序:
const importFileHandler = () => {

    let file = fileSelect.files[0];

    if (!file) return ;

    spread.import(file, console.log, error => {

        if (error.errorCode === GC.Spread.Sheets.IO.ErrorCode.noPassword || error.errorCode === GC.Spread.Sheets.IO.ErrorCode.invalidPassword) {

            wrongPasswordHandler(error.errorMessage);

        }

    }, {

        fileType: GC.Spread.Sheets.FileType.excel,

        password: importPassword.value

    });

};

listen(importBtn, 'click', importFileHandler);
6.导出Excel文件
与导入类似,我们可以支持用户在导出Excel时输入保护密码,所以我们只需要将密码传入SpreadJS的export函数。我们同样为它添加事件处理程序:
const exportFileHandler = () => {

    let password = exportPassword.value;

    spread.export(blob => saveAs(blob, (password ? 'encrypted-' : '') + 'export.xlsx'), console.log, {

        fileType: GC.Spread.Sheets.FileType.excel,

        password: password

    });

};

listen(exportBtn, 'click', exportFileHandler);
7.数据保护
我们同样可以保护数据,阻止用户改变它。为了实现这一点,我们可以添加一个按钮来保护工作簿当前的表单。稍作修改,此功能就可以适配于多种不同的需求,但对于此示例,我们仅保护活动表单。与其他按钮类似,我们需要添加点击按钮的事件处理程序,对于SpreadJS,我们可以添加保护的选项:
const protectHandler = () => {

    var option = {

        allowSelectLockedCells:true,

        allowSelectUnlockedCells:true,

        allowFilter: true,

        allowSort: false,

        allowResizeRows: true,

        allowResizeColumns: false,

        allowEditObjects: false,

        allowDragInsertRows: false,

        allowDragInsertColumns: false,

        allowInsertRows: false,

        allowInsertColumns: false,

        allowDeleteRows: false,

        allowDeleteColumns: false,

        allowOutlineColumns: false,

        allowOutlineRows: false

    };

    spread.getActiveSheet().options.protectionOptions = option;

    spread.getActiveSheet().options.isProtected = true;

};

listen(protectBtn, 'click', protectHandler);
8.运行程序
现在剩下的就是运行程序了。因为我们是用纯JS和HTML写的,我们可以直接在浏览器打开HTML文件:
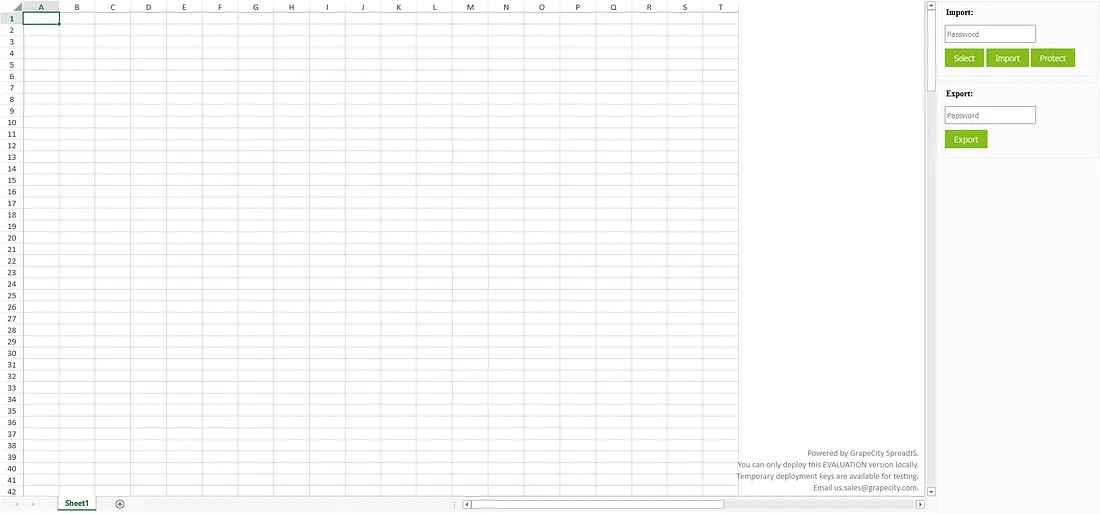
我们可以点击"Select"按钮来选择Excel文件来加载,然后点击"Import"按钮将其导入到SpreadJS:
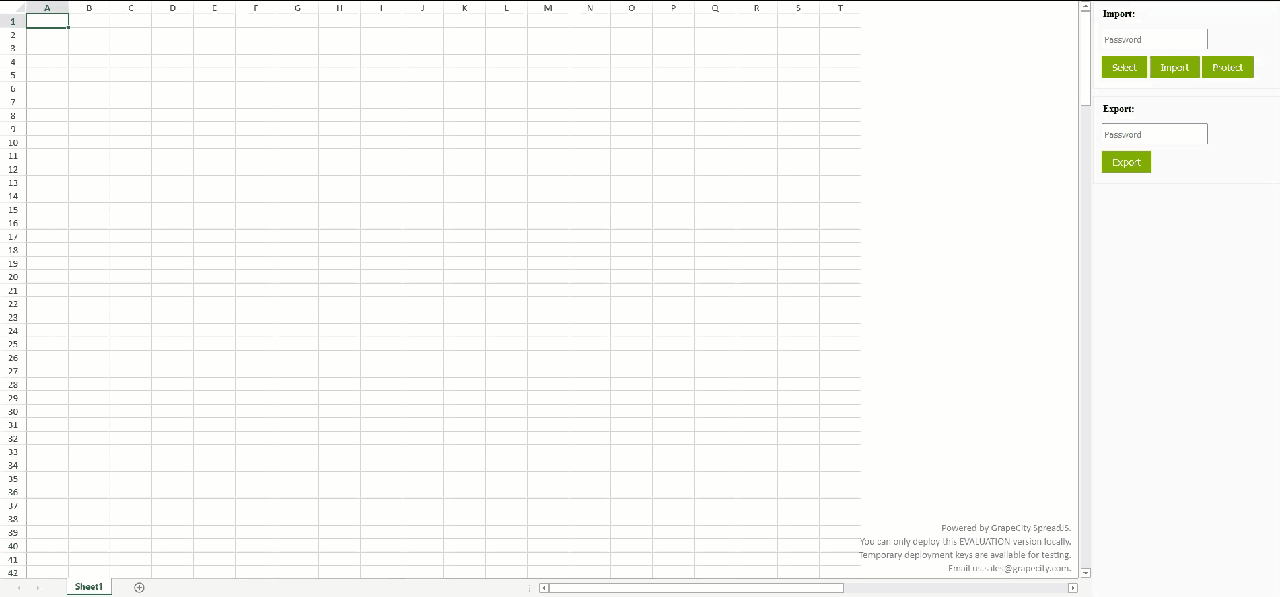
接下来,我们可以在导出的密码输入框键入密码,点击"Export"按钮:

如果您想查看完整的源码,可以点击这个Gitee地址。
总结
以上就是如何在Web应用中添加一个JavaScript Excel查看器的全过程,如果您想了解跟多信息,欢迎查看产品文档和在线demo。
如何在Web应用中添加一个JavaScript Excel查看器的更多相关文章
- 如何在RCP程序中添加一个banner栏
前言:这段时间还算比较空闲,我准备把过去做过的有些形形色色,甚至有些奇怪的研究总结一下,也许刚好有人用的着也不一定,不枉为之抓耳挠腮的时光和浪费的电力.以前有个客户提出要在RCP程序中添加一个bann ...
- 如何在web项目中添加javamelody monitoring 监控。
1.在工程的maven pom中添加依赖javamelody-core <!-- monitoring监控 --><!-- https://mvnrepository.com/art ...
- 如何在form组件中添加一个单选或者多选的字段
解决办法: 需要在增加的类里面加入choices 具体操作如下:
- [保姆级教程] 如何在 Linux Kernel (V5.17.7) 中添加一个系统调用(System call)
最近在学习 <linux Kernel Development>,本书用的linux kernel 是v2.6 版本的.看完"系统调用"一节后,想尝试添加一个系统调用, ...
- [译]如何在Web开发中使用Python
[译]如何在Web开发中使用Python 原文:HOWTO Use Python in the Web 摘要 这篇文档展示了Python如何融入到web中.它介绍了几种Python结合web服务器的方 ...
- 006.Adding a controller to a ASP.NET Core MVC app with Visual Studio -- 【在asp.net core mvc 中添加一个控制器】
Adding a controller to a ASP.NET Core MVC app with Visual Studio 在asp.net core mvc 中添加一个控制器 2017-2-2 ...
- SharePoint Framework 向web部件中添加外部库
博客地址:http://blog.csdn.net/FoxDave 在进行开发的时候,你很可能会想要引用一些公开的JavaScript库到你的项目中,本文将会介绍如何打包和共享这些库. 打包脚本 默认 ...
- Spring 如何在 WEB 应用中使用
1. Spring 如何在 WEB 应用中使用 ? 1). 需要额外加入的 jar 包: spring-web-4.0.0.RELEASE.jar spring-webmvc-4.0.0.RELEAS ...
- 008.Adding a model to an ASP.NET Core MVC app --【在 asp.net core mvc 中添加一个model (模型)】
Adding a model to an ASP.NET Core MVC app在 asp.net core mvc 中添加一个model (模型)2017-3-30 8 分钟阅读时长 本文内容1. ...
- 如何在VUE项目中添加ESLint
如何在VUE项目中添加ESLint 1. 首先在项目的根目录下 新建 .eslintrc.js文件,其配置规则可以如下:(自己小整理了一份),所有的代码如下: // https://eslint.or ...
随机推荐
- C#的重载决策
重载是许多编程语言支持的特性.所谓重载,就是指可以定义多个名称相同但参数(个数.类型和顺序)不同的方法(函数).先来看一个例子: void Main() { char cvalue = 'a'; ma ...
- 一行命令即可启动 Walrus丨入门教程
应用管理平台 Walrus 已正式开源,本文将介绍如何上手安装 Walrus 以及如何借助 Walrus 进行应用部署. 开源地址:https://github.com/seal-io/walrus ...
- 从一些常见的错误聊聊mysql服务端的关键配置
背景 每一年都进行大促前压测,每一次都需要再次关注到一些基础资源的使用问题,订单中心这边数据库比较多,最近频繁报数据库异常,所以对数据库一些配置问题也进行了研究,本文给出一些常见的数据库配置,说明这些 ...
- iOS视图控件的内容显示和离屏渲染流程
iOS中UI控件内容显示流程 UIKit界面组成 iOS中组成页面的各个元素基本来自UIKit,我们可以修改布局或自定义绘制来修改UIKit元素的默认展示. UIView的页面显示内容有CALayer ...
- 获取API接口返回的商品详情数据后该如何使用
获取API接口返回的商品详情数据后,我们可以使用以下方式将其处理和利用: 数据展示:我们可以将API接口返回的商品详情数据以列表.表格.图形等形式展示给用户,以便他们更好地了解商品的基本信息.特征.评 ...
- QA|新版Pycharm如何关闭和开启自动补全功能?|Pycharm|工具相关
自动补全开启状态: 自动补全关闭状态: 建议:新学者建议开启自动补全,这样可以把各个函数方法记忆的更加深刻!
- Elasticsearch之索引简单应用
本篇所有操作都在 Kibana 上执行 创建第一个索引 PUT product { // 索引设置 "settings": { // 分片数量 "number_of_sh ...
- 安卓APK签名注入大师(APP注入弹窗,注入打开密码,注入过期时间, 注入提示信息,一机一码)
安卓APK签名注入大师可以给安卓APK文件一键注入APP注入弹窗,注入打开密码,注入过期时间, 注入提示信息,一机一码等功能,方便开发人员给自己的APK文件添加消息提示, 密码等功能. 可以保护文件安 ...
- 如何随心所欲调试HotSpot VM源代码?(改造为CMakeLists项目)
常有小伙伴问我是怎么调试HotSpot VM源代码的,我之前通过视频和文章介绍过一种大家都用的调试方法,如下: 文章地址:第1.2篇-调试HotSpot VM源代码(配视频) 视频地址:https:/ ...
- RK3568开发笔记(十):开发板buildroot固件移植开发的应用Demo,启动全屏显示
前言 上一篇,移植应用前的通讯接口工作和全屏工作都已经完成了.本篇移植开发的商业应用. 交叉编译好应用 (略),参照<RK3568开发笔记(八):开发板烧写buildroot固件(支 ...