
将Word表格中单元格中的文字替换成对应的图片
示例
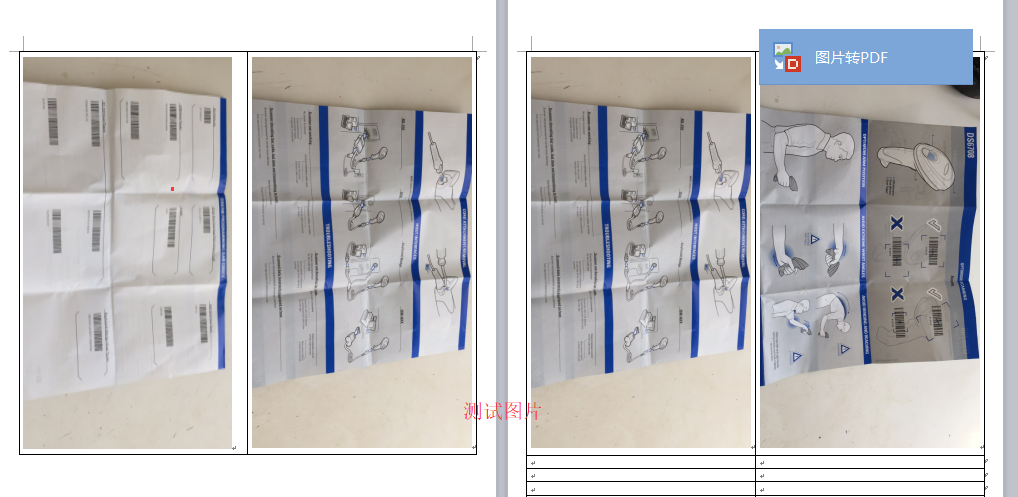
原文件结构:

替换后文档结构:
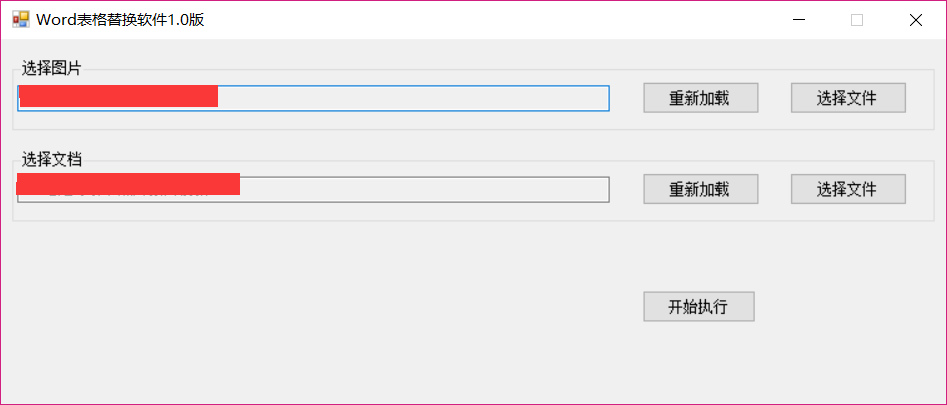
软件截图:
代码:
using System;
using System.Collections.Generic;
using System.ComponentModel;
using System.Data;
using System.Drawing;
using System.Linq;
using System.Text;
using System.Windows.Forms;
using System.IO;
using System.Net;
using System.Threading;
using System.Runtime.InteropServices;
using Microsoft.Office.Interop.Word;
namespace WordInsertImg
{
public partial class Form1 : Form
{
public Form1()
{
InitializeComponent();
}
private void btnSelectFile_Click(object sender, EventArgs e)
{
OpenFileDialog PictureDlg = new OpenFileDialog();
PictureDlg.Title = "打开文档";
PictureDlg.Filter = "DOC文件(*.doc)|*.doc";
PictureDlg.Multiselect = true;
if (PictureDlg.ShowDialog() == DialogResult.OK)
{
string foldPath = PictureDlg.FileName;
txtPath.Text = foldPath;
if (File.Exists("pathWord.ini"))
{
StreamWriter sw = new StreamWriter("pathWord.ini");
sw.Write(foldPath);
sw.Close();
}
else
{
File.WriteAllText("pathWord.ini", foldPath);
}
}
}
private void button2_Click(object sender, EventArgs e)
{
OpenFileDialog PictureDlg = new OpenFileDialog();
PictureDlg.Title = "打开图片";
PictureDlg.Filter = "JPG图片(*.jpg)|*.jpg|BMP图片(*.bmp)|*.bmp|所有文件(*.*)|*.*";
PictureDlg.Multiselect = true;
FolderBrowserDialog dialog = new FolderBrowserDialog();
dialog.Description = "请选择文件路径";
if (dialog.ShowDialog() == DialogResult.OK)
{
string foldPath = dialog.SelectedPath;
txtImgPath.Text = foldPath;
if (File.Exists("path.ini"))
{
StreamWriter sw = new StreamWriter("path.ini");
sw.Write(foldPath);
sw.Close();
}
else
{
File.WriteAllText("path.ini", foldPath);
}
}
}
private void btnUpload_Click(object sender, EventArgs e)
{
Microsoft.Office.Interop.Word.Application app = new Microsoft.Office.Interop.Word.Application();
object MissingValue = Type.Missing;
object file = txtPath.Text;
string PathNew = txtPath.Text.Replace(".doc", "_New_") + DateTime.Now.ToString("yyMMddHHmmss") + ".doc";
if (File.Exists(PathNew))
File.Delete(PathNew);
File.Copy(Convert.ToString(file), PathNew);
file = PathNew;
Microsoft.Office.Interop.Word.Document doc = app.Documents.Open(
ref file, ref MissingValue, ref MissingValue,
ref MissingValue, ref MissingValue, ref MissingValue,
ref MissingValue, ref MissingValue, ref MissingValue,
ref MissingValue, ref MissingValue, ref MissingValue,
ref MissingValue, ref MissingValue, ref MissingValue, ref MissingValue);
//doc.Content.Find.Text = strOldText ;
StringBuilder sbStrOld = new StringBuilder();
StringBuilder sbStrNew = new StringBuilder();
#region 表格替换
if (doc.Tables.Count > 0)
{
//int oldRows = 1;
for (int i = 1; i <= doc.Tables[1].Rows.Count; i++)
{
//取得单元格中的值
string item1 = doc.Tables[1].Cell(i, 1).Range.Text.Replace("\r\a", "");
//将光标指定到当前单元格
doc.Tables[1].Cell(i, 1).Select();
string FileName = "";
if (File.Exists(txtImgPath.Text + "\\" + item1 + ".jpg"))
{
doc.Tables[1].Cell(i, 1).Range.Text = "";
FileName = txtImgPath.Text + "\\" + item1 + ".jpg";//图片所在路径
}
else if (File.Exists(txtImgPath.Text + "\\" + item1 + ".png"))
{
doc.Tables[1].Cell(i, 1).Range.Text = "";
FileName = txtImgPath.Text + "\\" + item1 + ".png";//图片所在路径
}
else if (File.Exists(txtImgPath.Text + "\\" + item1 + ".jpeg"))
{
doc.Tables[1].Cell(i, 1).Range.Text = "";
FileName = txtImgPath.Text + "\\" + item1 + ".jpeg";//图片所在路径
}
if (File.Exists(FileName))
{
object LinkToFile = false;
object SaveWithDocument = true;
object Anchor = doc.Application.Selection.Range;
doc.Application.ActiveDocument.InlineShapes.AddPicture(FileName, ref LinkToFile, ref SaveWithDocument, ref Anchor);
doc.Application.ActiveDocument.InlineShapes[1].Width = 100f;//图片宽度
doc.Application.ActiveDocument.InlineShapes[1].Height = 100f;//图片高度
//将图片设置为四周环绕型
//Microsoft.Office.Interop.Word.Shape s = doc.Application.ActiveDocument.InlineShapes[1].ConvertToShape();
//s.WrapFormat.Type = Microsoft.Office.Interop.Word.WdWrapType.wdWrapSquare;
//以下为单元格跳转方式
//object what = WdGoToItem.wdGoToTable;
//object which = WdGoToDirection.wdGoToNext;
//doc.Application.Selection.GoTo(ref what, ref which);
//object which = WdGoToDirection.wdGoToNext;
//doc.Application.Selection.GoTo(ref which);
}
FileName = "";
string item2 = doc.Tables[1].Cell(i, 2).Range.Text.Replace("\r\a", "");
doc.Tables[1].Cell(i, 2).Select();
if (File.Exists(txtImgPath.Text + "\\" + item2 + ".jpg"))
{
doc.Tables[1].Cell(i, 2).Range.Text = "";
FileName = txtImgPath.Text + "\\" + item2 + ".jpg";//图片所在路径
}
else if (File.Exists(txtImgPath.Text + "\\" + item2 + ".png"))
{
doc.Tables[1].Cell(i, 2).Range.Text = "";
FileName = txtImgPath.Text + "\\" + item2 + ".png";//图片所在路径
}
else if (File.Exists(txtImgPath.Text + "\\" + item2 + ".jpeg"))
{
doc.Tables[1].Cell(i, 2).Range.Text = "";
FileName = txtImgPath.Text + "\\" + item2 + ".jpeg";//图片所在路径
}
if (File.Exists(FileName))
{
object LinkToFile = false;
object SaveWithDocument = true;
object Anchor = doc.Application.Selection.Range;
doc.Application.ActiveDocument.InlineShapes.AddPicture(FileName, ref LinkToFile, ref SaveWithDocument, ref Anchor);
doc.Application.ActiveDocument.InlineShapes[1].Width = 100f;//图片宽度
doc.Application.ActiveDocument.InlineShapes[1].Height = 100f;//图片高度
}
}
}
#endregion
doc.Save();
doc.Close(ref MissingValue, ref MissingValue, ref MissingValue);
//关闭应用
app.Quit(ref MissingValue, ref MissingValue, ref MissingValue);
app = null;
MessageBox.Show("插入完毕");
}
private void Form1_Load(object sender, EventArgs e)
{
if (File.Exists("pathWord.ini"))
{
StreamReader sr = new StreamReader("pathWord.ini");
txtPath.Text = sr.ReadToEnd();
sr.Close();
}
if (File.Exists("path.ini"))
{
StreamReader sr = new StreamReader("path.ini");
txtImgPath.Text = sr.ReadToEnd();
sr.Close();
}
}
}
}
要注意 Microsoft.Office.Interop.Word引用的版本,我这里引用的是14.0版的
将Word表格中单元格中的文字替换成对应的图片的更多相关文章
- 使用POI创建word表格合并单元格兼容wps
poi创建word表格合并单元格代码如下: /** * @Description: 跨列合并 */ public void mergeCellsHorizontal(XWPFTable table, ...
- poi 读取word 遍历表格和单元格中的图片
背景 项目需要解析word表格 需要批量导入系统,并保存每行信息到数据库 并且要保存word中的图片, 并保持每条信息和图片的对应关系 一行数据可能有多条图片 解决办法 没有找到现成的代码,怎么办呐? ...
- 使用POI创建word表格-在表格单元格中创建子表格
要实现的功能如下:表格中的单元格中有子表格 实现代码如下: XWPFParagraph cellPara = row.getCell(j).getParagraphArray(0); //row.ge ...
- EXCEL表格单元格中包含数字英文和汉字,如何自动去掉汉字,保留英文和数字
EXCEL表格单元格中包含数字英文和汉字,如何自动去掉汉字,保留英文和数字 Function 求数字和字母(对象 As String) '在文本与数字混杂中提取数字和字母 Dim myReg ...
- python 将表格多个列数据放到同一个单元格中
表格模板: 目的将卡片1到卡片5的所有数据组合起来到一个单元格中如下入F列中(工作中为了避免手动复制粘贴),其余不变,因为数据太多 自己一个一个复制工作效率太低,所以写这个脚本是为了方便自己有需要 ...
- Swift - 可编辑表格样例(可直接编辑单元格中内容、移动删除单元格)
(本文代码已升级至Swift3) 本文演示如何制作一个可以编辑单元格内容的表格(UITableView). 1,效果图 (1)默认状态下,表格不可编辑,当点击单元格的时候会弹出提示框显示选中的内容 ...
- itextpdf中表格中单元格的文字水平垂直居中的设置
在使用itextpdf中,版本是5.5.6,使用Doucument方式生成pdf时,设置单元格中字体的对齐方式时,发现一些问题,并逐渐找到了解决方式. 给我的经验就是:看官网的例子才能保证代码的效果, ...
- Swift - 异步加载各网站的favicon图标,并在单元格中显示
下面是一个简单的应用,表格视图的各个单元格自动异步加载各个网站的favicon图标,并显示出来. 主要是复习下如何自定义单元格,单元格中图片的异步加载,以及didSet的用法. 效果图如下: 操作步骤 ...
- html table中单元格自动换行
table中单元格自动换行样式: table-layout: fixed; word-wrap: break-word; table-layout 可能的值(IE不支持inherit属性) 值 描 ...
随机推荐
- 苹果内购服务器验证之receipt返回多组in_app思考
最近有部分用户反映,苹果内购充值失败,经过测试总结有几个关键点出现问题 1.app购买成功苹果没有返回票据,属于票据遗漏(取决于苹果服务器的响应状况),只能客户端进行监听刷新等处理 2.app连续购买 ...
- [转]CentOS Apache 性能调试!
查看Apache的并发请求数及其TCP连接状态: netstat -n | awk '/^tcp/ {++S[$NF]} END {for(a in S) print a, S[a]}' 返回结果示例 ...
- CSS深入理解学习笔记之absolute
1.absolute和float 拥有相同的特性表现: ①包裹性(容器应用之后,可以包裹里面的内容): <!doctype html> <html> <head> ...
- char (*p)[]和char *p[]的区别
理解的关键在于: 1. []的优先级高于*,(*p)[]理解为指向一个数组,*(p[])存放指针的数组 2. char (*p)[SIZE]:指向一维数组的指针,一维数组只能有SIZE个元素 char ...
- TDD入门demo
OK,前面的博客整理了一系列的junit相关内容,这里举一个例子TDD实际的编码例子,不管实际编码中是否使用TDD,个人觉得这种思想必须要有. 我们不一定在写业务代码之前一定要说是把测试类都写出来,至 ...
- Java8内存模型—永久代(PermGen)和元空间(Metaspace)(转)
Java8内存模型—永久代(PermGen)和元空间(Metaspace) 查看原文点击传送门:http://www.cnblogs.com/paddix/p/5309550.html 提示:本文做了 ...
- MySql全文索引
使用索引是数据库性能优化的必备技能之一.在MySQL数据库中,有四种索引:聚集索引(主键索引).普通索引.唯一索引以及我们这里将要介绍的全文索引(FULLTEXT INDEX). 全文索引(也称全文检 ...
- jsp页面取值
一般就用el表达式 ${recordList[4].baseRate8.split("/")[0] } <s:date name="recordList[#id]. ...
- android 页面的切换
startActivity后加:IntentHelper.jump(mContext, MyBalanceActivity.class);activity.overridePendingTransit ...
- ulua c#调用lua中模拟的类成员函数
项目使用ulua,我神烦这个东西.lua单纯在lua环境使用还好,一旦要跟外界交互,各种月经不调就来了.要记住贼多的细节,你才能稍微处理好.一个破栈,pop来push去,位置一会在-1,一会在-3,2 ...