Redux 学习(1) ----- Redux介绍
Redux 有三个基本的原则:
1,单一状态树,redux 只使用一个javascript 对象来保存整个应用的状态。 状态树样式如下:
const state = {
     count: 0
}
2,状态是只读的,它的意思不是说不能修改state,如果不能修改状态,那页面就完成静态化了,没有什么作用了,它想表达的是,我们不能直接修改state。修改state的唯一办法是发送一个action,让action 来告诉Redux, 页面上有事情发生了,action也很简单,就是一个JavaScript 对象,用来描述了页面上到底发生了什么变化。 格式如下:
{
    type: 'MINUS'
}
作为action的对象,必须有一个属性type, 用来告知Redux 页面上发生了什么,比如页面有一个按钮,我们点击了一下, 发送了一个上面的action, Redux 就知道,有人点击了减号按钮,那相应的,状态state就要做一次减法操作,在原来的state基础上减1(这里默认进行减1操作). 所以, 也可以这么说, action就表示了我们想对state 执行什么样的操作, state 将要做出什么样的变化. 当然,这是最简单的action. 再举一个例子, 如果用户点击减号按钮时,想要减少任意值, 那怎么办? 我们肯定要把用户想要减少的值告诉Redux, 这时就要要求action 携带这个数据, 其实, 也很容易就能办到, 因为action 只是一个普通的JavaScript对象, 想要带什么数据, 直接给它增加属性就可以了. 如下action就表示,我们想要减少5
{
  type: 'MINUS',
  minusValue:  5
}
我们发送了一个action,表示我们想要更改state, 那要在什么地方去改变我们的state,那就是reducer 应该做的事情了。 reducer 就是一个纯函数,它接受state, 和action 作为参数,然后返回一个新的state. 接受state, action 两个参数,就表示它可以根据action去改变state, 这里一定要注意,它一定是返回一个新的state,不要去改变原state的状态
function counterReducer(state, action) {
    switch (action.type){
        case 'ADD':
            return state + 1;
        default:
            return state;
    }
}
有了state,action, reducer,它们是怎么串联起来的,那就是store。
首先,我们整个应用的状态就是存储在store中,由store来维持整个应用的状态。其次它提供了store.dispatch 来发起action, 发起一个action后,提供了subscribe 监听这个action带来的状态的变化,状态发生变化后,它提供了getState() 来获取更新的state. 那怎么创建store, redux 提供了一个createStore方法,它接收reducer作为参数,返回store, 它还可以接受一个可选的state, 作为默认初始值。
你可以看到redux执行的是单向数据流,发送一个action给store, store 就会把当前的state和action传递给reducer, reducer 会计算出一个新的状态,通过store.getState()获取到最新的状态。
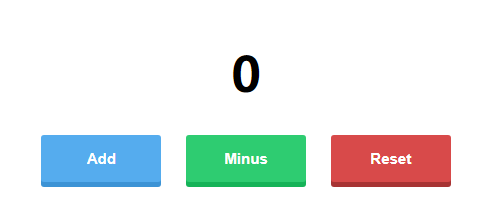
现在写一个加减项目来体验一下redux. 页面中有三个按钮,一个加,一个减和一个重置,还有一个h1 显示结果。在文件夹中新建一个index.html,一个counter.js 和一个counter.css文件
整个html代码如下:head 中引入css 和redux, body中就是三个按钮,和一个h1, 底部引入js文件
<!DOCTYPE html>
<html>
<head>
  <meta charset="utf-8">
  <title>Redux</title>
  <link rel="stylesheet" href="./counter.css">
  <script src="https://cdn.bootcss.com/redux/3.7.2/redux.js"></script>
</head>
<body>
  <div class="container">
    <h1 id="counter">0</h1>
    <button class="btn btn-blue" id="add">Add</button>
    <button class="btn btn-green" id="minus">Minus</button>
    <button class="btn btn-red" id="reset">Reset</button>
  </div>
  <script src="./counter.js"></script>
</body>
</html>
counter.css 文件如下:
body {
    padding: 40px;
    font-family: "helvetica neue", sans-serif;
  }

  .container {
    width: 600px;
    margin: auto;
    color: black;
    padding: 20px;
    text-align: center;
  }
  .container h1 {
    margin:;
    padding: 20px;
    font-size: 48px;
  }
  .container .btn {
    border:;
    padding: 15px;
    margin: 10px;
    width: 20%;
    font-size: 15px;
    outline: none;
    border-radius: 3px;
    color: #FFF;
    font-weight: bold;
  }

  .btn.btn-blue {
    background-color: #55acee;
    box-shadow: 0px 5px 0px 0px #3C93D5;
  }

  .btn.btn-blue:hover {
     background-color: #6FC6FF;
  }

  .btn.btn-green {
    background-color: #2ecc71;
    box-shadow: 0px 5px 0px 0px #15B358;
  }

  .btn.btn-green:hover {
    background-color: #48E68B;
  }

  .btn.btn-red {
    background-color: #d84a4a;
    box-shadow: 0px 5px 0px 0px #a73333;
  }

  .btn.btn-red:hover {
    background-color: #f15656;
  }
在页面中的效果如下:
现在我们来写counter.js 文件,就是如何使Redux
1, 首先我们要创建store, 那创建store之前 就要先定义state, reducer. 我们的state 非常简单, 就是一个count, 来展示数字
const state = {count: 0};
2, 创建reducer. 在这个简单的小例子中,我们有三个action, 当点击Add按钮时,它会发送ADD, 相应的count就会加1, 当点击Minus按钮时,它会发送MINUS, 相应的count 就会减1. 当点击Reset, 它会发送RESET, 相应的count置为0; 所以在reducer中我们要处理3个action, 相应的返回3个state,
function counterReducer(state, action) {
     // reducer 都会返加一个全新的state, 所以在这里声明了一个新的变量nextState,代表一个新的状态,用于返回
    var nextState = {
        count: state.count
    }
    switch (action.type){
        case 'ADD':         // ADD action, count 加1,
            nextState.count = state.count + 1;
            return nextState;
        case 'MINUS':       // MINUS action, count 减1
            nextState.count = state.count - 1;
            return nextState;
        case 'RESET':       // RESET action, count 置为0
            nextState.count = 0;
            return nextState;
        default:            // 当发送一个未知action时的后退处理
            return state;
    }
}
在设置reducer时,一定要注意:
1, 它是一个纯函数,返回一个新的状态;
2, 在switch case 语句中,一定要提供default, 返回当前状态
3, 现在有了state 和 reducer,可以创建store 了,Redux 提供了一个createStore方法来创建store, 它拉受一个必要的参数reducer, 后面可以跟可选的参数state
const store = Redux.createStore(counterReducer, state); // 创建store
4, 我们要在点击按钮时更改状态,那就要发送action
// Add 按钮发送ADD action
document.getElementById('add').addEventListener('click', function(){
    store.dispatch({type: 'ADD'})
})
// Minus按钮发送MINUS action
document.getElementById('minus').addEventListener('click', function() {
    store.dispatch({type: 'MINUS'})
})
// Reset按钮发送RESET action
document.getElementById('reset').addEventListener('click', function() {
    store.dispatch({type: 'RESET'})
})
5, 发送action 之后, state就会发生变化,我们页面中怎么获取到最新的状态进行展示?那就要订阅这个action事件,以便state 发生变化后,我们能及时更新state, 用到store.subscribe 函数, 它接受一个函数,只要有action发生,状态改变,它接受的回调函数就会触发。 我们可以在store.subscribe接受的函数中,获取store中的最新状态,获取最新状态,是用store.getState() 方法。 首先写一个render方法,获取最新的state, 然后给页面中的h1赋值。然后把render 方法传递给store.subscribe
const counterEl = document.getElementById('counter');

// render 函数获取状态,并给页面赋值
function render() {
    var state =  store.getState();  // 获取状态
    counterEl.innerHTML = state.count.toString();
}

// 订阅action, 以便action触发state, 状态发生变化后我们能及时得到通知,获取最新的state.
store.subscribe(render);
6, 现在点击Add 按钮,就可以看到页面中在不停的加1, 点击Minus,不停地减1,而点击Reset, 页面上会显示0。
基本功能是实现了,我们再来讨论一下react的最佳实践。
1, 最好不要给createStore 传递初始state参数, 我们可以在reducer中赋值初始状态。 在整个redux应用中,默认的初始state是undefined, 因此,在reducer中, 我们可以判断state是不是undefined, 如是,我们赋初值。在reducer的开头位置写如下内容
if (typeof state === 'undefined') {
    return {count : 0};
}
2, 初始调用一下render函数,获取到state的初始值,渲染到页面中,那么在页面中的h1中,我们就不用写0; 在store.subscribe(render) 语句前,调用一下render函数。
整个counter.js 如下
// reducer
function counterReducer(state, action) {
        if (typeof state === 'undefined') {
            return {count : 0};
        }
    var nextState = {       // 新状态
        count: state.count
    }
    switch (action.type){
        case 'ADD':         // ADD action, count 加1,
            nextState.count = state.count + 1;
            return nextState;
        case 'MINUS':       // MINUS action, count 减1
            nextState.count = state.count - 1;
            return nextState;
        case 'RESET':       // RESET action, count 置为0
            nextState.count = 0;
            return nextState;
        default:            // 当发送一个未知action时的后退处理
            return state;
    }
}

const store = Redux.createStore(counterReducer);    // store
const counterEl = document.getElementById('counter');

function render() {
    var state =  store.getState();  // 获取状态
    counterEl.innerHTML = state.count.toString();
}
render();            // 先调用一次render函数,把初始值放到页面中;
store.subscribe(render);

document.getElementById('add').addEventListener('click', function(){
    store.dispatch({type: 'ADD'})
})

document.getElementById('minus').addEventListener('click', function() {
    store.dispatch({type: 'MINUS'})
})

document.getElementById('reset').addEventListener('click', function() {
    store.dispatch({type: 'RESET'})
})
现在我们页面中只有一个加减功能, 逻辑比较简单,一个reducer可以解决问题, 如果页面中有很多功能,一个reducer就要处理很多action, 逻辑太复杂,代码量也会非常庞大,不利于代码的维护,所以肯定不能把所有的action 的处理放到一个reducer中,最好按逻辑进行reducer 划分。现在再在页面中添加一个功能,显示我们在input中输入的内容,就和to do list 一样。html页面中增加一个input 和三个按钮
<body>
<!--    加减按钮-->
  <div class="container">
    <h1 id="counter">0</h1>
    <button class="btn btn-blue" id="add">Add</button>
    <button class="btn btn-green" id="minus">Minus</button>
    <button class="btn btn-red" id="reset">Reset</button>
  </div>
    <!-- to do list按钮-->
  <div class="container">
    <ul id="todoList"></ul>
    <div>
          <div>
              <input type="text" placeholder="请输入任务内容" id="todo">
          </div>
        <button class="btn btn-green" id="new">New</button>
        <button class="btn btn-blue" id="delete">Delete</button>
        <button class="btn btn-red" id="delete_all">Delete All</button>
    </div>
  </div>
  <script src="./counter.js"></script>
</body>

action非常简单,点击new按钮的时候,它会发送NEW action 事件,同时带着我们在输入框中输入的内容,点击delete的时候,它会发送 DELETE action, 那就删除一条任务,
当点击Delete All的时候,清空任务。
var todoInput = document.getElementById('todo');  // 获取input输入框

// to do list 功能的action
document.getElementById('new').addEventListener('click',() => {
    store.dispatch({type:'NEW', payload: todoInput.value});  // NEW action要带着input输入框中的内容
})
document.getElementById('delete').addEventListener('click',() => {
    store.dispatch({type:'DELETE' });
})
document.getElementById('delete_all').addEventListener('click',() => {
    store.dispatch({type:'DELETE_ALL'});
})
对于三个action, 我们要写一个reducer:
// to do list reducer
function todoReducer(state, action) {
    if (typeof state === 'undefined') {
        return {todos: []}
    }
    var nextState = Object.assign({}, state);  // 创建一个新的变量
    switch (action.type) {
        case 'NEW' :
            nextState.todos.push(action.payload);
            return nextState;
        case 'DELETE':
            nextState.todos.pop();
            return nextState
        case 'DELETE_ALL':
            nextState.todos = [];
            return nextState;
        default:
            return state;
    }
}
现在遇到一个问题,我们的代码中有两个reducer, 但是createStore 函数却只能接受一个reducer,所以我们要把两个reducer合并成 一个reducer, 成为整个项目的根reducer,
正好Redux提供了一个combineReducer 方法,可以把多个reducer 合并成一个reducer. combineReducer 接受一个对象,对象的键,我们可以取,键对应的值就是我们定义的reducer, 但是我们一般都会取与reducer相同的键,方便记忆。
const store = Redux.createStore(Redux.combineReducers({
    counterReducer: counterReducer,
    todoReducer:todoReducer
}));
当把多个reducer合并到一起的时候,store中的state也发生了变化,你可以console.log(store.getState()) 看一下,你会发现,state这个对象多了几个属性,属性名正好就是我们定义的combineReducer中的接受的对象中的键,属性值则是各个对应的reducer中的定义的状态,在我们这个例子中,state
{ counterReducer: { count: 0 }, todoReducer: { todos:[] }}
在combineReducer接受的对象中,counterReducer作为属性名,对应的属性值,也就是对应的reducer是counterReducer, 所以在state中,属性名counterReducer对应的属性值就是counterReducer中对应的状态 {counter: 0 }, todoReducer也是这个原理, 在chrome的控制台中效果如下:

现在再定义一个函数,渲染获取到的状态到页面中。
var todoList = document.getElementById('todoList');

function renderList(state) {
    todoList.innerHTML = '';
    for (var index = 0; index < state.todoReducer.todos.length; index++) {
        var element = state.todoReducer.todos[index];
        var li = document.createElement('li');
        var todo = state.todoReducer.todos[index];
        li.innerHTML = todo.toString();
        todoList.appendChild(li);
    }
}
最后把这个函数放到render中,
function render() {
    var state =  store.getState();  // 获取状态
    counterEl.innerHTML = state.counterReducer.count.toString();
    renderList(state);
}
整个couter.js 如下:
// 处理加减counter 的 reducer
function counterReducer(state = {count:0}, action) {
    var nextState = {
        count: state.count
    }
    switch (action.type){
        case 'ADD':
            nextState.count = state.count + 1;
            return nextState;
        case 'MINUS':
            nextState.count = state.count - 1;
            return nextState;
        case 'RESET':
            nextState.count = 0;
            return nextState;
        default:
            return state;
    }
}
// 处理to do list中的reducer
function todoReducer(state, action) {
    if (typeof state === 'undefined') {
        return {todos: []}
    }
    var nextState = Object.assign({}, state);  // 创建一个新的变量
    switch (action.type) {
        case 'NEW' :
            nextState.todos.push(action.payload);
            return nextState;
        case 'DELETE':
            nextState.todos.pop();
            return nextState
        case 'DELETE_ALL':
            nextState.todos = [];
            return nextState;
        default:
            return state;
    }
}

// 利用Redux.combinerReducer, 把多个reducer合并到一个reducer中,然后传递给createStore函数,创建store
const store = Redux.createStore(Redux.combineReducers({
    counterReducer: counterReducer,
    todoReducer:todoReducer
}));

// 获取到页面中counter和todolist显示元素,就是 h1, ul, 以便我们在render函数中获取状态给它赋值,从而显示到页面
const counterEl = document.getElementById('counter');
const todoList = document.getElementById('todoList');

// 渲染to do list函数, 注意这里的状态的取值,我们要取state中的todoReducer中的状态
function renderList(state) {
    todoList.innerHTML = '';
    for (var index = 0; index < state.todoReducer.todos.length; index++) {
        var element = state.todoReducer.todos[index];
        var li = document.createElement('li');
        var todo = state.todoReducer.todos[index];
        li.innerHTML = todo.toString();
        todoList.appendChild(li);
    }
}
//整个应用的render函数,就是把处理各个状态的render渲染函数组合中一起
function render() {
    var state =  store.getState();
    counterEl.innerHTML = state.counterReducer.count.toString(); //处理counter的状态
    renderList(state) // 处理todo list的渲染函数。
}

render();
store.subscribe(render);

// 点击加减1的action
document.getElementById('add').addEventListener('click', function(){
    store.dispatch({type: 'ADD'})
})
document.getElementById('minus').addEventListener('click', function() {
    store.dispatch({type: 'MINUS'})
})
document.getElementById('reset').addEventListener('click', function() {
    store.dispatch({type: 'RESET'})
})

// to do list 功能的action

var todoInput = document.getElementById('todo');
document.getElementById('new').addEventListener('click',() => {
    store.dispatch({type:'NEW', payload: todoInput.value});
})
document.getElementById('delete').addEventListener('click',() => {
    store.dispatch({type:'DELETE' });
})
document.getElementById('delete_all').addEventListener('click',() => {
    store.dispatch({type:'DELETE_ALL'});
})
为了更深入地学习Redux , 我们用ES6 重构一下我们的例子,简单演示,我只使用counterReducer , 来处理加减功能。新建一个文件夹,然后npm init -y 创建package.json 文件, 再 npm i babel-core babel-loader babel-preset-es2015 babel-preset-stage-3 webpack webpack-dev-server --save-dev 安装webpack, babel 开发依赖。创建一个webpack.config.js 用于打包,.babelrc文件使用babel
webpack.config.js 文件如下
const path = require('path');

module.exports = {
    entry: path.join(__dirname, 'index.js'),
    output: {
        path: path.join(__dirname),
        filename: 'bundle.js'
    },
    module: {
        rules: [
            {
                test: /\.js$/,
                exclude: /node_modules/,
                loader: 'babel-loader'
            }
        ]
    }
}
.babelrc 文件如下:
{"presets" : ["es2015", "stage-3"]}
现在再新建一个index.html文件,index.html如下,可以去掉redux 引入, script标签也应该引入bundle.js打包后的文件。
<!DOCTYPE html>
<html>
<head>
  <meta charset="utf-8">
  <title>Redux</title>
  <link rel="stylesheet" href="./counter.css">
</head>
<body>
  <div class="container">
    <h1 id="counter"></h1>
    <button class="btn btn-blue" id="add">Add</button>
    <button class="btn btn-green" id="minus">Minus</button>
    <button class="btn btn-red" id="reset">Reset</button>
  </div>
  <script src="./bundle.js"></script>
</body>
</html>
新建一个index.js 文件,counter.js文件只处理了加减部分,此时要通过import引入redux, 当然我们首先要npm install redux -S 来安装它
import {createStore} from 'redux';  // 引入createStore 来创建 store, import Redux from 'redux' 是不对的

// reducer
function counterReducer(state, action) {
        if (typeof state === 'undefined') {
            return {count : 0};
        }
    var nextState = {       // 新状态
        count: state.count
    }
    switch (action.type){
        case 'ADD':         // ADD action, count 加1,
            nextState.count = state.count + 1;
            return nextState;
        case 'MINUS':       // MINUS action, count 减1
            nextState.count = state.count - 1;
            return nextState;
        case 'RESET':       // RESET action, count 置为0
            nextState.count = 0;
            return nextState;
        default:            // 当发送一个未知action时的后退处理
            return state;
    }
}

const store = createStore(counterReducer);    // store
const counterEl = document.getElementById('counter');

function render() {
    var state =  store.getState();  // 获取状态
    counterEl.innerHTML = state.count.toString();
}
render();            // 先调用一次render函数,把初始值放到页面中;
store.subscribe(render);

document.getElementById('add').addEventListener('click', function(){
    store.dispatch({type: 'ADD'})
})

document.getElementById('minus').addEventListener('click', function() {
    store.dispatch({type: 'MINUS'})
})

document.getElementById('reset').addEventListener('click', function() {
    store.dispatch({type: 'RESET'})
})
现在启动npm , 在package.json文件中scripts字段中输入 "dev": "webpack-dev-server", 在当前文件夹中调用 命令窗口, 输入npm run dev,就可以启动项目。在浏览器中http://localhost:8080/ , 功能没有问题。
Redux 学习(1) ----- Redux介绍的更多相关文章
- redux学习
redux学习: 1.应用只有一个store,用于保存整个应用的所有的状态数据信息,即state,一个state对应一个页面的所需信息 注意:他只负责保存state,接收action, 从store. ...
- React Redux学习笔记
React Router React Router 使用教程 Redux中间件middleware [译]深入浅出Redux中间件 Redux学习之一:何为middleware? ES6 ES6新特性 ...
- React+Redux学习笔记:React+Redux简易开发步骤
前言 React+Redux 分为两部分: UI组件:即React组件,也叫用户自定义UI组件,用于渲染DOM 容器组件:即Redux逻辑,处理数据和业务逻辑,支持所有Redux API,参考之前的文 ...
- Redux学习之我对于其工作流程的理解和实践
目录 1 工作流程图 2 各部位职责 3 Demo 1 工作流程图 2 各部位职责 我在理解这个流程图的时候,采用的是一种容易记住的办法,并且贴切实际工作职责. 我们可以把整个Redux工 ...
- redux学习总结
redux学习总结 *:first-child { margin-top: 0 !important; } body > *:last-child { margin-bottom: 0 !imp ...
- Redux学习及应用
Redux学习及应用 一:Redux的来源? Redux 是 JavaScript 状态容器,提供可预测化的状态管理.Redux是由 Flux 演变而来,但受 Elm 的启发,避开了 Flux 的复杂 ...
- 人工智能深度学习Caffe框架介绍,优秀的深度学习架构
人工智能深度学习Caffe框架介绍,优秀的深度学习架构 在深度学习领域,Caffe框架是人们无法绕过的一座山.这不仅是因为它无论在结构.性能上,还是在代码质量上,都称得上一款十分出色的开源框架.更重要 ...
- iOS学习之NSBundle介绍和使用
iOS学习之NSBundle介绍和使用 http://blog.csdn.net/totogo2010/article/details/7672271 新建一个Single View Applicat ...
- ASP.NET Core Web开发学习笔记-1介绍篇
ASP.NET Core Web开发学习笔记-1介绍篇 给大家说声报歉,从2012年个人情感破裂的那一天,本人的51CTO,CnBlogs,Csdn,QQ,Weboo就再也没有更新过.踏实的生活(曾辞 ...
随机推荐
- iOS开发简记(5):设备唯一标识与全局变量
这里记录两个iOS开发中经常用到的知识点,一个是唯一标识,一个是全局变量. (1)唯一标识 唯一标识一台设备(比如iPhone.iPad等)是一个基本的实现与业务上的需求,因为这个唯一标识在许多场景都 ...
- .net core实践系列之短信服务-目录
前言 经过两周多的业余时间,终于把该系列的文章写完了.第一次写系列,可能部分关键点并没有覆盖到,如果有疑问的朋友可以随时反馈给我.另外也感谢在我发布文章时给予我方案建议与反馈源码BUG的朋友们.下面是 ...
- Item 20: 使用std::weak_ptr替换会造成指针悬挂的类std::shared_ptr指针
本文翻译自modern effective C++,由于水平有限,故无法保证翻译完全正确,欢迎指出错误.谢谢! 博客已经迁移到这里啦 矛盾的是,我们很容易就能创造出一个和std::shared_ptr ...
- H5 文本属性
06-文本属性 我是文字 我是文字 我是段落我是段落我是段落我是段落我是段落我是段落我是段落我是段落我是段落我是段落我是段落我是段落我是段落我是段落我是段落我是段落我是段落我是段落我是段落我是段落我是 ...
- Xcode中控制台中打印中文处理
xcode 10以后的方法,一般使用 #ifdef DEBUG #define NSLog(FORMAT, ...) fprintf(stderr,"\n %s:%d %s\n", ...
- Python_架构、同一台电脑上两个py文件通信、两台电脑如何通信、几十台电脑如何通信、更多电脑之间的通信、库、端口号
1.架构 C/S架构(鼻祖) C:client 客户端 S:server 服务器 早期使用的一种架构,目前的各种app使用的就是这种架构,它的表现形式就是拥有专门的app. B/S架构(隶属于C/ ...
- 同事写得Python对页面压测脚本
#!/usr/bin/env python # *-* coding:utf-8 *-* import threading import requests import time # headers ...
- MySQL 5.7默认ONLY_FULL_GROUP_BY语义介绍
mysql 5.7版本 出现 ERROR 1064 (42000): You have an error in your SQL syntax; check the manual that corre ...
- js 通过url获取里面的参数值
场景描述:当我们从一个页面要带有一两个值跳转到另一个页面,另一个页面要使用这些参数的时候,我们就需要通过js获取这些参数啦. 先贴上代码: function getQueryString(name) ...
- hangfire使用笔记
1.导入nuget包 2.配置 简单配置后就可以写自己的Job了 注意:Hangfire.RecurringJobExtensions这个扩展支持两种job添加方法:json配置文件和特性.但由于时区 ...