kubernetes 测试 Mariadb gtid 主从复制.
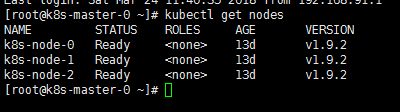
k8s 为 1个master 3个node
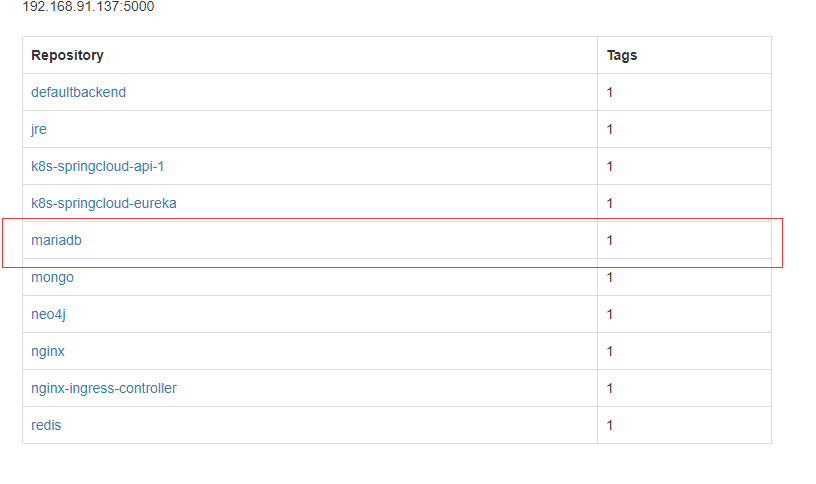
下载镜像 : mariadb 镜像版本是10.2.13 (此时10.3还没发布正式版)
docker pull mariadb
push到私有仓库
docker tag e1dd445713ae 192.168.91.137:/mariadb

docker push 192.168.91.137:/mariadb
-v /usr/local/docker/mariadb//conf:/etc/mysql/conf.d
挂载配置文件不靠谱,所以把容器内/etc/mysql 拷贝到glusterfs
docker cp d07feca8b0df:/etc/mysql /mnt/gv0/k8s-springcloud/mariadb/master/conf/mysql

docker cp d07feca8b0df:/etc/mysql /mnt/gv0/k8s-springcloud/mariadb/slave/conf/mysql
在master 的my.cnf中的[mysqld] 添加以下内容 server-id master ip
binlog-format=ROW

log-bin=master-bin

log-slave-updates=true

sync-master-info=

slave-parallel-threads=

binlog-checksum=CRC32

master-verify-checksum=

slave-sql-verify-checksum=

server-id=

report-port=

port=
在slave 的my.cnf中的[mysqld] 添加以下内容 server-id slave ip (第一次启动slave 时不加,待初始化好了数据库以后,第二次启动容器的时候,加入)
binlog-format=ROW

log-bin=master-bin

log-slave-updates=true

sync-master-info=

slave-parallel-threads=

binlog-checksum=CRC32

master-verify-checksum=

slave-sql-verify-checksum=

server-id=

report-port=

port=
master.yaml 以nodePort 方式访问
kubectl create -f master.yaml
apiVersion: extensions/v1beta1

kind: Deployment

metadata:

  name: mariadb-master

  namespace: k8s-springcloud

spec:

  replicas:

  selector:

    matchLabels:

      app: mariadb-master

  template:

    metadata:

      labels:

        app: mariadb-master

    spec:

      nodeName: k8s-node-

      hostNetwork: true

      terminationGracePeriodSeconds:

      containers:

      - name: mariadb-master

        image: 192.168.91.137:/mariadb

        env:

        - name: MYSQL_ROOT_PASSWORD

          value: root

        ports:

        - containerPort:

          hostPort:

        livenessProbe:

          exec:

            command:

            - mysql

            - -uroot

            - -proot

            - -e

            - "select 1"

          initialDelaySeconds:

          periodSeconds:

          timeoutSeconds:

        readinessProbe:

          exec:

            command:

            - mysql

            - -uroot

            - -proot

            - -e

            - "select 1"

          initialDelaySeconds:

          periodSeconds:

          timeoutSeconds:

        volumeMounts:

        - name: data

          mountPath: /var/lib/mysql

        - name: log

          mountPath: /var/log

        - name: conf

          mountPath: /etc/mysql

      volumes:

      - name: data

        hostPath:

          path: /mnt/gv0/k8s-springcloud/mariadb/master/data

      - name: log

        hostPath:

          path: /mnt/gv0/k8s-springcloud/mariadb/master/log

      - name: conf

        hostPath:

          path: /mnt/gv0/k8s-springcloud/mariadb/master/conf/mysql

---

apiVersion: v1

kind: Service

metadata:

  name: mariadb-master

  namespace: k8s-springcloud

  labels:

    app: mariadb-master

spec:

  type: NodePort

  ports:

  - port:

    nodePort:

    targetPort:
slave.yaml 以nodePort 方式访问
kubectl create -f slave.yaml
apiVersion: extensions/v1beta1

kind: Deployment

metadata:

  name: mariadb-slave

  namespace: k8s-springcloud

spec:

  replicas:

  selector:

    matchLabels:

      app: mariadb-slave

  template:

    metadata:

      labels:

        app: mariadb-slave

    spec:

      nodeName: k8s-node-

      terminationGracePeriodSeconds:

      containers:

      - name: mariadb-slave

        image: 192.168.91.137:/mariadb

        env:

        - name: MYSQL_ROOT_PASSWORD

          value: root

        ports:

        - containerPort:

          hostPort:

        livenessProbe:

          exec:

            command:

            - mysql

            - -uroot

            - -proot

            - -e

            - "select 1"

          initialDelaySeconds:

          periodSeconds:

          timeoutSeconds:

        readinessProbe:

          exec:

            command:

            - mysql

            - -uroot

            - -proot

            - -e

            - "select 1"

          initialDelaySeconds:

          periodSeconds:

          timeoutSeconds:

        volumeMounts:

        - name: data

          mountPath: /var/lib/mysql

        - name: log

          mountPath: /var/log

        - name: conf

          mountPath: /etc/mysql

      volumes:

      - name: data

        hostPath:

          path: /mnt/gv0/k8s-springcloud/mariadb/slave/data

      - name: log

        hostPath:

          path: /mnt/gv0/k8s-springcloud/mariadb/slave/log

      - name: conf

        hostPath:

          path: /mnt/gv0/k8s-springcloud/mariadb/slave/conf/mysql

---

apiVersion: v1

kind: Service

metadata:

  name: mariadb-slave

  namespace: k8s-springcloud

  labels:

    app: mariadb-slave

spec:

  type: NodePort

  ports:

  - port:

    nodePort:

    targetPort:

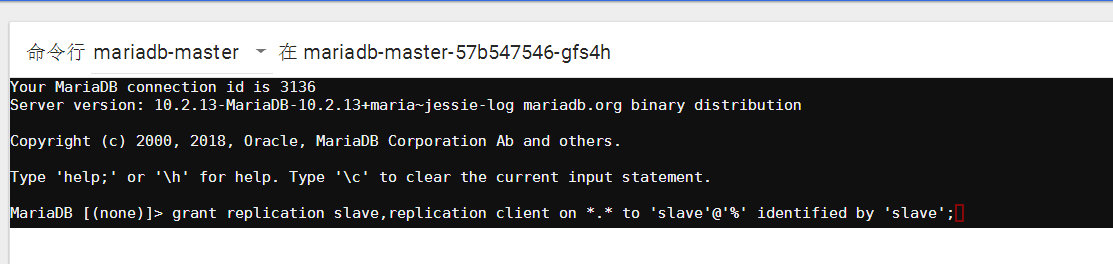
进入master 给slave 分配权限
grant replication slave,replication client on *.* to 'slave'@'%' identified by 'slave';

flush privileges;
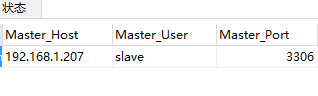
进入slave
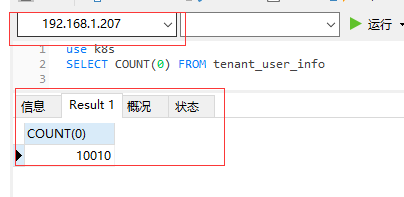
change master to MASTER_HOST='192.168.1.207',MASTER_USER='slave',MASTER_PASSWORD='slave',MASTER_USE_GTID=current_pos;

START SLAVE;
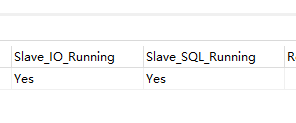
show slave status\G
在master创建表
-- ----------------------------

DROP TABLE IF EXISTS `tenant_user_info`;

CREATE TABLE `tenant_user_info`  (

  `id` varchar(255) CHARACTER SET utf8 COLLATE utf8_general_ci NOT NULL,

  `creator` varchar(255) CHARACTER SET utf8 COLLATE utf8_general_ci DEFAULT NULL,

  `create_time` datetime(0) DEFAULT NULL,

  `modifier` varchar(255) CHARACTER SET utf8 COLLATE utf8_general_ci DEFAULT NULL,

  `modify_time` datetime(0) DEFAULT NULL,

  `version` int(20) DEFAULT NULL,

  `username` varchar(255) CHARACTER SET utf8 COLLATE utf8_general_ci DEFAULT NULL,

  `password` varchar(255) CHARACTER SET utf8 COLLATE utf8_general_ci DEFAULT NULL,

  `account_non_expired` bit(1) DEFAULT NULL,

  `account_non_locked` bit(1) DEFAULT NULL,

  `credentials_non_expired` bit(1) DEFAULT NULL,

  `enabled` bit(1) DEFAULT NULL,

  PRIMARY KEY (`id`) USING BTREE

) ENGINE = InnoDB CHARACTER SET = utf8 COLLATE = utf8_general_ci ROW_FORMAT = Dynamic;

SET FOREIGN_KEY_CHECKS = 1;
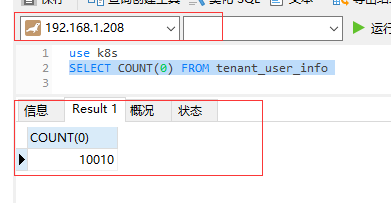
编写java程序,在插入过程中,直接把slave关机,然后插入结束后,看数据是否自动同步
@RunWith(SpringRunner.class)

@SpringBootTest

public class UserInfoServiceTest {

    @Resource

    private UserInfoService userInfoService;

    private ExecutorService executorService = Executors.newFixedThreadPool(20);

    @Test

    public void saveTest(){

        int dataCount = 10000;

        List<CompletableFuture<UserInfo>> futures = new ArrayList<>(dataCount);

        for(int i=0;i<dataCount;i++){

            UserInfo userInfo = new UserInfo();

            userInfo.setUsername("atho"+i);

            userInfo.setPassword("1232456");

            userInfo.setEnabled(true);

            userInfo.setCredentialsNonExpired(true);

            userInfo.setAccountNonExpired(true);

            userInfo.setAccountNonLocked(true);

                    futures.add(CompletableFuture.supplyAsync(() -> userInfoService.saveAndFlush(userInfo), executorService).exceptionally(e -> {

                        e.printStackTrace();

            return null;

        }));

        }

        futures.stream().map(CompletableFuture::join).collect(Collectors.toList()).forEach(u-> System.out.println(u.getId()));

    }

}
其中10条数据,是之前插入的
附上几个简单命令
#查看master gtid位置
select @@global.gtid_current_pos;
#查看slave gitd位置
select @@global.gtid_slave_pos;
#跳过几个错误
stop slave;
set global sql_slave_skip_counter=1;
start slave;
如果是已存在的数据库 改为gtid,那么复制数据库文件到slave 以后操作
master 操作
MariaDB [(none)]> show master status;
+-------------------+----------+--------------+------------------+
| File | Position | Binlog_Do_DB | Binlog_Ignore_DB |
+-------------------+----------+--------------+------------------+
| master-bin.000005 | 359 | | |
+-------------------+----------+--------------+------------------+
1 row in set (0.000 sec)
slave 操作
change master to master_host='192.168.91.141', MASTER_PORT=3306,master_user='slave', master_password='slave', master_log_file='master-bin.000005', master_log_pos=359;

START SLAVE;
kubernetes 测试 Mariadb gtid 主从复制.的更多相关文章
- Centos7.5部署MySQL5.7基于GTID主从复制+并行复制+半同步复制+读写分离(ProxySQL) 环境- 运维笔记 (完整版)
之前已经详细介绍了Mysql基于GTID主从复制的概念,原理和配置,下面整体记录下MySQL5.7基于GTID主从复制+并行复制+增强半同步复制+读写分离环境的实现过程,以便加深对mysql新特性GT ...
- MariaDB GTID 复制同步
MariaDB GTID 复制同步 GTID:Global Transaction ID,全局事务ID,在整个主从复制架构中任何两个事物ID是不能相同的.全局事务ID是Mster服务器生成一个128位 ...
- 企业级-Mysql双主互备高可用负载均衡架构(基于GTID主从复制模式)(原创)
前言: 原理与思想 这里选用GTID主从复制模式Mysql主从复制模式,是为了更加确保主从复制的正确性.健康性与易配性.这里做的是两服务器A,B各有Mysql实例331 ...
- Mariadb之主从复制的读写分离
首先我们来回顾下代理的概念,所谓代理就是指的是一端面向客户端,另外一端面向服务端,代理客户端访问服务端,我们把这种代理叫正向代理:代理服务端响应客户端我们叫做反向代理,这个我们在之前nginx系列博客 ...
- MariaDB设置主从复制[转载]
3. MariaDB设置主从复制 标签: mariadbMySQL主从复制 翻译人员: 铁锚 翻译日期: 2013年12月25日 原文链接: Setting Up Replication 主从复制 ...
- Linux - centos7 下 MySQL(mariadb) 和 主从复制
目录 Linux - centos7 下 MySQL(mariadb) 和 主从复制 MySQL(mariadb) 安装MySQL(mariadb) 配置数据库的中文支持 在远程用 mysql客户端去 ...
- MySQL 5.7 基于GTID主从复制+并行复制+半同步复制
环境准备 IP HOSTNAME SERVICE SYSTEM 192.168.131.129 mysql-master1 mysql CentOS7.6 192.168.131.130 mysql- ...
- MariaDB基于GTID主从复制及多主复制
一.简单主从模式配置步骤(必须要mysql5.6,此处以maridb10.0.10为例) 1.配置主从节点的服务配置文件 # vim /etc/my.cnf 1.1.配置master节点: [mysq ...
- mysql gtid 主从复制
基于GTID环境搭建主从复制 1.环境 ----------------------------------------------------------| |mysql版本 | 5.7.14 | ...
随机推荐
- linux(centos7)防火墙配置firewalld和iptables
linux系统中防火墙管理有2种方式,分别是iptables和firewalld(centos7.x),下面介绍centos7的配置方法 一.firewalld: 因为cenos7默认使用firewa ...
- spark 修改分区(存储结果需要)
修改分区就行了val rdd1 = sc.parallelize(Array(1,2,3,4,5,6,7,8))# 查看分区数rdd1.partitions.length# 改成1个分区val rd ...
- jquery datepicker只显示年和月
<html xmlns="http://www.w3.org/1999/xhtml"> <head > <title></titl ...
- 调整iRedmail之Roundcube webmail服务不可不知的几件事
iRedMail集成了roundcube webmail,极大的方便了安装维护工作,但是需求是千遍万化的,总有需要深入调整的地方.下面就是我调整roundcube时遇到的几点问题: 一.修改网页标题p ...
- [转]POI实现读写Excel2007完整示例
http://blog.csdn.net/little_stars/article/details/8210532 流程:(跟jxl相似,只是读取逻辑有点不同) 跟jxl的两处主要区别: 1.读取和写 ...
- jmeter正则表达式提取器--关联
http://desert3.iteye.com/blog/1394934 1.http://www.cnblogs.com/quange/archive/2010/06/11/1756260.htm ...
- python unittest 3- 框架Nose
当前python的测试框架主要有以下三个: 1)zope.testing 2)py.test 3)Nose Nose下载:https://github.com/nose-devs/nose 1.Nos ...
- 通过phoenix在hbase上创建二级索引,Secondary Indexing
环境描述: 操作系统版本:CentOS release 6.5 (Final) 内核版本:2.6.32-431.el6.x86_64 phoenix版本:phoenix-4.10.0 hbase版本: ...
- 【scala】 scala 类 (五)
1.scala类 1.class 关键字 2.var 属性 默认生成getter/setter 方法 3.val 属性 默认生成getter 方法 4. 自定义getter /setter 方法 , ...
- 2、一、Introduction(入门):1、Application Fundamentals(应用程序基础)
一.Introduction(入门) 1.Application Fundamentals(应用程序基础) Android apps are written in the Java programmi ...