使用Spring框架入门三:基于XML配置的AOP的使用
一、引入Jar包
        <!--测试1使用-->

        <dependency>

            <groupId>org.springframework</groupId>

            <artifactId>spring-context</artifactId>

            <version>5.0.5.RELEASE</version>

        </dependency>

        <!--测试2、3、4、5、6使用-->

        <dependency>

            <groupId>org.springframework</groupId>

            <artifactId>spring-aop</artifactId>

            <version>5.0.5.RELEASE</version>

        </dependency>

        <!--测试Aop使用-->

        <!-- https://mvnrepository.com/artifact/org.aspectj/aspectjweaver -->

        <dependency>

            <groupId>org.aspectj</groupId>

            <artifactId>aspectjweaver</artifactId>

            <version>1.9.1</version>

        </dependency>
注意,如果不引入aspectjweaver包,会报找不到类的错误。
二、测试步骤
1、新建切入点类(JoinPoint):
package aoptest1;

public class MyWorker {

    public void aopPointMethod1() {

        System.out.println("this is aopPointMethod1 executed.");

    }

}
2、建立增强类(Advice)
package aoptest1;

import org.aspectj.lang.ProceedingJoinPoint;

public class MyWorkerExtension {

    public void aopInspectAtBefore() {

        System.out.println("this is aopInspectAtBefore method execute.");

    }

    public void aopInspectAtAfter() {

        System.out.println("this is aopInspectAtAfter method execute.");

    }

    public void aopAround(ProceedingJoinPoint proceedingJoinPoint) {

        try {

            System.out.println("aopAround1");

            proceedingJoinPoint.proceed();

            System.out.println("aopAround2");

        } catch (Throwable throwable) {

            throwable.printStackTrace();

        }

    }

}
3、建立配置文件在resources下:applicationContextAopTest1.xml
<?xml version="1.0" encoding="UTF-8"?>

<beans xmlns="http://www.springframework.org/schema/beans"

       xmlns:xsi="http://www.w3.org/2001/XMLSchema-instance"

       xmlns:context="http://www.springframework.org/schema/context"

       xmlns:aop="http://www.springframework.org/schema/aop"

       xsi:schemaLocation="http://www.springframework.org/schema/beans

       http://www.springframework.org/schema/beans/spring-beans.xsd

       http://www.springframework.org/schema/context

       http://www.springframework.org/schema/context/spring-context.xsd

       http://www.springframework.org/schema/aop

       http://www.springframework.org/schema/aop/spring-aop.xsd">

    <context:component-scan base-package="aoptest1"/>

    <!--配置实体-->

    <bean id="myworker1" class="aoptest1.MyWorker"/>

    <bean id="myworkerExtension1" class="aoptest1.MyWorkerExtension"/>

    <!--配置AOP-->

    <aop:config>

        <!--配置切入点-->

        <aop:pointcut expression="execution(* aoptest1.MyWorker.aopPointMethod1(..))" id="aopPointMethod1PointCut"/>

        <!--配置切面-->

        <aop:aspect ref="myworkerExtension1">

            <aop:before method="aopInspectAtBefore" pointcut-ref="aopPointMethod1PointCut"/>

            <aop:after method="aopInspectAtAfter" pointcut-ref="aopPointMethod1PointCut"/>

            <aop:around method="aopAround" pointcut-ref="aopPointMethod1PointCut"/>

        </aop:aspect>

    </aop:config>

</beans>
4、测试
import aoptest1.MyWorker;

import org.junit.Test;

import org.springframework.context.ApplicationContext;

import org.springframework.context.support.ClassPathXmlApplicationContext;

public class AopTest {

    @Test

    public void aopTest1() {

        ApplicationContext context = new ClassPathXmlApplicationContext("applicationContextAopTest1.xml");

        MyWorker mywoker = context.getBean(MyWorker.class);

        mywoker.aopPointMethod1();

    }

}
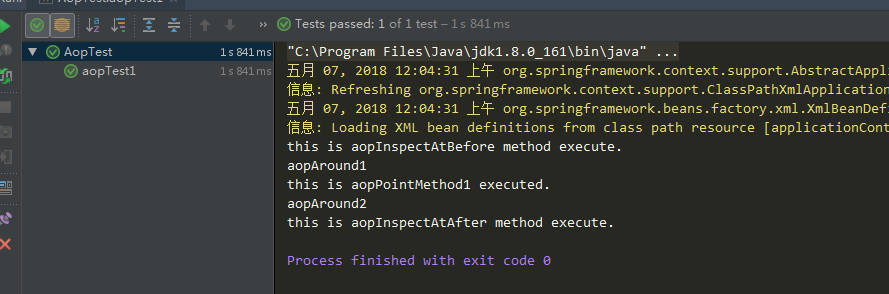
5、测试结果
this is aopInspectAtBefore method execute.

aopAround1

this is aopPointMethod1 executed.

aopAround2

this is aopInspectAtAfter method execute.
使用Spring框架入门三:基于XML配置的AOP的使用的更多相关文章
- Spring框架入门之基于xml文件配置bean详解
关于Spring中基于xml文件配置bean的详细总结(spring 4.1.0) 一.Spring中的依赖注入方式介绍 依赖注入有三种方式 属性注入 构造方法注入 工厂方法注入(很少使用,不推荐,本 ...
- Spring框架入门之基于Java注解配置bean
Spring框架入门之基于Java注解配置bean 一.Spring bean配置常用的注解 常用的有四个注解 Controller: 用于控制器的注解 Service : 用于service的注解 ...
- Spring3.0 入门进阶(三):基于XML方式的AOP使用
AOP是一个比较通用的概念,主要关注的内容用一句话来说就是"如何使用一个对象代理另外一个对象",不同的框架会有不同的实现,Aspectj 是在编译期就绑定了代理对象与被代理对象的关 ...
- spring框架之AspectJ的XML方式完成AOP的开发
1. 步骤一:创建JavaWEB项目,引入具体的开发的jar包 * 先引入Spring框架开发的基本开发包 * 再引入Spring框架的AOP的开发包 * spring的传统AOP的开发的包 * sp ...
- Spring使用AspectJ注解和XML配置实现AOP
本文演示的是Spring中使用AspectJ注解和XML配置两种方式实现AOP 下面是使用AspectJ注解实现AOP的Java Project首先是位于classpath下的applicationC ...
- 基于XML配置的AOP实现日志打印
Spring中可以使用注解或XML文件配置的方式实现AOP.1.导入jar包 com.springsource.net.sf.cglib -2.2.0.jar com.springsource.org ...
- Spring依赖注入:基于xml配置
基础接口 BeanFactory.ApplicationContext. BeanFactory用于创建并管理.获取各种类的对象. ApplicationContext从BeanFactory派生而来 ...
- 一步一步深入spring(6)--使用基于XML配置的spring实现的AOP
上节我们提到了使用基于注解实现的AOP,这节我们将用基于xml配置的方式来实现的AOP. 1.首先建立一个类,作为切面类,这个类主要用来实现注解中各种通知要实现的方法. package com.yan ...
- Spring3.2 中 Bean 定义之基于 XML 配置方式的源码解析
Spring3.2 中 Bean 定义之基于 XML 配置方式的源码解析 本文简要介绍了基于 Spring 的 web project 的启动流程,详细分析了 Spring 框架将开发人员基于 XML ...
随机推荐
- Jenkins CI CD
原文:https://www.sunjianhua.cn/archives/jenkins-ci-cd.html 1.安装git 以下为简单应用,适合无gitlab服务器用户. #在git服务器(19 ...
- 监测uitableview 向上滑动和向下滑动的事件
- (void)scrollViewDidScroll:(UIScrollView *)scrollView { CGFloat height = _varietyTableView.frame.si ...
- 使用 Crash 工具分析 Linux dump 文件
转自:http://blog.csdn.net/commsea/article/details/11804897 简介: Linux 内核由于其复杂性,使得对内核出现的各种异常的追踪变得异常困难.本文 ...
- Cannot subclass final class class com.sun.proxy.$Proxy
背景 这个错误是我在使用AOP动态切换数据库,实现数据库的读写分离的时候出现的问题,使用到的系统环境是: <spring.version>3.2.6.RELEASE</spring. ...
- 数据更新后让ListView自动滚动到底部
在做聊天界面的时候想要发送新的数据后,listview自动滚动到底部,显示出最新的数据.网上找了两个方法,觉得不错,记录一下. 方法一: 给listview添加下面两个属性 android:stack ...
- 通过Spannable对象设置textview的样式
通过Spannable对象我们可以设置textview的各种样式,其功能十分强大.通过SpannableString和它的setSpan(Object what, int start, int end ...
- [转]php使用 memcache 来存储 session
转自:http://koda.iteye.com/blog/466667 Memcache和PHP memcach扩展安装请见http://koda.iteye.com/blog/665761 设置s ...
- Asp.Net验证控件浅析
ASP.NET公有六种验证控件,分别如下: 控件名 功能描叙 RequiredFieldValidator(必须字段验证) 用于检查是否有输入值 CompareValidato ...
- JS 判断上传 文件 大小
随着HTML5 的发展,我们可以用file控件的size属性来获取客户端 上传文件的大小,但是 我今天测试 发现IE10支持,IE11的某个版本不支持, 于是就借用img控件来加载一此, 以此来获取文 ...
- [leetcode]Search in Rotated Sorted Array II @ Python
原题地址:https://oj.leetcode.com/problems/search-in-rotated-sorted-array-ii/ 题意: Follow up for "Sea ...