
google protobuf VC下的使用笔记
1
使用protobuf 2.x 下载地址(3.x 在c++11 vs2017下报错)
源码 https://github.com/google/protobuf
或者直接下载 二进制文件
2 如果下载的是代码 编译需要使用cmake 来生成VC的工程
cmake的使用从略
编译设置如图
3 如果下载的是代码 开启VC工程编译protobuf 由于以后自写代码需要使用protobuf的LIB 所以编译时请确认编译的版本
我使用的是VC2017编译的 x64 debug 版本
如图 
4 以protobuf中的例子 来进行实验
addressbook.proto
内容如下
 // See README.txt for information and build instructions.

 //

 // Note: START and END tags are used in comments to define sections used in

 // tutorials.  They are not part of the syntax for Protocol Buffers.

 //

 // To get an in-depth walkthrough of this file and the related examples, see:

 // https://developers.google.com/protocol-buffers/docs/tutorials

 // [START declaration]

 syntax = "proto3";

 package tutorial;

 // [END declaration]

 // [START java_declaration]

 option java_package = "com.example.tutorial";

 option java_outer_classname = "AddressBookProtos";

 // [END java_declaration]

 // [START csharp_declaration]

 option csharp_namespace = "Google.Protobuf.Examples.AddressBook";

 // [END csharp_declaration]

 // [START messages]

 message Person {

   string name = ;

   int32 id = ;  // Unique ID number for this person.

   string email = ;

   enum PhoneType {

     MOBILE = ;

     HOME = ;

     WORK = ;

   }

   message PhoneNumber {

     string number = ;

     PhoneType type = ;

   }

   repeated PhoneNumber phones = ;

 }

 // Our address book file is just one of these.

 message AddressBook {

   repeated Person people = ;

 }

 // [END messages]
addressbook.proto
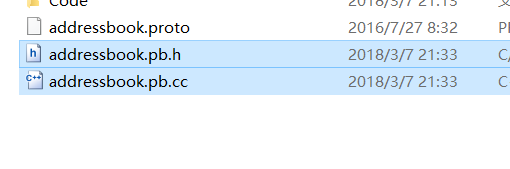
使用编译好的protoc.exe 通过addressbook.proto 生成CPP文件
指令如下 protoc -I=proto文件所在路径 -I=protobuf下src所在目录 --cpp_out=指定生成文件的路径 addressbook.proto(完整路径)
5 VC创建一个命令行工程 根目录下创建lib文件夹
将步骤4生成的lib文件拷贝到该文件夹
根目录下创建include文件夹
将protobuf->src下的google文件夹拷贝到该文件夹下
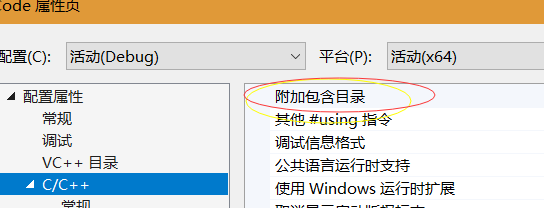
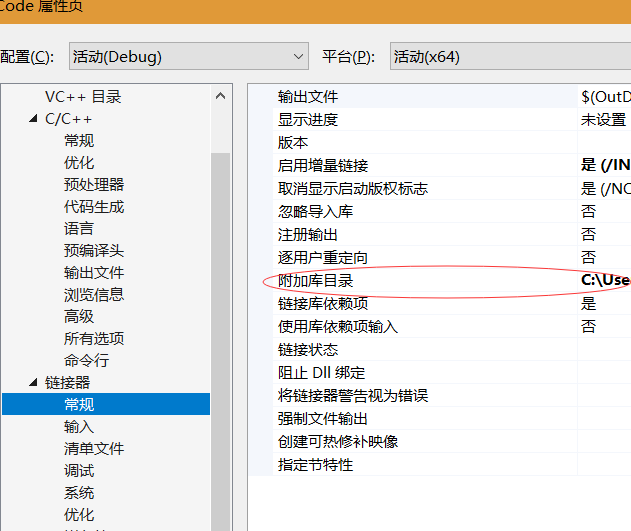
6 VC配置工程的属性
添加文件夹和lib文件夹 以及lib的文件名
如图

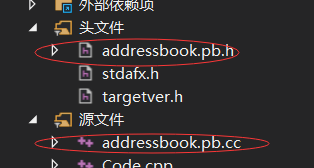
工程需要加入生成的protobuf CC文件
关闭预编译头

关闭 sdl检测

7 编译代码 代码内容可参考
protobuf->examples->add_person.cc
 // See README.txt for information and build instructions.

 #include <iostream>

 #include <fstream>

 #include <string>

 #include "addressbook.pb.h"

 using namespace std;

 // This function fills in a Person message based on user input.

 void PromptForAddress(tutorial::Person* person) {

   cout << "Enter person ID number: ";

   int id;

   cin >> id;

   person->set_id(id);

   cin.ignore(, '\n');

   cout << "Enter name: ";

   getline(cin, *person->mutable_name());

   cout << "Enter email address (blank for none): ";

   string email;

   getline(cin, email);

   if (!email.empty()) {

     person->set_email(email);

   }

   while (true) {

     cout << "Enter a phone number (or leave blank to finish): ";

     string number;

     getline(cin, number);

     if (number.empty()) {

       break;

     }

     tutorial::Person::PhoneNumber* phone_number = person->add_phones();

     phone_number->set_number(number);

     cout << "Is this a mobile, home, or work phone? ";

     string type;

     getline(cin, type);

     if (type == "mobile") {

       phone_number->set_type(tutorial::Person::MOBILE);

     } else if (type == "home") {

       phone_number->set_type(tutorial::Person::HOME);

     } else if (type == "work") {

       phone_number->set_type(tutorial::Person::WORK);

     } else {

       cout << "Unknown phone type.  Using default." << endl;

     }

   }

 }

 // Main function:  Reads the entire address book from a file,

 //   adds one person based on user input, then writes it back out to the same

 //   file.

 int main(int argc, char* argv[]) {

   // Verify that the version of the library that we linked against is

   // compatible with the version of the headers we compiled against.

   GOOGLE_PROTOBUF_VERIFY_VERSION;

   if (argc != ) {

     cerr << "Usage:  " << argv[] << " ADDRESS_BOOK_FILE" << endl;

     return -;

   }

   tutorial::AddressBook address_book;

   {

     // Read the existing address book.

     fstream input(argv[], ios::in | ios::binary);

     if (!input) {

       cout << argv[] << ": File not found.  Creating a new file." << endl;

     } else if (!address_book.ParseFromIstream(&input)) {

       cerr << "Failed to parse address book." << endl;

       return -;

     }

   }

   // Add an address.

   PromptForAddress(address_book.add_people());

   {

     // Write the new address book back to disk.

     fstream output(argv[], ios::out | ios::trunc | ios::binary);

     if (!address_book.SerializeToOstream(&output)) {

       cerr << "Failed to write address book." << endl;

       return -;

     }

   }

   // Optional:  Delete all global objects allocated by libprotobuf.

   google::protobuf::ShutdownProtobufLibrary();

   return ;

 }
add_person.cc
运行结果如图

google protobuf VC下的使用笔记的更多相关文章
- google::protobuf 编译方法
这两天用了一下Protobuf 感觉很方便, 记录一下编译过程, 以做务忘(需要安装cmake): 1: 下载地址: https://developers.google.com/protocol-bu ...
- 《Dotnet9》系列-Google ProtoBuf在C#中的简单应用
时间如流水,只能流去不流回! 点赞再看,养成习惯,这是您给我创作的动力! 本文 Dotnet9 https://dotnet9.com 已收录,站长乐于分享dotnet相关技术,比如Winform.W ...
- google protobuf学习笔记:windows下环境配置
欢迎转载,转载请注明原文地址:http://blog.csdn.net/majianfei1023/article/details/45371743 protobuf的使用和原理,请查看:http:/ ...
- window下编译并使用google protobuf
参考网址: http://my.oschina.net/chenleijava/blog/261263 http://www.ibm.com/developerworks/cn/linux/l-cn- ...
- 在C语言环境下使用google protobuf
本文写给经常使用C编程且不喜欢C++而又要经常使用google protobuf的人. 经常写通讯程序的人对数据进行序列化或者反序列化时,可能经常使用google的protobuf(PB ...
- Windows环境下google protobuf入门
我使用的是最新版本的protobuf(protobuf-2.6.1),编程工具使用VS2010.简单介绍下google protobuf: google protobuf 主要用于通讯,是google ...
- VS下使用Google Protobuf完成SOCKET通信
如何在Windows环境下的VS中安装使用Google Protobuf完成SOCKET通信 出处:如何在Windows环境下的VS中安装使用Google Protobuf完成SOCKET通信 最近一 ...
- 《精通并发与Netty》学习笔记(05 - Google Protobuf与Netty的结合)
protobuf是由Google开发的一套对数据结构进行序列化的方法,可用做通信协议,数据存储格式,等等.其特点是不限语言.不限平台.扩展性强 Netty也提供了对Protobuf的天然支持,我们今天 ...
- 《精通并发与Netty》学习笔记(04 - Google Protobuf介绍)
一 .Google Protobuf 介绍 protobuf是google团队开发的用于高效存储和读取结构化数据的工具,是Google的编解码技术,在业界十分流行,通过代码生成工具可以生成不同语言版本 ...
随机推荐
- stm32在linux下使用clion开发
参考大神的资料,淘宝买了个板子和jlink 几个概念 jlink / openJtag,实现调试协议的硬件 openocd,这个和上面的硬件一起组成调试器 这样有个感性的认识. 具体流程 libusb ...
- git 更新远程分支列表
git remote update origin --prune git remote update origin -p
- 如何将maven依赖项打进jar包,将一个完整的项目打进jar包
目的:我的目的就是将项目所有的文件,包括pom文件中依赖的jar包都打进一个jar包里面. 过程:将下面的内容放到pom文件里面. </dependencies> <build> ...
- Redis为什么可以支持那么大的并发访问量?为什么redis没有单点并发瓶颈?
一是redis使用内存 而是redis使用多路复用的IO模型: 现代的UNIX操作系统提供了select/poll/kqueue/epoll这样的系统调用,这些系统调用的功能是:你告知我一批套接字,当 ...
- percona-toolkit(pt-online-schema-change)工具包的安装和使用
1.下载和安装percona toolkit的包 #yum install http://www.percona.com/downloads/percona-release/redhat/0.1-4/ ...
- linux6下源码安装mysql5.6
概述:CentOS 6.4下通过yum安装的MySQL是5.1版的,比较老,所以就想通过源代码安装高版本的5.6.14.正文:一:卸载旧版本使用下面的命令检查是否安装有MySQL Serverrpm ...
- gentoo emerge L10N
gentoo 中安装软件的时候 emerge 提示 USE 中有 语言包可选安装,使用 L10N 来设置,设置方法是在USE中使用 l10n_,比如说 l10n_zh_CN 来安装中文支持包.
- 使用libvirtAPI打快照原理
参考: https://blog.51cto.com/3646344/2096347 https://blog.51cto.com/3646344/2096351(磁盘外部快照) API接口: htt ...
- IIS下https配置及安全整改
原文链接:https://www.cnblogs.com/JangoJing/p/6769759.html 1.https证书的分类 SSL证书没有所谓的"品质"和"等级 ...
- py库: GUI(tkinter)
图形用户界面(Graphical User Interface,简称 GUI) http://www.runoob.com/python/python-gui-tkinter.html Python ...