5.listview(QStringList QStringListModel)
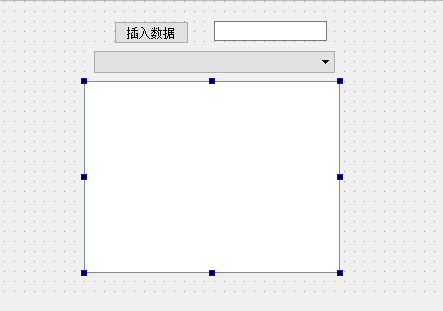
- UI
- mainwindow.h
#ifndef MAINWINDOW_H
#define MAINWINDOW_H #include <QMainWindow>
#include <QStringListModel> namespace Ui {
class MainWindow;
} class MainWindow : public QMainWindow
{
Q_OBJECT public:
explicit MainWindow(QWidget *parent = );
~MainWindow(); private slots:
//按下按钮
void on_pushButton_clicked();
22 //combox改变
23 void on_comboBox_currentIndexChanged(int index);
private:
Ui::MainWindow *ui;
27 //设置列表
28 QStringList *sl;
29 //设置模式,显示列表
30 QStringListModel *slm;
}; #endif // MAINWINDOW_H - mainwindow.cpp
 #include "mainwindow.h"

 #include "ui_mainwindow.h"

 #include <QStringListModel>

 MainWindow::MainWindow(QWidget *parent) :

     QMainWindow(parent),

     ui(new Ui::MainWindow)

 {

     ui->setupUi(this);

10     sl = new QStringList();

11     sl->append("hello1");

12     sl->append("hello2");

13     sl->append("hello3");

14     sl->append("hello4");

15     //创建字符串模式

16     slm = new QStringListModel(this);

17     slm->setStringList(*sl);

18     //显示

19     ui->listView->setModel(slm);

20

21     //设置combox选项

22     ui->comboBox->insertItem(0,"hello1","hello1");

23     ui->comboBox->insertItem(1,"hello2","hello2");

24     ui->comboBox->insertItem(2,"hello3","hello3");

25     ui->comboBox->insertItem(3,"hello4","hello4");


 }

 MainWindow::~MainWindow()

 {

     delete ui;

 }

 void MainWindow::on_pushButton_clicked()

 {

     QString qstr;

39     qstr = ui->lineEdit->text();

40     sl->append(qstr);

41     //模式设置字符串

42     slm->setStringList(*sl);

43     //显示

44     ui->listView->setModel(slm);

 }

 void MainWindow::on_comboBox_currentIndexChanged(int index)

 {

     //获取当前数据

50     QString myqstr=ui->comboBox->currentText();

51     ui->lineEdit->setText(myqstr);

} - main.cpp
 #include "mainwindow.h"

 #include <QApplication>

 int main(int argc, char *argv[])

 {

     QApplication a(argc, argv);

     MainWindow w;

     w.show();

     return a.exec();

 }
5.listview(QStringList QStringListModel)的更多相关文章
- Qt 学习之路:QStringListModel
上一章我们已经了解到有关 list.table 和 tree 三个最常用的视图类的便捷类的使用.前面也提到过,由于这些类仅仅是提供方便,功能.实现自然不如真正的 model/view 强大.从本章起, ...
- qt model/view 架构自定义模型之QStringListModel
# -*- coding: utf-8 -*- # python:2.x #QStringListModel #QStringListModel 是最简单的模型类,具备向视图提供字符串数据的能力. # ...
- QLineEdit 自动完成(使用setCompleter,内含一个ListView)
-------------------------------------CompleteLineEdit.h------------------------------------- #ifndef ...
- (二)使用预定义模型 QStringListModel例子
使用预定义模型 QStringListModel例子 源代码如下 Main.cpp #include <QApplication> #include "teamleadersdi ...
- Qt 学习之路 2(43):QStringListModel
Qt 学习之路 2(43):QStringListModel 豆子 2013年2月13日 Qt 学习之路 2 38条评论 上一章我们已经了解到有关 list.table 和 tree 三个最常用的视图 ...
- QT QStringListModel 示例代码
1. QStringListModel , 实现 插入 删除 编辑 list,支持鼠标双击编辑. 2. dialog.h #ifndef DIALOG_H #define DIALOG_H #inc ...
- PyQt(Python+Qt)学习随笔:model/view架构中的QStringListModel
老猿Python博文目录 专栏:使用PyQt开发图形界面Python应用 老猿Python博客地址 一.QStringListModel介绍 QStringListModel是Qt提供的一个已经实现Q ...
- PyQt学习随笔:ListView控件的视图和数据模型分离案例
Qt 中view类控件的目的是实现数据和模型分离,控件展示数据,数据保存在数据存储中,数据存储中的数据改变了,则控件中展示的数据跟随改变.当设计时只指定了一个控件和一个数据存储关联时,这种分离虽然也能 ...
- PyQt学习随笔:QtDesigner ListView控件列表项的初始化
在QtDesigner中设计的界面中添加ListView控件后,是没办法添加需要在ListView控件中显示的列表项.由于ListView控件只是一个展示列表项的视图控件,实现了界面与数据的分离,其要 ...
随机推荐
- javascript中标准事件流addEventListener介绍
addEventListener-开始 前面零散地写了些关于 addEventListener 的内容,觉得比较散,有些地方可能也说得不够清楚明白,所以决定以连载的形式从头到尾再写一篇. addEve ...
- vue首次进入微信没有标题问题
首先实在路由改变的时候可以有标题的 首次进入路由不显示标题,查到很多,最有解决可以自定义标签, 后者引入一个包vue-wechat-title,我就是用的后者,前面的没有式过 上地址 http ...
- Mac使用ssh登录远程linux系统查看jetty日志及同时使用github工具
转载请注明出处:http://www.houxiurong.com/?post=27 Mac默认是安装了ssh工具软件的. 先用mac的 终端工具生成 id_rsa 和id_rsa.pub 秘钥,生成 ...
- [Intermediate Algorithm] - Sum All Primes
题目 求小于等于给定数值的质数之和. 只有 1 和它本身两个约数的数叫质数.例如,2 是质数,因为它只能被 1 和 2 整除.1 不是质数,因为它只能被自身整除. 给定的数不一定是质数. 提示 For ...
- 认识优动漫PAINT,优动漫PAINT基本功能有哪些?
优动漫PAINT是一款搭载了绘制漫画.插画所需所有功能的软件.拥有笔感自然真实.表现形式多样的画笔工具,及高效.完美.便捷的上色工具等. 本文将通过由优动漫PAINT描绘的作品为例,简单介绍该软件的功 ...
- Binary Agents FreeCodeCamp
function binaryAgent(str) { var arr = str.split(" "); var newStr = ""; for(var i ...
- 训练1-E
有二个整数,它们加起来等于某个整数,乘起来又等于另一个整数,它们到底是真还是假,也就是这种整数到底存不存在,实在有点吃不准,你能快速回答吗?看来只能通过编程. 例如: x + y = 9,x * y ...
- CentOS 笔记(三) 目录结构
理解CentOS 目录结构 首次登录进入,应该是进入了,run文件夹 通过 cd ../ 进入了,最根节点 通过 ls 显示全部文件夹 通过 pwd 查看当前目录 参考: https://www ...
- JAVA 中 重定向
一.重定向:一个web资源收到客户端的请求后,通知客户端去访问另外一个web资源,这称之为请求重定向. 运用场景:如用户登录. 实现方式:通过response来实现: 如: 1.response.se ...
- ubuntu 下jrtplib编译
我本来想用最新的 jrtplib-3.9.1和jthread-1.3.1,可是最新的那两个版本中都是用cmake进行配置的,我搞了好久,查了好多资料也没有解决交叉编译的问题,无奈,只能选用比较老的两个 ...