Qt-上位机-串口助手
前言:参考自:https://blog.csdn.net/u014695839/article/details/50611549
一、新建Widgets Appliaction工程
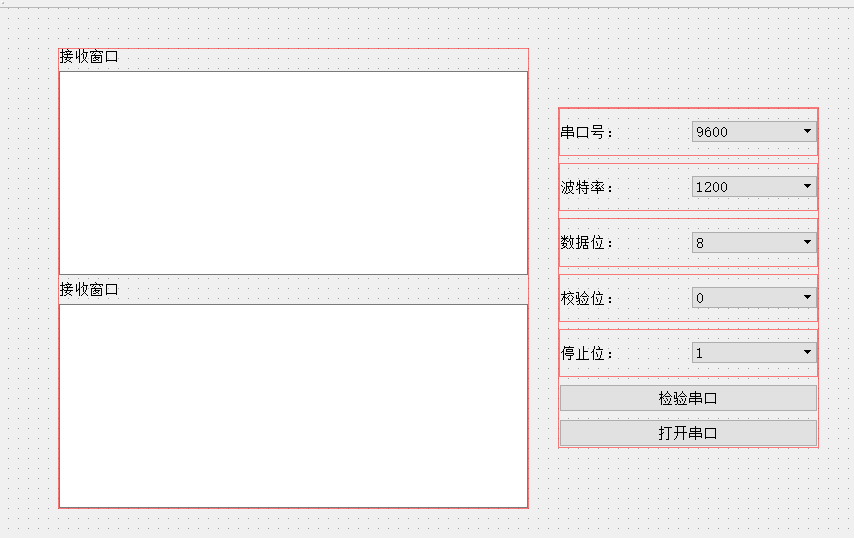
二、设计ui界面
三、修改文件
3.1 修改mainwindow.h文件
#ifndef MAINWINDOW_H
#define MAINWINDOW_H

#include <QMainWindow>
#include <QSerialPort>
#include <QSerialPortInfo>

namespace Ui {
class MainWindow;
}

class MainWindow : public QMainWindow
{
    Q_OBJECT

public:
    );
    ~MainWindow();

private slots:
    void serialPort_readyRead();

    void on_searchButton_clicked();

    void on_openButton_clicked();

    void on_sendButton_clicked();

    void on_clearButton_clicked();

private:
    Ui::MainWindow *ui;
    QSerialPort serial;
};

#endif
3.2 修改mainwindow.cpp文件
#include "mainwindow.h"
#include "ui_mainwindow.h"
#include <QMessageBox>

MainWindow::MainWindow(QWidget *parent) :
    QMainWindow(parent),
    ui(new Ui::MainWindow)
{
    ui->setupUi(this);

    //连接信号和槽
    QObject::connect(&serial, &QSerialPort::readyRead, this, &MainWindow::serialPort_readyRead);

    //发送按键失能
    ui->sendButton->setEnabled(false);
    //波特率默认选择下拉第三项:9600
    ui->baudrateBox->setCurrentIndex();
}

MainWindow::~MainWindow()
{
    delete ui;
}

void MainWindow::serialPort_readyRead()
{
    //从接收缓冲区中读取数据
    QByteArray buffer = serial.readAll();
    //从界面中读取以前收到的数据
    QString recv = ui->recvTextEdit->toPlainText();
    recv += QString(buffer);
    //清空以前的显示
    ui->recvTextEdit->clear();
    //重新显示
    ui->recvTextEdit->append(recv);
}

void MainWindow::on_searchButton_clicked()
{
    ui->portNameBox->clear();
    //通过QSerialPortInfo查找可用串口
    foreach(const QSerialPortInfo &info, QSerialPortInfo::availablePorts())
    {
        ui->portNameBox->addItem(info.portName());
    }
}

void MainWindow::on_openButton_clicked()
{
    if(ui->openButton->text()==QString("打开串口"))
    {
        //设置串口名
        serial.setPortName(ui->portNameBox->currentText());
        //设置波特率
        serial.setBaudRate(ui->baudrateBox->currentText().toInt());
        //设置数据位数
        switch(ui->dataBitsBox->currentIndex())
        {
        : serial.setDataBits(QSerialPort::Data8); break;
        default: break;
        }
        //设置奇偶校验
        switch(ui->ParityBox->currentIndex())
        {
        : serial.setParity(QSerialPort::NoParity); break;
        default: break;
        }
        //设置停止位
        switch(ui->stopBitsBox->currentIndex())
        {
        : serial.setStopBits(QSerialPort::OneStop); break;
        : serial.setStopBits(QSerialPort::TwoStop); break;
        default: break;
        }
        //设置流控制
        serial.setFlowControl(QSerialPort::NoFlowControl);

        //打开串口
        if(!serial.open(QIODevice::ReadWrite))
        {
            QMessageBox::about(NULL, "提示", "无法打开串口!");
            return;
        }

        //下拉菜单控件失能
        ui->portNameBox->setEnabled(false);
        ui->baudrateBox->setEnabled(false);
        ui->dataBitsBox->setEnabled(false);
        ui->ParityBox->setEnabled(false);
        ui->stopBitsBox->setEnabled(false);

        ui->openButton->setText(QString("关闭串口"));
        //发送按键使能
        ui->sendButton->setEnabled(true);
    }
    else
    {
        //关闭串口
        serial.close();

        //下拉菜单控件使能
        ui->portNameBox->setEnabled(true);
        ui->baudrateBox->setEnabled(true);
        ui->dataBitsBox->setEnabled(true);
        ui->ParityBox->setEnabled(true);
        ui->stopBitsBox->setEnabled(true);

        ui->openButton->setText(QString("打开串口"));
        //发送按键失能
        ui->sendButton->setEnabled(false);
    }
}

void MainWindow::on_sendButton_clicked()
{
    //获取界面上的数据并转换成utf8格式的字节流
    QByteArray data = ui->sendTextEdit->toPlainText().toUtf8();
    serial.write(data);
}

void MainWindow::on_clearButton_clicked()
{
    ui->recvTextEdit->clear();
}
三、运行
-END-
Qt-上位机-串口助手的更多相关文章
- 基于uFUN开发板的心率计(三)Qt上位机的实现
前言 上两周利用周末的时间,分别写了基于uFUN开发板的心率计(一)DMA方式获取传感器数据和基于uFUN开发板的心率计(二)动态阈值算法获取心率值,介绍了AD采集传感器数据和数据的滤波处理获取心率值 ...
- C#上位机串口控制12864显示
实现的效果 上面是用Proteus仿真的,,对了如果自己想用proteus仿真需要安装下面这个软件 再看一下实物显示效果 先做上位机部分........... 为了程序一启动就把电脑上能用的串口号显示 ...
- 14-ESP8266 SDK开发基础入门篇--上位机串口控制 Wi-Fi输出PWM的占空比,调节LED亮度,8266程序编写
https://www.cnblogs.com/yangfengwu/p/11102026.html 首先规定下协议 ,CRC16就不加了哈,最后我会附上CRC16的计算程序,大家有兴趣自己加上 上 ...
- ROS常用库(二) Serial库(单片机和上位机串口通讯)
比如我们做了个单片机,在win里面用串口调试助手接收和下发数据,那么在ubuntu里用ros怎么实现?换个说法,怎么实现上位机和下位机的通讯? 首先,用python自带的库就可以实现这个功能. 安装p ...
- 13-ESP8266 SDK开发基础入门篇--上位机串口控制 Wi-Fi输出PWM的占空比,IEEE754规约
https://www.cnblogs.com/yangfengwu/p/11100552.html 这节做个上位机控制Wi-Fi引脚输出的PWM占空比信号,灯的亮度就可以用上位机控制了 大家可以自己 ...
- VS2008基于对话框的MFC上位机串口通信(C++实现)简单例程
首先,在 vs2008 环境下创建 MFC 运用程序 设置项目名称为 ComTest(这个地方随意命名,根据个人习惯),点击确定后,点击下一步 出现如下界面 选择"基于对话框"模式 ...
- QT上位机
程序是用QT写的,通过COM口进行数据的读取. 源码地址:https://github.com/kunkunlin/QT-SWJ
- 15-ESP8266 SDK开发基础入门篇--上位机串口控制 Wi-Fi输出PWM的占空比,调节LED亮度,上位机程序编写
https://www.cnblogs.com/yangfengwu/p/11104167.html 先说一下整体思路哈.. 咱滑动的时候 会进入这个,然后咱呢不直接从这个里面写发送 因为这样的话太快 ...
- 嵌入式Linux学习笔记(六) 上位机QT界面实现和串口通讯实现
目录 (1).参考资料 (2).QT界面布局实现 (3).数据和操作逻辑 在上一章我们实现了下位机的协议制定,并通过串口通讯工具完成了对设备内外设(LED)的状态修改,下面就要进行上位机软件的实现了( ...
随机推荐
- Android 通用Dialog中设置RecyclerView
通用Dialog public class IOSRecyclerViewDialog{ private Context context; private Dialog dialog; private ...
- DB2 char长度问题
问题:发现用char转换了后的值长度都变为了11,更长的变为了254
- strusts2_json
引用别人的 Struts.xml <package name="default" extends ="json-default" > <act ...
- openlayers5学习笔记-001
tmp.initPoint = function (items) { //初始化所有农户点坐标,聚合 var count = items.length; var features = new Arra ...
- 常用前端布局,CSS技巧介绍
常用前端布局,CSS技巧介绍 对前端常用布局的整理总结,并对其性能优劣,兼容等情况进行介绍 css常用技巧之可变大小正方形的绘制 1:若通过设置width为百分比的方式,则高度不能通过百分比来控制. ...
- 使用maven创建web项目时后面多出来Maven Webapp如何删除
类似这样: 解决办法:
- ORA-12560: TNS: 协议适配器错误(oracle service 已启动)
如果是安装完 oracle 客户端之后才出现的这个问题,请往下看 安装 oracle client 时,会配置一个客户端的监听,如果电脑上之前安装过 oracle service 就会和服务的监听冲突 ...
- 【hdu 6336】 Matrix from Arrays
[链接] 我是链接,点我呀:) [题意] 在这里输入题意 [题解] 找个规律会发现 M[i][j] = M[i-2*L][j] = M[i][j-2*L] 先预处理出来(1,1)-(2L,2L)这个矩 ...
- 【codeforces 807A】Is it rated?
[题目链接]:http://codeforces.com/contest/807/problem/A [题意] 给你n个人在一场CF前后的rating值; 问你这场比赛是不是计分的 [题解] 如果有一 ...
- java并发之阻塞队列
在前面我们接触的队列都是非阻塞队列,比如PriorityQueue.LinkedList(LinkedList是双向链表,它实现了Dequeue接口). 阻塞队列与普通队列的区别在于:当队列是空的时, ...