Ionic4.x Javascript 扩展 ActionSheet Alert Toast Loading 以及 ionic 手势相 关事件
1、ActionSheet 官方文档:https://ionicframework.com/docs/api/action-sheet
<ion-header>
<ion-toolbar>
<ion-buttons slot="start">
<ion-back-button defaultHref="/tabs/tab1"></ion-back-button>
</ion-buttons>
<ion-title>actionsheet</ion-title>
</ion-toolbar>
</ion-header> <ion-content padding> <ion-button (click)="showAction()">
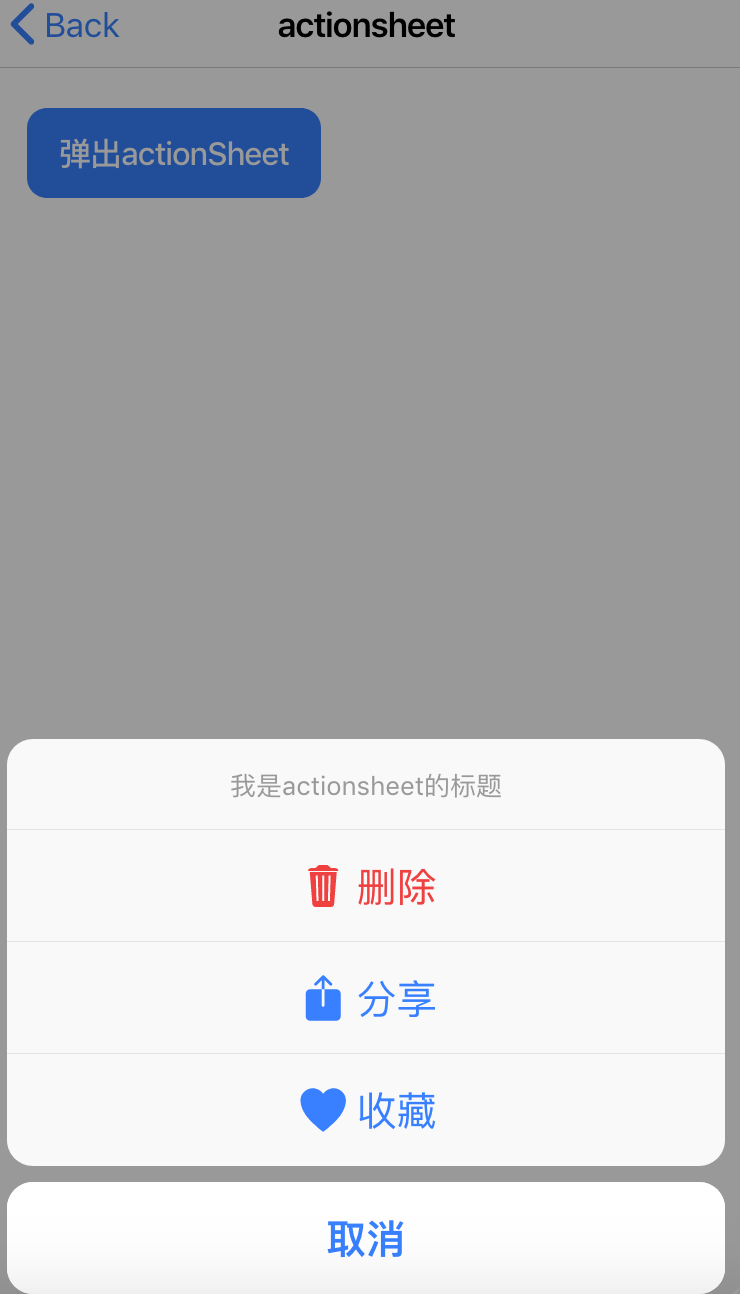
弹出actionSheet
</ion-button>
</ion-content>
import { Component, OnInit } from '@angular/core';

import { ActionSheetController } from '@ionic/angular';

@Component({

  selector: 'app-actionsheet',

  templateUrl: './actionsheet.page.html',

  styleUrls: ['./actionsheet.page.scss'],

})

export class ActionsheetPage implements OnInit {

  constructor(public actionSheetController: ActionSheetController) {}

  ngOnInit() {

  }

  async showAction(){

    const actionSheet = await this.actionSheetController.create({

      header: '我是actionsheet的标题',

      mode:'ios',   /*修改action的平台*/

      buttons: [{

        text: '删除',

        role: 'destructive',

        icon: 'trash',

        handler: () => {

          console.log('Delete clicked');

        }

      }, {

        text: '分享',

        icon: 'share',

        handler: () => {

          console.log('Share clicked');

        }

      }, {

        text: '收藏',

        icon: 'heart',

        handler: () => {

          console.log('Favorite clicked');

        }

      }, {

        text: '取消',

        role: 'cancel',

        handler: () => {

          console.log('Cancel clicked');

        }

      }]

    });

    await actionSheet.present();

  }

}
2、Alert 官方文档:https://ionicframework.com/docs/api/alert
<ion-header>

  <ion-toolbar>

    <ion-buttons slot="start">

      <ion-back-button defaultHref="/tabs/tab1"></ion-back-button>

    </ion-buttons>

    <ion-title>alert</ion-title>

  </ion-toolbar>

</ion-header>

<ion-content padding>

   <ion-button (click)="presentAlert()">

    presentAlert

   </ion-button>

   <ion-button (click)="presentAlertMultipleButtons()">

       确定要删除吗

   </ion-button>

   <ion-button (click)="presentAlertPrompt()">

     alert放表单

  </ion-button>

</ion-content>
import { Component, OnInit } from '@angular/core';

import { AlertController } from '@ionic/angular';

@Component({

  selector: 'app-alert',

  templateUrl: './alert.page.html',

  styleUrls: ['./alert.page.scss'],

})

export class AlertPage implements OnInit {

  constructor(public alertController: AlertController) {}

  ngOnInit() {

  }

  async presentAlert() {

    const alert = await this.alertController.create({

      header: '提示信息',

      message: '你已经支付成功了...',

      buttons: ['确认']

    });

    await alert.present();

  }

  async presentAlertMultipleButtons() {

    const alert = await this.alertController.create({

      header: '提示信息!',

      message: '您确定要删除吗?',

      buttons: [

        {

          text: '取消',

          role: 'cancel',

          cssClass: 'secondary',   //注意自定义class写在全局

          handler: (blah) => {

            console.log('Confirm Cancel: blah');

          }

        }, {

          text: '确定',

          handler: () => {

            console.log('Confirm Okay');

          }

        }

      ]

    });

    await alert.present();

  }

  async presentAlertPrompt() {

    const alert = await this.alertController.create({

      header: 'Prompt!',

      inputs: [

        {

          name: 'name1',

          type: 'text',

          placeholder: 'Placeholder 1'

        },

        {

          name: 'name2',

          type: 'text',

          id: 'name2-id',

          value: 'hello',

          placeholder: 'Placeholder 2'

        },

        {

          name: 'name3',

          value: 'http://ionicframework.com',

          type: 'url',

          placeholder: 'Favorite site ever'

        },

        // input date with min & max

        {

          name: 'name4',

          type: 'date',

          min: '2017-03-01',

          max: '2018-01-12'

        },

        // input date without min nor max

        {

          name: 'name5',

          type: 'date'

        },

        {

          name: 'name6',

          type: 'number',

          min: -5,

          max: 10

        },

        {

          name: 'name7',

          type: 'number'

        }

      ],

      buttons: [

        {

          text: 'Cancel',

          role: 'cancel',

          cssClass: 'secondary',

          handler: () => {

            console.log('Confirm Cancel');

          }

        }, {

          text: 'Ok',

          handler: (result) => {    //获取表单输入的值

            console.log(result);

          }

        }

      ]

    });

    await alert.present();

  }

}
3、Toast 官方文档:https://ionicframework.com/docs/api/toast
<ion-header>
<ion-toolbar>
<ion-buttons slot="start">
<ion-back-button defaultHref="/tabs/tab1"></ion-back-button>
</ion-buttons>
<ion-title>toast</ion-title>
</ion-toolbar>
</ion-header> <ion-content padding> <ion-button (click)="presentToast()">
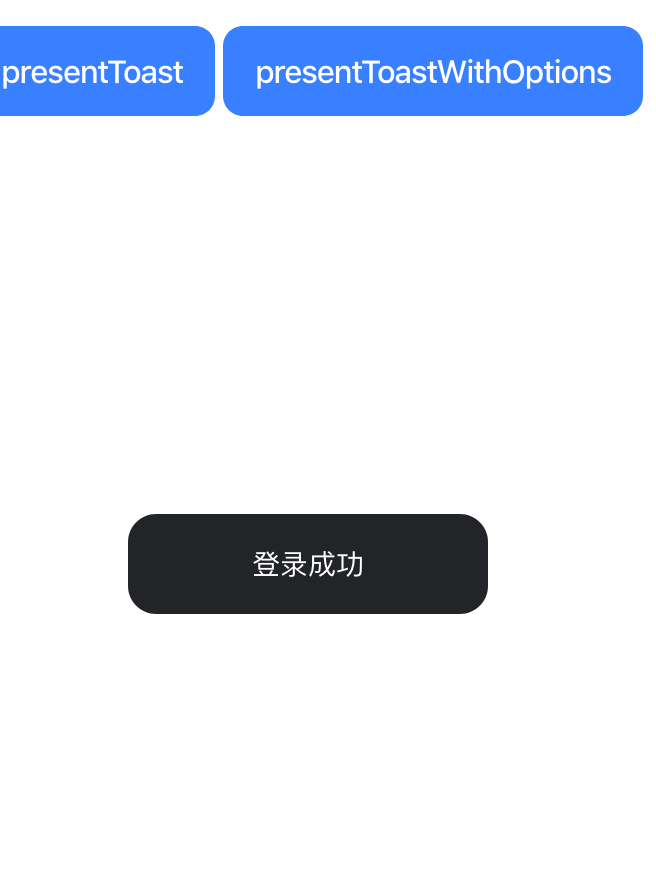
presentToast
</ion-button> <ion-button (click)="presentToastWithOptions()">
presentToastWithOptions
</ion-button> </ion-content>
import { Component, OnInit } from '@angular/core';

import { ToastController } from '@ionic/angular';

@Component({

  selector: 'app-toast',

  templateUrl: './toast.page.html',

  styleUrls: ['./toast.page.scss'],

})

export class ToastPage implements OnInit {

  constructor(public toastController: ToastController) {}

  ngOnInit() {

  }

  async presentToast() {

    const toast = await this.toastController.create({

      message: '登录成功',

      duration: 2000,

      position: 'middle',

      color:'dark',

      cssClass:'mytoast'    /*cssClass必须写在全局*/

    });

    toast.present();

  }

  async presentToastWithOptions() {

    const toast = await this.toastController.create({

      message: 'Click to Close',

      showCloseButton: true,

      position: 'top',

      closeButtonText: 'Done'

    });

    toast.present();

  }

}
4、Loading 官方文档:https://ionicframework.com/docs/api/loading
<ion-header>

  <ion-toolbar>

    <ion-buttons slot="start">

      <ion-back-button defaultHref="/tabs/tab1"></ion-back-button>

    </ion-buttons>

    <ion-title>loading</ion-title>

  </ion-toolbar>

</ion-header>

<ion-content padding>

    <ion-button (click)="presentLoading()">

      presentLoading

    </ion-button>

    <ion-button (click)="presentLoadingWithOptions()">

      presentLoadingWithOptions

    </ion-button>

</ion-content>
import { Component, OnInit } from '@angular/core';

import { LoadingController } from '@ionic/angular';

@Component({

  selector: 'app-loading',

  templateUrl: './loading.page.html',

  styleUrls: ['./loading.page.scss'],

})

export class LoadingPage implements OnInit {

  constructor(public loadingController: LoadingController) {}

  ngOnInit() {

  }

  async presentLoading() {

    const loading = await this.loadingController.create({

      message: '加载中...',

      duration: 5000

    });

    await loading.present();

    //事件

    await loading.onDidDismiss();

    // console.log({ role, data });

    console.log('Loading dismissed!');

  }

  async presentLoadingWithOptions() {

    const loading = await this.loadingController.create({

      // spinner: null,

      duration: 5000,   //延迟时间

      message: '请等待...',

      translucent: true,  //半透明的

      cssClass: 'custom-class custom-loading'   //注意自定义样式要写在全局

    });

    return await loading.present();

  }

}
5、Ionic4 手势相关事件
详情参考:http://www.ionic.wang/article-index-id-155.html 1、首先需要安装 hammerjs
ionic4 中的 gestures 手势事件包括: tap, press, pan, swipe, rotate, and pinch events 等。详细使用方法参考:
详情参考:http://www.ionic.wang/article-index-id-155.html
1、首先需要安装 hammerjs
npm install hammerjs --save
2、在项目的 src/main.ts 中引入 hammerjs
import 'hammerjs';
3、在项目中使用
<ion-button (press)="doPress()">

长按触发的事件

</ion-button>

<ion-button (tap)="doTap()">

点击触发的事件

</ion-button>
说明:如果未来的 ionic4.x 版本可以直接使用手势事件的话忽略上面的安装引入过程。
<ion-header>

  <ion-toolbar>

    <ion-title>gestures</ion-title>

  </ion-toolbar>

</ion-header>

<ion-content padding>

  <ion-button (tap)="doTap()">

    点击事件

  </ion-button>

  <ion-button (press)="doPress()">

    长按事件

  </ion-button>

  <ion-list>

    <ion-item>

      <ion-label  (press)="doPress()">衣服</ion-label>

    </ion-item>

    <ion-item>

      <ion-label  (press)="doPress()">鞋子</ion-label>

    </ion-item>

    <ion-item>

      <ion-label  (press)="doPress()">女装</ion-label>

    </ion-item>

  </ion-list>

</ion-content>
import { Component, OnInit } from '@angular/core';

import { AlertController } from '@ionic/angular';

@Component({

  selector: 'app-gestures',

  templateUrl: './gestures.page.html',

  styleUrls: ['./gestures.page.scss'],

})

export class GesturesPage implements OnInit {

  constructor(public alertController: AlertController) {}

  ngOnInit() {

  }

  doTap(){

    console.log('tap tap ...')

  }

  async doPress(){

    const alert = await this.alertController.create({

      backdropDismiss:false,

      header: '提示',

      message: '确定要删除吗!',

      buttons: [

        {

          text: '取消',

          role: 'cancel',

          cssClass: 'secondary',

          handler: (blah) => {

            console.log('Confirm Cancel: blah');

          }

        }, {

          text: '确定',

          handler: () => {

            console.log('Confirm Okay');

          }

        }

      ]

    });

    await alert.present();

  }

}

Ionic4.x Javascript 扩展 ActionSheet Alert Toast Loading 以及 ionic 手势相 关事件的更多相关文章
- iOS Webview 实现修改javascript confirm 和 alert
贴代码: @interface UIWebView (JavaScriptAlert) -(void) webView:(UIWebView *)sender runJavaScriptAlertPa ...
- Bootstrap Modal 框 alert confirm loading
/** * Created by Administrator on 2016/5/4. */ /** * 模态窗口 */ window.Modal = { tpls:{ alert:'<div ...
- 扩展javascript扩展(类,对象,原型)
扩展javascript扩展(类,对象,原型)
- Web前端——JavaScript扩展补充
JS补充 document也是windows的一个子对象 a标签点击事件 要想设置点击a标签,执行某种方法,推荐在a标签的herf属性使用JavaScript伪协议,实现点击之后执行的js方法,而不是 ...
- JavaScript扩展原型链浅析
前言 上文对原型和原型链做了一些简单的概念介绍和解析,本文将浅析一些原型链的扩展. javaScript原型和原型链 http://lewyon.xyz/prototype.html 扩展原型链 使用 ...
- vue中alert toast confirm loading 公用
import Vue from 'vue' import { ToastPlugin, AlertPlugin, ConfirmPlugin, LoadingPlugin } from 'vux' / ...
- Javascript扩展String.prototype实现格式金额、格式时间、字符串连接、计算长度、是否包含、日期计算等功能
<script src="Js/jquery-3.1.1.min.js"></script> <script type="text/java ...
- JavaScript 扩展运算符
扩展运算符格式扩展运算符格式很简单,就是三个点(...) 扩展运算符作用???扩展运算符允许一个表达式在期望多个参数(用于函数调用)或多个元素(用于数组字面量)或多个变量(用于解构赋值)的位置扩展. ...
- JavaScript实现自定义alert弹框
aaarticlea/png;base64,iVBORw0KGgoAAAANSUhEUgAAAh0AAAFkCAYAAACEpYlzAAAfj0lEQVR4nO3dC5BddZ0n8F93pxOQCO
随机推荐
- 【清北学堂】广州OI学习游记
\(Day~0\) 早上\(9\)点多才爬起来,然后水了道题. 下午从[数据删除]出发,颠簸了将近\(5\)个小时终于抵达广州. 一出地铁站--卧槽这天,卧槽这风,要下雨的节奏? 没过两分钟倾盆大雨. ...
- Jquery 操作DOM元素
一.文本输入框: text <input type=”text” value=”99.com” size=12 id=”input1” /> 1.获取文本值: $("#input ...
- Spring MVC框架及标签库
1.Spring MVC技术 1. 当DispatcherServlet接到请求时,他先回查找适当的处理程序来处理请求.DispatcherServlet通过一个或者多个处理程序映射,将每个请求映射到 ...
- 如何在C中以二进制格式打印十进制数?
回答: #define CHAR_BITS 8 // size of character #define INT_BITS ( sizeof(int) * CHAR_BITS) //bits i ...
- 使用jQuery快速高效制作网页交互特效----jQuery中的事件与动画
jQuery中的事件 和WinForm一样,在网页中的交互也是需要事件来实现的,例如tab切换效果,可以通过鼠标单击事件来实现. 事件在元素对象与功能代码中起着重要的桥梁作用. 在JQuery中,事件 ...
- Mongodb 查询优化(慢查询Profiling)
开启慢查询Profiling Profiling级别说明 0:关闭,不收集任何数据. 1:收集慢查询数据,默认是100毫秒. 2:收集所有数据 1.通过修改配置文件开启Profiling 修改启动mo ...
- Angular2日期格式化
一:组件日期格式化: ts中调用: import {DatePipe} from "@angular/common"; @Component({ providers: [D ...
- 从零开始实现SSD目标检测(pytorch)(一)
目录 从零开始实现SSD目标检测(pytorch) 第一章 相关概念概述 1.1 检测框表示 1.2 交并比 第二章 基础网络 2.1 基础网络 2.2 附加网络 第三章 先验框设计 3.1 引言 3 ...
- 学习C/C++的简单方法
如何学习C++呢.C和C++是很多专业的必修课,尤其对计算机专业来说,更是重中之重.C++语言是早期发展的高级语言,具备执行速度快,语法优美等特点.是底层高效率系统的首选开发语言.今天就和大家分享一下 ...
- python #!/usr/bin/python 的作用
在说之前,这里推荐写: #!/usr/bin/env python 进入正题,在 Python 里面第一行代码: #!/usr/bin/python 其他有的可能是 python2 或者 python ...