【spring Boot】spring boot获取资源文件的三种方式【两种情况下】
首先声明一点,springboot获取资源文件,需要看是
1》从spring boot默认的application.properties资源文件中获取
2》还是从自定义的资源文件中获取
带着这个想法去看下面几种方式
===============================================================================================
1》从spring boot默认的application.properties资源文件中获取
先给出来application.properties的内容
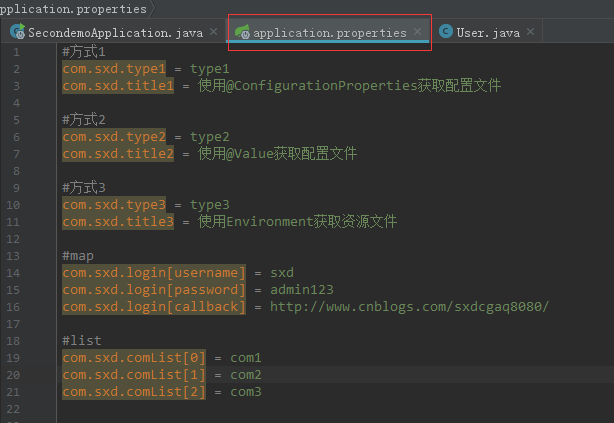
#方式1
com.sxd.type1 = type1
com.sxd.title1 = 使用@ConfigurationProperties获取配置文件 #方式2
com.sxd.type2 = type2
com.sxd.title2 = 使用@Value获取配置文件 #方式3
com.sxd.type3 = type3
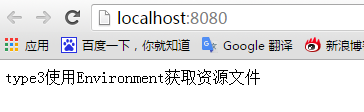
com.sxd.title3 = 使用Environment获取资源文件 #map
com.sxd.login[username] = sxd
com.sxd.login[password] = admin123
com.sxd.login[callback] = http://www.cnblogs.com/sxdcgaq8080/ #list
com.sxd.comList[0] = com1
com.sxd.comList[1] = com2
com.sxd.comList[2] = com3
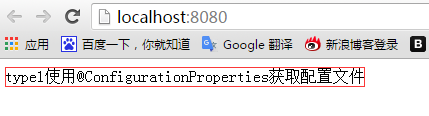
①===第一种方式:使用@ConfigurationProperties获取配置文件
先搞一个绑定资源文件的bean
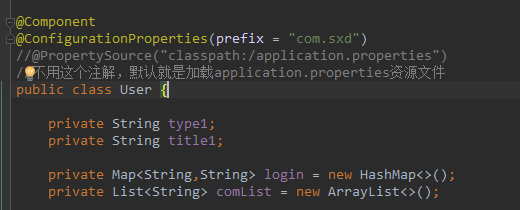
注意属性名和资源文件中的属性名相一致。
package com.sxd.beans;

import org.springframework.boot.context.properties.ConfigurationProperties;

import org.springframework.context.annotation.PropertySource;

import org.springframework.stereotype.Component;

import java.util.ArrayList;

import java.util.HashMap;

import java.util.List;

import java.util.Map;

@Component

@ConfigurationProperties(prefix = "com.sxd")

//@PropertySource("classpath:/application.properties")

//不用这个注解,默认就是加载application.properties资源文件

public class User {

    private String type1;

    private String title1;

    private Map<String,String> login = new HashMap<>();

    private List<String> comList = new ArrayList<>();

    public String getType1() {

        return type1;

    }

    public void setType1(String type1) {

        this.type1 = type1;

    }

    public String getTitle1() {

        return title1;

    }

    public void setTitle1(String title1) {

        this.title1 = title1;

    }

    public Map<String, String> getLogin() {

        return login;

    }

    public void setLogin(Map<String, String> login) {

        this.login = login;

    }

    public List<String> getComList() {

        return comList;

    }

    public void setComList(List<String> comList) {

        this.comList = comList;

    }

}
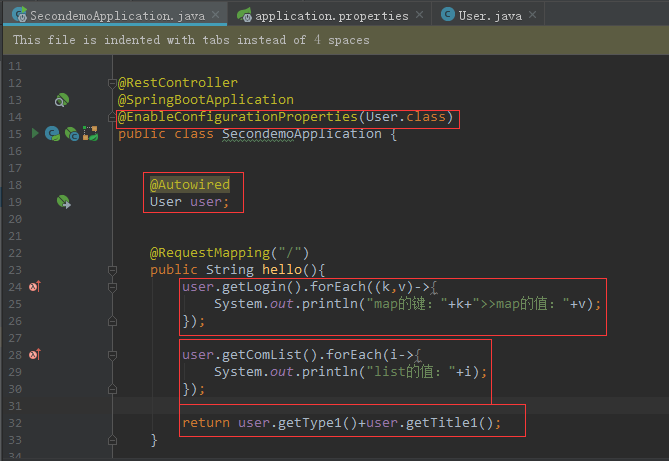
然后在启动类中使用
package com.sxd.secondemo;

import com.sxd.beans.User;

import org.springframework.beans.factory.annotation.Autowired;

import org.springframework.boot.SpringApplication;

import org.springframework.boot.autoconfigure.SpringBootApplication;

import org.springframework.boot.context.properties.EnableConfigurationProperties;

import org.springframework.web.bind.annotation.RequestMapping;

import org.springframework.web.bind.annotation.RestController;

@RestController

@SpringBootApplication

@EnableConfigurationProperties(User.class)

public class SecondemoApplication {

    @Autowired

    User user;

    @RequestMapping("/")

    public String hello(){

        user.getLogin().forEach((k,v)->{

            System.out.println("map的键:"+k+">>map的值:"+v);

        });

        user.getComList().forEach(i->{

            System.out.println("list的值:"+i);

        });

        return user.getType1()+user.getTitle1();

    }

    public static void main(String[] args) {

        SpringApplication.run(SecondemoApplication.class, args);

    }

}
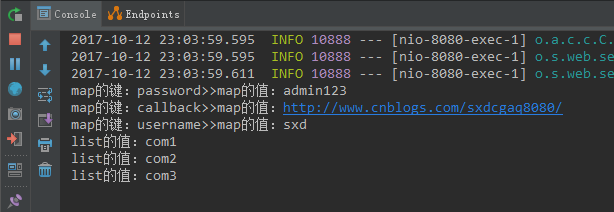
结果如下:
控制台打印:
访问地址:
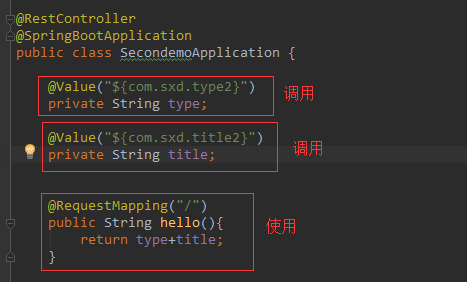
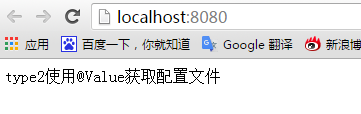
②===第二种方式:使用@Value获取配置文件
这里不用搞一个绑定资源文件的bean了。
只需要在你想用的地方使用@Value调用你想要的属性名对应的值即可。
package com.sxd.secondemo;

import com.sxd.beans.User;

import org.springframework.beans.factory.annotation.Autowired;

import org.springframework.beans.factory.annotation.Value;

import org.springframework.boot.SpringApplication;

import org.springframework.boot.autoconfigure.SpringBootApplication;

import org.springframework.boot.context.properties.EnableConfigurationProperties;

import org.springframework.web.bind.annotation.RequestMapping;

import org.springframework.web.bind.annotation.RestController;

@RestController

@SpringBootApplication

public class SecondemoApplication {

    @Value("${com.sxd.type2}")

    private String type;

    @Value("${com.sxd.title2}")

    private String title;

    @RequestMapping("/")

    public String hello(){

        return type+title;

    }

    public static void main(String[] args) {

        SpringApplication.run(SecondemoApplication.class, args);

    }

}
访问结果:
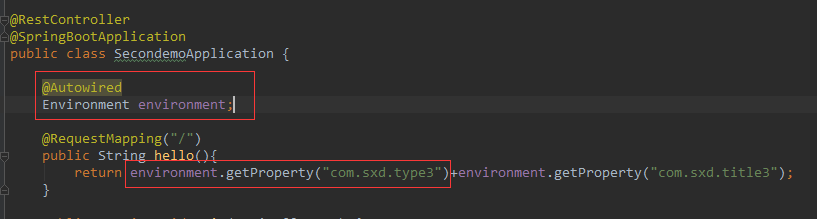
③===第三种方式:使用Environment获取资源文件
也不用提前做什么使用,Environment就是一个全局的资源池,application.properties中的属性值都可以从这里获取到。
package com.sxd.secondemo;

import com.sxd.beans.User;

import org.springframework.beans.factory.annotation.Autowired;

import org.springframework.beans.factory.annotation.Value;

import org.springframework.boot.SpringApplication;

import org.springframework.boot.autoconfigure.SpringBootApplication;

import org.springframework.boot.context.properties.EnableConfigurationProperties;

import org.springframework.core.env.Environment;

import org.springframework.web.bind.annotation.RequestMapping;

import org.springframework.web.bind.annotation.RestController;

@RestController

@SpringBootApplication

public class SecondemoApplication {

    @Autowired

    Environment environment;

    @RequestMapping("/")

    public String hello(){

        return environment.getProperty("com.sxd.type3")+environment.getProperty("com.sxd.title3");

    }

    public static void main(String[] args) {

        SpringApplication.run(SecondemoApplication.class, args);

    }

}
运行结果:
================================================================================================
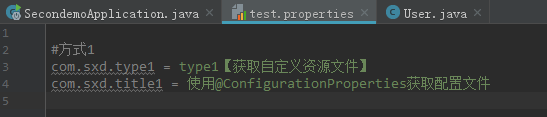
2》从自定义的资源文件中获取属性值
①===第一种方式:使用@ConfigurationProperties获取配置文件
自定义资源文件如下:
然后指定绑定自定义资源文件
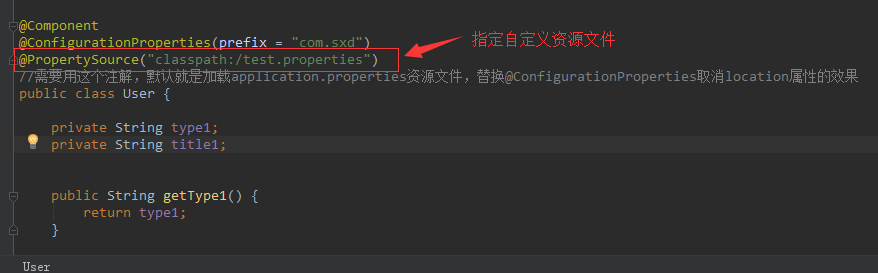
package com.sxd.beans;

import org.springframework.boot.context.properties.ConfigurationProperties;

import org.springframework.context.annotation.PropertySource;

import org.springframework.stereotype.Component;

@Component

@ConfigurationProperties(prefix = "com.sxd")

@PropertySource("classpath:/test.properties")

//需要用这个注解,默认就是加载application.properties资源文件,替换@ConfigurationProperties取消location属性的效果

public class User {

    private String type1;

    private String title1;

    public String getType1() {

        return type1;

    }

    public void setType1(String type1) {

        this.type1 = type1;

    }

    public String getTitle1() {

        return title1;

    }

    public void setTitle1(String title1) {

        this.title1 = title1;

    }

}
最后在启动类中使用一下

package com.sxd.secondemo; import com.sxd.beans.User;
import org.springframework.beans.factory.annotation.Autowired;
import org.springframework.beans.factory.annotation.Value;
import org.springframework.boot.SpringApplication;
import org.springframework.boot.autoconfigure.SpringBootApplication;
import org.springframework.boot.context.properties.EnableConfigurationProperties;
import org.springframework.core.env.Environment;
import org.springframework.web.bind.annotation.RequestMapping;
import org.springframework.web.bind.annotation.RestController; @RestController
@SpringBootApplication
@EnableConfigurationProperties(User.class)
public class SecondemoApplication { @Autowired
User user; @RequestMapping("/")
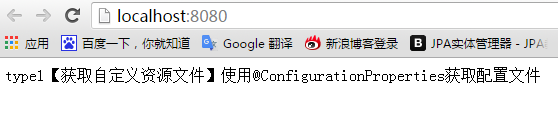
public String hello(){
return user.getType1()+user.getTitle1();
} public static void main(String[] args) {
SpringApplication.run(SecondemoApplication.class, args);
}
}
运行结果:
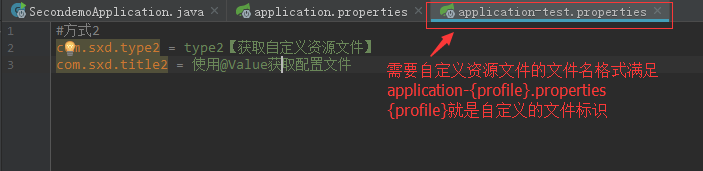
②===第二种方式:使用@Value获取配置文件
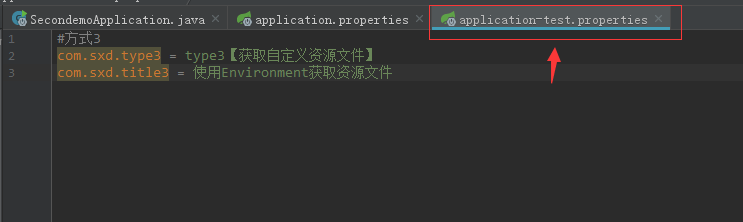
先设定一个自定义资源文件
如下,自定义资源文件需要满足application-{profile}.properties格式
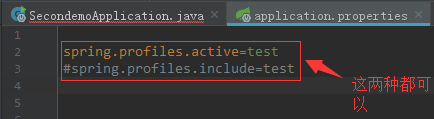
然后在application.properties文件中指明加载这个资源文件
spring.profiles.active=test

#spring.profiles.include=test
这两种哪种都可以加载上自定义的资源文件,后面的test就是上面{profile}的值
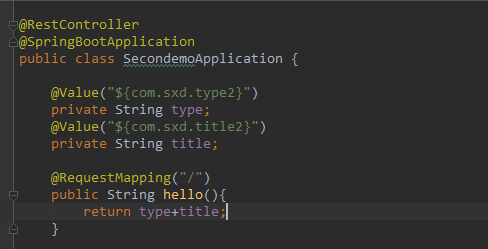
最后在启动类中使用@Value获取自定义资源文件中的属性,这个时候自定义的资源文件已经在application,properties文件中被指明要被加载了,因此是可以被获取到的
package com.sxd.secondemo;

import org.springframework.beans.factory.annotation.Value;

import org.springframework.boot.SpringApplication;

import org.springframework.boot.autoconfigure.SpringBootApplication;

import org.springframework.boot.context.properties.EnableConfigurationProperties;

import org.springframework.web.bind.annotation.RequestMapping;

import org.springframework.web.bind.annotation.RestController;

@RestController

@SpringBootApplication

public class SecondemoApplication {

    @Value("${com.sxd.type2}")

    private String type;

    @Value("${com.sxd.title2}")

    private String title;

    @RequestMapping("/")

    public String hello(){

        return type+title;

    }

    public static void main(String[] args) {

        SpringApplication.run(SecondemoApplication.class, args);

    }

}
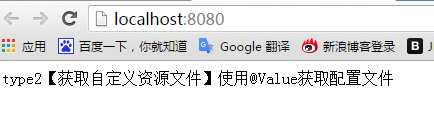
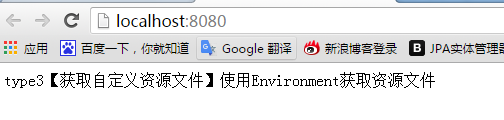
运行结果:
③===第三种方式:使用Environment获取资源文件
首先还是写一个自定义的资源文件,文件命名同上面第二种方式一样
接着,在application.properties中声明加载这个自定义的资源文件

最后在启动类中,也就是哪里使用就在那里自动注入Environment.

package com.sxd.secondemo;

import org.springframework.beans.factory.annotation.Autowired;

import org.springframework.boot.SpringApplication;

import org.springframework.boot.autoconfigure.SpringBootApplication;

import org.springframework.core.env.Environment;

import org.springframework.web.bind.annotation.RequestMapping;

import org.springframework.web.bind.annotation.RestController;

@RestController

@SpringBootApplication

public class SecondemoApplication {

    @Autowired

    Environment environment;

    @RequestMapping("/")

    public String hello(){

        return environment.getProperty("com.sxd.type3")+environment.getProperty("com.sxd.title3");

    }

    public static void main(String[] args) {

        SpringApplication.run(SecondemoApplication.class, args);

    }

}
运行结果:
==================================================================================================================
===================================================完成============================================================
【spring Boot】spring boot获取资源文件的三种方式【两种情况下】的更多相关文章
- Spring Boot中的静态资源文件
Spring Boot中的静态资源文件 1.SSM中的配置 2.Spring Boot 中的配置 2.1 整体规划 2.2 源码解读 2.3 自定义配置 2.3.1 application.prope ...
- 【Spring】获取资源文件+从File+从InputStream对象获取正文数据
1.获取资源文件或者获取文本文件等,可以通过Spring的Resource的方式获取 2.仅有File对象即可获取正文数据 3.仅有InputStream即可获取正文数据 package com.sx ...
- wpf 前台获取资源文件路径问题
1 <ImageBrush ImageSource="YT.CM.CommonUI;component/Resource/FloadwindowImage/middle.png&quo ...
- JavaWeb基础: 获取资源文件
Web工程在编译构建完毕以后,需要部署到Tomcat上运行,资源的硬盘路径也会随着改变.要想对资源文件进行读写操作需要获取其硬盘地址,在Web工程中通常通过ServletContext/ClassLo ...
- java基础知识3--如何获取资源文件(Java中获取资源文件的url)
java开发中,常见的resource文件有:.xml,.properties,.txt文件等,后台开发中经常用到读取资源文件,处理业务逻辑,然后返回结果. 获取资源文件的方法说明getResourc ...
- 关于获取资源文件,Class.getResource和ClassLoader.getResource的区别
原文同步发表至个人博客[夜月归途] 原文链接:http://www.guitu18.com/se/java/2019-02-22/29.html 作者:夜月归途 出处:http://www.guitu ...
- Java中获取资源文件的方法总结
这里总结3中方法获取资源文件的 ServletContext Class ClassLoader 文件的位置 1. ServletContext public void doGet(HttpServl ...
- Java 获取资源文件路径
1 问题描述 通过源码运行时,一般使用如下方式读取资源文件: String str = "1.jpg"; 资源文件与源码文件放在同一目录下,或者拥有同一父级目录: String s ...
- 对比MFC资源文件谈谈WPF布局方式
对比MFC资源文件谈谈WPF布局方式 MFC方式 对于传统的MFC基于UI的应用程序设计通常分两步走,首先是设计UI,使用的是RC文件,然后是代码文件,对RC文件进行操作,如下面Figure 1 的基 ...
随机推荐
- 安装wget 、 wget命令
今天给服务器安装新LNMP环境时,wget 时提示 -bash:wget command not found,很明显没有安装wget软件包.一般linux最小化安装时,wget不会默认被安装. 可以通 ...
- 使用git send-email发送邮件时报错: Unable to initialize SMTP properly怎么处理?
答: 配置~/.gitconfig中的smtpserver 需往~/.gitconfig中添加如下内容: [sendemail] smtpserver = <stmp_server_name ...
- hibernate中session的管理方式
package loaderman.c_session; import loaderman.b_second_cache.Dept; import loaderman.b_second_cache.E ...
- flutter richText富文本
flutter中富文本使用 RichText( text: TextSpan( text: '登陆即同意', style: TextStyle(fontSize: 14, color: Colors. ...
- CentOS7安装后无法使用鼠标选中
运行命令:yum install gpm* 安装gpm 启动gpm服务:service gpm start 运行systemctl enable gpm.servicere 添加到后台服务. 备注: ...
- Qt编写自定义控件17-按钮进度条
前言 按钮进度条,顾名思义,表面上长得像一个按钮,单击以后切换成进度条指示按钮单击动作执行的进度,主要用在一些需要直接在按钮执行动作显示对应进度的场景,在很多网页中经常看到这种效果,这个效果有个优点就 ...
- [Feature] Build pipeline
准备数据集 一.数据集 Ref: 6. Dataset loading utilities[各种数据集选项] 第一部分,加载原始iris数据集的数据: 第二部分,先增加一行,再增加一列: #%% pa ...
- Oracle 本地创建多个实例并创建多个监听(只能在服务端弄,不可在客户端)
注意:监听必须在客户端创建,在客户端创建,会报错. 1.创建监听 通过 Net Configuration Assistant 创建监听,设置端口: 注意:此监听创建完后,服务列表里面并没有此服务的 ...
- B站动手学深度学习第十八课:seq2seq(编码器和解码器)和注意力机制
from mxnet import nd h_forward = nd.array([1,2]) h_backward = nd.array([3,4]) h_bi = nd.concat(h_for ...
- Java类的加载及初始化
每个类的编译代码都存在于它自己的独立文件中,该文件在需要使用该程序代码时才会被加载.通常有以下三种加载情况: (1) 访问了子类的静态变量或静态方法:仅对类的静态变量,静态块执行初始化操作,并仅初始化 ...