【干货】教你如何利用fullPage.js以及move.js插件打造高端大气的网站效果!
前言:
如今我们经常能见到全屏网站,尤其是国外网站。这些网站用几幅很大的图片或色块做背景,再添加一些简单的内容,显得格外的高端大气上档次。
在学习过jQuery插件之后,才发现之前的很多网站特效完全可以借助jQuery插件来实现,今天我们来尝试使用move.js以及fullPage.js插件来制作一个“高端网站”。
网站效果展示如下:
- 支持鼠标滚动
- 支持前进后退和键盘控制
- 多个回调函数
- 支持手机、平板触摸事件
- 支持 CSS3 动画
- 支持窗口缩放
- 窗口缩放时自动调整
- 可设置滚动宽度、背景颜色、滚动速度、循环选项、回调、文本对齐方式等等
Move.js是一款简单小巧的模拟CSS3动画的JS插件。它可以完成CSS3的各种动画效果:移动、变形、倾斜、背景色渐变、旋转等。并且可以在动画中使用各种easing效果。
首先,我们再h5中写出基本结构主体,代码如下:
<body>
<div id="fullpage">
<div class="section" id="section1">
<h1>fullpage-演示iphone5C官网</h1>
<img src="img/iphone1.jpg" />
</div>
<div class="section" id="section2">
<img src="img/iphone2.png" class="img2" />
<img src="img/iphone3.png" class="img3" />
<img src="img/iphone4.png" class="img4" />
<div class="description">
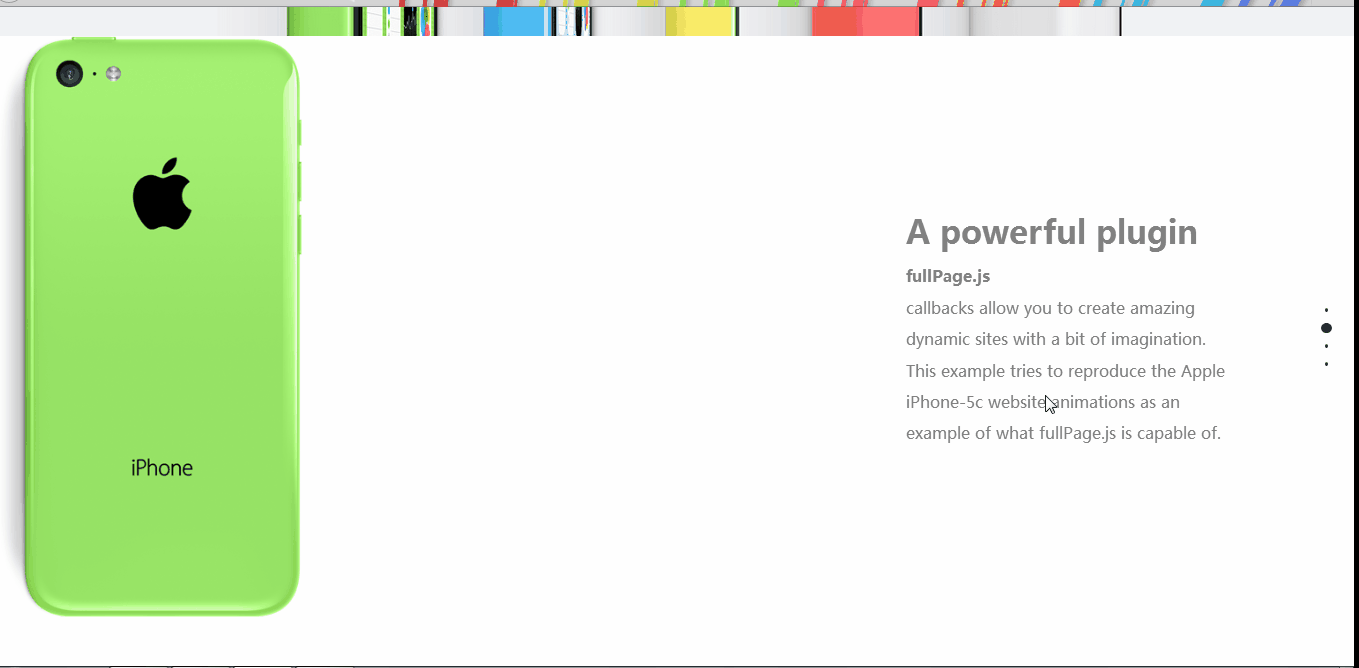
<h1>A powerful plugin</h1>
<strong>fullPage.js</strong>
<br /> callbacks allow you to create amazing dynamic sites with a bit of imagination. This example tries to reproduce the Apple iPhone-5c website animations as an example of what fullPage.js is capable of.
</div>
</div>
<div class="section" id="section3">
<img src="img/iphone-red.png" class="red" />
<img src="img/iphone-yellow.png" class="yellow" />
<img src="img/iphone-blue.png" class="blue" /> <div class="description">
<h2>Amazing stuff</h2> Combining
<strong>fullPage.js</strong> with your own CSS styles and animations, you will be able to create something remarkable.
</div> </div>
<div class="section" id="section4"> <div class="description">
<h2>Just a demo</h2>
This is, of course, just a demo. I didn't want to spend much time on it. Don't expect it to work perfectly in all kind of screens. It has been designed to work on 1180px width or over on modern browsers with CSS3.
</div>
<img src="img/iphone-green.png" class="green" />
<img src="img/iphone-two.png" class="two" />
</div>
</div> </body>
tips:
在fullPage中,class为section表示一个屏幕。
section不能执行包裹在body中,必须使用一个div包裹所有的section。
section中的每一个slide表示一个横向幻灯片,可在当前屏中左右横向切换。
在CSS样式中,我们对各部分元素进行了定位和静态的页面布局设置,代码如下:
*{

    margin: 0px;

    padding: 0px;

}

#section1{

    background-color: #F0F2F4;

    overflow: hidden;

    text-align: center;

}

#fullPage{

    min-width: 1250px;

}

.section{

    min-height: 650px;

}

#section1 h1{

    font-size: 70px;

    text-align: center;

    margin: 60px 0px;

}

#section img{

     width: 45%;

}

#section2{

    position: relative;

    overflow: hidden;

}

#section2 .description{

    width: 370px;

    position: absolute;

    top: 200px;

    right: 130px;

    color: #808080;

    font-size: 18px;

    line-height: 35px;

}

#section2 .description h1{

    font-size: 36px;

    margin-bottom: 15px;

}

#section2 img{

    height: 685px;

    position: absolute;

    transform: scale(0.6);

    top: -17px;

}

#section2 .img3{

    z-index:;

}

#section3{

    position: relative;

    overflow: hidden;

}

#section3 .description{

    width: 500px;

    position: absolute;

    top: 200px;

    right: 130px;

    color: #808080;

    font-size: 18px;

    line-height: 35px;

}

#section3 .description h1{

    font-size: 36px;

    margin-bottom: 15px;

}

#section3 img{

    position: absolute;

}

#section3 .red{

    left: 250px;

    top: 150px;

}

#section3 .yellow{

    left: -40px;

    bottom: -400px;

}

#section3 .blue{

    bottom: -400px;

    left: 550px;

}

#section4{

    position: relative;

}

#section4 .green{

    position: absolute;

    left:250px;

    top: 200px;

}

#section4 .description{

    width: 90%;

    position: absolute;

    top: 100px;

    left: 5%;

    color: #808080;

    font-size: 14px;

    line-height: 25px;

    text-align: center;

}

#section4 .description h2{

    font-size: 36px;

    margin-bottom: 15px;

}

#section4 .two{

    position: absolute;

    bottom: -230px;

    left: 600px;

}
接下来便是导入需要的JS文件:
需要注意的地方是:fullPage.js必须在JQuery.js文件之后导入!而move.js使用的是原生JS语言,故没有要求。

在我们组建好网页布局之后,必须先选中包裹所有section的div的ID,并调用fullPage()方法,才能加载布局。
调用fullPage()方法之后,可以给函数传入对象类型的参数,设置fullPage的各种属性。
<script type="text/javascript">

        $(function() {

            $("#fullpage").fullpage({

                navigation: true,

                verticalCentered: false,

                anchors: ["page1", "page2", "page3", "page4"],

                onLeave: function(index, nextIndex, direction) {

                    switch(index) {

                        case 2:

                            move(".img2").x(0).duration(".7").delay(600).scale(0.8).end();

                            move(".img3").x(0).duration(".7").delay(600).scale(1).end()

                            move(".img4").x(0).duration(".7").delay(600).scale(0.8).end()

                            break;

                        case 3:

                        if(nextIndex!=4){

                            move(".red").y(0).duration("1").scale(1).end();

                            move(".yellow").y(0).duration("1").scale(0.8).end()

                            move(".blue").y(0).duration("1").scale(0.8).end()

                            break;

                            }

                        case 4:

                               move(".green").y(0).duration("0.7").scale(1).end()

                               move(".two").y(0).duration("0.7").scale(0.9).skewY(0).end()

                           break;

                    }

                    switch(nextIndex) {

                        case 2:

                            move(".img2").x(-35).duration(".7").delay(700).scale(0.8).end();

                            move(".img3").x(300).duration(".7").delay(700).scale(1).end()

                            move(".img4").x(700).duration(".7").delay(700).scale(0.8).end()

                            break;

                        case 3:

                            move(".red").y(-400).duration("1.2").scale(1).end();

                            move(".yellow").y(-400).duration("1.2").scale(0.8).end()

                            move(".blue").y(-400).duration("1.2").scale(0.8).end()

                            move(".green").y(-400).duration("1.2").scale(1).end()

                            move(".two").y(0).duration("0.7").scale(0.9).rotate(180).end()

                           break;

                    }

                }

            });

        });

    </script>
网站主题效果出来之后需要进行细致的调整,另外插件只是工具,提升自己能力的途径是尝试自己创作插件。
【干货】教你如何利用fullPage.js以及move.js插件打造高端大气的网站效果!的更多相关文章
- 教你如何利用threejs对3D模型皮肤进行DIY
一步一步教你如何利用threejs加载gltf模型来实现DIY换肤功能. 模型准备 模型制作 模型可以通过网上下载,也可以自己通过c4d.maya.blender等模型制作软件得到.这里就不叙述有关模 ...
- fullpage.js全屏滚动插件使用小结
刚做好公司网站,通过全屏滚动,显著提高了官网的浏览体验.遂总结一下使用fullpage.js的方法.欢迎指正 一. fullpage.js简介 fullpage.js是一套实现浏览器全屏滚动的js插件 ...
- 教你如何利用分布式的思想处理集群的参数配置信息——spring的configurer妙用
引言 最近LZ的技术博文数量直线下降,实在是非常抱歉,之前LZ曾信誓旦旦的说一定要把<深入理解计算机系统>写完,现在看来,LZ似乎是在打自己脸了.尽管LZ内心一直没放弃,但从现状来看,需要 ...
- FullPage.js全屏滚动插件学习总结
如今我们经常能见到全屏网站,尤其是国外网站.这些网站用几幅很大的图片或色块做背景,再添加一些简单的内容,显得格外的高端大气上档次.比如 iPhone 5C 的介绍页面(查看),QQ浏览器的官网站.如果 ...
- 教你如何利用xml格式的sitemap文件做好SEO
教你如何利用xml格式的sitemap文件做好SEO 浏览: | 更新:-- : 一般的网站中都有网站地图文件,它有HTML格式与XML格式,网站地图可以帮助搜索引擎抓取.帮助用户找到自己所需要的内容 ...
- 如何在我们项目中利用开源的图表(js chart)
最近觉得应该把自己在技术上的一些心得记录在博客里面跟大家分享,一起讨论,一起成长! 这篇随笔主要为介绍chart在项目中的运用,因为在我们看到一些开源的chart时候,是使 ...
- 利用修改div的位置+js对象存储div信息 实现简单的div自定义布局功能
原文:利用修改div的位置+js对象存储div信息 实现简单的div自定义布局功能 利用修改div的位置+js对象存储div信息 实现简单的div自定义布局功能1.在界面上添加几个checkbox和一 ...
- 【Python3爬虫】教你怎么利用免费代理搭建代理池
一.写在前面 有时候你的爬虫刚开始的时候可以正常运行,能够正常的爬取数据,但是过了一会,却出现了一个“403 Forbidden",或者是”您的IP访问频率太高“这样的提示,这就意味着你的I ...
- Workbench利用Python驱动DM执行Js进行建模
Workbench的工作平台下可以利用Python进行一些操作,包括添加system和component等等.DM可以通过执行Jscript脚本进行自动建模,因此,结合这两块的内容,可以利用Pytho ...
随机推荐
- PHP基础与JS操作的区别
嵌入页面方式 JS嵌入方式:<script></script> PHP嵌入方式:<?php ?>(常用) 输出语法 Javascript输出 1.alert(&qu ...
- python 如何在一个for循环中遍历两个列表
是我在看<笨方法学python>过程中发现有一行代码看不懂--" for sentence in snippet, phrase:",所以研究了半天,感觉挺有收获的.所 ...
- java修饰符public final static abstract transient
JAVA 修饰符public final static abstract transient 关键字: public final static abstract ... 1.public prot ...
- 导入import com.sun.image.codec.jpeg.JPEGCodec出错
在Eclipse中处理图片时,需要引入两个包:import com.sun.image.codec.jpeg.JPEGCodec;import com.sun.image.codec.jpeg.JPE ...
- VS2017 Cordova 出现错误 @ionic/app-scripts 未安装
在安装vs2017 Cordova中遇到出现错误 @ionic/app-scripts 未安装 在系统添加环境变量SASS_BINARY_PATH,将我们下载的win32-ia64-47_bindin ...
- 【Ubuntu 16】DEB软件包管理
一.背景介绍 开源软件最早的时候没有软件包和软件包管理器,用户只能下载源码包自行配置 编译 安装. 后来linux各发行版本推出了软件包格式和软件包管理程序 Red Hat.Centos使用RPM格式 ...
- JavaScript的8行代码搞定js文件引入问题
单页面的操作,免不了会有各种jsp的嵌套问题,一个操作页面里面可能涉及到几十甚至上百个jsp页面. 平常我们对用到的js文件的引入,都会放到index的header里面.如图: 但是,让我们思考三个问 ...
- String中的两种实例化方式的区别
直接赋值:(String str = "字符串");只会开辟一块堆内存空间,并且会自动保存在对象池中以供下次重复使用. 构造方法:(String str = new String ...
- grunt之connect、watch
先说下这两个插件配合的用处,简单的说,它们可以拯救你的F5.connect用于建立一个静态服务器,watch监听文件的修改并自动实时刷新浏览器的页面. 还是options走起. connect(V0. ...
- RadioButtonList控件如何取得选中的值
1.需求:我现在页面上有放两个单选控件,现在要通过判断不同的单选控件来对页面上的标签进行显示和隐藏操作 2.控件如下 <asp:RadioButtonList ID=" RepeatD ...