TensorFlow v2.0实现逻辑斯谛回归
使用TensorFlow v2.0实现逻辑斯谛回归
此示例使用简单方法来更好地理解训练过程背后的所有机制
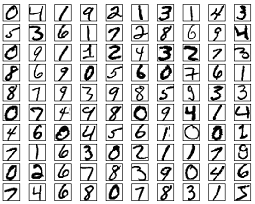
MNIST数据集概览
此示例使用MNIST手写数字。该数据集包含60,000个用于训练的样本和10,000个用于测试的样本。这些数字已经过尺寸标准化并位于图像中心,图像是固定大小(28x28像素),其值为0到255。
在此示例中,每个图像将转换为float32,归一化为[0,1],并展平为784个特征(28 * 28)的1维数组。
from __future__ import absolute_import,division,print_function

import tensorflow as tf

import numpy as np
# MNIST 数据集参数

num_classes = 10 # 数字0-9

num_features = 784 # 28*28

# 训练参数

learning_rate = 0.01

training_steps = 1000

batch_size = 256

display_step = 50
# 准备MNIST数据

from tensorflow.keras.datasets import mnist

(x_train, y_train),(x_test,y_test) = mnist.load_data()

# 转换为float32

x_train, x_test = np.array(x_train, np.float32), np.array(x_test, np.float32)

# 将图像平铺成784个特征的一维向量(28*28)

x_train, x_test = x_train.reshape([-1, num_features]), x_test.reshape([-1, num_features])

# 将像素值从[0,255]归一化为[0,1]

x_train,x_test = x_train / 255, x_test / 255
# 使用tf.data api 对数据随机分布和批处理

train_data = tf.data.Dataset.from_tensor_slices((x_train, y_train))

train_data = train_data.repeat().shuffle(5000).batch(batch_size).prefetch(1)
# 权值矩阵形状[784,10],28 * 28图像特征数和类别数目

W = tf.Variable(tf.ones([num_features, num_classes]), name="weight")

# 偏置形状[10], 类别数目

b = tf.Variable(tf.zeros([num_classes]), name="bias")

# 逻辑斯谛回归(Wx b)

def logistic_regression(x):

    #应用softmax将logits标准化为概率分布

    return tf.nn.softmax(tf.matmul(x,W)   b)

# 交叉熵损失函数

def cross_entropy(y_pred, y_true):

    # 将标签编码为一个独热编码向量

    y_true = tf.one_hot(y_true, depth=num_classes)

    # 压缩预测值以避免log(0)错误

    y_pred = tf.clip_by_value(y_pred, 1e-9, 1.)

    # 计算交叉熵

    return tf.reduce_mean(-tf.reduce_sum(y_true * tf.math.log(y_pred)))

# 准确率度量

def accuracy(y_pred, y_true):

    # 预测的类别是预测向量中最高分的索引(即argmax)

    correct_prediction = tf.equal(tf.argmax(y_pred, 1), tf.cast(y_true, tf.int64))

    return tf.reduce_mean(tf.cast(correct_prediction, tf.float32))

# 随机梯度下降优化器

optimizer = tf.optimizers.SGD(learning_rate)
# 优化过程

def run_optimization(x, y):

    #将计算封装在GradientTape中以实现自动微分

    with tf.GradientTape() as g:

        pred = logistic_regression(x)

        loss = cross_entropy(pred, y)

    # 计算梯度

    gradients = g.gradient(loss, [W, b])

    # 根据gradients更新 W 和 b

    optimizer.apply_gradients(zip(gradients, [W, b]))
# 针对给定训练步骤数开始训练

for step, (batch_x,batch_y) in enumerate(train_data.take(training_steps), 1):

    # 运行优化以更新W和b值

    run_optimization(batch_x, batch_y)

    if step % display_step == 0:

        pred = logistic_regression(batch_x)

        loss = cross_entropy(pred, batch_y)

        acc = accuracy(pred, batch_y)

        print("step: %i, loss: %f, accuracy: %f" % (step, loss, acc))
output:
step: 50, loss: 608.584717, accuracy: 0.824219

step: 100, loss: 828.206482, accuracy: 0.765625

step: 150, loss: 716.329407, accuracy: 0.746094

step: 200, loss: 584.887634, accuracy: 0.820312

step: 250, loss: 472.098114, accuracy: 0.871094

step: 300, loss: 621.834595, accuracy: 0.832031

step: 350, loss: 567.288818, accuracy: 0.714844

step: 400, loss: 489.062988, accuracy: 0.847656

step: 450, loss: 496.466675, accuracy: 0.843750

step: 500, loss: 465.342224, accuracy: 0.875000

step: 550, loss: 586.347168, accuracy: 0.855469

step: 600, loss: 95.233109, accuracy: 0.906250

step: 650, loss: 88.136490, accuracy: 0.910156

step: 700, loss: 67.170349, accuracy: 0.937500

step: 750, loss: 79.673691, accuracy: 0.921875

step: 800, loss: 112.844872, accuracy: 0.914062

step: 850, loss: 92.789581, accuracy: 0.894531

step: 900, loss: 80.116165, accuracy: 0.921875

step: 950, loss: 45.706650, accuracy: 0.925781

step: 1000, loss: 72.986969, accuracy: 0.925781
# 在验证集上测试模型

pred = logistic_regression(x_test)

print("Test Accuracy: %f" % accuracy(pred, y_test))
output:
Test Accuracy: 0.901100
# 可视化预测

import matplotlib.pyplot as plt

# 在验证集上中预测5张图片

n_images = 5

test_images = x_test[:n_images]

predictions = logistic_regression(test_images)

# 可视化图片和模型预测结果

for i in range(n_images):

    plt.imshow(np.reshape(test_images[i],[28,28]), cmap='gray')

    plt.show()

    print("Model prediction: %i" % np.argmax(predictions.numpy()[i]))
output:
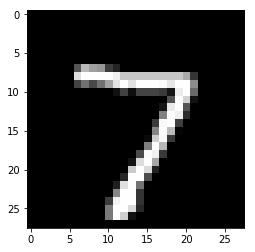
Model prediction: 7
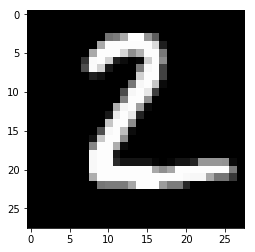
Model prediction: 2
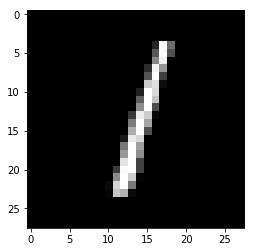
Model prediction: 1
Model prediction: 0
Model prediction: 4
欢迎关注磐创博客资源汇总站:
http://docs.panchuang.net/
欢迎关注PyTorch官方中文教程站:
http://pytorch.panchuang.net/
TensorFlow v2.0实现逻辑斯谛回归的更多相关文章
- 使用TensorFlow v2.0构建多层感知器
使用TensorFlow v2.0构建一个两层隐藏层完全连接的神经网络(多层感知器). 这个例子使用低级方法来更好地理解构建神经网络和训练过程背后的所有机制. 神经网络概述 MNIST 数据集概述 此 ...
- 使用TensorFlow v2.0构建卷积神经网络
使用TensorFlow v2.0构建卷积神经网络. 这个例子使用低级方法来更好地理解构建卷积神经网络和训练过程背后的所有机制. CNN 概述 MNIST 数据集概述 此示例使用手写数字的MNIST数 ...
- TensorFlow v2.0实现Word2Vec算法
使用TensorFlow v2.0实现Word2Vec算法计算单词的向量表示,这个例子是使用一小部分维基百科文章来训练的. 更多信息请查看论文: Mikolov, Tomas et al. " ...
- TensorFlow v2.0的基本张量操作
使用TensorFlow v2.0的基本张量操作 from __future__ import print_function import tensorflow as tf # 定义张量常量 a = ...
- 在Anaconda3环境下安装并切换 Tensorflow 2.0 环境
背景 Anaconda切换各种环境非常方便,现在我们就来介绍一下如何使用anaconda安装tensorflow环境. anaconda v3.5 from 清华镜像站 tensorflow v2.0 ...
- TensorFlow 2.0 新特性
安装 TensorFlow 2.0 Alpha 本文仅仅介绍 Windows 的安装方式: pip install tensorflow==2.0.0-alpha0 # cpu 版本 pip inst ...
- TensorFlow 2.0高效开发指南
Effective TensorFlow 2.0 为使TensorFLow用户更高效,TensorFlow 2.0中进行了多出更改.TensorFlow 2.0删除了篇冗余API,使API更加一致(统 ...
- 三分钟快速上手TensorFlow 2.0 (下)——模型的部署 、大规模训练、加速
前文:三分钟快速上手TensorFlow 2.0 (中)——常用模块和模型的部署 TensorFlow 模型导出 使用 SavedModel 完整导出模型 不仅包含参数的权值,还包含计算的流程(即计算 ...
- 使用TensorFlow v2库实现线性回归
使用TensorFlow v2库实现线性回归 此示例使用简单方法来更好地理解训练过程背后的所有机制 from __future__ import absolute_import, division, ...
随机推荐
- springboot+jwt实现token登陆权限认证
一 前言 此篇文章的内容也是学习不久,终于到周末有时间码一篇文章分享知识追寻者的粉丝们,学完本篇文章,读者将对token类的登陆认证流程有个全面的了解,可以动态搭建自己的登陆认证过程:对小项目而已是个 ...
- 选题在线提交系统(html+JS+php)
前言: 作为学习委员还是有挺多的事情要忙的,比如经常统计同学们的课设题目选择结果.如果老师的要求少一点,我还可以轻松一点.但是当老师对选题有种种限制的时候,自己就估计不会那么好办了.这 ...
- MYSQL对数据库和表的基本操作
CREATE DATABASE testdb CHARSET=UTF8 创建一个数据库 名字叫做testdb USE testdb; 选择数据库 CREATE TABLE testTable1( ) ...
- 整合 KAFKA+Flink 实例(第一部分,趟坑记录)
2017年后,一大波网络喧嚣,说流式处理如何牛叉,如何高大上,抱歉,工作满负荷,没空玩那个: 今年疫情隔离在家,无聊,开始学习 KAFKA+Flink ,目前的打算是用爬虫抓取网页数据,传递到Kafk ...
- ubuntu 18.04 添加快快捷方式
1. 创建启动软件的快捷方式的文件 # cd ~/桌面 # vim pycharm18.1.desktop # 注意文件的后缀是 .desktop [Desktop Entry] Version=1. ...
- 常用阻塞队列 BlockingQueue 有哪些?
为什么要使用阻塞队列 之前,介绍了一下 ThreadPoolExecutor 的各参数的含义(并发编程之线程池ThreadPoolExecutor),其中有一个 BlockingQueue,它是一个阻 ...
- html5调用摄像头功能
前言 前些天,线上笔试的时候,发现需要浏览器同意开启摄像头,感觉像是 js 调用的,由于当时笔试,也就没想到这么多
- SuperBenchmarker一个用.NET编写的压测工具
0x01 前言 在这之前想必大家对ab(http)与abs(https)也有一些了解,我们今天不去看ab和abs,SuperBenchmarker(sb.exe)是一个压测工具,他是一个受Apache ...
- koa进阶史(一)
1,设置静态文件目录,将__dirname 写成_dirname,乍看没什么毛病,但是一运行之后发现,_dirname is not defined,下次注意哈 app.use(express.sta ...
- DEX文件解析---2、Dex文件checksum(校验和)解析
一.checksum介绍 checksum(校验和)是DEX位于文件头部的一个信息,用来判断DEX文件是否损坏或者被篡改,它位于头部的0x08偏移地址处,占用4个字节,采用小端序存储. ...