1-2SpringBoot项目属性配置
前面我们讲解了SpringBoot HelloWorld实现
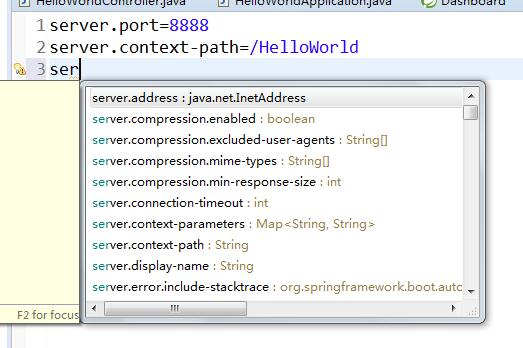
今天具体来讲解上那个application.properties项目配置文件
打开是空白 里面可以配置项目,所以配置项目我们 alt+/ 都能提示出来
上一讲tomcat默认端口8080 默认路径是根目录/
我们现在改成 端口8080 以及上下文路径/HelloWorld
改完后保存,启动HelloWorldApplication类
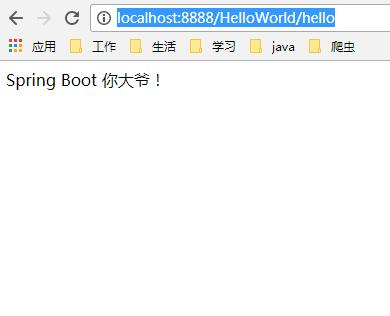
页面输入:http://localhost:8888/HelloWorld/hello
结果出来了
SpringBoot支持自定义属性
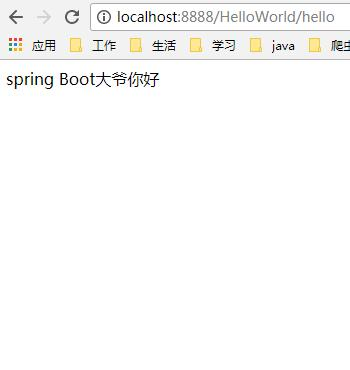
我们在application.properties中加一个helloWorld属性,属性值spring Boot大爷你好
server.port=8888
server.context-path=/HelloWorld
helloWorld=spring Boot\u5927\u7237\u4F60\u597D
当然对中文字节编码处理了
import org.springframework.beans.factory.annotation.Value;import org.springframework.web.bind.annotation.RequestMapping;import org.springframework.web.bind.annotation.RestController;@RestControllerpublic class HelloWorldController { @Value("${helloWorld}") private String helloWorld; @RequestMapping("/hello") public String say(){ return helloWorld; }}
页面里 我们定义然后配置一个属性值,调用请求,可以直接返回配置的值。
这个是一个很好的功能,比较方便;
我们重启HelloWorldApplication类,
页面输入:http://localhost:8888/HelloWorld/hello
显示:
假如我们要配置一个类别下的多个属性,
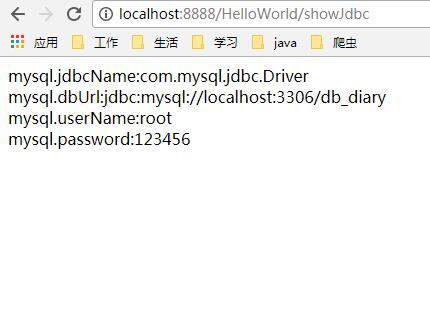
比如mysql的jdbc连接配置
mysql.jdbcName=com.mysql.jdbc.Driver
mysql.dbUrl=jdbc:mysql://localhost:3306/db_diary
mysql.userName=root
mysql.password=123456
我们贴到application.properties
然后按照前面的方案,我们在Controller里写四个属性;
import org.springframework.beans.factory.annotation.Value;
import org.springframework.web.bind.annotation.RequestMapping;import org.springframework.web.bind.annotation.RestController;@RestControllerpublic class HelloWorldController { @Value("${helloWorld}") private String helloWorld; @Value("${mysql.jdbcName}") private String jdbcName; @Value("${mysql.dbUrl}") private String dbUrl; @Value("${mysql.userName}") private String userName; @Value("${mysql.password}") private String password; @RequestMapping("/hello") public String say(){ return helloWorld; } @RequestMapping("/showJdbc") public String showJdbc(){ return "mysql.jdbcName:"+jdbcName+"<br/>" +"mysql.dbUrl:"+dbUrl+"<br/>" +"mysql.userName:"+userName+"<br/>" +"mysql.password:"+password; }}重启启动类,
页面输入:http://localhost:8888/HelloWorld/showJdbc
上面那种 假如属性很多 要写一大串 假如多个地方使用 每个地方都得写这么多 不可取
下面我们介绍ConfigurationProperties配置方式
新建一个MysqlProperties类 把所有属性都配置上去
import org.springframework.boot.context.properties.ConfigurationProperties;
import org.springframework.stereotype.Component;/** * Mysql属性配置文件 * @author user * */@Component@ConfigurationProperties(prefix="msyql")public class MysqlProperties { private String jdbcName; private String dbUrl; private String userName; private String password; public String getJdbcName() { return jdbcName; } public void setJdbcName(String jdbcName) { this.jdbcName = jdbcName; } public String getDbUrl() { return dbUrl; } public void setDbUrl(String dbUrl) { this.dbUrl = dbUrl; } public String getUserName() { return userName; } public void setUserName(String userName) { this.userName = userName; } public String getPassword() { return password; } public void setPassword(String password) { this.password = password; } }执行前缀msyql
以及加上@Component作为组件 方便其他地方注入
当然这里会提示,
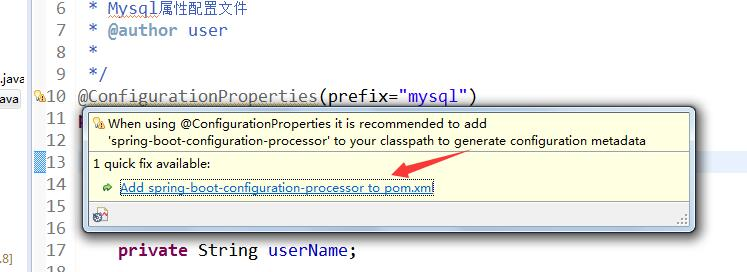
需要引入依赖到pom.xml
我们点下即可

pom.xml里会自动多了一个依赖,自动下载jar包
HelloWorldController里改下
import javax.annotation.Resource;
import org.springframework.beans.factory.annotation.Autowired;import org.springframework.beans.factory.annotation.Value;import org.springframework.web.bind.annotation.RequestMapping;import org.springframework.web.bind.annotation.RestController;@RestControllerpublic class HelloWorldController { @Value("${helloWorld}") private String helloWorld; @Autowired private MysqlProperties mysqlProperties; @RequestMapping("/hello") public String say(){ return helloWorld; } @RequestMapping("/showJdbc") public String showJdbc(){ return "mysql.jdbcName:"+mysqlProperties.getJdbcName()+"<br/>" +"mysql.dbUrl:"+mysqlProperties.getDbUrl()+"<br/>" +"mysql.userName:"+mysqlProperties.getUserName()+"<br/>" +"mysql.password:"+mysqlProperties.getPassword(); }}只需要定义MysqlProperties即可 方便很多 运行就不演示了和前面一样
1-2SpringBoot项目属性配置的更多相关文章
- VS项目属性配置实验过程
(原创,转载注明出处:http://www.cnblogs.com/binxindoudou/p/4017975.html ) 一.实验背景 cocos2d-x已经发展的相对完善了,从项目的创建.编译 ...
- VS IDE 中Visual C++ 中的项目属性配置
VS IDE 中Visual C++ 中的项目属性配置 一. Visual C++ 项目系统基于 MSBuild. 虽然可以直接在命令行上编辑 XML 项目文件和属性表,我们仍建议你使用 VS IDE ...
- Spring Boot项目属性配置
接着上面的入门教程,我们来学习下Spring Boot的项目属性配置. 1.配置项目内置属性 属性配置主要是在application.properties文件里配置的(编写时有自动提示)这里我们将se ...
- SpringBoot 入门:项目属性配置
开发一个SpringBoot 项目,首当其冲,必然是配置项目 一.项目属性配置 1. SpringBoot自带了Tomcat服务器,通过使用项目配置文件来修改项目的配置,如图配置了部署在80端口,目录 ...
- springboot快速入门(二)——项目属性配置(日志详解)
一.概述 application.properties就是springboot的属性配置文件 在使用spring boot过程中,可以发现项目中只需要极少的配置就能完成相应的功能,这归功于spring ...
- SpringBoot项目属性配置-第二章
SpringBoot入门 1. 相信很多人选择Spring Boot主要是考虑到它既能兼顾Spring的强大功能,还能实现快速开发的便捷.我们在Spring Boot使用过程中,最直观的感受就是没有了 ...
- 转载:VS项目属性配置总结
本文来自:http://www.mamicode.com/info-detail-232474.html https://www.cnblogs.com/alinh/p/8066820.h ...
- VS项目属性配置总结
以下是针对VS2013下的VC++项目: Debug和Release说明: Debug 通常称为调试版本,它包含调试信息,并且不作任何优化,便于程序员调试程序.Release 称为发布版本,它往往是进 ...
- [02] SpringBoot的项目属性配置
1.application.properties 简述 配置文件的使用和调整都非常方便,直接在项目默认的classpath下的application.properties文件中做调整即可.例如Spri ...
- spring boot学习(2) SpringBoot 项目属性配置
第一节:项目内置属性 application.properties配置整个项目的,相当于以前的web.xml: 注意到上一节的访问HelloWorld时,项目路径也没有加:直接是http://loca ...
随机推荐
- ORM框架的概述
ORM: object relation mapping [对象][关系]映射 将对象 映射到 数据库中 类名 数据库表名 对象 ...
- PHP的自定义模板引擎
前面的话 在大多数的项目组中,开发一个Web程序都会出现这样的流程:计划文档提交之后,前端工程师制作了网站的外观模型,然后把它交给后端工程师,它们使用后端代码实现程序逻辑,同时使用外观模型做成基本架构 ...
- 设计模式课程 设计模式精讲 6-2 抽象工厂coding
1 代码讲解 1.1 抽象工厂优点 1.2 抽象工厂缺点 1.3 为何有产品族的业务场景宜用抽象工厂设计模式?而不是工厂设计模式? 2 代码演练 2.1 抽象工厂代码演练 1 代码讲解 1.1 抽象工 ...
- UITextField的快速基本使用代码块
概述 UITextField在界面中显示可编辑文本区域的对象. 您可以使用文本字段来使用屏幕键盘从用户收集基于文本的输入.键盘可以配置许多不同类型的输入,如纯文本,电子邮件,数字等等.文本字段使用目标 ...
- UIKit框架使用总结--看看你掌握了多少
一.经常使用的,基本就是每次项目迭代都需要使用的 UIView.UILabel.UIImage.UIColor.UIFont.UIImageView.UITextField.UIButton. UIS ...
- if,while,for循环
目录 if条件 while循环 for循环 拓展知识点 if条件 if 条件: code elif 条件: code else: code # 三元运算符 x = 10 y = 20 print(y ...
- Python学习第十课——文件的基本操作
文件基本操作 文件读操作 #读出路径下的测试.txt文件 f = open('测试.txt', encoding='utf-8') # 打开要读文件 data = f.read() # 读取内容 pr ...
- Linux软Raid--mdadm命令
mdadm:为软RAID提供管理界面,RAID设备可命名为/dev/md0./dev/md1./dev/md2./dev/md3等 命令的语法格式:mdadm[mode] <raiddevice ...
- Linux引导过程!(重点)
1.开机自检:服务器开机后,将根据主板BIOS (基本输入系统),中的设置对CPU .内存.显卡.键盘等设备进行初步检测,并初始化部分硬件. 2.MBR 引导:当从本机硬盘中启动系统时,首先根据硬盘中 ...
- CSP2019 Emiya 家今天的饭
Description: 有 \(n\) 中烹饪方法和 \(m\) 种食材,要求: 至少做一种菜 所有菜的烹饪方法各不相同 同种食材的菜的数量不能超过总菜数的一半 求做菜的方案数. Solution1 ...