
VIM使用(三)
Vim自动补全神器:YouCompleteMe
Ubuntu下,先通过Bundle安装插件:
Bundle 'Valloric/YouCompleteMe'
Bundle 'scrooloose/syntastic'
Bundle 'Valloric/ListToggle'
Bundle 'SirVer/ultisnips'

YouCompleteMe的特别之处
基于语义补全
总所周知,Vim是一款文本编辑器。也就是说,其最基础的工作就是编辑文本,而不管该文本的内容是什么。在Vim被程序员所使用后,其慢慢的被肩负了与IDE一样的工作,文本自动补全(ie.acp,omnicppcompleter),代码检查(Syntastic)等等工作。
针对文本自动补全这个功能来说,主要有两种实现方式。
- 基于文本
我们常用的omnicppcompleter,acp,vim自带的c-x, c-n的实现方式就是基于文本。更通俗的说法,其实就是一个字:
猜
其通过文本进行一些正则表达式的匹配,再根据生成的tags(利用ctags生成)来实现自动补全的效果。
- 基于语义
顾名思义,其是通过分析源文件,经过语法分析以后进行补全。由于对源文件进行分析,基于语义的补全可以做到很精确。但是这显然是vim所不可能支持的。而且经过这么多年发展,由于语法分析有很高的难度,也一直没有合适的工具出现。直到,由apple支持的clang/llvm横空出世。YouCompleteMe也正是在clang/llvm的基础上进行构建的。
整合实现了多种插件
- clang_complete
- AutoComplPop
- Supertab
- neocomplcache
- Syntastic(类似功能,仅仅针对c/c++/obj-c代码)
支持语言
- c
- c++
- obj-c
- c#
- python
对于其他的语言,会调用vim设置的omnifunc来匹配,因此同样支持php,ruby等语言。
已知的有 * javascript —-tern_for_vim * ruby/java —-eclim
使用感受
- 和IDE一样,自动补全,
- 根据
include的文件进行补全 - 不用再蹩脚的生成tags
- 补全非常精准,而且速度很快,不会有延迟(以前在大项目上,acp用起来实在是很卡)
- 支持类似tags的跳转,跳到定义处以及使用处
- 出错提示很智能,并且用起来真的是如丝般柔滑,不用输入
:w进行强制检测
编译:
等待vundle将YouCompleteMe安装完成
而后进行编译安装:
sudo apt-get install python-dev
cd ~/.vim/bundle/YouCompleteMe

./install --clang-completer
如果不需要c-family的补全,可以去掉--clang-completer。如果需要c#的补全,请加上--omnisharp-completer。
正常来说,YCM会去下载clang的包,如果已经有,也可以用系统--system-libclang。
就这样,安装结束。打开vim,如果没有提示YCM未编译,则说明安装已经成功了。
配置
不同于很多vim插件,YCM首先需要编译,另外还需要有配置。在vim启动后,YCM会找寻当前路径以及上层路径的.ycm_extra_conf.py.在~/.vim/bundle/YouCompleteMe/cpp/ycm/.ycm_extra_conf.py中提供了默认的模板。也可以参考我的(就在模板上改改而已)。不过这个解决了标准库提示找不到的问题。
一般来说,我会在~目录下放一个默认的模板,而后再根据不同的项目在当前目录下再拷贝个.ycm_extra_conf.py。
# This file is NOT licensed under the GPLv3, which is the license for the rest

# of YouCompleteMe.

#

# Here's the license text for this file:

#

# This is free and unencumbered software released into the public domain.

#

# Anyone is free to copy, modify, publish, use, compile, sell, or

# distribute this software, either in source code form or as a compiled

# binary, for any purpose, commercial or non-commercial, and by any

# means.

#

# In jurisdictions that recognize copyright laws, the author or authors

# of this software dedicate any and all copyright interest in the

# software to the public domain. We make this dedication for the benefit

# of the public at large and to the detriment of our heirs and

# successors. We intend this dedication to be an overt act of

# relinquishment in perpetuity of all present and future rights to this

# software under copyright law.

#

# THE SOFTWARE IS PROVIDED "AS IS", WITHOUT WARRANTY OF ANY KIND,

# EXPRESS OR IMPLIED, INCLUDING BUT NOT LIMITED TO THE WARRANTIES OF

# MERCHANTABILITY, FITNESS FOR A PARTICULAR PURPOSE AND NONINFRINGEMENT.

# IN NO EVENT SHALL THE AUTHORS BE LIABLE FOR ANY CLAIM, DAMAGES OR

# OTHER LIABILITY, WHETHER IN AN ACTION OF CONTRACT, TORT OR OTHERWISE,

# ARISING FROM, OUT OF OR IN CONNECTION WITH THE SOFTWARE OR THE USE OR

# OTHER DEALINGS IN THE SOFTWARE.

#

# For more information, please refer to <http://unlicense.org/>

import os

import ycm_core

# These are the compilation flags that will be used in case there's no

# compilation database set (by default, one is not set).

# CHANGE THIS LIST OF FLAGS. YES, THIS IS THE DROID YOU HAVE BEEN LOOKING FOR.

flags = [

'-Wall',

'-Wextra',

#'-Werror',

#'-Wc++98-compat',

'-Wno-long-long',

'-Wno-variadic-macros',

'-fexceptions',

'-stdlib=libc++',

# THIS IS IMPORTANT! Without a "-std=<something>" flag, clang won't know which

# language to use when compiling headers. So it will guess. Badly. So C++

# headers will be compiled as C headers. You don't want that so ALWAYS specify

# a "-std=<something>".

# For a C project, you would set this to something like 'c99' instead of

# 'c++11'.

'-std=c++11',

# ...and the same thing goes for the magic -x option which specifies the

# language that the files to be compiled are written in. This is mostly

# relevant for c++ headers.

# For a C project, you would set this to 'c' instead of 'c++'.

'-x',

'c++',

'-I',

'.',

'-isystem',

'/usr/include',

'-isystem',

'/usr/local/include',

'-isystem',

'/Library/Developer/CommandLineTools/usr/include',

'-isystem',

'/Library/Developer/CommandLineTools/usr/bin/../lib/c++/v1',

]

# Set this to the absolute path to the folder (NOT the file!) containing the

# compile_commands.json file to use that instead of 'flags'. See here for

# more details: http://clang.llvm.org/docs/JSONCompilationDatabase.html

#

# Most projects will NOT need to set this to anything; you can just change the

# 'flags' list of compilation flags. Notice that YCM itself uses that approach.

compilation_database_folder = ''

if os.path.exists( compilation_database_folder ):

  database = ycm_core.CompilationDatabase( compilation_database_folder )

else:

  database = None

SOURCE_EXTENSIONS = [ '.cpp', '.cxx', '.cc', '.c', '.m', '.mm' ]

def DirectoryOfThisScript():

  return os.path.dirname( os.path.abspath( __file__ ) )

def MakeRelativePathsInFlagsAbsolute( flags, working_directory ):

  if not working_directory:

    return list( flags )

  new_flags = []

  make_next_absolute = False

  path_flags = [ '-isystem', '-I', '-iquote', '--sysroot=' ]

  for flag in flags:

    new_flag = flag

    if make_next_absolute:

      make_next_absolute = False

      if not flag.startswith( '/' ):

        new_flag = os.path.join( working_directory, flag )

    for path_flag in path_flags:

      if flag == path_flag:

        make_next_absolute = True

        break

      if flag.startswith( path_flag ):

        path = flag[ len( path_flag ): ]

        new_flag = path_flag + os.path.join( working_directory, path )

        break

    if new_flag:

      new_flags.append( new_flag )

  return new_flags

def IsHeaderFile( filename ):

  extension = os.path.splitext( filename )[  ]

  return extension in [ '.h', '.hxx', '.hpp', '.hh' ]

def GetCompilationInfoForFile( filename ):

# The compilation_commands.json file generated by CMake does not have entries

# for header files. So we do our best by asking the db for flags for a

# corresponding source file, if any. If one exists, the flags for that file

# should be good enough.

  if IsHeaderFile( filename ):

    basename = os.path.splitext( filename )[  ]

    for extension in SOURCE_EXTENSIONS:

      replacement_file = basename + extension

      if os.path.exists( replacement_file ):

        compilation_info = database.GetCompilationInfoForFile(

          replacement_file )

        if compilation_info.compiler_flags_:

          return compilation_info

    return None

  return database.GetCompilationInfoForFile( filename )

def FlagsForFile( filename, **kwargs ):

  if database:

# Bear in mind that compilation_info.compiler_flags_ does NOT return a

# python list, but a "list-like" StringVec object

    compilation_info = GetCompilationInfoForFile( filename )

    if not compilation_info:

      return None

    final_flags = MakeRelativePathsInFlagsAbsolute(

      compilation_info.compiler_flags_,

      compilation_info.compiler_working_dir_ )

# NOTE: This is just for YouCompleteMe; it's highly likely that your project

# does NOT need to remove the stdlib flag. DO NOT USE THIS IN YOUR

# ycm_extra_conf IF YOU'RE NOT 100% SURE YOU NEED IT.

#try:

#  final_flags.remove( '-stdlib=libc++' )

#except ValueError:

#  pass

  else:

    relative_to = DirectoryOfThisScript()

    final_flags = MakeRelativePathsInFlagsAbsolute( flags, relative_to )

  return {

    'flags': final_flags,

    'do_cache': True

  }
YouCompleteMe提供的其他功能
YCM除了提供了基本的补全功能,自动提示错误的功能外,还提供了类似tags的功能:
- 跳转到定义
GoToDefinition - 跳转到声明
GoToDeclaration - 以及两者的合体
GoToDefinitionElseDeclaration
可以在.vimrc中配置相应的快捷键。
|
1
2
3
|
nnoremap <leader>gl :YcmCompleter GoToDeclaration<CR>nnoremap <leader>gf :YcmCompleter GoToDefinition<CR>nnoremap <leader>gg :YcmCompleter GoToDefinitionElseDeclaration<CR> |
另外,YCM也提供了丰富的配置选项,同样在.vimrc中配置。具体请参考
|
1
2
|
let g:ycm_error_symbol = '>>'let g:ycm_warning_symbol = '>*' |
同时,YCM可以打开location-list来显示警告和错误的信息:YcmDiags。个人关于ycm的配置如下:
|
1
2
3
4
5
6
7
|
" for ycmlet g:ycm_error_symbol = '>>'let g:ycm_warning_symbol = '>*'nnoremap <leader>gl :YcmCompleter GoToDeclaration<CR>nnoremap <leader>gf :YcmCompleter GoToDefinition<CR>nnoremap <leader>gg :YcmCompleter GoToDefinitionElseDeclaration<CR>nmap <F4> :YcmDiags<CR> |
YCM提供的跳跃功能采用了vim的jumplist,往前跳和往后跳的快捷键为Ctrl+O以及Ctrl+I。
UltiSnips简介:
详细参考:http://mednoter.com/UltiSnips.html
UltiSnips 只是个引擎,需要搭配预设的代码块才能运转起来,以下是我创建的几个常用代码块。
代码块集合 honza/vim-snippets 通过Bundle安装:
Bundle 'honza/vim-snippets'
如果想自己创建代码块,也参考:http://mednoter.com/UltiSnips.html的内容.
这个插件很简单,给你看我的设置好了:
NeoBundle 'SirVer/ultisnips'

let g:UltiSnipsSnippetDirectories=['UltiSnips']

let g:UltiSnipsSnippetsDir = '~/.vim/UltiSnips'

let g:UltiSnipsExpandTrigger = '<Tab>'

let g:UltiSnipsListSnippets = '<C-Tab>'

let g:UltiSnipsJumpForwardTrigger = '<Tab>'

let g:UltiSnipsJumpBackwardTrigger = '<S-Tab>'
哦,对了,我想起来一件事情。g:UltiSnipsSnippetDirectories 选项的值必须是文件夹名称(可以是多个),并且这个(些)文件夹必须存在于 runtimepath 中的某一项之下。比如说 ~/.vim 就是 runtimepath 中的一项。默认的文件夹 UltiSnips 会自动创建,如果你换了,那你必须保证这个文件夹是存在的。我看你换成了 snippets,如果你事先安装过 SnipMate,那么 snippets 才会存在,否则你得自行创建。g:UltiSnipsSnippetDirectories 选项的作用是指定 UltiSnips 的搜索路径,你找不到 snippets 的原因大概就是这样。
解释为什么错了真的很累,换个角度告诉你,如果你做对了是什么样子的:
let g:UltiSnipsSnippetsDir = '~/.vim/UltiSnips'这个设置会确保 snippets 都在指定的文件夹内(你自己编辑的也会保存在这里,如果你用了第三方的并且还要进一步编辑,你得确保都复制到了这里)let g:UltiSnipsSnippetDirectories = ['UltiSnips']这个设置会告诉 UltiSnips 去哪儿找 snippets,可以是多个地方,所以如果你用第三方的 snippets,和上一个设置不在一起的话,你得把它们的路径放这里。要注意的是,这个数组里的每一项都必须在runtimepath其中的一项之下,所以不确定的话,先看看runtimepath的值。若上述两点都做对了,那么在任意类型文件打开的前提下输入
:UltiSnipsEdit都会打开对应类型的 snippets,能不能用,哪些能用,一看便知。

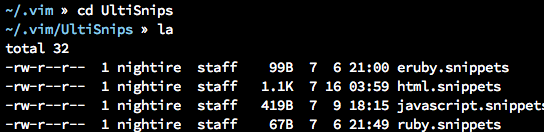
注:代码片段的扩展引用
比如在 cpp.snippets 文件的第一行增加一句 extends c ,在打开一个cpp 文件时,会首先查找搜索路径内的所有 c.snippets 文件,所以可以很容易复用已有的代码片段文件。
相关的配置内容:
"""""""""""""""""""""""""""""""""""""""""""""""""""""""""""""""""""""""""'

"

"    YouCompleteMe 设置

"

"""""""""""""""""""""""""""""""""""""""""""""""""""""""""""""""""""""""""""

let g:ycm_global_ycm_extra_conf = '~/.vim/.ycm_extra_conf.py'

let g:ycm_confirm_extra_conf =

let g:ycm_collect_identifiers_from_tags_files =

"settags+=./.tags

nnoremap <leader>gl :YcmCompleter GoToDeclaration<CR>

nnoremap <leader>gf :YcmCompleter GoToDefinition<CR>

nnoremap <leader>gg :YcmCompleter GoToDefinitionElseDeclaration<CR>

let g:ycm_key_list_select_completion = [ ' <c-n> ', ' <Down> ']

let g:ycm_key_list_previous_completion = ['<c-p>', '<Up>']

"设置error和warning的提示符,如果没有设置,ycm会以syntastic的

" g:syntastic_warning_symbol 和 g:syntastic_error_symbol 这两个为准

let g:ycm_error_symbol='>>'

let g:ycm_warning_symbol='>*'

let g:ycm_complete_in_comments =   "在注释输入中也能补全

let g:ycm_complete_in_strings =    "在字符串输入中也能补全

"每次重新生成匹配项,禁止缓存匹配项

let g:ycm_cache_omnifunc=

"不查询ultisnips提供的代码模板补全,如果需要,设置成1即可

let g:ycm_use_ultisnips_completer=

let g:ycm_seed_identifiers_with_syntax=   "语言关键字补全, 不过python关键字都很短,所以,需要的自己打开

" 直接触发自动补全 " 修改对C函数的补全快捷键,默认是CTRL + space,修改为ALT + ;

let g:ycm_key_invoke_completion = '<M-c>'

nnoremap <F5> :YcmForceCompileAndDiagnostics<CR>

set completeopt=menuone,longest

set pumheight=

" 黑名单,不启用

let g:ycm_filetype_blacklist = {

      \ 'tagbar' : ,

      \ 'gitcommit' : ,

      \}

"""""""""""""""""""""""""""""""""""""""""""""""""""""""""""""""""""""""""'

"

"    UltiSnips 设置

" ultisnips内置了很多代码片段,并且支持自定义。

"

"""""""""""""""""""""""""""""""""""""""""""""""""""""""""""""""""""""""""""

" Snippets are separated from the engine. Add this if you want them:

"Plugin 'honza/vim-snippets'

" Trigger configuration. Do not use <tab> if you use https://github.com/Valloric/YouCompleteMe.

let g:UltiSnipsExpandTrigger="<tab>"

let g:UltiSnipsJumpForwardTrigger="<c-b>"

let g:UltiSnipsJumpBackwardTrigger="<c-z>"

" If you want :UltiSnipsEdit to split your window.

"let g:UltiSnipsEditSplit="vertical"

"""""""""""""""""""""""""""""""""""""""""""""""""""""""""""""""""""""""""'

"

"    syntastic 设置  用于语法检查

" syntastic 与 YouComleteMe 结合对语法 进行检查,并将警告和错误信息显示在行号那一栏的左侧。添加下面的命令安装 syntastic:

"

"""""""""""""""""""""""""""""""""""""""""""""""""""""""""""""""""""""""""""

let g:syntastic_error_symbol='✗'

let g:syntastic_warning_symbol='⚠'

let g:syntastic_enable_highlighting =

let g:syntastic_stl_format = '[%E{Err: %fe #%e}%B{, }%W{Warn: %fw #%w}]'
VIM使用(三)的更多相关文章
- 逐步搭建Lamp环境之vim的三种模式以及基本命令
在Linux中vim的三种模式分别为:命令模式.末行模式.编辑模式.以下是三者的关系图: 三种模式的彼此切换: 命令模式是vim中的默认模式. 命令模式切换至末行模式: 使用英文冒号(:). 末行模式 ...
- vim的三种模式
vim的三种模式(最基本的) 命令模式:在该模式下是不能对文件进行编辑的,可以输入快捷键进行一些操作(删除. 复制.移动光标.粘贴)[打开默认 是进入命令模式] 编辑 ...
- vim 第三章 插入模式
vim 第三章 插入模式 在普通模式下可以删除 复制 及粘贴的命令 在插入模式下也存在以中方便快捷的方式 能够粘贴寄存器中文本 两种方式来插入键盘上不存在的非常用字符 替换模式 ...
- 轻快的VIM(三):删除
这一节我们来看看删除,删除命令比较简单,不过要使删除更有效率 你需要配合我们第一节中讲的各种移动命令 字符删除 x 删除光标所在处字符 X 删除光标所在前字符 这里没有什么可注意的地方,但需要说明一下 ...
- vim使用(三):.viminfo和.vimrc
1. viminfo 在vim中操作的行为,vim会自己主动记录下来,保存在 ~/.viminfo 文件里. 这样为了方便下次处理, 如:vim打开文件时,光标会自己主动在上次离开的位置显示. 原来搜 ...
- vi和vim的三种模式
1.一般模式 用vi 或vim 命令 ——>一般模式 2. 插入模式 i,o,a,r 及其各自大写 ——>插入模式 一般用 i 3.命令行模式 用命令来完成 读取,存盘,替换,离开vim ...
- Vim的三款实用插件
Vim 是 Linux 下的常用文本编辑器,但也经常被称为是一个上古神器,因为它对于初学者而言相当不友好,也不好入门. 但是,对于高手而言,他们不仅将 Vim 玩得很溜,而且还将它当作代码开发的主要工 ...
- linux中vim编辑器三种模式及常用命令的使用
Linux命令经常使用才会烂熟于心 命令行模式: 移动光标: 向下左右箭头可以移动光标: 将光标移动到行尾:$; 将光标移动到行头:^: 将光标移动到页尾:shift+g; 将光标移动到页头:1+sh ...
- 入门VMware Workstation下的Debian学习之Vim简单使用(三)
什么是Vim? Vim具有程序编辑的能力,可以主动的以字体颜色辨别语法的正确性,方便程序设计. Vim是从vi发展出来的一个文本编辑器.代码补完.编译及错误跳转等方便编程的功能特别丰富,在程序员中被广 ...
- Linux基础三---打包压缩&vim&系统的初始化和服务
一,常用命令——tar&vim 1. tar [参数] 文件名 [路径] 参数: -c :建立一个压缩文件的参数指令(create 的意思): -x :解开一个压缩文件的参数指令! ...
随机推荐
- jquery实现动态添加html代码
先看下思导图,整体了解下,然后我们再来学习. 现在我们来看一下几段代码,然后根据这几段代码我们来学习一下如何正确的学习动态添加html. 一.html()方法 html函数的作用原理首先是移除目标元素 ...
- FusionCharts制作报表使用XML导入数据时出现的中文乱码问题
今天在使用FusionCharts制作报表时用XML导入数据,总是出现乱码问题,下面是我的解决方案. 让FusionCharts支持中文 刚刚将XML导入到html中后,在火狐浏览器一直报Invali ...
- 第三方登录 QQ 错误码100044(提示 该应用非官方正版应用)
当你碰到这个问题的时候,不要着急,你的功能已经走通了,代码没有问题. 100044 原因: 1.首先确定你的包名和签名,跟申请第三方平台的是一个.(真心吐槽一下,接盘侠不好当,尤其是没有交接的) 2. ...
- Finder Item脚本如何包装成 Mac App
第一步,包装 记得之前把一个 java 程序的 jar 包 用 automator包装成了 app, 但自己找不到做法了.回头我想了想 这么实验可行. 这样做成 app 后保存在 /Applicati ...
- 关于monkeyrunner的一些初步理解性的题目
1.Monkeyrunner中包含几个基本类?分别大概的作用是什么? Monkeyrunner中基本包含了MonkeyRunner,MonkeyDevice,MonkeyImage MonkeyRun ...
- 如何去掉Eclipse里面自动追加的一些注释!!!内详
比如我创建一个类,勾选了自动生成main函数.他就来一个// TODO Auto-generated method stub比如我输入"try"然后自动补完try catch bl ...
- HTML和CSS设置动态导航以及CSS中伪元素的简单说明
HTML页面代码: <!DOCTYPE html> <html> <head> <title>Test</title> <meta c ...
- touchstart,touchmove判断手机中滑屏方向
滑动屏幕 touchstart:接触屏幕时触发,touchmove:活动过程触发,touchend:离开屏幕时触发 首先获取手接触屏幕时的坐标X,Y //获取接触屏幕时的X和Y$('body') ...
- PoEdu - C++阶段班【Po学校】- Lesson02_类与对象_第4天
复习:上节作业讲解 注意点: 设计SetString()的时候,要注意重置原来的空间. char * SetString(const char *str) { _len = strlen(str); ...
- 122. Best Time to Buy and Sell Stock(二) leetcode解题笔记
122. Best Time to Buy and Sell Stock II Say you have an array for which the ith element is the price ...