
SpringBoot+Mybatis多模块项目搭建教程
一、前言
框架为SpringBoot+Mybatis,本篇主要记录了在IDEA中搭建SpringBoot多模块项目的过程。
1、开发工具及系统环境
- IDE:IntelliJ IDEA 2018.2
- 系统环境:mac OSX
2、项目目录结构
- biz层:业务逻辑层
- dao层:数据持久层
- web层:请求处理层
二、搭建步骤
1、创建父工程
① IDEA 工具栏选择菜单 File -> New -> Project...

② 选择Spring Initializr,Initializr默认选择Default,点击Next

③ 填写输入框,点击Next

④ 这步不需要选择直接点Next

⑤ 点击Finish创建项目

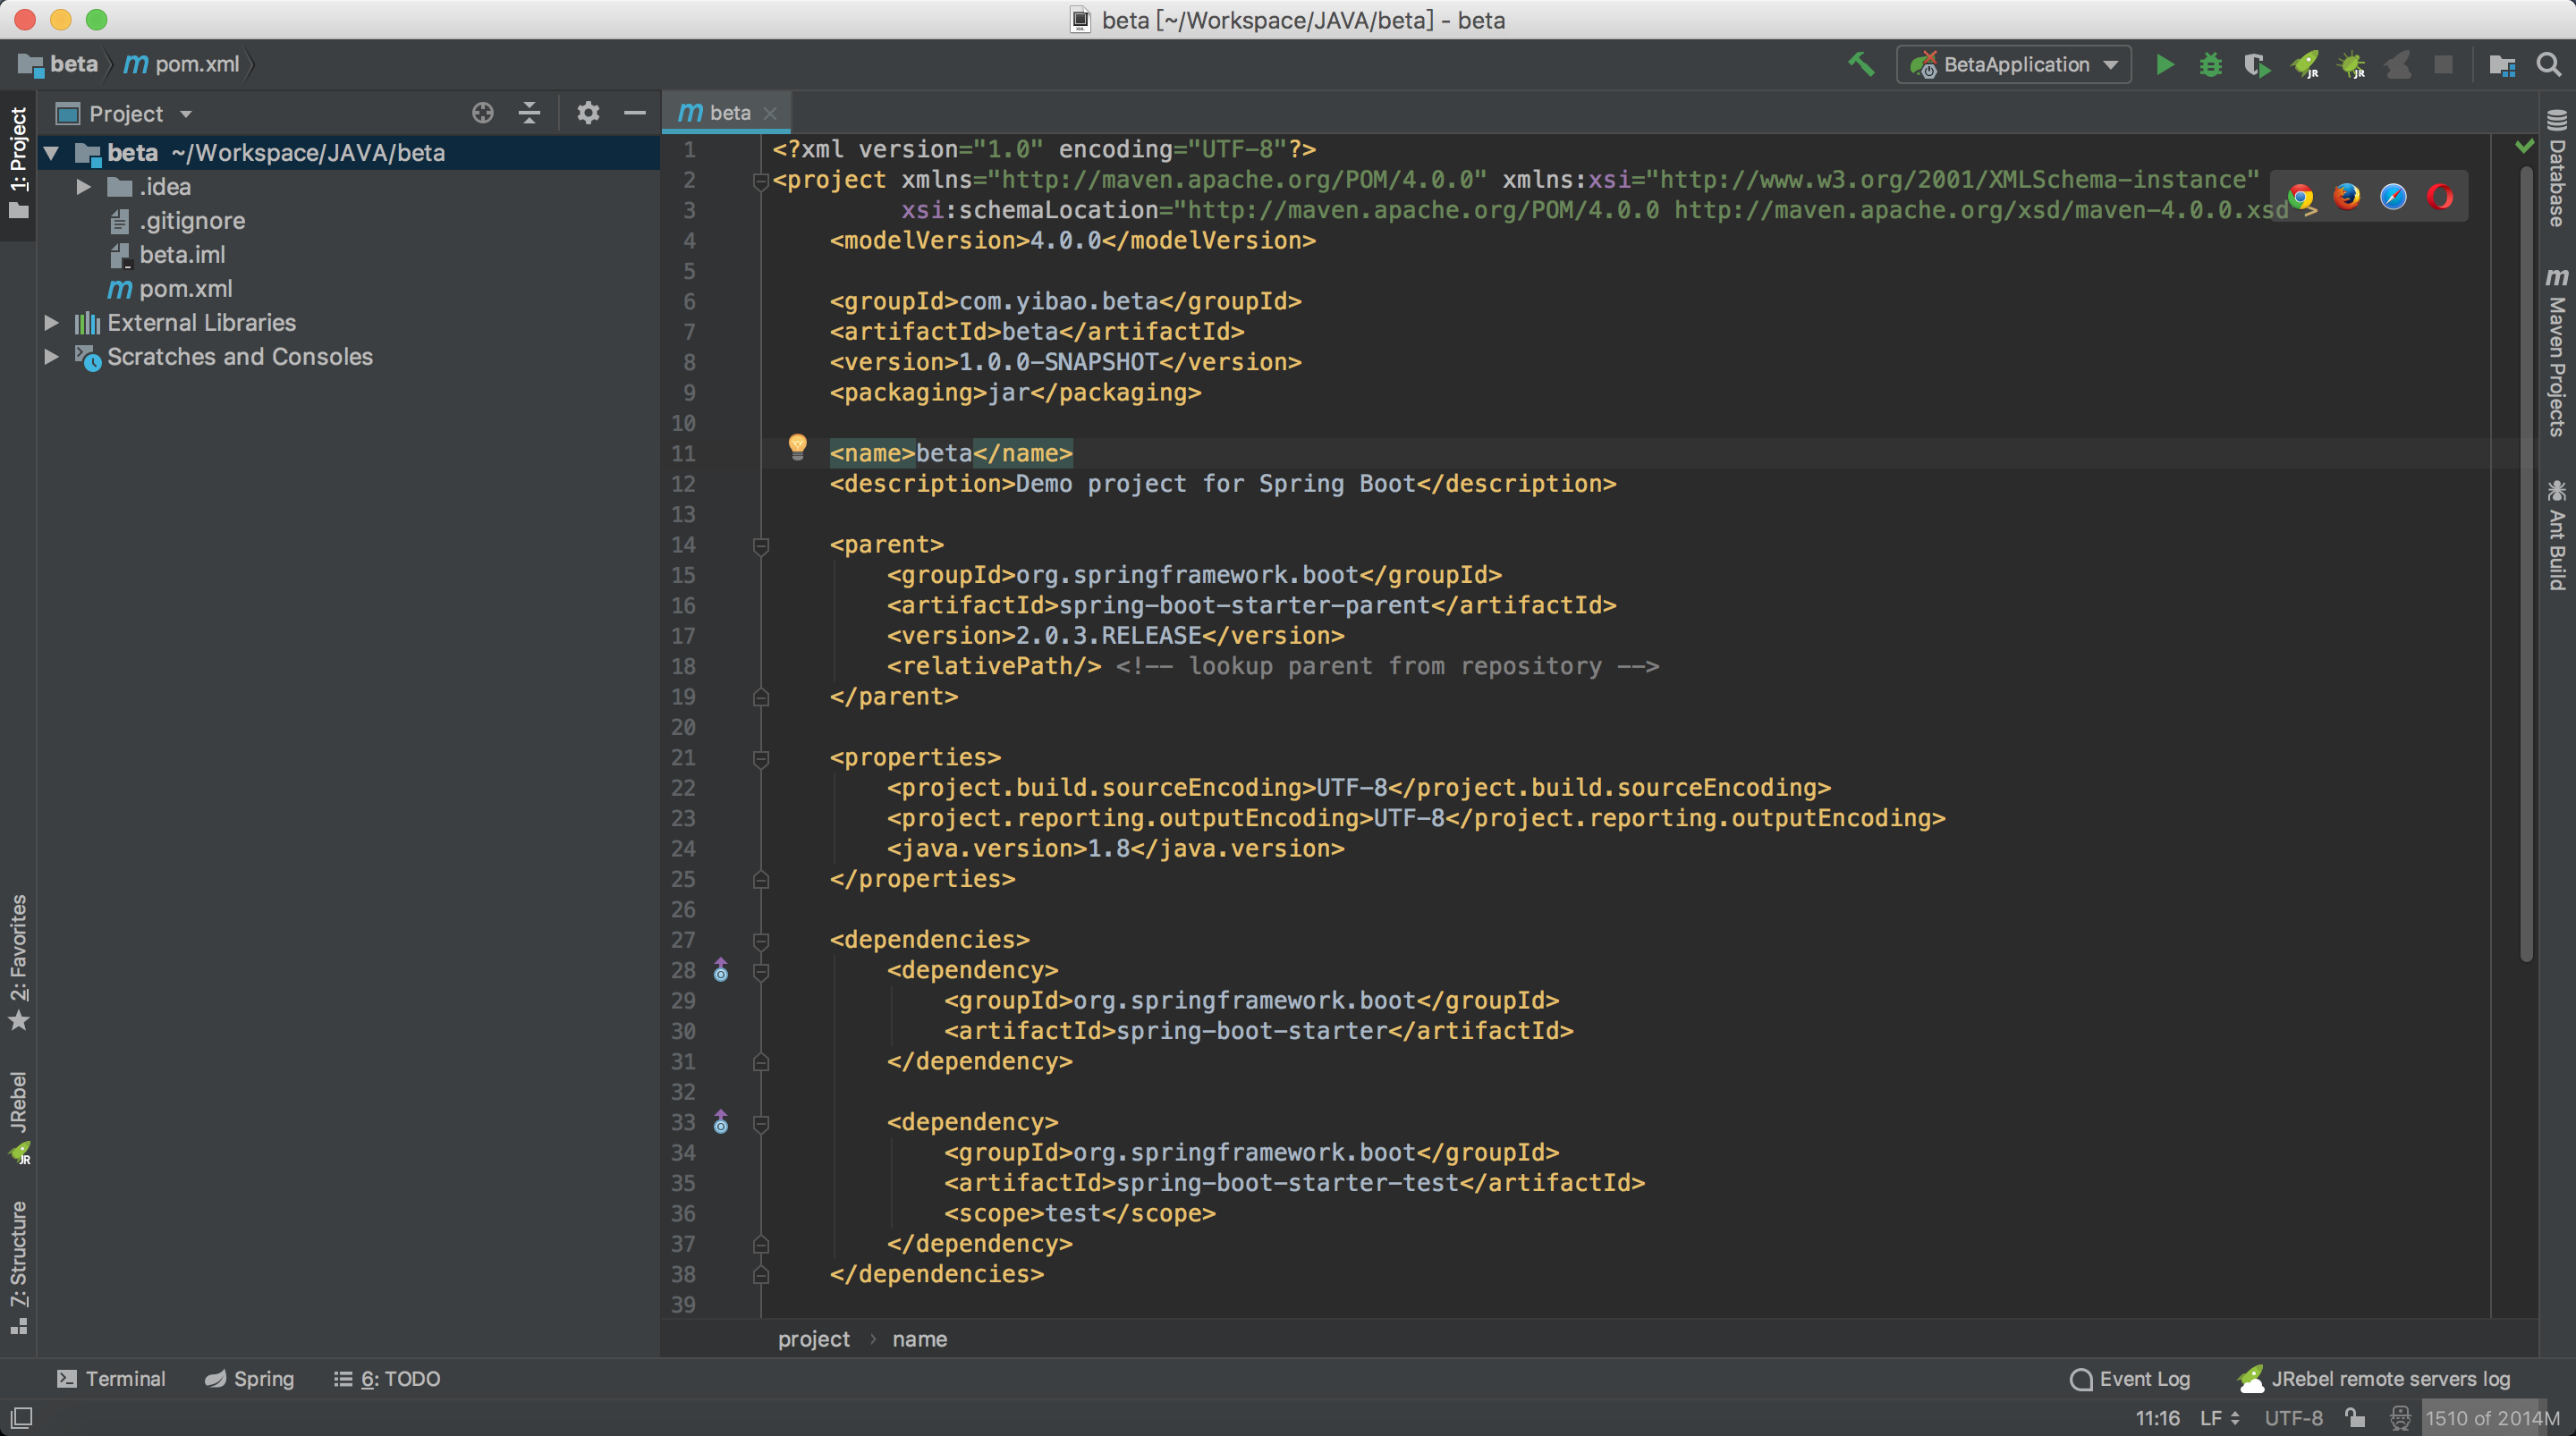
⑥ 最终得到的项目目录结构如下

⑦ 删除无用的.mvn目录、src目录、mvnw及mvnw.cmd文件,最终只留.gitignore和pom.xml
2、创建子模块
① 选择项目根目录beta右键呼出菜单,选择New -> Module

② 选择Maven,点击Next

③ 填写ArifactId,点击Next

④ 修改Module name增加横杠提升可读性,点击Finish

⑤ 同理添加【beta-dao】、【beta-web】子模块,最终得到项目目录结构如下图

3、运行项目
① 在beta-web层创建com.yibao.beta.web包(注意:这是多层目录结构并非单个目录名,com >> yibao >> beta >> web)并添加入口类BetaWebApplication.java

package com.yibao.beta.web;

import org.springframework.boot.SpringApplication;

import org.springframework.boot.autoconfigure.SpringBootApplication;

/**

 * @author linjian

 * @date 2018/9/29

 */

@SpringBootApplication
public class BetaWebApplication {

    public static void main(String[] args) {

        SpringApplication.run(BetaWebApplication.class, args);

    }

}
② 在com.yibao.beta.web包中添加controller目录并新建一个controller,添加test方法测试接口是否可以正常访问
package com.yibao.beta.web.controller;

import org.springframework.web.bind.annotation.GetMapping;

import org.springframework.web.bind.annotation.RequestMapping;

import org.springframework.web.bind.annotation.RestController;

/**

 * @author linjian

 * @date 2018/9/29

 */

@RestController

@RequestMapping("demo")

public class DemoController {

    @GetMapping("test")

    public String test() {

        return "Hello World!";

    }

}
③ 运行BetaWebApplication类中的main方法启动项目,默认端口为8080,访问http://localhost:8080/demo/test得到如下效果
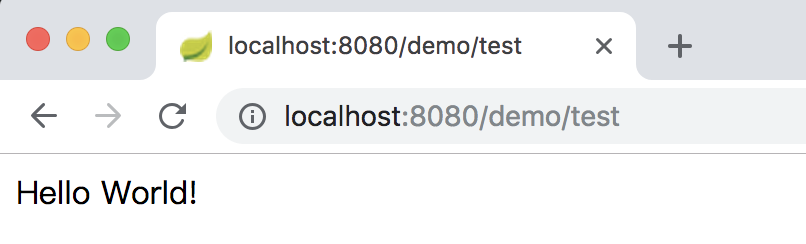
以上虽然项目能正常启动,但是模块间的依赖关系却还未添加,下面继续完善
4、配置模块间的依赖关系
各个子模块的依赖关系:biz层依赖dao层,web层依赖biz层
① 父pom文件中声明所有子模块依赖(dependencyManagement及dependencies的区别自行查阅文档)
<dependencyManagement>
    <dependencies>
        <dependency>
            <groupId>com.yibao.beta</groupId>
            <artifactId>beta-biz</artifactId>
            <version>${beta.version}</version>
        </dependency>
        <dependency>
            <groupId>com.yibao.beta</groupId>
            <artifactId>beta-dao</artifactId>
            <version>${beta.version}</version>
        </dependency>
        <dependency>
            <groupId>com.yibao.beta</groupId>
            <artifactId>beta-web</artifactId>
            <version>${beta.version}</version>
        </dependency>
    </dependencies>
</dependencyManagement>
其中${beta.version}定义在properties标签中
② 在beta-web层中的pom文件中添加beta-biz依赖
<dependencies>
    <dependency>
        <groupId>com.yibao.beta</groupId>
        <artifactId>beta-biz</artifactId>
    </dependency>
</dependencies>
③ 在beta-biz层中的pom文件中添加beta-dao依赖
<dependencies>
    <dependency>
        <groupId>com.yibao.beta</groupId>
        <artifactId>beta-dao</artifactId>
    </dependency>
</dependencies>
5、web层调用biz层接口测试
① 在beta-biz层创建com.yibao.beta.biz包,添加service目录并在其中创建DemoService接口类
package com.yibao.beta.biz.service;

/**

 * @author linjian

 * @date 2018/9/29

 */

public interface DemoService {

    String test();

}
package com.yibao.beta.biz.service.impl;

import com.yibao.beta.biz.service.DemoService;

import org.springframework.stereotype.Service;

/**

 * @author linjian

 * @date 2018/9/29

 */

@Service

public class DemoServiceImpl implements DemoService {

    @Override

    public String test() {

        return "test";

    }

}
② DemoController通过@Autowired注解注入DemoService,修改DemoController的test方法使之调用DemoService的test方法,最终如下所示
package com.yibao.beta.web.controller;

import com.yibao.beta.biz.service.DemoService;

import org.springframework.beans.factory.annotation.Autowired;

import org.springframework.web.bind.annotation.GetMapping;

import org.springframework.web.bind.annotation.RequestMapping;

import org.springframework.web.bind.annotation.RestController;

/**

 * @author linjian

 * @date 2018/9/29

 */

@RestController

@RequestMapping("demo")

public class DemoController {

    @Autowired

    private DemoService demoService;

    @GetMapping("test")

    public String test() {

        return demoService.test();

    }

}
③ 再次运行BetaWebApplication类中的main方法启动项目,发现如下报错
***************************

APPLICATION FAILED TO START

***************************

Description:

Field demoService in com.yibao.beta.web.controller.DemoController required a bean of type 'com.yibao.beta.biz.service.DemoService' that could not be found.

Action:

Consider defining a bean of type 'com.yibao.beta.biz.service.DemoService' in your configuration.
原因是找不到DemoService类,此时需要在BetaWebApplication入口类中增加包扫描,设置@SpringBootApplication注解中的scanBasePackages值为com.yibao.beta,最终如下所示
package com.yibao.beta.web;

import org.mybatis.spring.annotation.MapperScan;

import org.springframework.boot.SpringApplication;

import org.springframework.boot.autoconfigure.SpringBootApplication;

/**

 * @author linjian

 * @date 2018/9/29

 */

@SpringBootApplication(scanBasePackages = "com.yibao.beta")

@MapperScan("com.yibao.beta.dao.mapper")

public class BetaWebApplication {

    public static void main(String[] args) {

        SpringApplication.run(BetaWebApplication.class, args);

    }

}
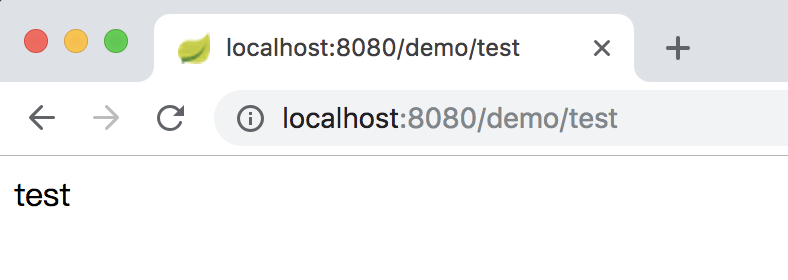
设置完后重新运行main方法,项目正常启动,访问http://localhost:8080/demo/test得到如下效果
6、集成Mybatis
① 父pom文件中声明mybatis-spring-boot-starter及lombok依赖
dependencyManagement>
    <dependencies>
        <dependency>
            <groupId>org.mybatis.spring.boot</groupId>
            <artifactId>mybatis-spring-boot-starter</artifactId>
            <version>1.3.2</version>
        </dependency>
        <dependency>
            <groupId>org.projectlombok</groupId>
            <artifactId>lombok</artifactId>
            <version>1.16.22</version>
        </dependency>
    </dependencies>
</dependencyManagement>
② 在beta-dao层中的pom文件中添加上述依赖
<dependencies>
    <dependency>
        <groupId>org.mybatis.spring.boot</groupId>
        <artifactId>mybatis-spring-boot-starter</artifactId>
    </dependency>
    <dependency>
        <groupId>mysql</groupId>
        <artifactId>mysql-connector-java</artifactId>
    </dependency>
    <dependency>
        <groupId>org.projectlombok</groupId>
        <artifactId>lombok</artifactId>
    </dependency>
</dependencies>
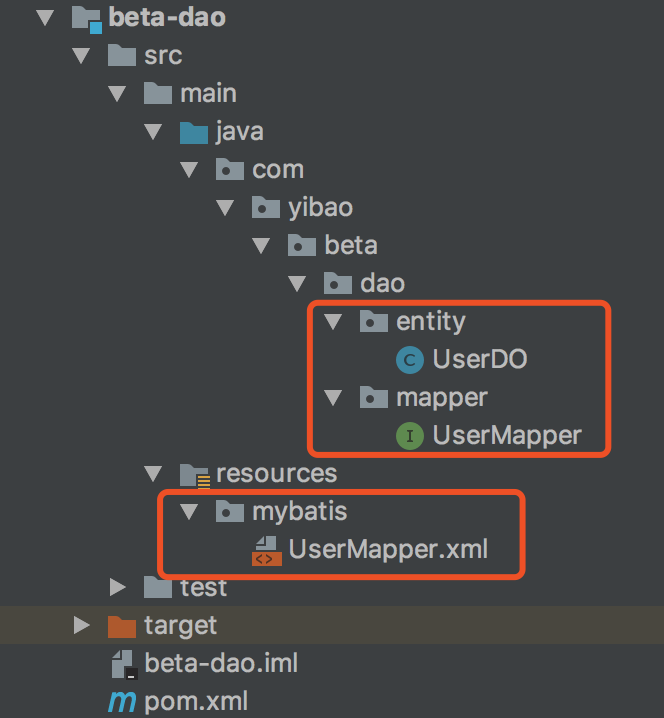
③ 在beta-dao层创建com.yibao.beta.dao包,通过mybatis-genertaor工具生成dao层相关文件(DO、Mapper、xml),存放目录如下
④ applicatio.properties文件添加jdbc及mybatis相应配置项
spring.datasource.driverClassName = com.mysql.jdbc.Driver

spring.datasource.url = jdbc:mysql://192.168.1.1/test?useUnicode=true&characterEncoding=utf-8

spring.datasource.username = test

spring.datasource.password = 123456

mybatis.mapper-locations = classpath:mybatis/*.xml

mybatis.type-aliases-package = com.yibao.beta.dao.entity
⑤ DemoService通过@Autowired注解注入UserMapper,修改DemoService的test方法使之调用UserMapper的selectByPrimaryKey方法,最终如下所示
package com.yibao.beta.biz.service.impl;

import com.yibao.beta.biz.service.DemoService;

import com.yibao.beta.dao.entity.UserDO;

import com.yibao.beta.dao.mapper.UserMapper;

import org.springframework.beans.factory.annotation.Autowired;

import org.springframework.stereotype.Service;

/**

 * @author linjian

 * @date 2018/9/29

 */

@Service

public class DemoServiceImpl implements DemoService {

    @Autowired

    private UserMapper userMapper;

    @Override

    public String test() {

        UserDO user = userMapper.selectByPrimaryKey(1);

        return user.toString();

    }

}
⑥ 再次运行BetaWebApplication类中的main方法启动项目,发现如下报错
APPLICATION FAILED TO START

***************************

Description:

Field userMapper in com.yibao.beta.biz.service.impl.DemoServiceImpl required a bean of type 'com.yibao.beta.dao.mapper.UserMapper' that could not be found.

Action:

Consider defining a bean of type 'com.yibao.beta.dao.mapper.UserMapper' in your configuration.
原因是找不到UserMapper类,此时需要在BetaWebApplication入口类中增加dao层包扫描,添加@MapperScan注解并设置其值为com.yibao.beta.dao.mapper,最终如下所示
package com.yibao.beta.web;

import org.mybatis.spring.annotation.MapperScan;

import org.springframework.boot.SpringApplication;

import org.springframework.boot.autoconfigure.SpringBootApplication;

/**

 * @author linjian

 * @date 2018/9/29

 */

@SpringBootApplication(scanBasePackages = "com.yibao.beta")

@MapperScan("com.yibao.beta.dao.mapper")

public class BetaWebApplication {

    public static void main(String[] args) {

        SpringApplication.run(BetaWebApplication.class, args);

    }

}
设置完后重新运行main方法,项目正常启动,访问http://localhost:8080/demo/test得到如下效果
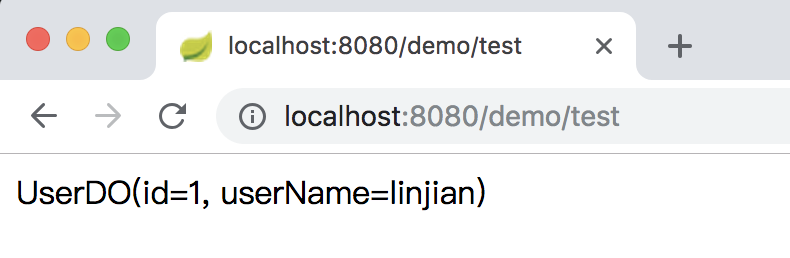
至此,一个简单的SpringBoot+Mybatis多模块项目已经搭建完毕,我们也通过启动项目调用接口验证其正确性。
四、总结
一个层次分明的多模块工程结构不仅方便维护,而且有利于后续微服务化。在此结构的基础上还可以扩展common层(公共组件)、server层(如dubbo对外提供的服务)
此为项目重构的第一步,后续还会的框架中集成logback、disconf、redis、dubbo等组件
五、未提到的坑
在搭建过程中还遇到一个maven私服的问题,原因是公司内部的maven私服配置的中央仓库为阿里的远程仓库,它与maven自带的远程仓库相比有些jar包版本并不全,导致在搭建过程中好几次因为没拉到相应jar包导致项目启动不了。
SpringBoot+Mybatis多模块项目搭建教程的更多相关文章
- Spring Boot + MyBatis 多模块项目搭建教程
一.前言 1.开发工具及系统环境 IDE:IntelliJ IDEA 2020.2.2 系统环境:Windows 2.项目目录结构 biz层:业务逻辑层 dao层:数据持久层 web层:请求处理层 二 ...
- SpringBoot+Mybatis多模块(module)项目搭建教程
一.前言 最近公司项目准备开始重构,框架选定为SpringBoot+Mybatis,本篇主要记录了在IDEA中搭建SpringBoot多模块项目的过程. 1.开发工具及系统环境 IDE:Intelli ...
- 利用springboot创建多模块项目
本文旨在用最通俗的语言讲述最枯燥的基本知识 最近要对一个不大不小的项目进行重构,用spring觉得太过于繁琐,用cloud又有觉得过于庞大,维护的人手不够:权衡之下,最终选了springboot作为架 ...
- SpringBoot之多模块项目
SpringBoot之多模块项目 说明:我们通过maven的父子工程来搭建springboot的多模块项目** 项目的整体结构 本项目涉及了到了五个模块 framework-web模块主要是放置前端的 ...
- SpringBoot+Maven 多模块项目的构建、运行、打包实战
前言 最近在做一个很复杂的会员综合线下线上商城大型项目,单模块项目无法满足多人开发和架构,很多模块都是重复的就想到了把模块提出来,做成公共模块,基于maven的多模块项目,也好分工开发,也便于后期微服 ...
- Spring-Boot构建多模块项目
Spring-Boot构建多模块项目 功能模块单独项目开发,可以将一个庞大的项目分解成多个小项目,便于细分开发 Maven多模块项目不能独立存在,必须有一个介质来包含. 1.创建一个Maven 项目, ...
- SpringBoot+Maven 多模块项目的构建、运行、打包
SpringBoot+Maven 多模块项目的构建.运行.打包 https://blog.csdn.net/zekeTao/article/details/79413919
- IDEA+SpringBoot+Mybatis+maven分布式项目框架的搭建
参考文章:https://blog.csdn.net/qq_34410726/article/details/98214992 一.maven分布式工程的基本架构 demo #父工程模块,主要用来定 ...
- IDEA创建SpringBoot的多模块项目教程
最近在写一个多模块的SpringBoot项目,基于过程总了一些总结,故把SpringBoot多个模块的项目创建记录下来. 首先,先建立一个父工程: (1)在IDEA工具栏选择File->New- ...
随机推荐
- Django—使用后台管理Models
后台的配置 1.创建后台管理员 [root@localhost study_django]# python manage.py createsuperuser [root@localhost stud ...
- Paper慢慢读 - AB实验人群定向 Recursive Partitioning for Heterogeneous Casual Effects
这篇是treatment effect估计相关的论文系列第一篇所以会啰嗦一点多给出点背景. 论文 Athey, S., and Imbens, G. 2016. Recursive partition ...
- element-ui 中dialog居中
.el-dialog{ display: flex; flex-direction: column; margin:0 !important; ...
- LeetCode解题笔记 - 1. Two Sum
1. Two Sum Given an array of integers, return indices of the two numbers such that they add up to a ...
- [题解向] PAM简单习题
\(1\) LG5496 [模板]回文自动机 对于 \(s\) 的每个位置,请求出以该位置结尾的回文子串个数. \(|s|\leq 1e6\) 然后就是PAM的板子题咋感觉好像没有不是很板的PAM题呢 ...
- 百度开源的分布式唯一ID生成器UidGenerator,解决了时钟回拨问题
UidGenerator是百度开源的Java语言实现,基于Snowflake算法的唯一ID生成器.而且,它非常适合虚拟环境,比如:Docker.另外,它通过消费未来时间克服了雪花算法的并发限制.Uid ...
- 《细说PHP》第四版 样章 第18章 数据库抽象层PDO 11
18.8.3 完美分页类的代码实现 分页类的编写除了需要使用在18.8.2节中提供的可以操作的3个成员方法,还需要更多的成员,但其他的成员方法和成员属性只需要内部使用,并不需要用户在对象外部操作,所 ...
- webpack入门配置步骤详解
1.初始化 1.npm install webpack webpack-cli webpack-dev-server --g 全局安装必要的第三方插件 2.mkdir config dist src ...
- 使用码云,GitHub进行版本控制,并通过WebHook进行自动部署
我们通常需要在 PUSH 代码到远程仓库时,线上环境会自动进行代码同步,这时候就需要用到WebHook,它会自动回调我们设定的http地址. 通过请求我们自已编写的脚本,来拉取代码,实现与远程仓库代码 ...
- SpringBoot开发案例之mail中文附件名字乱码
最近在开发一个邮件发送多附件的微服务,使用的是org.springframework.mail.javamail.JavaMailSender;包下面的JavaMailSender 但是发送出来的附件 ...