Linux下使用 github+hexo 搭建个人博客04-next主题优化
上篇我们说了 hexo 的优化,针对的站点的优化。
本篇讲解 next 主题的优化,包括:使用语言、前端页面显示宽度、菜单、侧栏、头像、添加或取消动画效果、打赏功能等等。
让页面排版更符合我们所要的功能和所想的风格。
可参考网站
http://theme-next.iissnan.com/getting-started.html
主题设定
选择 Scheme
修改 next 主题配置文件。
 [root@zhangblog next]# pwd

 /app/softinsall/hexo/themes/next

 [root@zhangblog next]# vim _config.yml

 # Schemes

 #scheme: Muse

 #scheme: Mist

 scheme: Pisces

 #scheme: Gemini
可以自行更换,不用重启 hexo 服务。个人更喜欢 Pisces,将菜单栏放在左侧,而不是原来的顶部。
Muse 默认 Scheme,这是 NexT 最初的版本,黑白主调,大量留白
Mist Muse 的紧凑版本,整洁有序的单栏外观
Pisces 双栏 Scheme,小家碧玉似的清新
页面宽度设置
默认情况下,该主题页面两边留白较多,所以如果需要可以把两边留白处减少些。
当然,此步操作可略。
 [root@zhangblog css]# pwd

 /app/softinsall/hexo/themes/next/source/css

 [root@zhangblog css]# vim _variables/base.styl  # 修改处一

 $main-desktop                   = 1160px

 [root@zhangblog css]# vim _schemes/Pisces/_layout.styl  # 修改处二

 .content-wrap {

   float: right;

   box-sizing: border-box;

   padding: $content-desktop-padding;

   /* width: $content-desktop; 改为如下信息 */

   width: calc(% - 252px);

   background: white;

   min-height: 700px;

   box-shadow: $box-shadow-inner;

   border-radius: $border-radius-inner;
设置语言
页面默认为英文,改为中文显示。
首先确定该主题支持哪些语言。
 [root@zhangblog languages]# pwd  # 在主题目录,查看 next 主题支持哪些语言

 /app/softinsall/hexo/themes/next

 [root@zhangblog languages]# ll languages/

 total

 -rw-r--r--  root root  Jun   : default.yml

 -rw-r--r--  root root  Jun   : de.yml

 -rw-r--r--  root root  Jun   : en.yml

 -rw-r--r--  root root  Jun   : fr-FR.yml

 -rw-r--r--  root root  Jun   : id.yml

 -rw-r--r--  root root  Jun   : it.yml

 -rw-r--r--  root root  Jun   : ja.yml

 -rw-r--r--  root root  Jun   : ko.yml

 -rw-r--r--  root root  Jun   : nl-NL.yml

 -rw-r--r--  root root  Jun   : pt-BR.yml

 -rw-r--r--  root root  Jun   : pt.yml

 -rw-r--r--  root root  Jun   : ru.yml

 -rw-r--r--  root root  Jun   : vi.yml

 -rw-r--r--  root root  Jun   : zh-Hans.yml  # 中文简体,使用该语言

 -rw-r--r--  root root  Jun   : zh-hk.yml

 -rw-r--r--  root root  Jun   : zh-tw.yml
在站点配置文件使用指定语言。
 [root@zhangblog hexo]# pwd  # 站点目录

 /app/softinsall/hexo

 [root@zhangblog hexo]# vim _config.yml

 ………………

 language: zh-Hans

 timezone:
重新生成静态文件,然后重启 hexo 服务,再次访问可见是中文显示了。
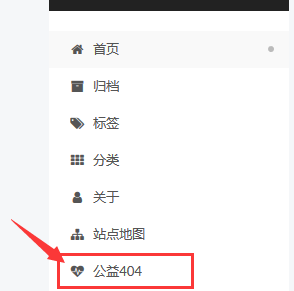
设置菜单
菜单配置包括三个部分,第一是菜单项(名称和链接),第二是菜单项的显示文本,第三是菜单项对应的图标。
修改主题配置文件。
 [root@zhangblog next]# vim _config.yml

 menu:

   home: / || home

   archives: /archives/ || archive

   tags: /tags/ || tags

   categories: /categories/ || th

   about: /about/ || user

   #schedule: /schedule/ || calendar

   sitemap: /sitemap.xml || sitemap

   commonweal: // || heartbeat

 # Enable/Disable menu icons.

 menu_icons:

   enable: true
home 主页
archives 归档类
tags 标签页
categories 分类页
about 关于页
schedule 时间表
sitemap 网站地图
commonweal 公益 404
设置侧栏
修改主题配置文件。
 [root@zhangblog next]# vim _config.yml

 sidebar:

   # Sidebar Position, available values: left | right (only for Pisces | Gemini).

   position: left

   #position: right
默认不用修改。
侧边栏位置,可用值::left | right (仅适用于 Pisces | Gemini)。
设置头像
修改主题配置文件。
 [root@zhangblog next]# vim _config.yml

 # Sidebar Avatar

 avatar:

   # In theme directory (source/images): /images/avatar.gif

   # In site directory (source/uploads): /uploads/avatar.gif

   # You can also use other linking images.

   url: /uploads/avatar.png
如果是站外,完整的互联网 URI 如:http://example.com/avatar.png
如果是站内:
1、将头像放置主题目录下的 source/uploads/ (新建 uploads 目录若不存在),配置为:avatar: /uploads/avatar.png
2、或者 放置在 source/images/ 目录下,配置为:avatar: /images/avatar.png
图片路径
 [root@zhangblog next]# pwd  # next 主题目录

 /app/softinsall/hexo/themes/next

 [root@zhangblog next]# ll source/uploads/avatar.png

 -rw-r--r--  root root  Apr  : source/uploads/avatar.png
主题配置
设置「RSS」
false:禁用 RSS,不在页面上显示 RSS 连接。
留空:使用 Hexo 生成的 Feed 链接。 你可以需要先安装 hexo-generator-feed 插件。
安装插件
 [root@iZ28xbsfvc4Z hexo]# pwd  # 站点目录

 /app/softinsall/hexo

 [root@iZ28xbsfvc4Z hexo]# npm install hexo-generator-feed --save
站点配置文件修改
 [root@zhangblog hexo]# pwd

 /app/softinsall/hexo

 [root@zhangblog hexo]# vim _config.yml

 #Feed Atom

 feed:

   type: atom

   path: atom.xml

   limit:

   hub:

   content:

   content_limit:

   content_limit_delim: ' '
参数讲解:
type: RSS 的类型(atom/rss2)
path: 文件路径,默认是 atom.xml/rss2.xml
limit: 展示文章的数量,使用 0 或则 false 代表展示全部
hub:
content: 在RSS文件中是否包含内容,有3个值 true/false 默认不填为 false
content_limit: 指定内容的长度作为摘要,仅仅在上面content设置为 false 和没有自定义的描述出现
content_limit_delim: 上面截取描述的分隔符,截取内容是以指定的这个分隔符作为截取结束的标志。在达到规定的内容长度之前最后出现的这个分隔符之前的内容,防止从中间截断。
添加「标签」页面
新建标签页面
 [root@zhangblog hexo]# pwd  # 定位到 Hexo 站点目录下

 /app/softinsall/hexo

 [root@zhangblog hexo]# hexo new page tags

 INFO  Created: /app/softinsall/hexo/source/tags/index.md
标签页面设置
 [root@zhangblog tags]# pwd

 /app/softinsall/hexo/source/tags

 [root@zhangblog tags]# ll

 total

 -rw-r--r--  root root  Jun   : index.md

 [root@zhangblog tags]# cat index.md

 ---

 title: All Tags

 date: -- ::

 type: "tags"

 comments: false

 ---
注意:如果有集成评论服务,页面也会带有评论。 若需要关闭的话,请添加字段 comments 并将值设置为 false。
使用标签
在文章中使用标签。
[root@zhangblog hexo]# pwd
/app/softinsall/hexo
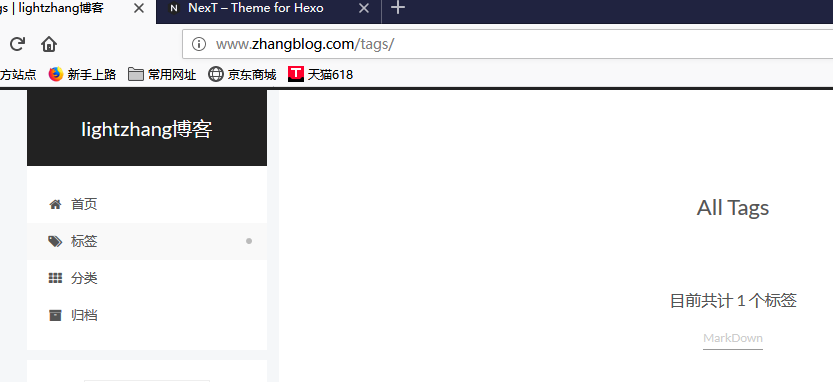
[root@zhangblog hexo]# head source/_posts/MarkDown-新手指南.md # 相关信息如下
---
title: MarkDown 新手指南
date: -- ::
tags:
- MarkDown
---
浏览器访问
添加「分类」页面
新建分类页面
 [root@zhangblog hexo]# pwd  # 定位到 Hexo 站点目录下

 /app/softinsall/hexo

 [root@zhangblog hexo]# hexo new page categories

 INFO  Created: /app/softinsall/hexo/source/categories/index.md
分类页面设置
 [root@zhangblog categories]# pwd

 /app/softinsall/hexo/source/categories

 [root@zhangblog categories]# ll

 total

 -rw-r--r--  root root  Jun   : index.md

 [root@zhangblog categories]# cat index.md

 ---

 title: 文章分类

 date: -- ::

 type: "categories"

 comments: false

 ---
注意:如果有集成评论服务,页面也会带有评论。 若需要关闭的话,请添加字段 comments 并将值设置为 false。
使用分类
在文章中使用分类。
[root@zhangblog hexo]# pwd
/app/softinsall/hexo
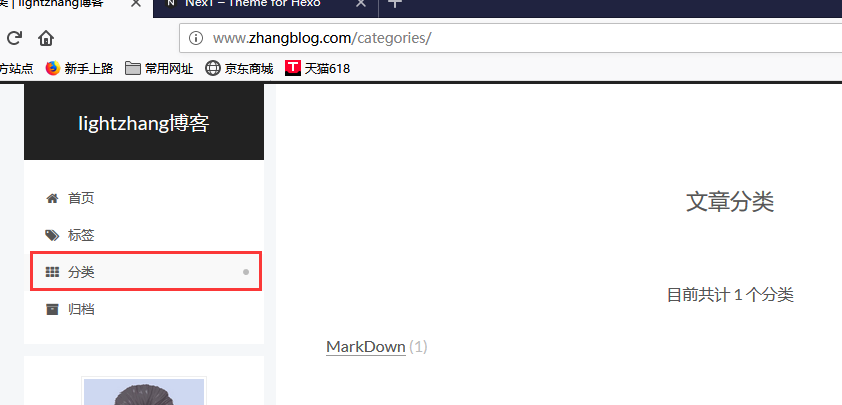
[root@zhangblog hexo]# head source/_posts/MarkDown-新手指南.md # 相关信息如下
---
title: MarkDown 新手指南
date: -- ::
tags:
- MarkDown
categories:
- MarkDown
---
浏览器访问
添加「关于」页面
新建关于页面
 [root@zhangblog hexo]# pwd  # 定位到 Hexo 站点目录下

 /app/softinsall/hexo

 [root@zhangblog hexo]# hexo new page about

 INFO  Created: /app/softinsall/hexo/source/about/index.md
关于页面编辑
[root@zhangblog about]# pwd
/app/softinsall/hexo/source/about
[root@zhangblog about]# ll
total
-rw-r--r-- root root Jun : index.md
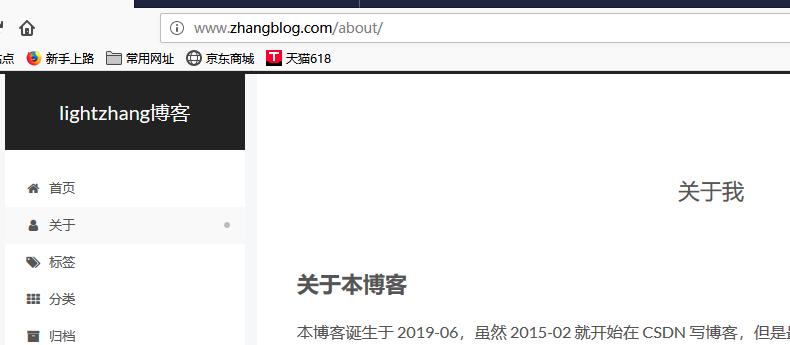
[root@zhangblog about]# cat index.md
---
title: 关于我
date: -- ::
--- # 关于本博客
本博客诞生于 -,虽然 - 就开始在 CSDN 写博客,但是最开始都是作为自己的笔记记录,因此刚开始那段时间也不怎么重视排版。如果在 CSDN 看了我那些早期的博客,发现排版不好,体验性欠缺,还请多多包涵。 后来该博客经过几次改版,自己发现不怎么适应。因此就转到了博客园。相比前者的经常改版,甚至有段时间广告频繁,博客园就好很多,页面也非常清爽。 ……………… 等等,后期可能还会有其他动作,敬请期待………… # 联系方式
邮箱:zhanglianghhh@.com
QQ: </br> <center> **你对本站的捐赠,就是我最大的动力!** </center> ---
浏览器访问
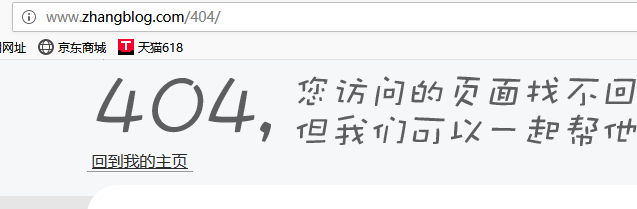
添加「公益404」页面
腾讯公益404页面,寻找丢失儿童,让大家一起关注此项公益事业!
新建关于页面
 [root@zhangblog hexo]# pwd  # 定位到 Hexo 站点目录下

 /app/softinsall/hexo

 [root@zhangblog hexo]# hexo new page

 INFO  Created: /app/softinsall/hexo/source//index.md
关于页面编辑
 [root@zhangblog ]# pwd

 /app/softinsall/hexo/source/

 [root@zhangblog ]# ll

 total

 -rw-r--r--  root root  Jun   : index.md

 [root@zhangblog ]# cat index.md

 ---

 title:

 date: -- ::

 ---

 <!DOCTYPE HTML>

 <html>

 <head>

   <meta http-equiv="content-type" content="text/html;charset=utf-8;"/>

   <meta http-equiv="X-UA-Compatible" content="IE=edge,chrome=1" />

   <meta name="robots" content="all" />

   <meta name="robots" content="index,follow"/>

   <link rel="stylesheet" type="text/css" href="https://qzone.qq.com/gy/404/style/404style.css">

 </head>

 <body>

   <script type="text/plain" src="http://www.qq.com/404/search_children.js"

           charset="utf-8" homePageUrl="/"

           homePageName="回到我的主页">

   </script>

   <script src="https://qzone.qq.com/gy/404/data.js" charset="utf-8"></script>

   <script src="https://qzone.qq.com/gy/404/page.js" charset="utf-8"></script>

 </body>

 </html>
浏览器访问
侧边栏社交链接
侧栏社交链接的修改包含两个部分,第一是链接,第二是链接图标。两者配置均在主题配置文件中。
 [root@zhangblog next]# pwd  # 主题目录

 /app/softinsall/hexo/themes/next

 [root@zhangblog next]# vim _config.yml

 social:

   GitHub: https://github.com/zhanglianghhh || github

   E-Mail: mailto:zhanglianghhh@.com || envelope

   知乎: https://www.zhihu.com/people/lightzhang-23-69/activities || globe

   CSDN: https://blog.csdn.net/woshizhangliang999 || codiepie

   博客园: https://www.cnblogs.com/zhanglianghhh/p/ || rss-square

 social_icons:

   enable: true

   icons_only: false

   transition: false
以如下配置说明:
GitHub: https://github.com/zhanglianghhh || github
GitHub: 表示页面显示的文字
https://github.com/zhanglianghhh : 跳转URL
github: 使用的图标
更多图标参见如下网站:
页面效果

开启打赏功能
越来越多的平台(微信公众号、新浪博客、简书、百度打赏等)支持打赏功能,付费阅读时代越来越近,因此增加了打赏功能。
支持微信打赏和支付宝打赏,只需在主题配置文件中填入微信和支付宝收款二维码图片地址,即可开启打赏功能。
 [root@zhangblog next]# pwd  # 在主题目录

 /app/softinsall/hexo/themes/next

 [root@zhangblog next]# vim _config.yml

 # Reward

 reward_comment: 坚持原创分享,你的支持就是我最大的动力!

 wechatpay: /uploads/weixin_cash_code.png

 alipay: /uploads/alipay_cash_code.png
图片所在位置
 [root@zhangblog next]# pwd  # 在主题目录

 /app/softinsall/hexo/themes/next

 [root@zhangblog next]# ll source/uploads/weixin_cash_code.png

 -rw-r--r--  root root  Jun   : source/uploads/weixin_cash_code.png

 [root@zhangblog next]# ll source/uploads/alipay_cash_code.png

 -rw-r--r--  root root  Jun   : source/uploads/alipay_cash_code.png
页面效果

友情链接
在主题配置文件中修改。
 [root@zhangblog next]# pwd  # 主题目录

 /app/softinsall/hexo/themes/next

 [root@zhangblog next]# vim _config.yml

 # Blog rolls

 links_icon: link

 links_title: Links

 #links_layout: block

 links_layout: inline

 links:

   OpenInfo: http://mp.weixin.qq.com/user1

   stormzhang: http://mp.weixin.qq.com/user2
页面效果

站点建立时间
这个时间将在站点的底部显示,例如 © 2015- 2019。 编辑主题配置文件,修改字段 since。
 [root@zhangblog next]# pwd  # 主题目录

 /app/softinsall/hexo/themes/next

 [root@zhangblog next]# vim _config.yml

 footer:

   # Specify the date when the site was setup.

   # If not defined, current year will be used.  修改处如下

   since:

   # Icon between year and copyright info.

   icon: user
页面效果

订阅微信公众号
在每篇文章的末尾默认显示微信公众号二维码,扫一扫,轻松订阅。
编辑主题配置文件,如下:
 [root@zhangblog next]# pwd  # 在主题目录

 /app/softinsall/hexo/themes/next

 [root@zhangblog next]# vim _config.yml

 # Wechat Subscriber

 wechat_subscriber:

   enabled: true

   qcode: /uploads/weixin_pulic_code.png

   description: 欢迎扫一扫,订阅我的微信公众号!
页面样式修改
 [root@zhangblog next]# pwd  # 在主题目录

 /app/softinsall/hexo/themes/next

 [root@zhangblog next]# vim layout/_macro/wechat-subscriber.swig

 <div id="wechat_subscriber" style="display: block; padding: 10px 0; margin: 20px auto; width: 100%; text-align: center">

 <!--

     <img id="wechat_subscriber_qcode" src="{{ theme.wechat_subscriber.qcode }}" alt="{{ theme.author }} wechat" style="width: 200px; max-width: 100%;"/>

     去掉 style 中的 width: 200px;

      -->

     <img id="wechat_subscriber_qcode" src="{{ theme.wechat_subscriber.qcode }}" alt="{{ theme.author }} wechat" style="max-width: 100%;"/>

     <div>{{ theme.wechat_subscriber.description }}</div>

 </div>
页面效果

设置「动画效果」
Next 主题默认开启动画效果,由于该效果使用 JavaScript 编写,因此只有当 JavaScript 脚本加载完毕后,才会显示页面。
如果你对加载速度在乎的话,那么可以关闭动画效果。
编辑主题配置文件,如下:
 [root@zhangblog next]# pwd  # 在主题目录

 /app/softinsall/hexo/themes/next

 [root@zhangblog next]# vim _config.yml

 # Use velocity to animate everything.

 motion:

   # true 开启动画, false 关闭动画

   enable: true

   async: false
设置「背景动画」
Next 主题自带四种背景动画效果,有兴趣自行体验,不过建议最好别开背景动画,因为会消耗额外的客户端资源。
编辑主题配置文件,如下:
 [root@zhangblog next]# pwd  # 在主题目录

 /app/softinsall/hexo/themes/next

 [root@zhangblog next]# vim _config.yml

 # Canvas-nest

 canvas_nest: false

 # three_waves

 three_waves: false

 # canvas_lines

 canvas_lines: false

 # canvas_sphere

 canvas_sphere: false
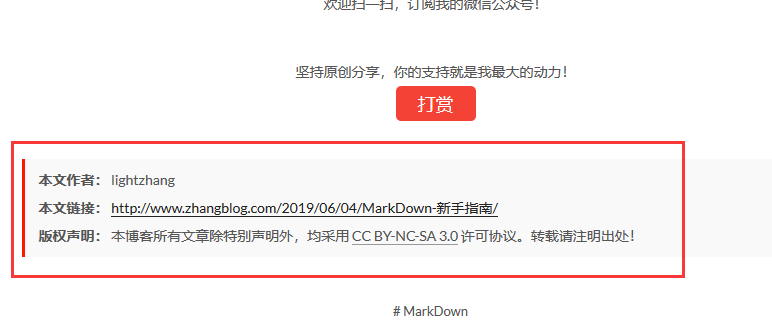
底部版权信息
修改主题配置文件,如下:
 [root@zhangblog next]# pwd  # 在主题目录

 /app/softinsall/hexo/themes/next

 [root@zhangblog next]# vim _config.yml

 # Declare license on posts

 post_copyright:

   enable: true

   license: CC BY-NC-SA 3.0

   license_url: https://creativecommons.org/licenses/by-nc-sa/3.0/
页面效果
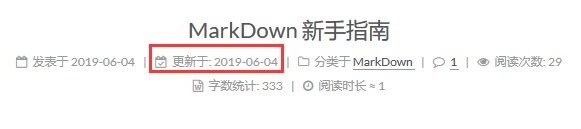
添加文章更新时间
在主题配置文件中进行修改配置。
[root@iZ28xbsfvc4Z next]# pwd # 主题目录
/app/softinsall/hexo/themes/next
[root@iZ28xbsfvc4Z next]# vim _config.yml
# Post meta display settings
post_meta:
item_text: true
created_at: true
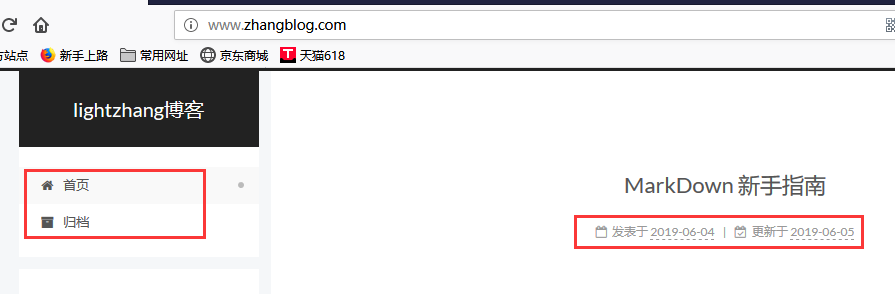
updated_at: true # 从 false 改为 true
categories: true
浏览器访问
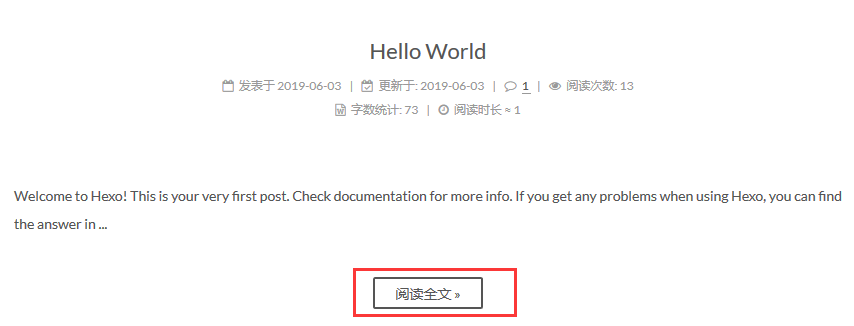
首页不显示全文(只显示预览)
在主题配置文件中进行修改配置。
 [root@iZ28xbsfvc4Z next]# pwd  # 主题目录

 /app/softinsall/hexo/themes/next

 [root@iZ28xbsfvc4Z next]# vim _config.yml

 # Automatically Excerpt. Not recommend.

 # Please use <!-- more --> in the post to control excerpt accurately.

 auto_excerpt:

   # 从 false 改为 true

   enable: true

   length:
页面效果
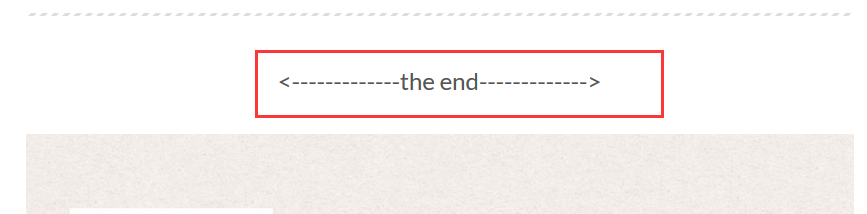
文章末尾统一添加“本文结束”标记
 [root@iZ28xbsfvc4Z next]# pwd  # 主题目录

 /app/softinsall/hexo/themes/next

 [root@iZ28xbsfvc4Z next]# vim layout/_macro/passage-end-tag.swig  # 增加该文件

 <div>

     {% if not is_index %}

         <div style="text-align:center;color: #555;font-size:24px;"><-------------The End-------------></div>

     {% endif %}

 </div>

 [root@iZ28xbsfvc4Z next]# vim layout/_macro/post.swig  # 修改该文件,在 <div class="post-body>…………</div> 标签后增加如下信息

     <!-- 文章末尾统一添加“本文结束”标记 -->

     <div>

       {% if not is_index %}

         {% include 'passage-end-tag.swig' %}

       {% endif %}

     </div>

 [root@iZ28xbsfvc4Z next]# vim _config.yml  # 主题配置文件修改

 # 文章末尾添加“本文结束”标记

 passage_end_tag:

   enabled: true
页面效果
推荐阅读
Linux下使用 github+hexo 搭建个人博客01-hexo搭建
Linux下使用 github+hexo 搭建个人博客02-hexo部署到Github Pages
Linux下使用 github+hexo 搭建个人博客03-hexo配置优化
Linux下使用 github+hexo 搭建个人博客04-next主题优化
Linux下使用 github+hexo 搭建个人博客05-next主题接入评论系统
Linux下使用 github+hexo 搭建个人博客06-next主题接入数据统计
Linux下使用 github+hexo 搭建个人博客07-next主题接入搜索和站点管理

Linux下使用 github+hexo 搭建个人博客04-next主题优化的更多相关文章
- Linux下使用 github+hexo 搭建个人博客07-next主题接入搜索和站点管理
这是搭建个人博客系统系列文章的最后一篇,如果你是从第一篇一路跟下来的,那么恭喜你,即将完成整个博客网站的搭建.OK,话不多说,开始我们的收官之战. 不知你想过没有,如果我们的文章少,一眼看完整个目录, ...
- Linux下使用 github+hexo 搭建个人博客06-next主题接入数据统计
之前说了 next 主题的优化和接入评论系统.让我们完成了自己所需的页面风格和排版,也可让访问用户在每篇博文评论,完成博主和访问用户的交互. 本章我们继续讲解其他重要功能. 既然是一个网站,那么我们就 ...
- Linux下使用 github+hexo 搭建个人博客05-next主题接入评论系统
静态站点拥有一定的局限性,因此我们需要借助于第三方服务来扩展我们站点的功能. 而评论系统是最常用于和网站用户交流的,因此本章讲解在 next 主题,如何接入评论系统. 参考网站:Next 使用文档,第 ...
- Linux下使用 github+hexo 搭建个人博客03-hexo配置优化
上两张文章,我们说了 hexo 部署.主题的切换.博文的创建.MarkDown 简单使用和 hexo 部署到 GitHub Pages. 也说了我们会使用 next 主题做为我们后期博客的使用和维护. ...
- Linux下使用 github+hexo 搭建个人博客02-hexo部署到Github Pages
之前的这篇文章<Linux下使用 github+hexo 搭建个人博客01-hexo搭建>,相信大家都知道怎么搭建 hexo ,怎么切换主题,并且完成了一篇博文的创建,以及 MarkDow ...
- Linux下使用 github+hexo 搭建个人博客01-hexo搭建
为什么要搭建自己的博客系统? 原因有好几个吧,归类如下:1.自己搭建博客系统很有成就感,可以自己选定页面风格和页面排版: 2.自己搭建博客系统可以根据自己的需要添加各种插件功能,因此整体上比网上的第三 ...
- Windows下通过GitHub+Hexo搭建个人博客的步骤
Windows下通过GitHub+Hexo搭建个人博客的步骤 https://blog.csdn.net/namechenfl/article/details/90442312 https://bl ...
- Mac下使用GitHub+Hexo搭建个人博客
首发链接 开始之前需要在电脑上安装好Git和node.js,Mac上可以使用Homebrew命令行工具来安装Git和node.js 安装Homebrew 在命令行工具输入以下命令,如果已经安装过Hom ...
- Github+Hexo,搭建专有博客
前言 记得从大二开始,就一直想搭个专属网站,当时使劲抠页面[前端页面是从QQ空间抠的,现在想抠估计没这么容易了],写代码,忙活半天才把程序弄好. 可惜最终项目还是没上线,因为当时有两问题绕不开 需要购 ...
随机推荐
- 关于Redis 二进制内容的 可视化尝试
二进制内容的 能否可视化? 网上的资料比较少啊! -------------------------------------------------------------------------- ...
- Java之Hashmap中value为null,则返回json数据中key不存在
前两天干活儿的时候,将实例对象放在Hashmap中返回给前端: ArtificialEntity artificialEntity = artificialService.getInfoById(id ...
- Dynamic Code Evaluation:Code Injection 动态代码评估:代码注入
- Power BI 概念及 国内版Pro 试用账户注册流程
视频内容: Power BI 基本概念:https://v.qq.com/x/page/s3026nn69eu.html Power BI Pro 世纪互联版本试用账号注册:https://v.qq. ...
- `MediaDevices.getUserMedia` `undefined` 的问题
通过 MediaDevices.getUserMedia() 获取用户多媒体权限时,需要注意其只工作于以下三种环境: localhost 域 开启了 HTTPS 的域 使用 file:/// 协议打开 ...
- Servlet是什么?JSP和Servlet的区别。Servlet的生命周期。
Servlet(Server Applet),全称Java Servlet, 是用Java编写的服务器端程序.而这些Sevlet都要实现Servlet这个借口.其主要功能在于交互式地浏览和修改数据,生 ...
- JT/T 808-2013 道路运输车辆卫星定位系统北斗兼容车载终端通讯协议技术规范
文档下载地址:JT/T 808-2013 道路运输车辆卫星定位系统北斗兼容车载终端通讯协议技术规范
- 最近几周,写了个微信好友检测助手App
版权声明:本文为xing_star原创文章,转载请注明出处! 本文同步自http://javaexception.com/archives/130 微信好友检测助手App 最近几周,写了个微信好友检测 ...
- FS-Cache和CacheFS 有什么不同吗?(转载)
FS-Cache and CacheFS. Are there any differences between these two? Initially, I thought both were sa ...
- centos7设置服务开机自启
1.在/usr/lib/systemd/system/路径下创建文件 ***.service. 写入如下内容 [Unit]Description=nginxAfter=network.target [ ...