ReactNative: 使用Touchable触摸类组件
一、简介
在应用程序中,最灵魂的功能就是交互。通过给应用程序的组件添加事件来实现交互,进而提高用户体验。然而,ReactNative并不能像Web开发那样可以给大多数的标签元素绑定click事件,例如div、button、input等等,但是RN除了可以通过Text的onPress完成事件外,还是额外提供了4个组件来解决这个问题。这4个组件统称为“Touchable类组件”,也即触摸类组件,使用它们就可以像Text组件那样通过onPress使得其他任意组件都可以被点击。分别是TouchableHighlight、TouchableOpacity、TouchableWithoutFeedback、TouchableNativeFeedback。(注意:TouchableNativeFeedback用于安卓,此处不做解释)
二、区别
这三个组件都能实现触摸点击,进而完成事件交互,但是产生的交互过渡效果是有区别的,具体如下:

三、详请
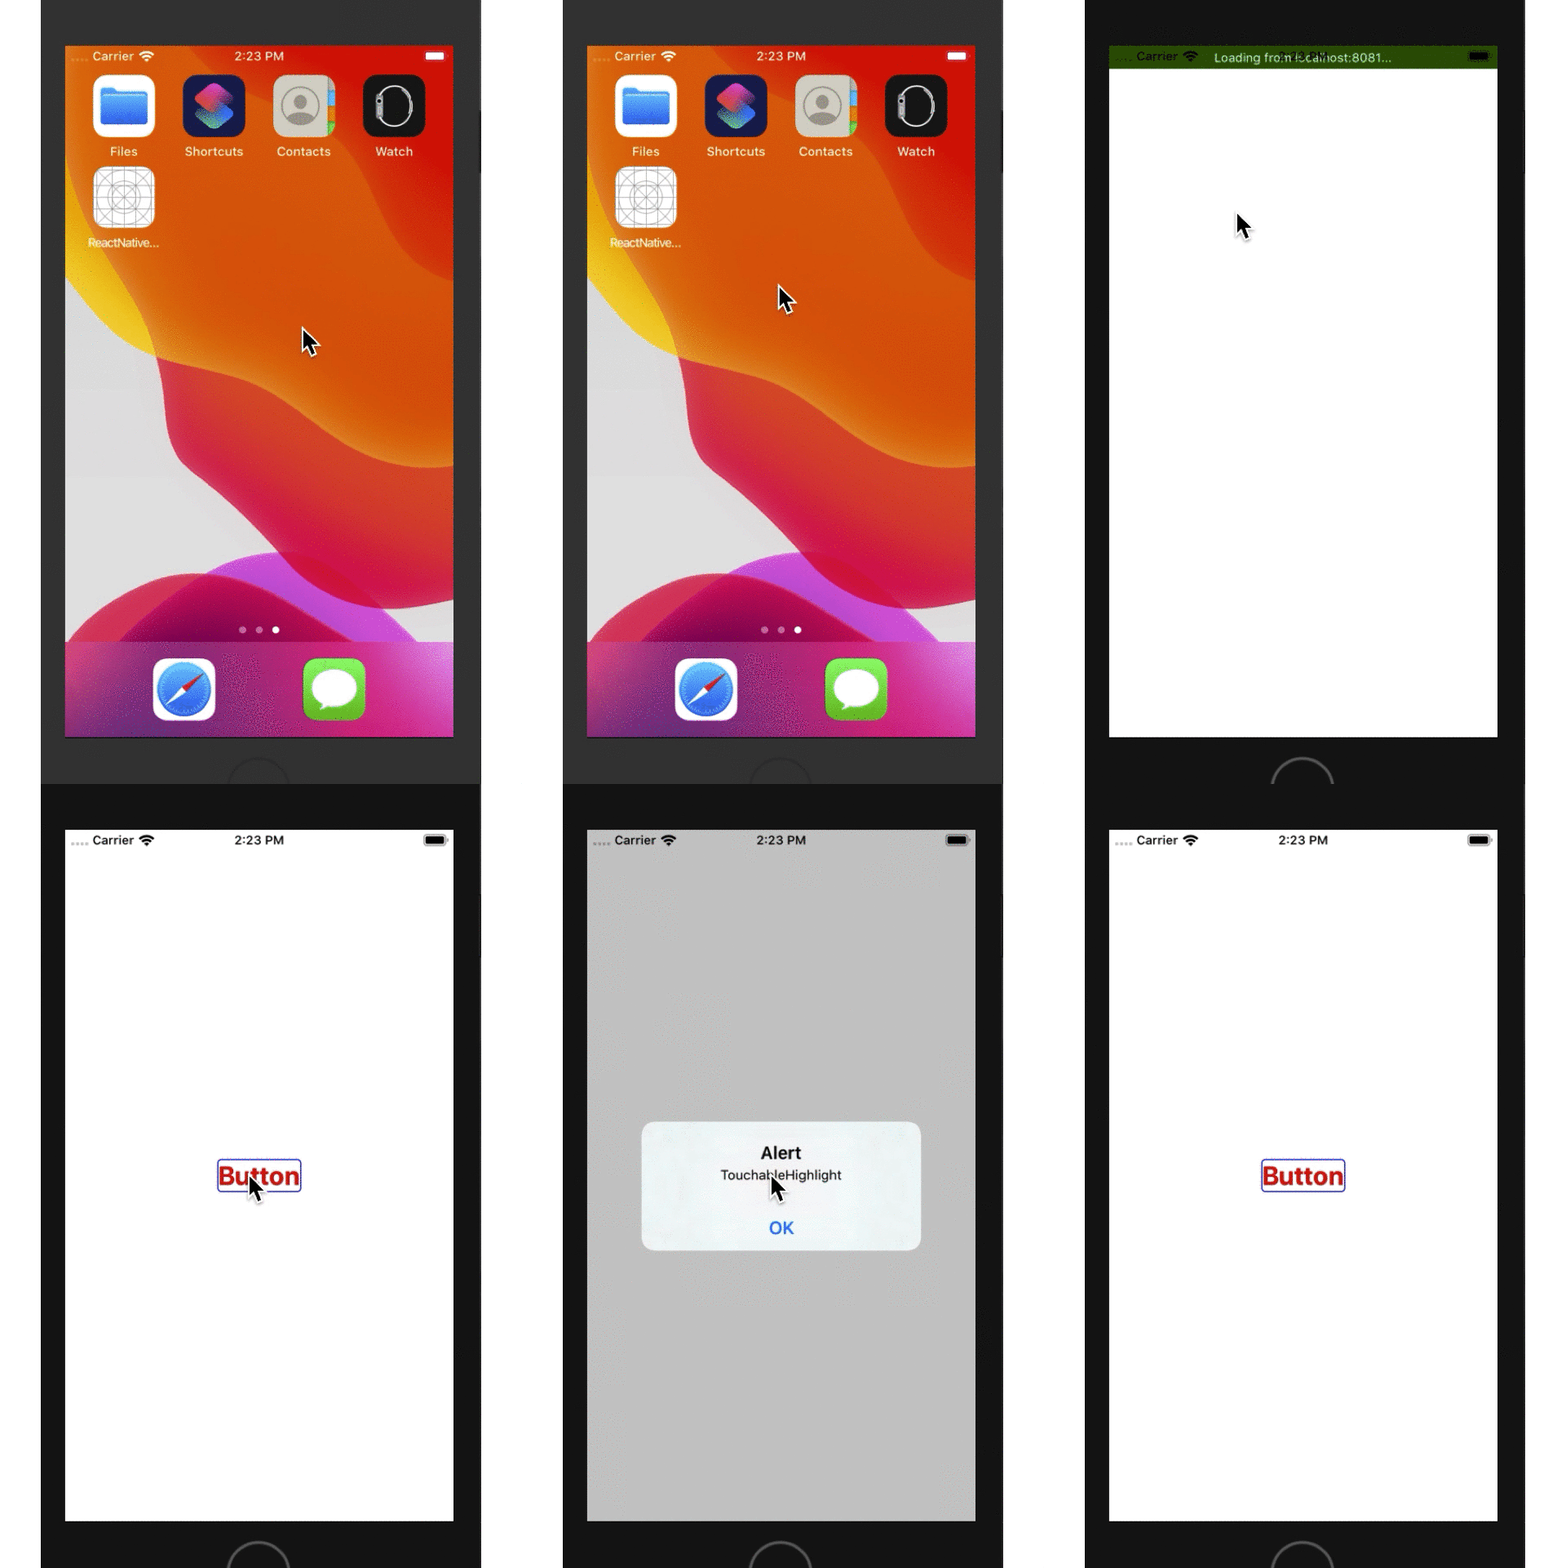
1、TouchableHighlight,它拥有明显视觉交互效果,这种效果能够很友善地告知用户当前点击事件被触发了,从而避免重复点击。它的主要属性和事件如下:
//触摸时透明度的设置

avtiveOpacity

//隐藏背景阴影时触发该事件

onHideUnderlay

//出现背景阴影时触发该事件

onShowUnderlay

//点击时背景阴影效果的背景颜色

underlayColor
使用效果如下:点击时背景颜色发生改变,有比较明显的交互提示
/**

 * Sample React Native App

 * https://github.com/facebook/react-native

 * @flow

 */

import React, { Component } from 'react';

import {

  AppRegistry,

  StyleSheet,

  View,

  Text,

  TouchableHighlight

} from 'react-native';

export default class ReactNativeDemo extends Component {

  render() {

    return (

        <View style={style.flex}>

            <View style={style.touch}>

                <TouchableHighlight

                    activeOpacity={0.5}

                    underlayColor={'#E1F6FF'}

                    onPress={() => alert("TouchableHighlight")}

                    onHideUnderlay={() => console.log("--onHideUnderlay--")}

                    onShowUnderlay={() => console.log("--onShowUnderlay--")}

                >

                         <Text style={style.font}>Button</Text>

                </TouchableHighlight>

            </View>

        </View>

    );

  }

}

const style = StyleSheet.create({

    flex: {

        flex: 1,

        justifyContent: 'center',

        alignItems: 'center'

    },

    touch:{

        borderColor:'blue',

        borderWidth: 1,

        borderRadius: 4,

        justifyContent: 'center',

        alignItems: 'center'

    },

    font:{

        fontSize: 25,

        fontWeight: 'bold',

        color:'red'

    }

});

AppRegistry.registerComponent('ReactNativeDemo', () => ReactNativeDemo);
-- ::02.747 [info][tid:com.facebook.react.JavaScript] --onShowUnderlay--

-- ::04.767 [info][tid:com.facebook.react.JavaScript] --onHideUnderlay--

-- ::04.768 [info][tid:com.facebook.react.JavaScript] --onShowUnderlay--

-- ::04.869 [info][tid:com.facebook.react.JavaScript] --onHideUnderlay--

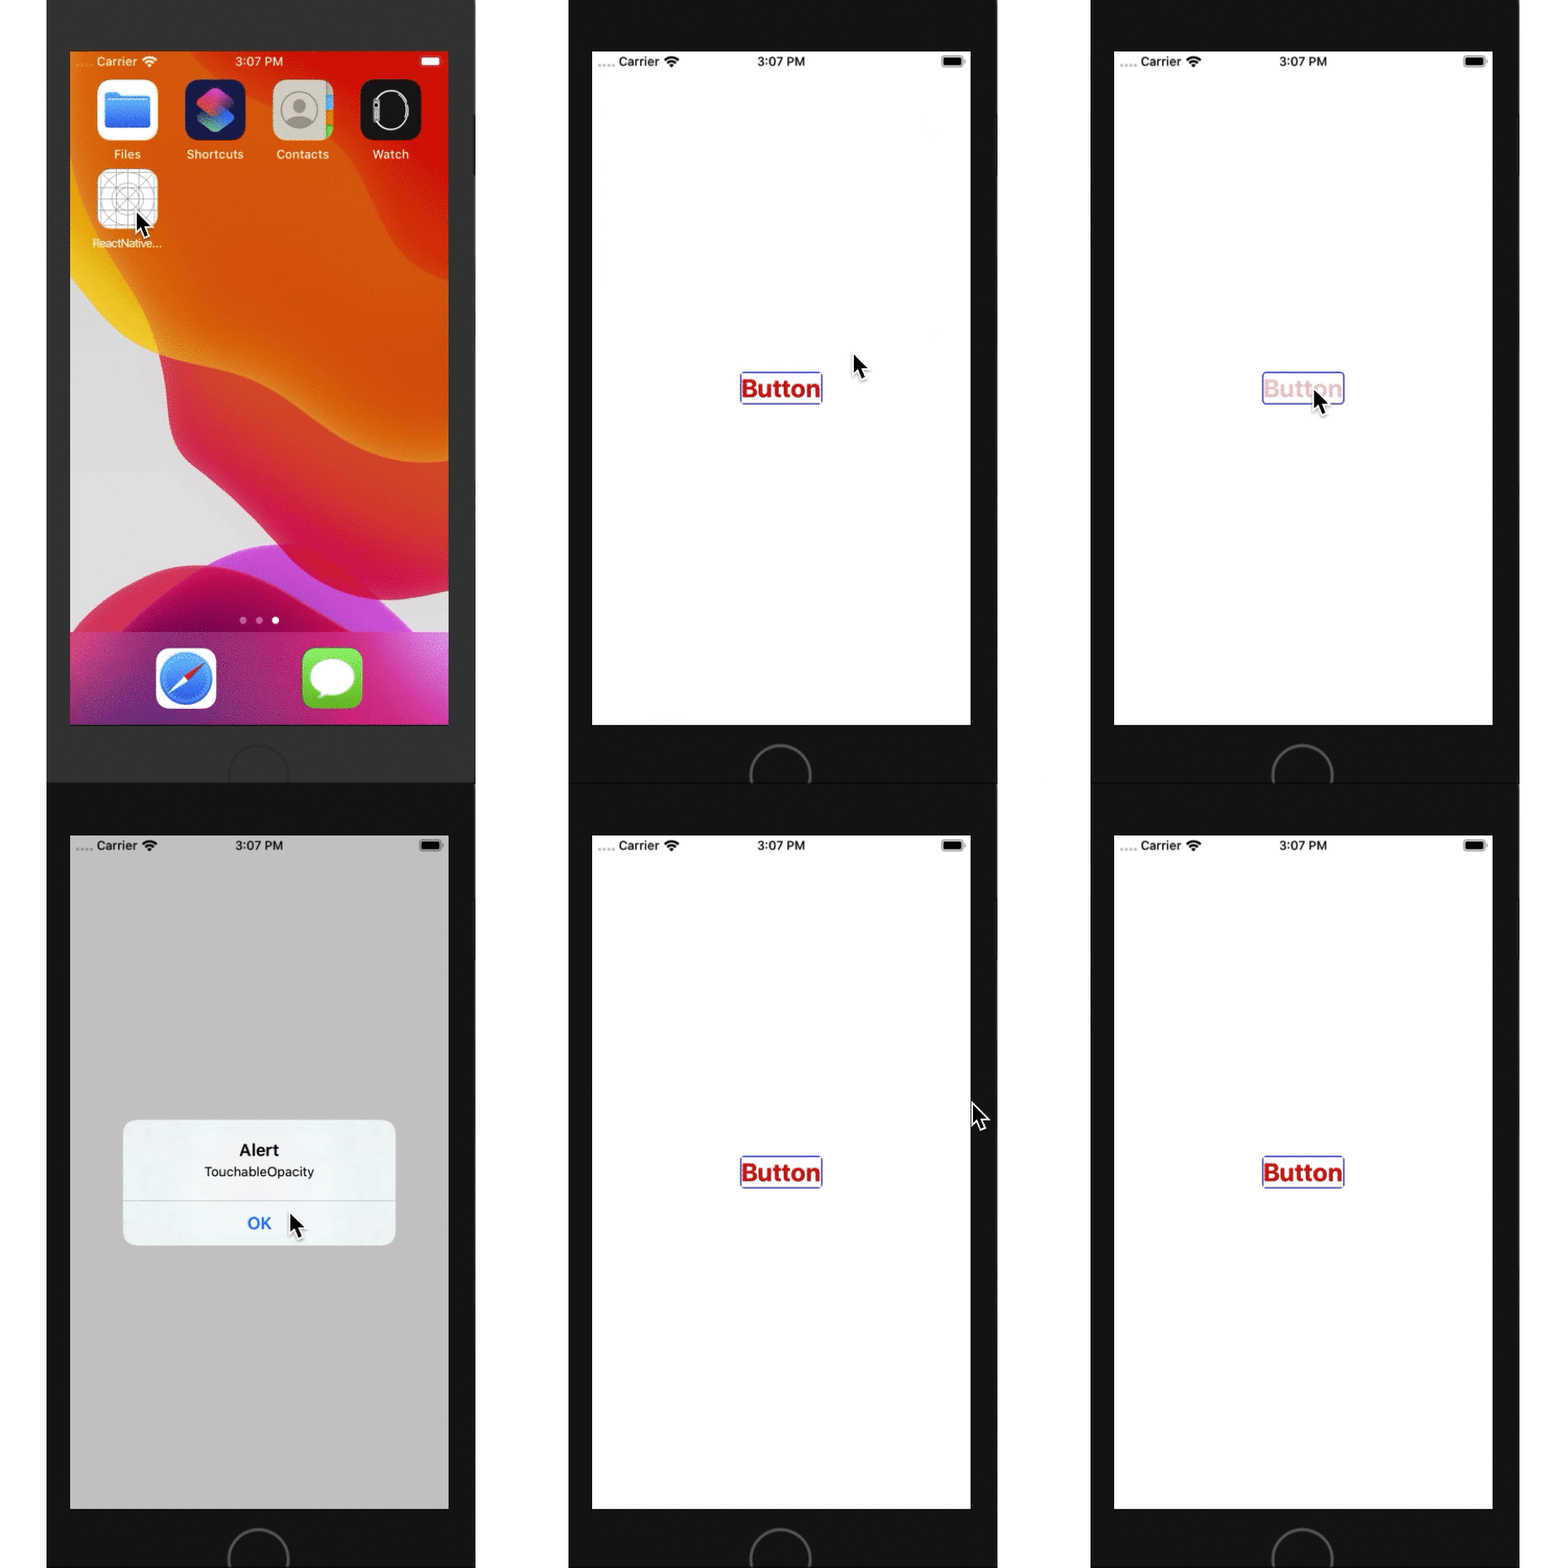
2、TouchableOpacity,它也能给出交互提示,不过它不能设置背景色,只能设置通过透明度,反而更加方便。它仅有一个属性。
//触摸时透明度的设置

avtiveOpacity
使用效果如下:点击时透明度发生改变,也有较明显的交互提示
/**

 * Sample React Native App

 * https://github.com/facebook/react-native

 * @flow

 */

import React, { Component } from 'react';

import {

  AppRegistry,

  StyleSheet,

  View,

  Text,

  TouchableOpacity

} from 'react-native';

export default class ReactNativeDemo extends Component {

  render() {

    return (

        <View style={style.flex}>

            <View style={style.touch}>

                <TouchableOpacity

                    activeOpacity={0.2}

                    onPress={() => alert("TouchableOpacity")}

                >

                         <Text style={style.font}>Button</Text>

                </TouchableOpacity>

            </View>

        </View>

    );

  }

}

const style = StyleSheet.create({

    flex: {

        flex: 1,

        justifyContent: 'center',

        alignItems: 'center'

    },

    touch:{

        borderColor:'blue',

        borderWidth: 1,

        borderRadius: 4,

        justifyContent: 'center',

        alignItems: 'center'

    },

    font:{

        fontSize: 25,

        fontWeight: 'bold',

        color:'red'

    }

});

AppRegistry.registerComponent('ReactNativeDemo', () => ReactNativeDemo);

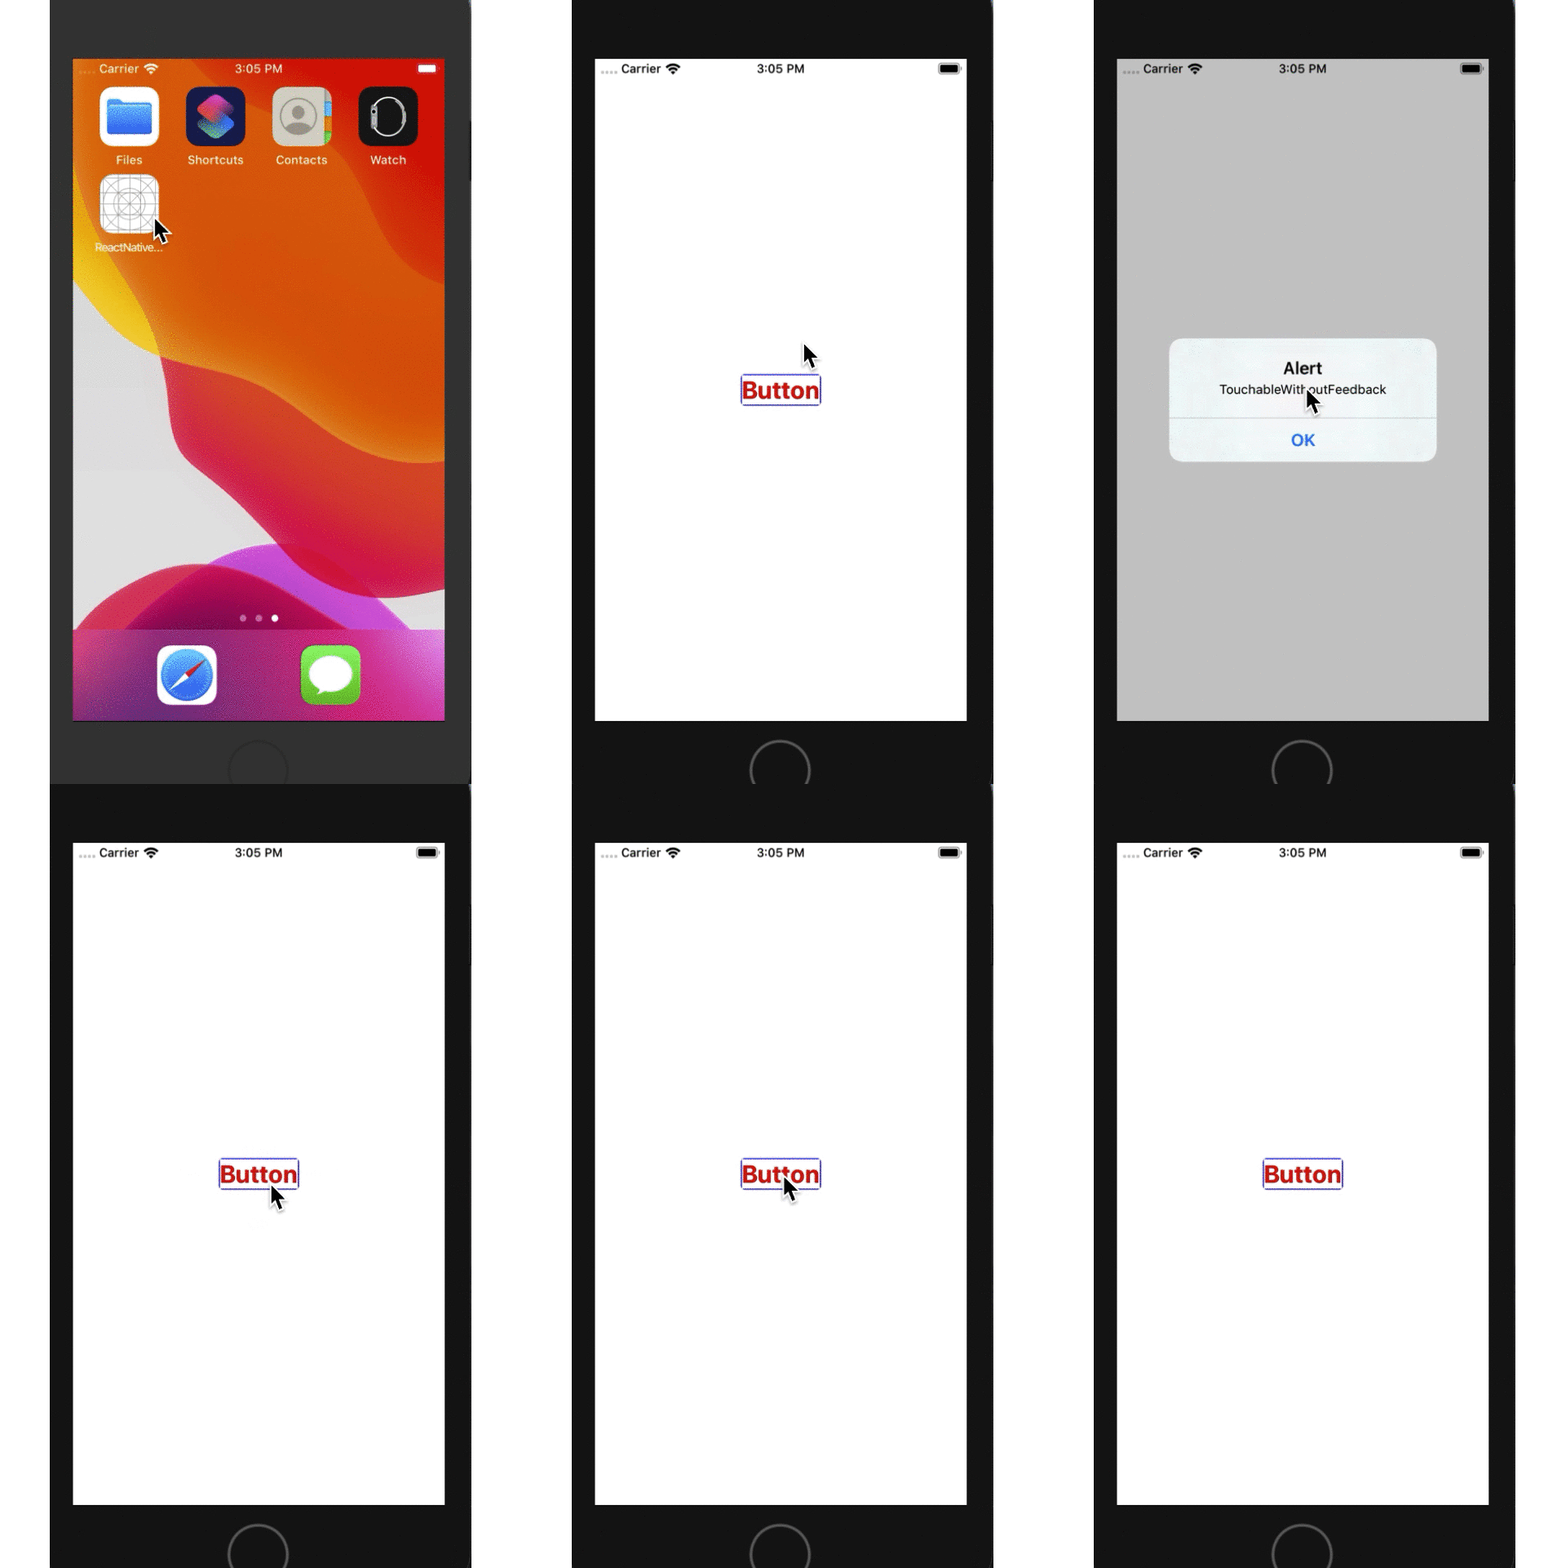
3、TouchableWithoutFeedback,使用它绑定事件,不会有明显的交互提示,就跟Web交互一样,而不是Native交互,除非特殊情况,不推荐使用。它不能直接嵌套子组件Text组件,必须先隔一个父组件,否则自身事件属性不能触发,它支持三个自身属性事件如下:
//长按事件

onLongPress

//触摸进入事件

onPressIn

//触摸释放事件

onPressOut
使用效果如下:发现交互时无任何明显提示,长按打印日至
/**

 * Sample React Native App

 * https://github.com/facebook/react-native

 * @flow

 */

import React, { Component } from 'react';

import {

  AppRegistry,

  StyleSheet,

  View,

  Text,

    TouchableWithoutFeedback

} from 'react-native';

export default class ReactNativeDemo extends Component {

  render() {

    return (

        <View style={style.flex}>

            <View style={style.touch}>

                <TouchableWithoutFeedback

                    onPress={() => alert("TouchableWithoutFeedback")}

                    onLongPress={() => console.log("--onLongPress--")}

                    onPressIn={() => console.log("--onPressIn--")}

                    onPressOut={() => console.log("--onPressOut--")}

                >

                    <View><Text style={style.font}>Button</Text></View> /*Text嵌套在View组件中,然后在嵌套到该触摸类组件中*/

                </TouchableWithoutFeedback>

            </View>

        </View>

    );

  }

}

const style = StyleSheet.create({

    flex: {

        flex: 1,

        justifyContent: 'center',

        alignItems: 'center'

    },

    touch:{

        borderColor:'blue',

        borderWidth: 1,

        borderRadius: 4,

        justifyContent: 'center',

        alignItems: 'center'

    },

    font:{

        fontSize: 25,

        fontWeight: 'bold',

        color:'red'

    }

});

AppRegistry.registerComponent('ReactNativeDemo', () => ReactNativeDemo);
-- ::48.796 [info][tid:com.facebook.react.JavaScript] --onPressIn--

-- ::49.301 [info][tid:com.facebook.react.JavaScript] --onLongPress--

-- ::50.465 [info][tid:com.facebook.react.JavaScript] --onPressOut--

-- ::52.096 [info][tid:com.facebook.react.JavaScript] --onPressIn--

-- ::52.100 [info][tid:com.facebook.react.JavaScript] --onPressOut--

ReactNative: 使用Touchable触摸类组件的更多相关文章
- cocos2d-x 源代码分析 : control 源代码分析 ( 控制类组件 controlButton)
源代码版本号来自3.1rc 转载请注明 cocos2d-x源代码分析总文件夹 http://blog.csdn.net/u011225840/article/details/31743129 1.继承 ...
- ReactNative: 使用AppReistry注册类
一.简介 每一个应用程序的运行都有一个入口文件或者入口函数,例如iOS中的使用UIApplicationMain类完成入口函数的实现,在React-Native中,AppRegistry类就肩负着这个 ...
- ReactNative Android之原生UI组件动态addView不显示问题解决
ReactNative Android之原生UI组件动态addView不显示问题解决 版权声明:本文为博主原创文章,未经博主允许不得转载. 转载请表明出处:http://www.cnblogs.com ...
- 同学帮帮移动 H5 弹出层类组件:txbb-pop
Txbb.Pop 同学帮帮弹出层类组件,简洁.无依赖,使用 CSS3 实现动画效果. 为什么要再造一遍轮子 弹出层是常见的业务场景,而且弹出层的业务场景很简单,没必要使用大而全的库,并且,我们经常会有 ...
- React - 组件:类组件
目录: 1. 类组件有自己的状态 2. 继承React.Component-会有生命周期和this 3. 内部需要一个render函数(类组件会默认调用render方法,但不会默认添加,需要手动填写r ...
- vue-property-decorator和typescript结合构建的class类组件,父组件触发子组件方法的方式
vue-property-decorator和typescript结合构建的class类组件,父组件触发子组件方法的方式 class类组件示例 Father类组件 <template> & ...
- DRF-视图类组件
补充 GET books-------->查看数据--------------------> 返回所有数据列表 :[{},{},{}] POST books-------->添加数 ...
- 类组件(Class component)和函数式组件(Functional component)之间有何不同
类组件不仅允许你使用更多额外的功能,如组件自身的状态和生命周期钩子,也能使组件直接访问 store 并维持状态当组件仅是接收 props,并将组件自身渲染到页面时,该组件就是一个 ‘无状态组件(sta ...
- 你真的会用Flutter日期类组件吗
Flutter系统提供了一些日期选择类组件,比如DayPicker.MonthPicker.YearPicker.showDatePicker.CupertinoDatePicker等,其中前4个为M ...
随机推荐
- 第三方OAuth授权登录,QQ、微信(WeChat)、微博、GitHub、码云(Gitee)、淘宝(天猫)、微软(Microsoft )、钉钉、谷歌(Google)、支付宝(AliPay)、StackOverflow
Netnr.Login 第三方OAuth授权登录 支持第三方登录 三方 参考文档 参考文档 参考文档 参考文档 参考文档 参考文档 参考文档 参考文档 参考文档 参考文档 参考文档 参考文档 安装 ( ...
- 【Java Web开发学习】Spring MVC异常统一处理
[Java Web开发学习]Spring MVC异常统一处理 文采有限,若有错误,欢迎留言指正. 转载:https://www.cnblogs.com/yangchongxing/p/9271900. ...
- centos7 php(mariadb)安装pdo
环境:centos7+php5.4.16+mariadb5.5.52 在centos7环境下安装PDO,安装的时候都是自己分开安装的,先装的PHP(httpd)后装的mariadb. 数据库安装完成后 ...
- IUSEP研修报告
目录 Introduction Alberta - Edmonton University of Alberta IUSEP Schoolwork and Project Principle of F ...
- 用Bootstrap做一个历史朝代表
引入CDN,算好需要合并的单元格. <!DOCTYPE html> <html> <head> <!-- 移动设备 --> <meta name= ...
- layui2.5 开关在confirm确认了之后在关/开
<!--默认选中--> <div class="layui-form-item layui-form"> <div class="layui ...
- 百度大脑EdgeBoard计算卡基于Resnet50/Mobile-SSD模型的性能评测
ResNet模型 前言在上一次的测试中,我们从头开始训练了一个三个卷积层串联一个全连接层的输出,作为猫狗分类的预测的模型,这次我们自己训练一个ResNet模型,并在以下三个环境中进行性能的对比 AIS ...
- Spring Boot 2.X 国际化
国际化文件的编写 messages.properties init project 7月前 messages_en_US.properties init project 7月前 messages_zh ...
- Jmeter性能测试分布式技术
一.什么是分布式测试 分布式测试是指通过局域网和Internet,把分布于不同地点.独立完成特定功能的测试计算机连接起来,以达到测试资源共享.分散操作.集中管理.协同工作.负载均衡.测试过程监控等目的 ...
- shiro实战(1)--web
目录结构: 数据库结构: 一·web.xml <?xml version="1.0" encoding="UTF-8"?> <web-app ...
