
CentOS 6.5 + Nginx 1.8.0 + PHP 5.6(with PHP-FPM) 负载均衡源码安装 之 (一)Nginx安装篇
CentOS 6.5 minimal安装不再赘述
Nginx源码安装
1.安装wget下载程序
yum -y install wget
2.安装编译环境:gcc gcc-c++ automake autoconf libtool make
yum -y install gcc gcc-c++ automake autoconf libtool make
3.安装相关依赖包(目前采用的是源码安装,放置到源码目录,也可使用其他如yum方式安装):
PCRE库(用于支持http rewrite)
cd /usr/local/src

wget ftp://ftp.csx.cam.ac.uk/pub/software/programming/pcre/pcre-8.37.tar.gz

tar zxvf pcre-8.37.tar.gz

cd pcre-8.37

./configure

make

make install
zlib库(用于支持http gzip)
cd /usr/local/src

wget http://zlib.net/zlib-1.2.8.tar.gz

tar zxvf zlib-1.2..tar.gz

cd zlib-1.2.

./configure

make

make install
4.创建下载文件存放的目录(后面下载的都放入此目录),并进入
cd /root

mkdir download

cd download
5.下载nginx源码包(v1.8.0)最近稳定版
wget http://nginx.org/download/nginx-1.8.0.tar.gz
6.解压、编译、安装(采用默认安装配置,但pcre的位置需要指定)
tar zxvf nginx-1.8..tar.gz

cd nginx-1.8.

./configure --with-pcre=/usr/local/src/pcre-8.37
make
make install
最终nginx的安装路径信息为:
Configuration summary

  + using PCRE library: /usr/local/src/pcre-8.37

  + OpenSSL library is not used

  + using builtin md5 code

  + sha1 library is not found

  + using system zlib library

  nginx path prefix: "/usr/local/nginx"

  nginx binary file: "/usr/local/nginx/sbin/nginx"

  nginx configuration prefix: "/usr/local/nginx/conf"

  nginx configuration file: "/usr/local/nginx/conf/nginx.conf"

  nginx pid file: "/usr/local/nginx/logs/nginx.pid"

  nginx error log file: "/usr/local/nginx/logs/error.log"

  nginx http access log file: "/usr/local/nginx/logs/access.log"

  nginx http client request body temporary files: "client_body_temp"

  nginx http proxy temporary files: "proxy_temp"

  nginx http fastcgi temporary files: "fastcgi_temp"

  nginx http uwsgi temporary files: "uwsgi_temp"

  nginx http scgi temporary files: "scgi_temp"
7.我们测试运行下服务器
/usr/local/nginx/sbin/nginx
然后本地通过wget访问下:
cd ~

wget http://localhost
访问结果如下,表示已经可以访问:
---- ::--  http://localhost/

正在解析主机 localhost... ::, 127.0.0.1

正在连接 localhost|::|:... 失败:拒绝连接。

正在连接 localhost|127.0.0.1|:... 已连接。

已发出 HTTP 请求,正在等待回应...  OK

长度: [text/html]

正在保存至: “index.html”

%[======================================>]          --.-K/s   in 0s

-- :: (54.4 MB/s) - 已保存 “index.html” [/])
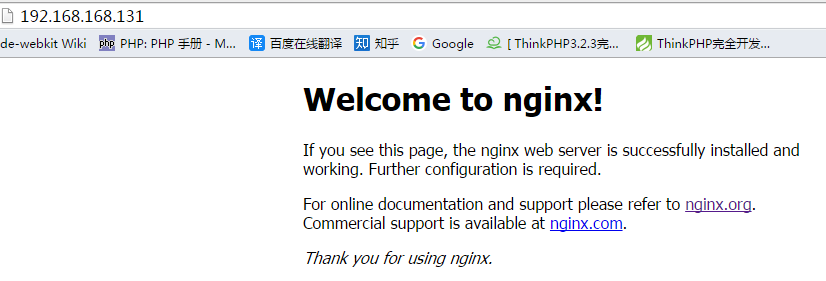
我们也可以通过外面浏览器去访问这个虚拟机,直接在浏览器输入该虚拟机ip: http://192.168.168.131 (具体IP以自己虚拟机为准),应该会展示出下页面(若无法访问,参考最下面):
8.以上虽然可以访问了,但每次需要手动去调用才执行,所以我们需要:
8.1.编写一个服务脚本,存放到/etc/init.d/nginx (/etc/init.d目录一般用于存放系统所有的服务程序),脚本内容如下:
 #!/bin/sh

 #

 # nginx - this script starts and stops the nginx daemin

 #

 # chkconfig:   -

 # description:  Nginx is an HTTP(S) server, HTTP(S) reverse \

 #               proxy and IMAP/POP3 proxy server

 # processname: nginx

 # config:      /usr/local/nginx/conf/nginx.conf

 # pidfile:     /usr/local/nginx/logs/nginx.pid

 # Source function library.

 . /etc/rc.d/init.d/functions

 # Source networking configuration.

 . /etc/sysconfig/network

 # Check that networking is up.

 [ "$NETWORKING" = "no" ] && exit

 nginx="/usr/local/nginx/sbin/nginx"

 prog=$(basename $nginx)

 NGINX_CONF_FILE="/usr/local/nginx/conf/nginx.conf"

 lockfile=/var/lock/subsys/nginx

 start() {

     [ -x $nginx ] || exit

     [ -f $NGINX_CONF_FILE ] || exit

     echo -n $"Starting $prog: "

     daemon $nginx -c $NGINX_CONF_FILE

     retval=$?

     echo

     [ $retval -eq  ] && touch $lockfile

     return $retval

 }

 stop() {

     echo -n $"Stopping $prog: "

     killproc $prog -QUIT

     retval=$?

     echo

     [ $retval -eq  ] && rm -f $lockfile

     return $retval

 }

 restart() {

     configtest || return $?

     stop

     start

 }

 reload() {

     configtest || return $?

     echo -n $"Reloading $prog: "

     killproc $nginx -HUP

     RETVAL=$?

     echo

 }

 force_reload() {

     restart

 }

 configtest() {

   $nginx -t -c $NGINX_CONF_FILE

 }

 rh_status() {

     status $prog

 }

 rh_status_q() {

     rh_status >/dev/null >&

 }

 case "$1" in

     start)

         rh_status_q && exit

         $

         ;;

     stop)

         rh_status_q || exit

         $

         ;;

     restart|configtest)

         $

         ;;

     reload)

         rh_status_q || exit

         $

         ;;

     force-reload)

         force_reload

         ;;

     status)

         rh_status

         ;;

     condrestart|try-restart)

         rh_status_q || exit

             ;;

     *)

         echo $"Usage: $0 {start|stop|status|restart|condrestart|try-restart|reload|force-reload|configtest}"

         exit

 esac
然后给此脚本添加运行权限:
chmod +x /etc/init.d/nginx
测试此脚本(停止服务、启动服务、重启服务),成功后会打印“确定”字样:
service nginx stop

service nginx start

service nginx restart
8.2.将服务脚本注册为系统服务并随系统启动
chkconfig nginx on
到此,Nginx就已安装完毕并可提供服务了
CentOS 6.5 + Nginx 1.8.0 + PHP 5.6(with PHP-FPM) 负载均衡源码安装 之 (一)Nginx安装篇的更多相关文章
- CentOS 6.5 + Nginx 1.8.0 + PHP 5.6(with PHP-FPM) 负载均衡源码安装
CentOS 6.5 + Nginx 1.8.0 + PHP 5.6(with PHP-FPM) 负载均衡源码安装 http://www.cnblogs.com/ppoo24/p/4918288.ht ...
- CentOS 6.5 + Nginx 1.8.0 + PHP 5.6(with PHP-FPM) 负载均衡源码安装 之 (三)Nginx负载均衡配置
Nginx反向代理到单个PHP-FPM(PHP-FPM可位于不同机器) 0.首先,创建我们的网站根目录[注:须在PHP-FPM所在的那台机器创建](以后网站的代码放到此目录下): mkdir /opt ...
- CentOS 6.5 + Nginx 1.8.0 + PHP 5.6(with PHP-FPM) 负载均衡源码安装 之 (二)PHP(PHP-FPM)安装篇
编译安装PHP及内置PHP-FPM nginx本身不能处理PHP,它只是个web服务器,当接收到请求后,如果是php请求,则发给php解释器处理,并把结果返回给客户端(浏览器). nginx一般是把请 ...
- CentOS 6.5 + Nginx 1.8.0 + PHP 5.6(with PHP-FPM) 负载均衡源码安装 之 (四)问题汇总
关于外网无法访问虚拟机centos的问题 此一般由于centos默认防火墙配置,导致外部不允许访问80端口(或其他如9000端口).解决方法如下: 1.加入80端口的防火墙规则 /sbin/iptab ...
- 架构设计:负载均衡层设计方案(3)——Nginx进阶
版权声明:欢迎转载,但是看在我辛勤劳动的份上,请注明来源:http://blog.csdn.net/yinwenjie(未经允许严禁用于商业用途!) 目录(?)[-] Nginx继续进阶 1gzip ...
- 架构设计:负载均衡层设计方案(6)——Nginx + Keepalived构建高可用的负载层
1.概述 前两遍文章中,我们一直在说后文要介绍Nginx + Keepalived的搭建方式.这篇文章开始,我们就来兑现前文的承诺,后续的两篇文章我们将介绍Nginx + Keepalived和 LV ...
- Nginx(四) nginx+consul+upasync 在ubnutu18带桌面系统 实现动态负载均衡
1.1 什么是动态负载均衡 传统的负载均衡,如果Upstream参数发生变化,每次都需要重新加载nginx.conf文件,因此扩展性不是很高,所以我们可以采用动态负载均衡,实现Upstream可配置化 ...
- Linux 集群概念 , wsgi , Nginx负载均衡实验 , 部署CRM(Django+uwsgi+nginx), 部署学城项目(vue+uwsgi+nginx)
Linux 集群概念 , wsgi , Nginx负载均衡实验 , 部署CRM(Django+uwsgi+nginx), 部署学城项目(vue+uwsgi+nginx) 一丶集群和Nginx反向代理 ...
- Nginx可以说是标配组件,但是主要场景还是负载均衡、反向代理、代理缓存、限流等场景;而把Nginx作为一个Web容器使用的还不是那么广泛。
Nginx可以说是标配组件,但是主要场景还是负载均衡.反向代理.代理缓存.限流等场景:而把Nginx作为一个Web容器使用的还不是那么广泛. 用Nginx+Lua(OpenResty)开发高性能Web ...
随机推荐
- Python学习打算
背景:本人用python写自动化脚本,基础的东西都会啦.但是呢,鉴于年轻应该好好学习,所以打算再买一本python书籍用来精读. Python 好的博客: Python快速教程(好多,一点也不快速): ...
- Java实现文件的预览
最近项目需要用到文件的预览功能,就开始在网上收集资料,学习了几种文件预览的方法.我集成到我项目内测试的有以下三种,最后使用的是第三种: 直接使用别人提供的服务 例如:office web 365 使用 ...
- FLEX 图片拷贝
在用FLEX做GIS相关的开发的时候,遇到一个问题.因为是监控类的系统,所以需要要求地图上的ICON的实时更新,从而会出现重复加载的情况.就是重复请求相同的图片用做背景,尤其是在加载的ICON较多的时 ...
- linux性能分析命令和性能观察工具
- SKView类
继承自 UIView:UIResponder:NSObject 符合 NSCoding(UIView)UIAppearance(UIView)UIAppearanceContainer(UIView) ...
- android:allowbackup="true"
<application android:allowBackup="false" android:label="@string/app_name"> ...
- 设计模式--迪米特法则(Lod/LKP)
迪米特法则:(Law of Demeter, LoD),也称最少知识原则(Least Knowledge Principle, LKP) 理解: 假设两个类不必彼此直接通信,那么这两个类就不 ...
- lubuntu12.11 source.list
deb http://ports.ubuntu.com/ubuntu-ports/ precise main universe deb-src http://ports.ubuntu.com/ubun ...
- 综合使用LruCache和DiskLruCache 缓存图片
Activity public class MainActivity extends Activity { private GridView mPhotoWall; private P ...
- bzoj 3831 Little Bird (单调队列优化dp)
/*先贴个n*n的*/ #include<iostream> #include<cstdio> #include<cstring> #define maxn 100 ...