CentOS 7.3最小系统安装KVM
一、准备工作
安装wget和vim
yum install -y wget vim
修改yum源为阿里源
wget -O /etc/yum.repos.d/CentOS-Base.repo http://mirrors.aliyun.com/repo/Centos-7.repo
sed -i 's/$releasever/7/g' /etc/yum.repos.d/CentOS-Base.repo
yum clean all
yum makecache
检查是否支持虚拟化
egrep '(vmx|svm)' /proc/cpuinfo
关闭SELinux,将 /etc/sysconfig/selinux 中的 SELinux=enforcing 修改为 SELinux=disabled
安装系统基本包
yum install epel-release net-tools vim unzip zip wget ftp -y
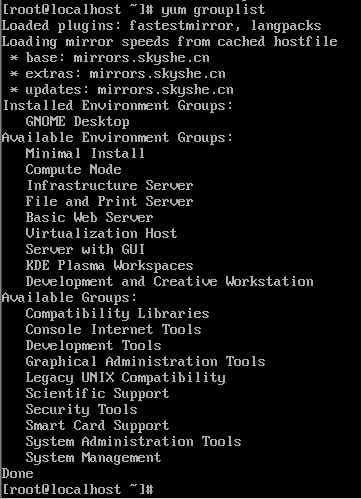
[root@xuegod72 ~]# yum grouplist "virtualization Host" -y
Loaded plugins: fastestmirror
There is no installed groups file.
Maybe run: yum groups mark convert (see man yum)
Loading mirror speeds from cached hostfile
* base: mirrors.aliyun.com
* epel: mirrors.ustc.edu.cn
* extras: mirrors.aliyun.com
* updates: mirrors.aliyun.com
Available Environment Groups:
Virtualization Host
Done
[root@xuegod72 ~]# yum list virt-manager xorg-x11-xauth
Loaded plugins: fastestmirror
Loading mirror speeds from cached hostfile
* base: mirrors.aliyun.com
* epel: mirrors.ustc.edu.cn
* extras: mirrors.aliyun.com
* updates: mirrors.aliyun.com
Available Packages
virt-manager.noarch 1.4.0-2.el7 base
xorg-x11-xauth.x86_64 1:1.0.9-1.el7 base
[root@xuegod72 ~]# yum groupinstall "Virtualization Host" -y
[root@xuegod72 ~]# yum install -y virt-manager xorg-x11-xauth
[root@xuegod72 ~]# yum install -y xorg-x11-font-utils xorg-x11-server-utils xorg-x11-utils xorg-x11-xauth
二、安装桌面(可选)
yum groupinstall "DevelopmentTools"
yum groupinstall "Virtualization" "Virtualization Client""Virtualization Platform"
yum -y groupinstall "X Window System"
yum -y groupinstall "GNOME Desktop"
早版本中可能是这个名字"GNOME Desktop Environment",使用yum grouplist可以查看可用的组
这里是“GNOME Desktop”,所以使用命令yum -y groupinstall "GNOME Desktop" 安装
yum -y groupinstall chinese-support (这个是中文包)如果最小化安装时选择中文包,这里可以不装。
三、安装KVM虚拟机
(一)使用virt-manager安装
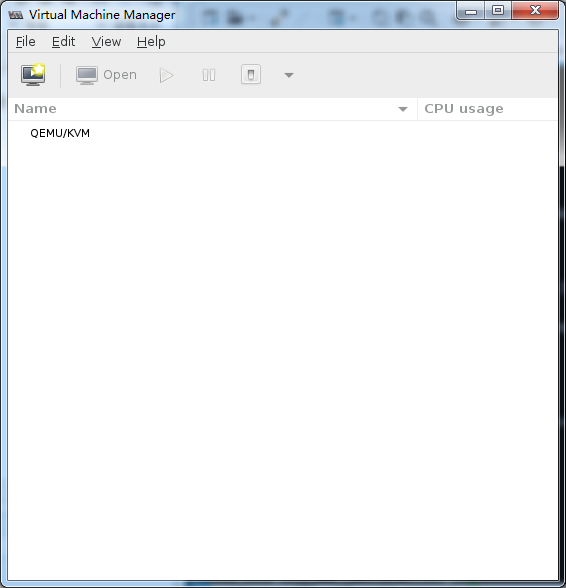
[root@xuegod72 ~]# vrit-manager
出现虚拟机管理器界面
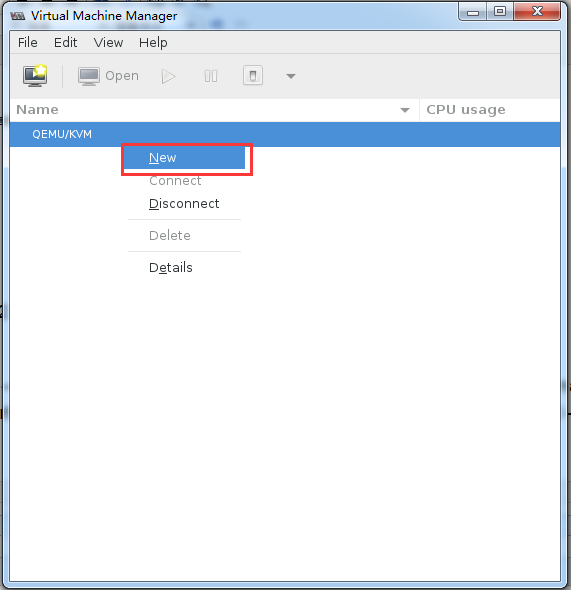
在QEMU/KVM那儿鼠标右键,选择New
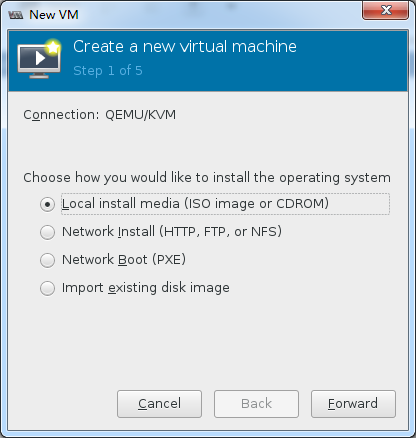
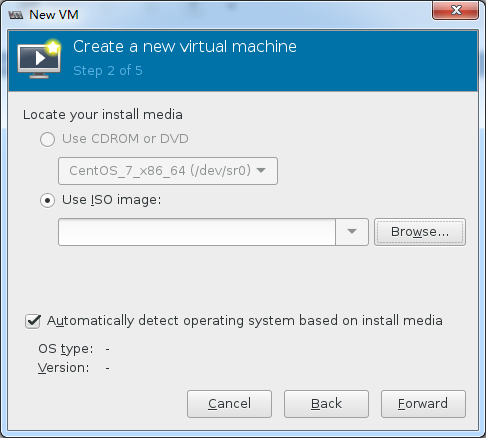
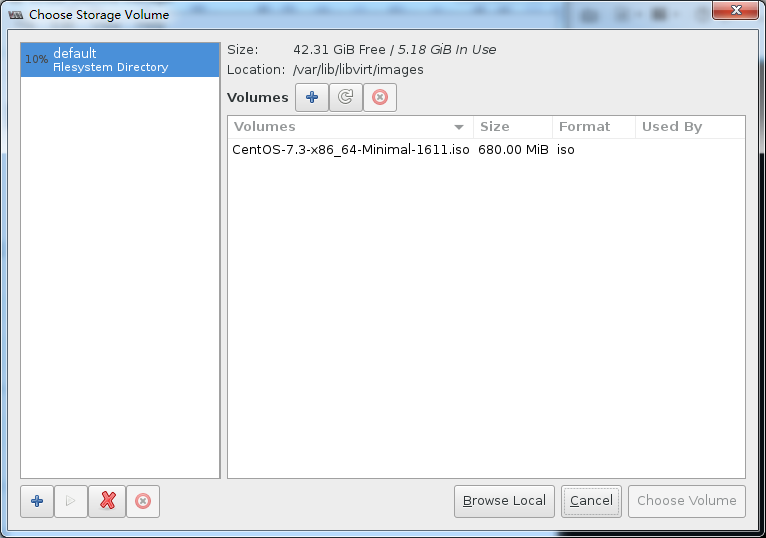
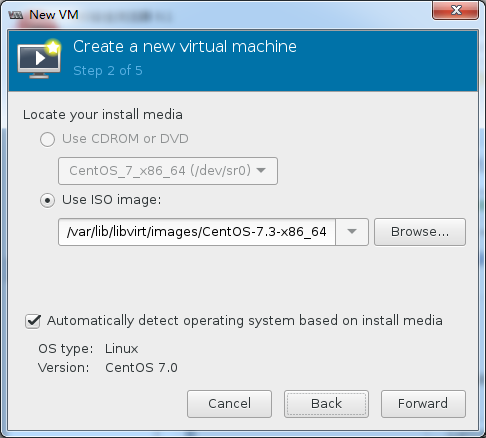
这里可以先传一个镜像文件到/var/lib/libvirt/images路径下,点 "Browse"就可以看到
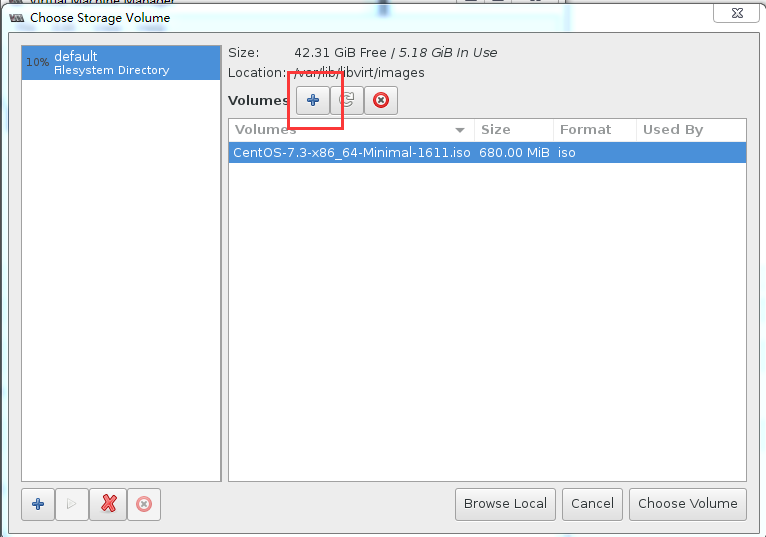
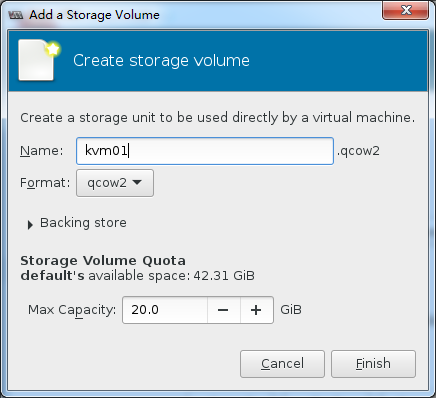
点 + 号,创建磁盘
选择上传的镜像
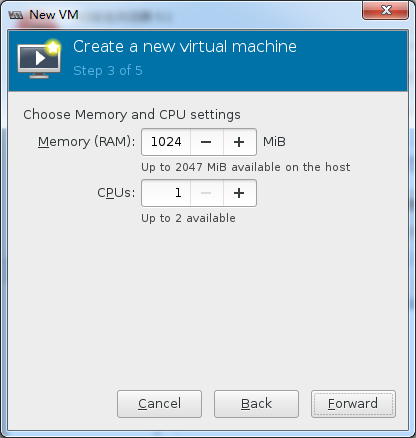
设置内存和CPU
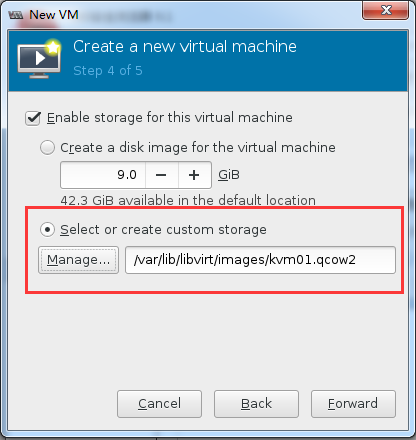
这里选择刚创建的虚拟磁盘
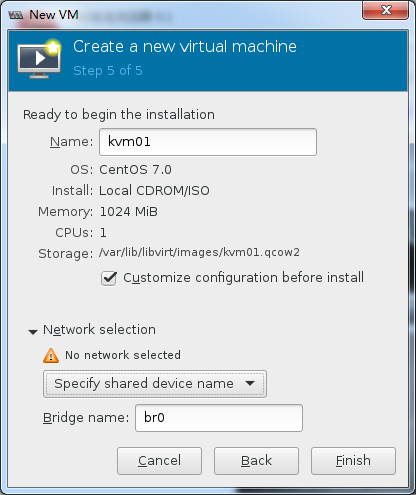
设置KVM名称和网络
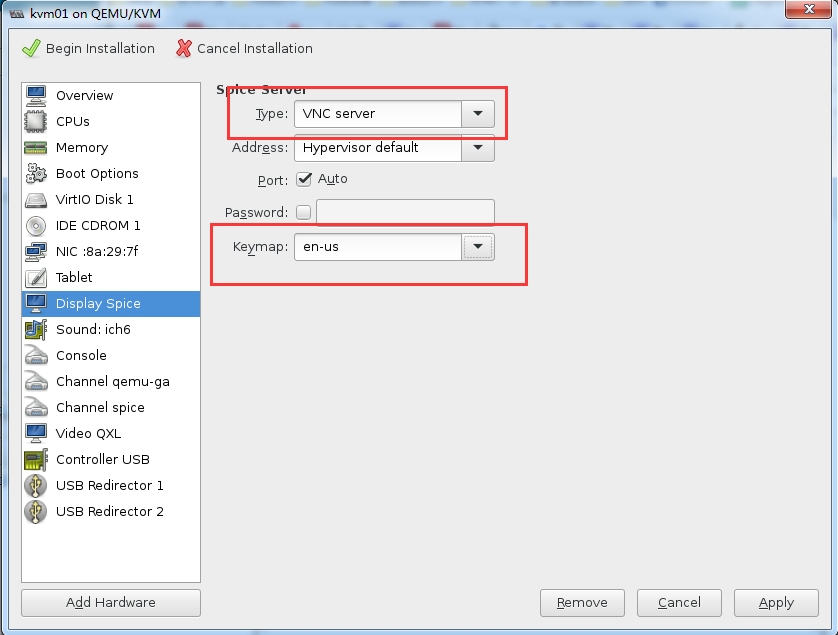
设置Display Spice如下
Apply之后点击 
开始安装
注: KVM安装完成后可能ping不通外网,但是可以上网(可以使用yum安装软件)
(二)文本字符安装
安装 vnc客户端软件,方便远程连接正在安装中的虚拟机界面:
[root@xuegod72 ~]# yum install tigervnc -y
创建硬盘
[root@vm1 images]# qemu-img create -f qcow2 /var/lib/libvirt/images/kvm01.img 20G
安装kvm
[root@vm1 images]# virt-install --name=kvm01 --ram 6144 --vcpus=2 --disk path=/var/lib/libvirt/images/kvm01.img,format=qcow2,size=20 --network bridge=br0 --os-type=linux --cdrom /var/lib/libvirt/images/CentOS-7-x86_64-Minimal-1611.iso --vnc --vnclisten=0.0.0.0 --vncport=5900
安装时连接KVM方法一:
[root@xuegod72 ~]# vncviewer 127.0.0.1
注:KVM中的vnc默认绑定的是本机127.0.0.1,如果其他机器想用vnc客户端访问这台kvm服务器正在安装的虚拟机,需要把vnc绑定到服务器的IP地址或者绑定到全局0.0.0.0
修改vnc监听IP地址为0.0.0.0,即本机所有的IP地址都监听5900端口
[root@xuegod72 ~]# vim /etc/libvirt/qemu.conf
将第12行的注释取消掉
vnc_listen = "0.0.0.0"
重启服务
[root@xuegod72 ~]# systemctl restart libvirtd
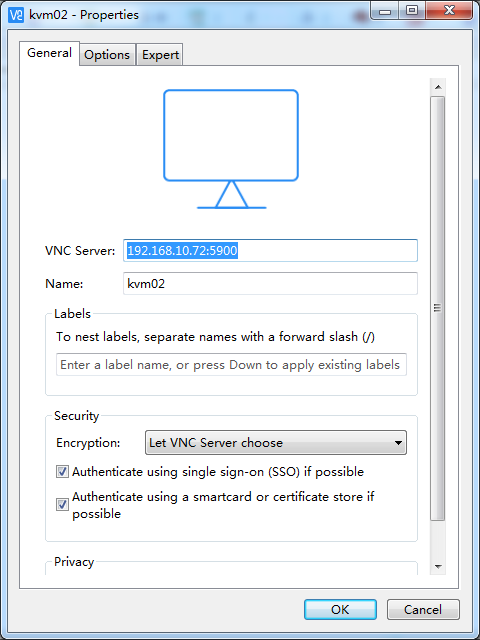
方法二:在windows系统上安装vncviewer 客户端连接
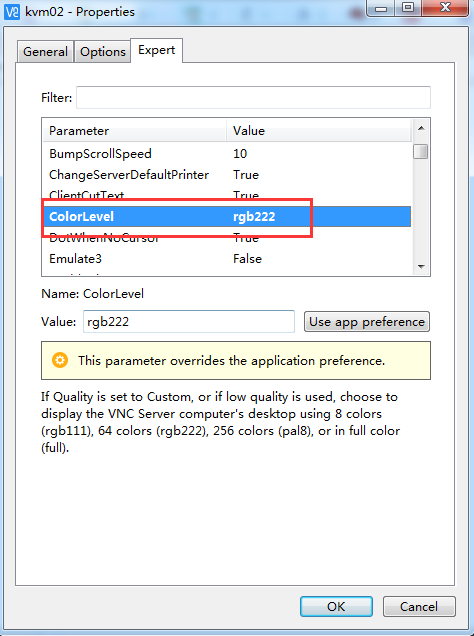
Expert选项卡ColorLevel选项修改为rgb222
修改KVM监听的端口
修改kvm.xml
<graphics type='vnc' port='5900' autoport='no' listen='0.0.0.0'>
<listen type='address' address='0.0.0.0'/>
</graphics>
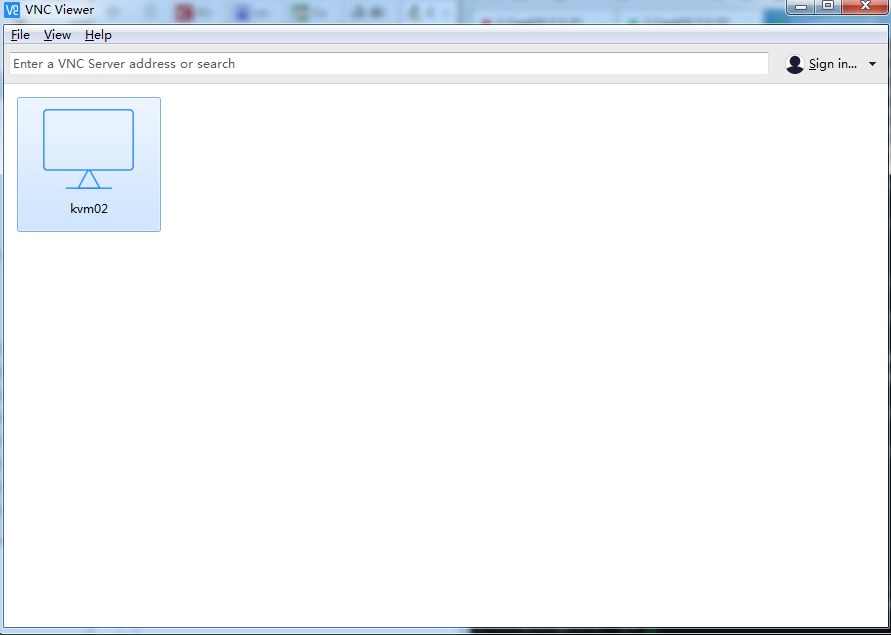
双击就可以连接

创建快照
[root@vm1 images]# virsh snapshot-create kvm01
查看快照
[root@vm1 images]# virsh snapshot-list kvm01
Name Creation Time State
------------------------------------------------------------
1502871731 2017-08-16 16:22:11 +0800 shutoff
恢复快照
[root@vm1 images]# virsh domstate kvm01
CentOS 7.3最小系统安装KVM的更多相关文章
- CentOS 7.3.1611系统安装配置图解教程
操作系统:CentOS 7.3.1611 IP地址:192.168.21.130 网关:192.168.21.2 DNS:8.8.8.8 8.8.4.4 备注: CentOS 7.x系列只有64位系统 ...
- CentOS 7.6最小化安装(系统盘和数据盘分离安装)
CentOS 7.6最小化安装(系统盘和数据盘分离安装) 作者:尹正杰 版权声明:原创作品,谢绝转载!否则将追究法律责任. 一.创建虚拟机 鉴于大家使用的平台操作系统可能不尽相同,博主精力有限,仅演示 ...
- CentOS 6,7最小化安装后再安装图形界面
CentOS 6.2最小化安装后再安装图形界面 在安装CentOS 6.2时发现它没有提示我要怎么安装,而是“自作主张”地给我选择了最小化安装,结果装完之后只有终端界面,因为有时候不得不用图形界面,所 ...
- Win7+ubuntu kylin+CentOS 6.5三系统安装图文教程
Win7+ubuntu kylin+CentOS 6.5三系统安装图文教程 引言:原本机子上已经装好了win7+Ubuntu Kylin 由win7引导,而不是Ubuntu的grub引导的双系统(安装 ...
- CentOS 6.x 最小化安装推荐安装的依赖包和修改内核参数
CentOS 6.x 最小化安装推荐安装的依赖包 我在日常工作中,新建的xenserver的虚拟机,CentOS release 6.9 (Final)操作系统,采用最小化安装,后续很多操作需要各种依 ...
- CentOS 7 在最小化安装之后进行安装Apache服务,httpd-2.4.34
此博文是CentOS 7 在最小化安装之后进行安装Apache服务的操作步骤,httpd版本为httpd-2.4.34. 一.基本服务环境搭建 安装apache需要的基本环境:apr apr-util ...
- 基于CentOS 7下最小化安装的操作系统搭建Zabbix3.0环境
环境说明 系统版本:CentOS Linux release 7.3.1611 (Core) 内核版本:3.10.0-514.el7.x86_64 Httpd版本:Apache/2.4.6 (Cent ...
- Centos 7 最小化kvm部署
1.检查CPU是否支持虚拟化 sh-4.2# grep -E '(vmx|svm)' /proc/cpuinfo # 若是无任何显示,则表示CPU不支持kvm虚拟化 2.关闭selinux sh-4. ...
- CentOS安装-(CentOS7)最小化安装
镜像:CentOS-7-x86_64-DVD-1908.iso 1.将安装光盘插入服务器,开机会读取系统安装程序,选择 Install CentOS 7 2.安装过程是图形界面,可以选择熟悉的语言执行 ...
随机推荐
- js循环json数组
例如数据库里面的json字符串是这样的 var str = '[{"name":"宗2瓜","num":"1",&quo ...
- 【9207&&b701】统计数字(NOIP2007)
问题描述 某次科研调查时得到了n个自然数,每个数均不超过1500000000 (1.5*109).已知不相同的数不超过10000个,现在需要统计这些自然数各自出现的次数,并按照自然数从小到大的顺序输出 ...
- 忙里偷闲( ˇˍˇ )闲里偷学【C语言篇】——(5)有趣的指针
一.指针是C语言的灵魂 # include <stdio.h> int main(){ int *p; //p是变量名,int *表示p变量存放的是int类型变量的地址,p是一个指针变量 ...
- [React] Recompose: Override Styles & Elements Types in React
When we move from CSS to defining styles inside components we lose the ability to override styles wi ...
- erlang抽象码与basho的protobuf
erlang抽象码与basho的protobuf(一)使用 erlang抽象码与basho的protobuf(二)代码生成原理之词法与语法分析 erlang抽象码与basho的protobuf(三)代 ...
- Java8内存模型
一.JVM内存模型 内存空间(Runtime Data Area)中可以按照是否线程共享分为两块,线程共享的是方法区(Method Area)和堆(Heap),线程独享的是Java虚拟机栈(Java ...
- 进入Erlang的世界
http://erlang.group.iteye.com/group/wiki/1407-to-enter-the-world-of-erlang 进入Erlang的世界 作为程序员,我们曾经闻听很 ...
- 【codeforces 776A】A Serial Killer
[题目链接]:http://codeforces.com/contest/776/problem/A [题意] 这个杀手每天会除掉一个人; 这个杀手每天都有两个目标; 给你它杀人的日志,以及这个人被杀 ...
- ASCII码(转)
ASCII(American Standard Code for Information Interchange,美国标准信息交换代码)是基于拉丁字母的一套电脑编码系统,主要用于显示现代英语和其他西欧 ...
- 【64.52%】【codeforces 697D】Puzzles
time limit per test1 second memory limit per test256 megabytes inputstandard input outputstandard ou ...