Spring Boot自动运行之 CommandLineRunner、ApplicationRunner和@PostConstruct
在使用Spring Boot开发的工作中,我们经常会需要遇到一种功能需求,比如在服务启动时候,去加载一些配置,去请求一下其他服务的接口。Spring Boot给我们提供了三种常用的实现方法:

第一种是实现CommandLineRunner接口,

第二种是实现ApplicationRunner接口

第三种是使用注解:@PostConstruct
1、CommandLineRunner
1、CommandLineRunner执行的时间节点是在Application完成初始化工作之后。

2、CommandLineRunner在有多个实现的时候,可以使用@order注解指定执行先后顺序。

3、源码在:org.springframework.boot.SpringApplication#run(),可以看看
我们先看一下CommandLineRunner的源码:
package org.springframework.boot;

@FunctionalInterface

public interface CommandLineRunner {

    void run(String... args) throws Exception;

}
SpringApplication源码:
public ConfigurableApplicationContext run(String... args) {

        StopWatch stopWatch = new StopWatch();

        stopWatch.start();

        DefaultBootstrapContext bootstrapContext = this.createBootstrapContext();

        ConfigurableApplicationContext context = null;

        this.configureHeadlessProperty();

        SpringApplicationRunListeners listeners = this.getRunListeners(args);

        listeners.starting(bootstrapContext, this.mainApplicationClass);

        try {

            ApplicationArguments applicationArguments = new DefaultApplicationArguments(args);

            ConfigurableEnvironment environment = this.prepareEnvironment(listeners, bootstrapContext, applicationArguments);

            this.configureIgnoreBeanInfo(environment);

            Banner printedBanner = this.printBanner(environment);

            context = this.createApplicationContext();

            context.setApplicationStartup(this.applicationStartup);

            this.prepareContext(bootstrapContext, context, environment, listeners, applicationArguments, printedBanner);

            this.refreshContext(context);

            this.afterRefresh(context, applicationArguments);

            stopWatch.stop();

            if (this.logStartupInfo) {

                (new StartupInfoLogger(this.mainApplicationClass)).logStarted(this.getApplicationLog(), stopWatch);

            }

            listeners.started(context);

            this.callRunners(context, applicationArguments);

        } catch (Throwable var10) {

            this.handleRunFailure(context, var10, listeners);

            throw new IllegalStateException(var10);

        }

        try {

            listeners.running(context);

            return context;

        } catch (Throwable var9) {

            this.handleRunFailure(context, var9, (SpringApplicationRunListeners)null);

            throw new IllegalStateException(var9);

        }

    }
callRunners方法源码:
private void callRunners(ApplicationContext context, ApplicationArguments args) {

        List<Object> runners = new ArrayList();

        runners.addAll(context.getBeansOfType(ApplicationRunner.class).values());

        runners.addAll(context.getBeansOfType(CommandLineRunner.class).values());

        AnnotationAwareOrderComparator.sort(runners);

        Iterator var4 = (new LinkedHashSet(runners)).iterator();

        while(var4.hasNext()) {

            Object runner = var4.next();

            if (runner instanceof ApplicationRunner) {

                this.callRunner((ApplicationRunner)runner, args);

            }

            if (runner instanceof CommandLineRunner) {

                this.callRunner((CommandLineRunner)runner, args);

            }

        }

    }
我们写一个例子实现:
import org.springframework.boot.CommandLineRunner;

import org.springframework.core.annotation.Order;

import org.springframework.stereotype.Component;

import java.util.Arrays;

@Component

@Order(1)

public class CommandLineRunnerTest implements CommandLineRunner {

    @Override

    public void run(String... args) throws Exception {

        System.out.println("----CommandLineRunnerTest1 start---"+ Arrays.toString(args));

    }

}
2、ApplicationRunner
ApplicationRunner跟CommandLineRunner是区别是在run方法里接收的参数不同,CommandLineRuner接收的参数是String... args,而ApplicationRunner的run方法的参数是ApplicationArguments
看看ApplicationRunner的源码:
package org.springframework.boot;

@FunctionalInterface

public interface ApplicationRunner {

    void run(ApplicationArguments args) throws Exception;

}
我们写一个例子实现:
import org.springframework.boot.ApplicationArguments;

import org.springframework.boot.ApplicationRunner;

import org.springframework.core.annotation.Order;

import org.springframework.stereotype.Component;

import java.util.List;

import java.util.Set;

@Component

@Order(1)

public class ApplicationRunnerTest implements ApplicationRunner {

    @Override

    public void run(ApplicationArguments args) throws Exception {

        System.out.println("---ApplicationRunnerTest start----");

        List<String> nonOptionArgs = args.getNonOptionArgs();

        System.out.println("[非选项参数]>>> " + nonOptionArgs);

        Set<String> optionNames = args.getOptionNames();

        for(String optionName: optionNames) {

            System.out.println("[选项参数]>>> name:" + optionName

                    + ";value:" + args.getOptionValues(optionName));

        }

    }

}
3、@PostConstruct
@PostConstruct是在javaEE5的时候引入的,它并不是Spring提供的,但是Spring有对@PostConstruct的实现。并且是在对象加载完之后执行。
先看注解源码
@Documented

@Retention (RUNTIME)

@Target(METHOD)

public @interface PostConstruct {

}
我们写一个例子实现:
import org.springframework.stereotype.Component;

import javax.annotation.PostConstruct;

@Component

public class PostConstructTest {

    @PostConstruct

    public void start(){

        System.out.println("---PostConstruct start---");

    }

}
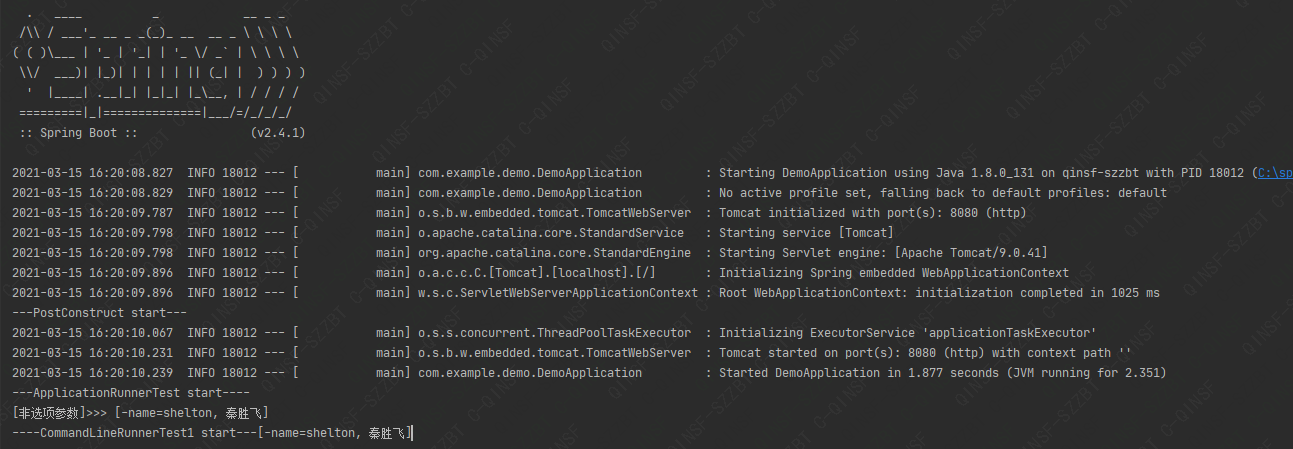
运行代码输出结果 :
5、源码
https://gitee.com/Qinux/command-line-runner-demo.git
微信公众号:一凡码农

欢迎交流
Spring Boot自动运行之 CommandLineRunner、ApplicationRunner和@PostConstruct的更多相关文章
- Spring Boot自动配置与Spring 条件化配置
SpringBoot自动配置 SpringBoot的自动配置是一个运行时(应用程序启动时)的过程,简化开发时间,无需浪费时间讨论具体的Spring配置,只需考虑如何利用SpringBoot的自动配置即 ...
- Spring Boot自动配置原理、实战
Spring Boot自动配置原理 Spring Boot的自动配置注解是@EnableAutoConfiguration, 从上面的@Import的类可以找到下面自动加载自动配置的映射. org.s ...
- Spring Boot自动配置
Spring Boot自动配置原理 Spring Boot的自动配置注解是@EnableAutoConfiguration, 从上面的@Import的类可以找到下面自动加载自动配置的映射. org.s ...
- Spring boot 自动配置自定义配置文件
示例如下: 1. 新建 Maven 项目 properties 2. pom.xml <project xmlns="http://maven.apache.org/POM/4 ...
- Spring Boot 自动装配(二)
目录 目录 前言 1.起源 2.Spring Boot 自动装配实现 2.1.@EnableAutoConfiguration 实现 2.1.1. 获取默认包扫描路径 2.1.2.获取自动装配的组件 ...
- Spring Boot自动配置原理(转)
第3章 Spring Boot自动配置原理 3.1 SpringBoot的核心组件模块 首先,我们来简单统计一下SpringBoot核心工程的源码java文件数量: 我们cd到spring-boot- ...
- Spring Boot自动配置如何工作
通过使用Mongo和MySQL DB实现的示例,深入了解Spring Boot的@Conditional注释世界. 在我以前的文章“为什么选择Spring Boot?”中,我们讨论了如何创建Sprin ...
- Spring Boot 自动配置的原理、核心注解以及利用自动配置实现了自定义 Starter 组件
本章内容 自定义属性快速入门 外化配置 自动配置 自定义创建 Starter 组件 摘录:读书是读完这些文字还要好好用心去想想,写书也一样,做任何事也一样 图 2 第二章目录结构图 第 2 章 Spr ...
- Spring Boot 自动配置之@Conditional的使用
Spring Boot自动配置的"魔法"是如何实现的? 转自-https://sylvanassun.github.io/2018/01/08/2018-01-08-spring_ ...
- 将Spring Boot项目运行在Docker上
将Spring Boot项目运行在Docker上 一.使用Dockerfile构建Docker镜像 1.1Dockerfile常用指令 1.1.1ADD复制文件 1.1.2ARG设置构建参数 1.1. ...
随机推荐
- NC24263 USACO 2018 Feb G]Directory Traversal
题目链接 题目 题目描述 奶牛Bessie令人惊讶地精通计算机.她在牛棚的电脑里用一组文件夹储存了她所有珍贵的文件,比如: bessie/ folder1/ file1 folder2/ file2 ...
- NC235745 拆路
题目链接 题目 题目描述 有 \(n\) 个城镇,城镇之间有 \(m\) 条道路相连,道路可以看成无向边.每一个城镇都有自己的一个繁荣度 \(v_i\) ,一个城镇 \(u\) 受到的影响 \(p\) ...
- Nand flash基本原理
Nand flash基本原理 Flash全名叫做Flash Memory,属于非易失性存储设备(Non-volatile Memory Device),与此相对应的是易失性存储设备(Vol ...
- Java设计模式-备忘录模式Memento
介绍 备忘录模式(Memento Pattern)在不破坏封装性的前提下,捕获一个对象的内部状态,并在该对象之外保存这个状态.这样以后就可将该对象恢复到原先保存的状态. 可以这里理解备忘录模式:现实生 ...
- Springboot thymeleaf实战总结
介绍 以下总结了使用Thymeleaf做项目过程中碰到的有价值的知识点.拿出来分享! 1.配置context-path 在公共模板中添加: <script type="text/jav ...
- SpringBoot+Shiro+LayUI权限管理系统项目-9.核心知识点总结
1.说明 本篇讲一下本项目几个重要的知识点,详细看源码,文章下方捐赠或QQ联系捐赠获取. 2.Shiro如何设置密码加密算法 1.在shiro配置文件中添加: @Bean public HashedC ...
- 解决:Not found the kernel library or the kernel library is invalid
问题说明: 今天运行一个E语言写的程序报错, 看样子是缺少核心依赖库. 解决方法 去下载个易语言安装包安装一下即可.比如我安装的是: 易语言5.6完美破解版(精简版).exe 下载地址:https:/ ...
- win32-改变显示器的亮度
调用SetMonitorBrightness 代码示例: #pragma comment(lib, "dxva2.lib") #include <windows.h> ...
- C++ 时间复杂度
看到网上一些资料的案例不全,所以自己开个来复习. O(1)<O(log2n)<O(n)<O(nlog2n)<O(n^2)<O(n^3)<-<O(2^n)< ...
- 如何快速使用LayUI MINI框架
是什么 LayUI MINI是基于LayUI框架开发的一套最简洁.易用的后台框架模板,它已经是一个非常完整的脚手架,有现成的页面模板可以参考甚至是直接使用. 通常来说,如果我们准备开发一套管理系统的W ...