How to Install Bugzilla on Ubuntu 20.04
In this blog post, we are going to explain in step-by-step detail on how to install Bugzilla on Ubuntu 20.04.
Bugzilla is an open-source web-based bug tracking system written in Perl. This testing tool is developed and maintained by the Mozilla project, and the team of developers is still developing and expanding its features. The main purpose of this detect-tracking software is to track the bugs, issues, and other change requests. The compatibility of the software on multiple operating systems like Windows, macOS, and Linux makes it more popular than any other.
Installing Bugzilla on Ubuntu 20.04 is a very easy process and may take up to 10 minutes. Let’s get started!
Table of Contents
Prerequisites
- A server with Ubuntu 20.04 OS
- A VPS with at least 4 GB of RAM available
- User privileges: root or non-root user with sudo privileges
Step 1. Update the System
Since we have a fresh installation of Ubuntu 20.04, we need to update the packages to the latest versions available:
sudo apt update -y && sudo apt upgrade -y
Step 2. Install Apache2
We are going to use Apache as a web server in this tutorial. To install it execute the command below:
sudo apt install apache2
After successfull installation, start and enable the service
sudo systemctl start apache2 && sudo systemctl enable apache2
To check if everything is OK, execute the following command for the status of the Apache2 service:
sudo systemctl status apache2
You should receive the following output:
root@vps:~# sudo systemctl status apache2

● apache2.service - The Apache HTTP Server

     Loaded: loaded (/lib/systemd/system/apache2.service; enabled; vendor preset: enabled)

     Active: active (running) since Sat 2022-04-02 12:35:15 UTC; 36min ago

       Docs: https://httpd.apache.org/docs/2.4/

   Main PID: 44676 (apache2)

      Tasks: 7 (limit: 4617)

     Memory: 15.5M

     CGroup: /system.slice/apache2.service
Step 3. Install Perl and Dependencies
Since Bugzilla is written in Perl programming language, we need to install it along with the dependencies.
sudo apt install build-essential libappconfig-perl libdate-calc-perl libtemplate-perl libmime-tools-perl build-essential libdatetime-timezone-perl libdatetime-perl libemail-sender-perl libemail-mime-perl libemail-mime-perl libdbi-perl libdbd-mysql-perl libcgi-pm-perl libmath-random-isaac-perl libmath-random-isaac-xs-perl libapache2-mod-perl2 libapache2-mod-perl2-dev libchart-perl libxml-perl libxml-twig-perl perlmagick libgd-graph-perl libtemplate-plugin-gd-perl libsoap-lite-perl libhtml-scrubber-perl libjson-rpc-perl libdaemon-generic-perl libtheschwartz-perl libtest-taint-perl libauthen-radius-perl libfile-slurp-perl libencode-detect-perl libmodule-build-perl libnet-ldap-perl libfile-which-perl libauthen-sasl-perl libfile-mimeinfo-perl libhtml-formattext-withlinks-perl libgd-dev libmysqlclient-dev graphviz sphinx-common rst2pdf libemail-address-perl libemail-reply-perl
Step 4. Install MariaDB database server
To install the MariaDB database server, execute the command below.
sudo apt install mariadb-server
Start and enable the mariadb.service with the following commands:
sudo systemctl start mariadb && sudo systemctl enable mariadb
Check the status of the mariadb.service
sudo systemctl status mariadb
You should receive the following output:
root@vps:~# sudo systemctl status mariadb

● mariadb.service - MariaDB 10.3.34 database server

     Loaded: loaded (/lib/systemd/system/mariadb.service; enabled; vendor preset: enabled)

     Active: active (running) since Sat 2022-04-02 13:30:06 UTC; 7min ago

       Docs: man:mysqld(8)

             https://mariadb.com/kb/en/library/systemd/

   Main PID: 70881 (mysqld)

     Status: "Taking your SQL requests now..."

      Tasks: 30 (limit: 4617)

     Memory: 65.3M

     CGroup: /system.slice/mariadb.service

             └─70881 /usr/sbin/mysqld
Step 5. Create Bugzilla database and user
Next, we need to create a Bugzilla database, the Bugzilla user, and grant the permissions for that user to the database.
 CREATE USER 'bugzilla'@'localhost' IDENTIFIED BY 'YourStrongPasswordHere';

 CREATE DATABASE bugzilla;

 GRANT ALL PRIVILEGES ON bugzilla.* TO 'bugzilla'@'localhost';

 FLUSH PRIVILEGES;

 EXIT;
Step 6. Install Bugzilla
Before we can install Bugzilla we need to download the latest stable version.
 cd /var/www/html

wget https://ftp.mozilla.org/pub/mozilla.org/webtools/bugzilla-5.0.6.tar.gz
Once downloaded, extract the bugzilla file.
tar -xvf bugzilla-5.0.6.tar.gz -C /var/www/html/

 mv bugzilla-5.0.6 bugzilla
Once, this is done go into the “bugzilla” directory and check the setup.
cd /var/www/html/bugzilla/

./checksetup.pl
If the setup, fails due to some missing Perl modules, you should receive the following output:
COMMANDS TO INSTALL REQUIRED MODULES (You *must* run all these commands

and then re-run checksetup.pl):

    /usr/bin/perl install-module.pl DateTime

    /usr/bin/perl install-module.pl DateTime::TimeZone

    /usr/bin/perl install-module.pl Template

    /usr/bin/perl install-module.pl Email::Sender

    /usr/bin/perl install-module.pl Email::MIME

    /usr/bin/perl install-module.pl List::MoreUtils

    /usr/bin/perl install-module.pl Math::Random::ISAAC

    /usr/bin/perl install-module.pl JSON::XS

To attempt an automatic install of every required and optional module

with one command, do:

  /usr/bin/perl install-module.pl --all

*** Installation aborted. Read the messages above. ***
Execute the commands below to install the required modules:
/usr/bin/perl install-module.pl DateTime

/usr/bin/perl install-module.pl DateTime::TimeZone

/usr/bin/perl install-module.pl Template

/usr/bin/perl install-module.pl Email::Sender

/usr/bin/perl install-module.pl Email::MIME

/usr/bin/perl install-module.pl List::MoreUtils

/usr/bin/perl install-module.pl Math::Random::ISAAC

/usr/bin/perl install-module.pl JSON::XS

/usr/bin/perl install-module.pl ExtUtils::PkgConfig module
Once, the required modules are installed you need to check the setup again:
./checksetup.pl
Now, when the modules are installed, the next message that you should receive is that there is an error with the database connection:
There was an error connecting to MySQL:

    Access denied for user 'bugs'@'localhost'

This might have several reasons:

* MySQL is not running.

* MySQL is running, but there is a problem either in the

  server configuration or the database access rights. Read the Bugzilla

  Guide in the doc directory. The section about database configuration

  should help.

* Your password for the 'bugs' user, specified in $db_pass, is

  incorrect, in './localconfig'.

* There is a subtle problem with Perl, DBI, or MySQL. Make

  sure all settings in './localconfig' are correct. If all else fails, set

  '$db_check' to 0.
To solve this, you need to open the “/var/www/html/bugzilla/localconfig” file with your favorite editor and make the following changes:
sudo nano /var/www/html/bugzilla/localconfig
Enter the name of the database, user, and the password you set in step 5.
$webservergroup = 'www-data';

$db_driver = 'mysql';

$db_host = 'localhost';

$db_name = 'bugzilla';

$db_user = 'bugzilla';

$db_pass = 'YourStrongPasswordHere';

$db_port = 0;
After these settings are done run the ./checksetup.pl again.
./checksetup.pl
You should define your administrator’s email, username and password once the database connection is successful.
Checking for            DBD-mysql (v4.001)    ok: found v4.050

Checking for                MySQL (v5.0.15)   ok: found v5.5.5-10.3.34-MariaDB-0ubuntu0.20.04.1

Removing existing compiled templates...

Precompiling templates...done.

Fixing file permissions...

Initializing "Product/Component Changes" email_setting ...

Initializing "Dependency Tree Changes" email_setting ...

Marking closed bug statuses as such...

Creating default classification 'Unclassified'...

Setting up foreign keys...

Setting up the default status workflow...

Creating default groups...

Setting up user preferences...

Looks like we don't have an administrator set up yet. Either this is

your first time using Bugzilla, or your administrator's privileges

might have accidentally been deleted.

Enter the e-mail address of the administrator: admin@yourdomain.com

Enter the real name of the administrator: admin

Enter a password for the administrator account:

Please retype the password to verify:

admin@yourdomain.com is now set up as an administrator.

Creating initial dummy product 'TestProduct'...

Now that you have installed Bugzilla, you should visit the 'Parameters'

page (linked in the footer of the Administrator account) to ensure it

is set up as you wish - this includes setting the 'urlbase' option to

the correct URL.

checksetup.pl complete.
Step 7. Create a Virtual Host configuration file
In order can access the Bugzilla Web interface we need to create a virtual host configuration file where we can define our domain, document root, and some script parameters.
First, create the configuration file with the following command:
touch /etc/apache2/sites-available/bugzilla.conf
Open the file, and paste the following lines of code:
<VirtualHost *:80>

ServerName yourdomain.com

DocumentRoot /var/www/html/bugzilla/

<Directory /var/www/html/bugzilla/>

AddHandler cgi-script .cgi

Options +Indexes +ExecCGI

DirectoryIndex index.cgi

AllowOverride Limit FileInfo Indexes Options AuthConfig

</Directory>

ErrorLog /var/log/apache2/yourdomain.com.error_log

CustomLog /var/log/apache2/yourdomain.com.access_log common

</VirtualHost>
Enable the Apache2 confguration file and other modules:
sudo a2ensite bugzilla.conf

sudo a2enmod headers env rewrite expires cgi
Check the syntax of the Apache2 configuration.
apachectl -t
You should receive the following output:
root@host:~# apachectl -t

Syntax OK
If you receive this output you can safely restart the Apache service.
sudo systemctl restart apache2
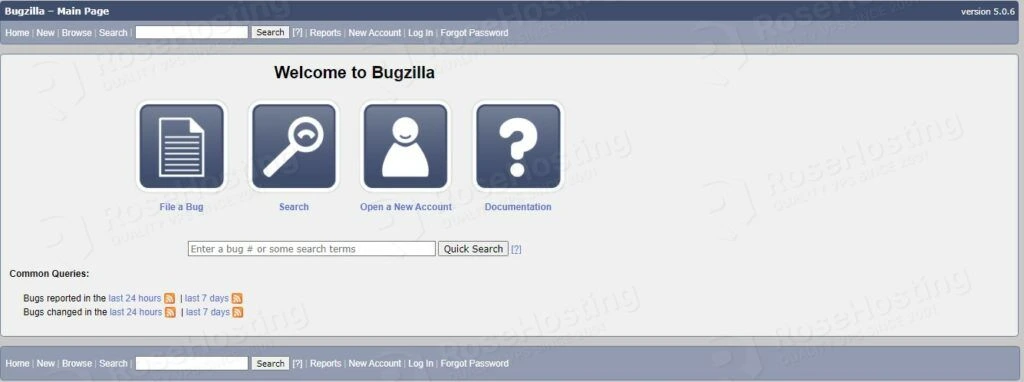
Now, you can access the Bugzilla Web interface at http://YourDomain.com
Congratulations! You successfully installed and configured Bugzilla tracking software on Ubuntu 20.04. If you find it difficult to install, you can always contact our technical support and they will do the rest for you. We are available 24/7.
If you liked this post on how to install Bugzilla on Ubuntu 20.04, please share it with your friends on social networks or simply leave a reply below. Thanks.
Leave a Comment
Comment
NameEmail
Save my name, email, and website in this browser for the next time I comment.
To prove you are human please solve the following *7 − = two
How to Install Bugzilla on Ubuntu 20.04的更多相关文章
- 安装MySQL到Ubuntu 20.04
本文的内容主要来自对How To Install MySQL on Ubuntu 20.04的翻译.在根据该文的指导下,我在自己的Ubuntu 20.04.3 LTS版本中安装了MySQL 8. St ...
- How To Install Nginx on Ubuntu 16.04 zz
Introduction Nginx is one of the most popular web servers in the world and is responsible for hostin ...
- Ubuntu 20.04下源码编译安装ROS 2 Foxy Fitzroy
ROS 2 Foxy Fitzroy(以下简称Foxy)于2020年6月5日正式发布了,是LTS版本,支持到2023年5月.本文主要根据官方的编译安装教程[1]完成,并记录编译过程中遇到的问题. 1. ...
- win10 + Ubuntu 20.04 LTS 双系统 引导界面美化
版权声明:本文为CSDN博主「ZChen1996」的原创文章,遵循CC 4.0 BY-SA版权协议,转载请附上原文出处链接及本声明. 原文链接:https://blog.csdn.net/ZChen1 ...
- Ubuntu 20.04.1 安装软件和系统配置脚本
#!/bin/bash # https://launchpad.net/ubuntu # https://www.easyicon.net # https://download-chromium.ap ...
- Ubuntu 20.04上通过Wine 安装微信
没有想过会在一个手机软件上花这么多心思,好在今天总算安装成功,觉得可以记录下这个过程,方便他人方便自己. 首先介绍下我使用过的其他方法,希望可以节省大家一些时间: Rambox Pro:因为原理是网页 ...
- 树莓派安装 Ubuntu 20.04 LTS 碰壁指南
树莓派安装 Ubuntu 20.04 LTS 碰壁指南 设备 Raspberry 4B 4+32G 系统 Ubuntu 20.04 LTS 1.镜像下载与烧录 镜像下载地址:https://cdima ...
- OpenCV4.4.0 安装测试 Installation & Examination (Ubuntu18.04, Ubuntu 20.04)
OpenCV4.4.0 安装测试 Installation & Examination (Ubuntu18.04, Ubuntu 20.04) 单纯简单的 OpenCV 安装配置方法,在这个地 ...
- Pangolin 安装测试 Installation & Examination (Ubuntu 20.04)
Pangolin 安装测试 Installation & Examination (Ubuntu 20.04) 如题所述,这是一个比较轻松的 Pangolin 安装配置方法,同样是基于 WSL ...
- Ubuntu 20.04 Docker 安装并配置
前言 Docker 的使用能极大地方便我们的开发,减少环境搭建,依赖安装等繁琐且容易出错的问题. 安装 Docker Ubuntu 20.04 官方 apt 源中就有 Docker,我们可以直接通过 ...
随机推荐
- 一文读懂什么是AIGC?
目录 AIGC概念 AIGC发展历史 在早期萌芽阶段(1950s~1990s) 在沉淀累积阶段(1990s~2010s) 在快速发展阶段(2010s~至今) ChatGPT AIGC能做什么? 电子商 ...
- JavaCV人脸识别三部曲之三:识别和预览
欢迎访问我的GitHub 这里分类和汇总了欣宸的全部原创(含配套源码):https://github.com/zq2599/blog_demos <JavaCV人脸识别三部曲>链接 < ...
- PostgreSQL JDBC 开发指导
JDBC 驱动程序 目录 设置 JDBC 驱动程序 初始化驱动程序 使用 SSL 发出查询和处理结果 调用存储函数和过程 存储二进制数据 JDBC 转义 PostgreSQL 扩展的 JDBC API ...
- 活动回顾:Flutter实时音视频应用场景实践
11月7日,即构和上海GDG技术社区联合举办了实时音视频技术云上技术分享专场,来自即构科技和Bilibili的资深技术专家进行了深度分享.大会吸引了500+开发人员交流.观看,并在活动过程中与分享嘉宾 ...
- 即构SDK7月迭代:新增支持按通道设置延迟模式,让卡顿大大减少
即构SDK 7月迭代如期而至,本月SDK更新主要增加了按推流通道设置延迟模式,大大减少了直播卡顿:媒体本地录制新增AAC 格式,可生成更小的录制文件,更易于上传.此外还有多项功能的优化,让用户获得更好 ...
- Description Resource Path Location
解决办法 在项目上右键属性Properties,属性列表中选择Project Facets,在打开的Project Facets页面中的Java下拉列表中,选择相应版本. 有可能是java1.6 改成 ...
- 如何快速又高质量的输出PDF实验报告?
摘要:本文由葡萄城技术团队于博客园原创并首发.转载请注明出处:葡萄城官网,葡萄城为开发者提供专业的开发工具.解决方案和服务,赋能开发者. PDF文档的打印在很多应用场景中都会被使用到,最为常见的就是实 ...
- Flutter ncnn 使用
Flutter 实现手机端 App,如果想利用 AI 模型添加新颖的功能,那么 ncnn 就是一种可考虑的手机端推理模型的框架. 本文即是 Flutter 上使用 ncnn 做模型推理的实践分享.有如 ...
- npm install 下载依赖的过程
首先检查.npmrc文件,项目级.npmrc文件>用户级的.npmrc文件>全局性的.npmrc文件>npm内置的.npmrc文件 是否有lock文件 没有lock文件 从npm远程 ...
- 论文解读(MCD)《Maximum Classifier Discrepancy for Unsupervised Domain Adaptation》
Note:[ wechat:Y466551 | 付费咨询,非诚勿扰 ] 论文信息 论文标题:Maximum Classifier Discrepancy for Unsupervised Domain ...