SpringBoot使用thymeleaf案例
1 编写application.properties文件
spring.thymeleaf.prefix=classpath:/templates/
spring.thymeleaf.suffix=.html
spring.thymeleaf.mode=HTML5
spring.thymeleaf.encoding=UTF-
spring.thymeleaf.servlet.content-type=text/html
#springboot 官方文档建议我们关闭thymeleaf的缓存
spring.thymeleaf.cache=false
2.创建实体类
public class Student {
    private Integer stu_id;
    private String stu_name;

    public Integer getStu_id() {
        return stu_id;
    }

    public void setStu_id(Integer stu_id) {
        this.stu_id = stu_id;
    }

    public String getStu_name() {
        return stu_name;
    }

    public void setStu_name(String stu_name) {
        this.stu_name = stu_name;
    }

    public Student(Integer stu_id, String stu_name) {
        this.stu_id = stu_id;
        this.stu_name = stu_name;
    }
    public Student(){

    }
}
3 创建Controller层
    @RequestMapping("/getStudents")
    public String getStudents(Model model){
        System.out.println("hello");
        List<Student> studentList=new ArrayList<>();
        Student student1=new Student(111,"张三");
        Student student2=new Student(222,"李四");
        Student student3=new Student(333,"王五");
        studentList.add(student1);
        studentList.add(student2);
        studentList.add(student3);
        model.addAttribute("student",studentList);
        return "Hello";
    }
4.编写html页面
<body>
    <table border="1">
        <tr>
            <td>学生编号</td>
            <td>学生姓名</td>
        </tr>
        <tr th:each="stu:${student}">
            <td th:text="${stu.stu_id}"></td>
            <td th:text="${stu.stu_name}"></td>
        </tr>
    </table>
</body>
5.启动程序
@SpringBootApplication
public class StartSpringBoot {
    public static void main(String[] args) {
        SpringApplication.run(StartSpringBoot.class,args);
    }
}
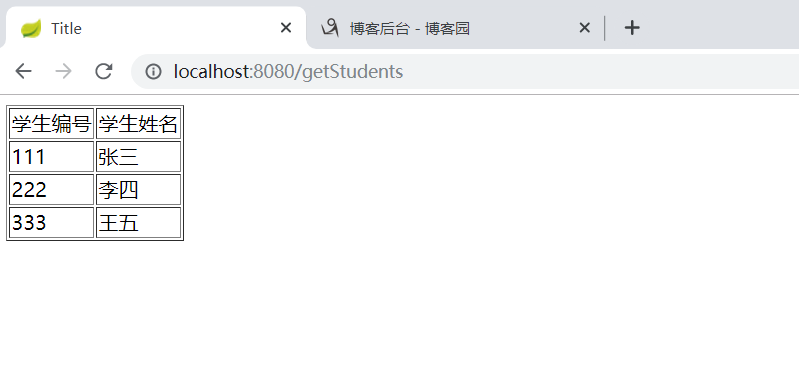
6.运行 结果
SpringBoot使用thymeleaf案例的更多相关文章
- springboot整合 thymeleaf 案例
1.运行环境 开发工具:intellij idea JDK版本:1.8 项目管理工具:Maven 4.0.0 2.GITHUB地址 https://github.com/nbfujx/springBo ...
- Springboot+JPA+Thymeleaf 校园博客完整小网站
本文所属[知识林]:http://www.zslin.com/web/article/detail/35 此项目是一个比较简易的校园博客.麻雀虽小五脏俱全,虽然是比较简易的但是涉及的知识点还是比较全面 ...
- 【原】无脑操作:IDEA + maven + Shiro + SpringBoot + JPA + Thymeleaf实现基础授权权限
上一篇<[原]无脑操作:IDEA + maven + Shiro + SpringBoot + JPA + Thymeleaf实现基础认证权限>介绍了实现Shiro的基础认证.本篇谈谈实现 ...
- 【原】无脑操作:IDEA + maven + Shiro + SpringBoot + JPA + Thymeleaf实现基础认证权限
开发环境搭建参见<[原]无脑操作:IDEA + maven + SpringBoot + JPA + Thymeleaf实现CRUD及分页> 需求: ① 除了登录页面,在地址栏直接访问其他 ...
- 【Springboot】Springboot整合Thymeleaf模板引擎
Thymeleaf Thymeleaf是跟Velocity.FreeMarker类似的模板引擎,它可以完全替代JSP,相较与其他的模板引擎,它主要有以下几个特点: 1. Thymeleaf在有网络和无 ...
- 从.Net到Java学习第九篇——SpringBoot下Thymeleaf
从.Net到Java学习系列目录 Thymeleaf概述 Thymeleaf 是一个流行的模板引擎,该模板引擎采用java语言开发.模板引擎是一个技术名称,是跨领域平台的概念,在java语言体系下有模 ...
- 从.Net到Java学习第六篇——SpringBoot+mongodb&Thymeleaf&模型验证
SpringBoot系列目录 SpringBoot整合mongodb MongoDB 是一个介于关系数据库和非关系数据库之间的产品,是非关系数据库当中功能最丰富,最像关系数据库的.如果你没用过Mong ...
- SpringBoot 之Thymeleaf模板.
一.前言 Thymeleaf 的出现是为了取代 JSP,虽然 JSP 存在了很长时间,并在 Java Web 开发中无处不在,但是它也存在一些缺陷: 1.JSP 最明显的问题在于它看起来像HTML或X ...
- IDEA上创建 Maven SpringBoot+mybatisplus+thymeleaf 项目
概述 在WEB领域,Java也是在不断的探索和改进,从开始的JSP--->Struts1--->Struts2+Spring--->Spring MVC--->SpringBo ...
随机推荐
- DS 图解堆排
堆排其实就是选择排序,只不过用了完全二叉树特性. 堆排思想 : 利用完全二叉树特性建堆和重复选择调整来得到有序数组. 完全二叉树有什么特性呢? 节点左对齐 ---> 层序遍历不会出现空,可以用数 ...
- leetcode动态规划笔记一---一维DP
动态规划 刷题方法 告别动态规划,连刷 40 道题,我总结了这些套路,看不懂你打我 - 知乎 北美算法面试的题目分类,按类型和规律刷题 题目分类 一维dp House Robber : 求最大最小值 ...
- 通过 SMB 共享目录
在 system1 上配置SMB服务 ,要求: 1.您的 SMB 服务器必须是 STAFF 工作组的一个成员 2.共享 /common 目录,共享名必须为 common 3.只有 group8.exa ...
- deppin Linux下安装docker
首先楼主用的是deppin15.11 docker 简介:Docker作为一个软件集装箱化平台,可以让开发者构建应用程序时,将它与其依赖环境一起打包到一个容器中,然后很容易地发布和应用到任意平台中. ...
- 执行kubectl create-f replicaset.yaml后k8s是如何工作的
参考:提高 kubectl 使用生产力[译] 英文原文:https://learnk8s.io/blog/kubectl-productivity/ Kubernetes 架构 Kubernetes ...
- 如何让 height:100%; 起作用---父级元素必须设定高度
参考: http://www.webhek.com/post/css-100-percent-height.html https://www.cnblogs.com/kunmomo/p/1060066 ...
- 【转载】C#中List集合使用Max()方法查找到最大值
在C#的List集合操作中,有时候需要查找到List集合中的最大值,此时可以使用List集合的扩展方法Max方法,Max方法有2种形式,一种是不带任何参数的形式,适用于一些值类型变量的List集合,另 ...
- 83.基于Vue SEO的四种方案(小结)
前言:众所周知,Vue SPA单页面应用对SEO不友好,当然也有相应的解决方案,下面列出几种最近研究和使用过的SEO方案,SRR和静态化基于Nuxt来说. 1.SSR服务器渲染:2.静态化:3.预渲染 ...
- 下载Spring
下载Spring Spring官网并不直接提供Spring的下载,Spring现在托管在GitHub上. 1.进入Spring官网 -> PROJECTS -> SPRING FRAMEW ...
- 结对项目(python) 黄浩伟 黄飞越
作者:黄浩伟 黄飞越 一 .Github项目地址: https://github.com/Flying123haha/123.git 二.psp表格: PSP2.1 Personal Softwar ...