Widget Size and Position !!!!!!!!!!!!!!!!!!
https://medium.com/@diegoveloper/flutter-widget-size-and-position-b0a9ffed9407
I have read many questions about how we can obtain the dimensions or positions of the widgets that we have on screen.
In some cases we find ourselves in situations in which we want to achieve that for any reason.
The widget doesn’t have position or size by itself, in order to achieve this it’s necessary that we obtain the RenderBox associated with the context of our Widget.
But how do we do this?
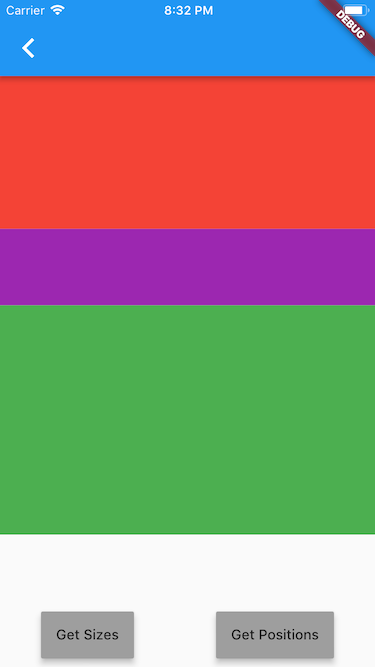
Let’s start building a demo app which has 3 panels of different colors, Red, Purple and Green inside a Column and we have two buttons at the bottom to get the Size and Position.
This is the code of the demo app:
And the result:
Ok so now the question is : How can I get the size and position of each panel?
Let’s focus on just one panel for this post (Red panel) , after we know how to get the size and position for one panel it should be easy for the others.
Get the size of a Widget
In order to do that, we need our Widget to have a Key, for this we create a GlobalKey and assign it to our Widget.
//creating Key for red panel
GlobalKey _keyRed = GlobalKey();
...
//set key
    Flexible(
             flex: 2,
             child: Container(
               key: _keyRed,
               color: Colors.red,
             ),
     ),
Once our Widget already has a Key, we can use this Key to be able to obtain the size in the following way:
_getSizes() {
    final RenderBox renderBoxRed = _keyRed.currentContext.findRenderObject();
    final sizeRed = renderBoxRed.size;
    print("SIZE of Red: $sizeRed");
 }
If we press the Get Sizes button, you’ll get this result in the console:
flutter: SIZE of Red: Size(375.0, 152.9)
now we know that our Red panel has 375.0 as width and 152.9 as height
It was easy, right?
Let’s go to obtain the position in which our Widget is located.
Get the position of a Widget
In the same way that we did previously, our Widget must have an associated Key.
Now we update the method to obtain the position of the Widget relative to the top-left of the defined position (in this case we are using 0.0 it means the top-left corner of our current screen).
_getPositions() {
    final RenderBox renderBoxRed = _keyRed.currentContext.findRenderObject();
    final positionRed = renderBoxRed.localToGlobal(Offset.zero);
    print("POSITION of Red: $positionRed ");
  }
If we press the Get Positions button, you’ll get this result in the console:
flutter: POSITION of Red: Offset(0.0, 76.0)
It means our Widget start from 0.0 from the X axis and 76.0 from the Y axis from TOP-LEFT.
Why 76.0? That’s because there is an AppBar above that has a height of 76.0.

So we already know how to get the size and position of our Widgets, well so far. Yay!!
But what happens if I’m interested in getting the size or position at the beginning, without having to press a button for it.

Ok then let’s call our methods in our constructor.
_MainSizeAndPositionState(){
     _getSizes();
     _getPositions();
   }
Run the app and …. oh we have an error here:
flutter: The following NoSuchMethodError was thrown building Builder:
flutter: The method 'findRenderObject' was called on null.
flutter: Receiver: null
flutter: Tried calling: findRenderObject()
Ok let’s try calling the methods from the initState , it should work ….. or no
@override
  void initState() {
    _getSizes();
    _getPositions();
    super.initState();
  }
Run the app and … a little different but the same error:
flutter: Another exception was thrown: NoSuchMethodError: The method 'findRenderObject' was called on null.
So, we have a problem, we can not get the size or position at the beginning, so how do I do it?

This happens because the context is not yet associated with our state.
You can find more information about the lifecycle of the Widgets here: https://medium.com/flutter-community/widget-state-buildcontext-inheritedwidget-898d671b7956
So we have to wait for our Widget to finish rendering, but how can achieve that?
There is a simple way, as I show you below.
@override
  void initState() {
    WidgetsBinding.instance.addPostFrameCallback(_afterLayout);
    super.initState();
  }
 _afterLayout(_) {
    _getSizes();
    _getPositions();
  }
With this you make sure to call your methods after the layout is completed.
If we run our app again, this is the result:
flutter: SIZE of Red: Size(375.0, 152.9)
flutter: POSITION of Red: Offset(0.0, 76.0)
Finally!!!
You can also review this package created by my friend Simon Lightfoot here: https://pub.dartlang.org/packages/after_layout
Conclusion
Many times, we get complicated by things that are very simple, it is necessary to read the documentation that Flutter provides, anyway every day we learn new things.
You can check the source code in my flutter-samples repo https://github.com/diegoveloper/flutter-samples
Widget Size and Position !!!!!!!!!!!!!!!!!!的更多相关文章
- 【Cocos2d-x】源代码分析之 2d/ui/Widget
从今天開始 咱也模仿 红孩儿这些大牛分析源代码 ,因为水平有限 不正确之处欢迎狂喷.哈哈. #ifndef __UIWIDGET_H__ #define __UIWIDGET_H__ #include ...
- Android学习笔记_63_手机安全卫士知识点归纳(3)分享 程序锁 服务 进程管理 widget
1.分享: Intent shareIntent = new Intent(); shareIntent.setAction(Intent.ACTION_SEND); shareIntent.setT ...
- OSG Qt Widget加载三维模型
graphicswindowqt.h #ifndef GRAPHICSWINDOWQT_H #define GRAPHICSWINDOWQT_H #include <QGLWidget> ...
- iOS-CALayer中position与anchorPoint详解
iOS-CALayer中position与anchorPoint详解 属性介绍 CALayer通过四个属性来确定大小和位置, 分别为:frame.bounds.position.anchorPoint ...
- QT把widget转换成图片后打印
from PyQt5.QtWidgets import (QApplication, QWidget, QTableWidget,QPushButton, QVBoxLayout, QTableWid ...
- Qt 【widget如何铺满窗口】
刚接触qt不是很长时间,都是使用ui拖拽控件实现界面,然后发现有些问题就是控件一旦多了起来,拖拽就不好控制了,然后就转而使用纯代码开发. 一下是碰到第一个问题: 创建一个MainWidget; Mai ...
- 第15.30节 PyQt编程实战:通过eventFilter监视QScrollArea的widget()的Paint消息画出scrollAreaWidgetContents的范围矩形
老猿Python博文目录 专栏:使用PyQt开发图形界面Python应用 老猿Python博客地址 一.引言 在<PyQt(Python+Qt)学习随笔:QScrollArea滚动区域详解> ...
- 带你实现开发者头条APP(五)--RecyclerView下拉刷新上拉加载
title: 带你实现开发者头条APP(五)--RecyclerView下拉刷新上拉加载 tags: -RecyclerView,下拉刷新,上拉加载更多 grammar_cjkRuby: true - ...
- Android之ListView&ViewPager模拟新闻界面
模拟新闻 APP 的界面 1)写 ListView 之前先写布局: 这里有两种 Item 的布局: <?xml version="1.0" encoding="ut ...
随机推荐
- 在Windows环境下搭建Snort+BASE入侵检测系统
操作系统: Windows 7 (service pack 1) 所需软件: 虚拟机:VirtualBox 网络数据包截取驱动程序:WinPcap 4.1.3 (WinPcap_4_1_3.exe) ...
- rancher2.x的安装
docker run -d --restart=unless-stopped \-p 80:80 -p 443:443 \-v /var/lib/rancher:/var/lib/rancher/ ...
- Linux 权限规划ACL
什么是ACL ACL是Access Control List的缩写,主要目的是提供传统的owner.group.others的read.write.execute权限之外的具体权限设置 ACL可以针对 ...
- iOS9 TableView和ScrollView滚动不响应问题
今天开始适配iOS9,发现在有UITableView或是ScrollView的界面滚动不灵敏有些卡顿,研究了下是因为tableview的cell里有可以相应点击事件的Button,当我点击到Butto ...
- 刷题记录:Shrine
目录 刷题记录:Shrine 刷题记录:Shrine 题目复现链接:https://buuoj.cn/challenges 参考链接:Shrine 解此题总结一下flask的SSTI:CTF SSTI ...
- vs2015 编译obs studio 遇到的几个错误
1. >D:\project\vs\obs\ObsProject\obs-studio\plugins\win-wasapi\win-wasapi.cpp(245): error C2065: ...
- postgres开启慢查询日志
1.全局设置修改配置postgres.conf: log_min_duration_statement=5000 然后加载配置: postgres=# select pg_reload_conf() ...
- java 库 pdfbox 将 pdf 文件转换成高清图片方法
近期需要将 pdf 文件转成高清图片,使用库是 pdfbox.fontbox.可以使用 renderImageWithDPI 方法指定转换的清晰度,当然清晰度越高,转换需要的时间越长,转换出来的图片越 ...
- rrr
# coding:utf-8 import pika username = 'feng' password = 'nihao' host = '192.168.1.144' credentials = ...
- centos7.6环境jenkins升级到tomcat8.0.53和jenkins2.168版本
Jenkins服务器:192.168.10.175数据备份服务器:192.168.10.164 jenkins服务器报错不能访问,插件无法加载就不能正常获取代码,重启尝试解决无果,于是采用 如下方案: ...