
LFS(Linux From Scratch)构建过程全记录(二):磁盘分区
写在前面
本文将会详细记录LFS中,构建分区,构建文件系统和挂载分区的全过程
准备新硬盘
为了更加符合“从零开始构建Linux”的要求,我在虚拟机中,新建了一个磁盘

我们将会在这个新磁盘上构建所需的分区和文件系统,并对其进行挂载
创建新磁盘后,我们启动虚拟机,输入sudo fdisk -l,查看当前虚拟机磁盘的情况
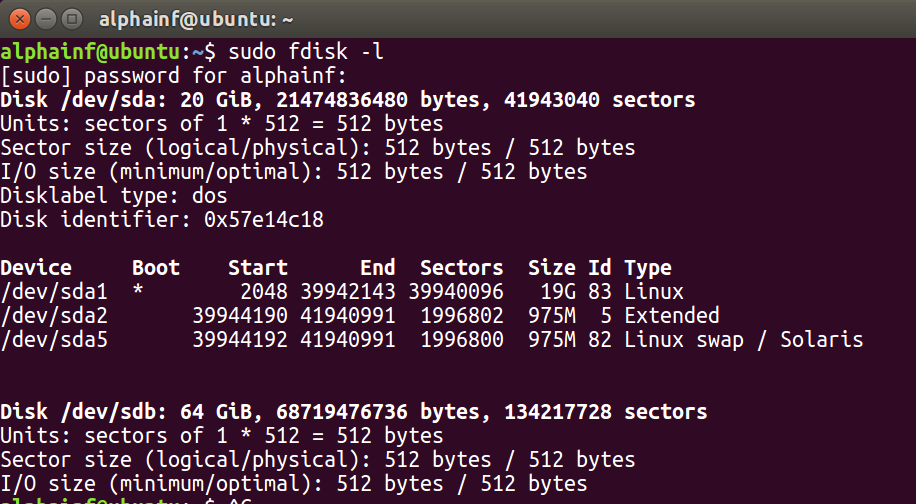
复制出来的信息如下所示:
 1 alphainf@ubuntu:~$ sudo fdisk -l

 2 [sudo] password for alphainf:

 3 Disk /dev/sda: 20 GiB, 21474836480 bytes, 41943040 sectors

 4 Units: sectors of 1 * 512 = 512 bytes

 5 Sector size (logical/physical): 512 bytes / 512 bytes

 6 I/O size (minimum/optimal): 512 bytes / 512 bytes

 7 Disklabel type: dos

 8 Disk identifier: 0x57e14c18

 9

10 Device     Boot    Start      End  Sectors  Size Id Type

11 /dev/sda1  *        2048 39942143 39940096   19G 83 Linux

12 /dev/sda2       39944190 41940991  1996802  975M  5 Extended

13 /dev/sda5       39944192 41940991  1996800  975M 82 Linux swap / Solaris

14

15

16 Disk /dev/sdb: 64 GiB, 68719476736 bytes, 134217728 sectors

17 Units: sectors of 1 * 512 = 512 bytes

18 Sector size (logical/physical): 512 bytes / 512 bytes

19 I/O size (minimum/optimal): 512 bytes / 512 bytes
如上所示,有sda和sdb两个硬盘
其中sda所挂载的是当前系统,分了三个区,分别是Linux,Extended和Swap
sdb为我们刚创建的新硬盘,尚未进行分区
分区
根据书中的要求,我们至少需要完成三个分区的构造
分别为boot,根分区,交换分区
由于磁盘空间足够,boot和根分区我们都将分配20G,交换分区分配8G
构建boot分区的过程如下,注意,我输入的内容均在冒号的后面
比如Command (m for help): p中的p
alphainf@ubuntu:~$ sudo fdisk /dev/sdb

Welcome to fdisk (util-linux 2.27.1).

Changes will remain in memory only, until you decide to write them.

Be careful before using the write command.

Device does not contain a recognized partition table.

Created a new DOS disklabel with disk identifier 0xd868f5e0.

Command (m for help): p

Disk /dev/sdb: 64 GiB, 68719476736 bytes, 134217728 sectors

Units: sectors of 1 * 512 = 512 bytes

Sector size (logical/physical): 512 bytes / 512 bytes

I/O size (minimum/optimal): 512 bytes / 512 bytes

Disklabel type: dos

Disk identifier: 0xd868f5e0

Command (m for help): n

Partition type

   p   primary (0 primary, 0 extended, 4 free)

   e   extended (container for logical partitions)

Select (default p): p

Partition number (1-4, default 1): 1

First sector (2048-134217727, default 2048):

Last sector, +sectors or +size{K,M,G,T,P} (2048-134217727, default 134217727): +20G

Created a new partition 1 of type 'Linux' and of size 20 GiB.

Command (m for help): p

Disk /dev/sdb: 64 GiB, 68719476736 bytes, 134217728 sectors

Units: sectors of 1 * 512 = 512 bytes

Sector size (logical/physical): 512 bytes / 512 bytes

I/O size (minimum/optimal): 512 bytes / 512 bytes

Disklabel type: dos

Disk identifier: 0xd868f5e0

Device     Boot Start      End  Sectors Size Id Type

/dev/sdb1        2048 41945087 41943040  20G 83 Linux
我们可以看到/dev/sdb1已经出现
我们可以通过同样的方法,构造出/dev/sdb2,也是20GB,/sdb2将作为根分区
接下来,我们构建/dev/sdb3,并将该分区的类型调整为交换分区
Command (m for help): n

Partition type

   p   primary (2 primary, 0 extended, 2 free)

   e   extended (container for logical partitions)

Select (default p): p

Partition number (3,4, default 3):

First sector (83888128-134217727, default 83888128):

Last sector, +sectors or +size{K,M,G,T,P} (83888128-134217727, default 134217727): +8G

Created a new partition 3 of type 'Linux' and of size 8 GiB.

Command (m for help): t #注意这里,用于调整分区类型

Partition number (1-3, default 3):

Partition type (type L to list all types): 82

Changed type of partition 'Linux' to 'Linux swap / Solaris'.

Command (m for help): p

Disk /dev/sdb: 64 GiB, 68719476736 bytes, 134217728 sectors

Units: sectors of 1 * 512 = 512 bytes

Sector size (logical/physical): 512 bytes / 512 bytes

I/O size (minimum/optimal): 512 bytes / 512 bytes

Disklabel type: dos

Disk identifier: 0xd868f5e0

Device     Boot    Start       End  Sectors Size Id Type

/dev/sdb1           2048  41945087 41943040  20G 83 Linux

/dev/sdb2       41945088  83888127 41943040  20G 83 Linux

/dev/sdb3       83888128 100665343 16777216   8G 82 Linux swap / Solaris
我们可以通过以下指令实现
在完成上述设置后,记得输入w并回车,以保存对磁盘分区的修改
修改完成后将出山以下提示:
Command (m for help): w

The partition table has been altered.

Calling ioctl() to re-read partition table.

Syncing disks.
我们最后再输入sudo fdisk -l 确认分区情况
alphainf@ubuntu:~$ sudo fdisk -l

[sudo] password for alphainf:

Disk /dev/sda: 20 GiB, 21474836480 bytes, 41943040 sectors

Units: sectors of 1 * 512 = 512 bytes

Sector size (logical/physical): 512 bytes / 512 bytes

I/O size (minimum/optimal): 512 bytes / 512 bytes

Disklabel type: dos

Disk identifier: 0x57e14c18

Device     Boot    Start      End  Sectors  Size Id Type

/dev/sda1  *        2048 39942143 39940096   19G 83 Linux

/dev/sda2       39944190 41940991  1996802  975M  5 Extended

/dev/sda5       39944192 41940991  1996800  975M 82 Linux swap / Solaris

Disk /dev/sdb: 64 GiB, 68719476736 bytes, 134217728 sectors

Units: sectors of 1 * 512 = 512 bytes

Sector size (logical/physical): 512 bytes / 512 bytes

I/O size (minimum/optimal): 512 bytes / 512 bytes

Disklabel type: dos

Disk identifier: 0xd868f5e0

Device     Boot    Start       End  Sectors Size Id Type

/dev/sdb1           2048  41945087 41943040  20G 83 Linux

/dev/sdb2       41945088  83888127 41943040  20G 83 Linux

/dev/sdb3       83888128 100665343 16777216   8G 82 Linux swap / Solaris
我们发现,sdb出现了分区,这是我们期望的状态
在分区上创建文件系统
我们可以依次输入下列指令,实现文件系统的创建
sudo mkfs -v -t ext4 /dev/sdb1

sudo mkfs -v -t ext4 /dev/sdb2

sudo mkswap /dev/sdb3
以下是输入指令后的输出信息(以根目录的创建和交换分区创建的输出为例)
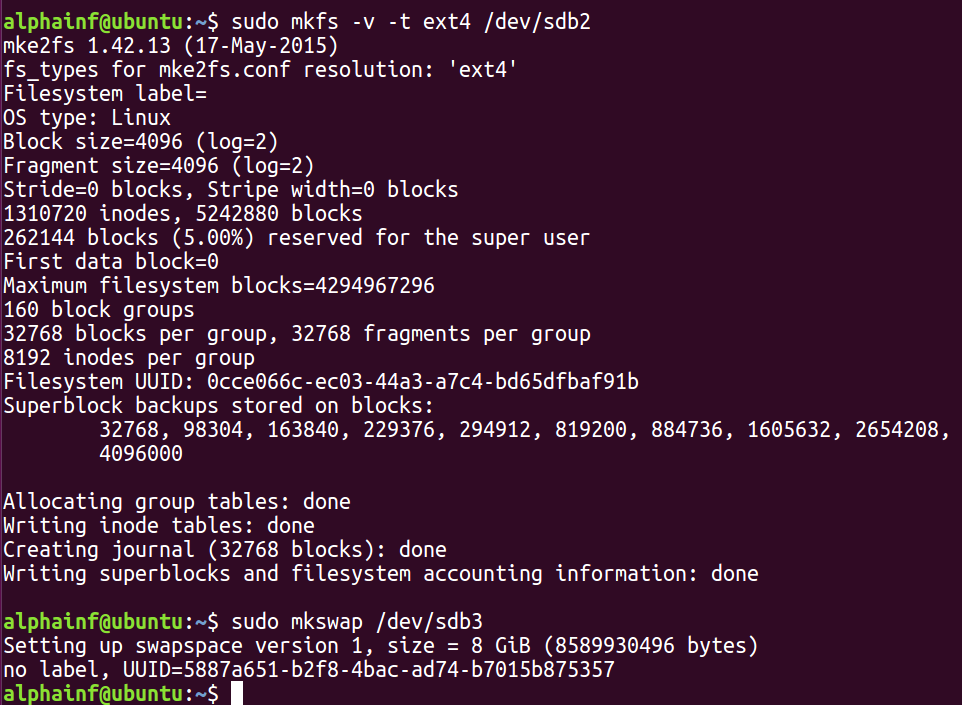
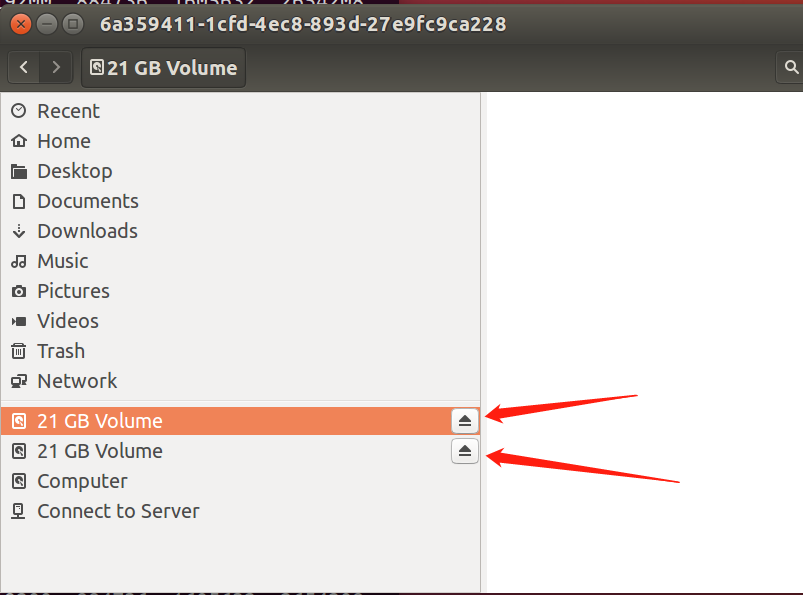
我们还可以打开文件夹,看到这两个刚生成的磁盘
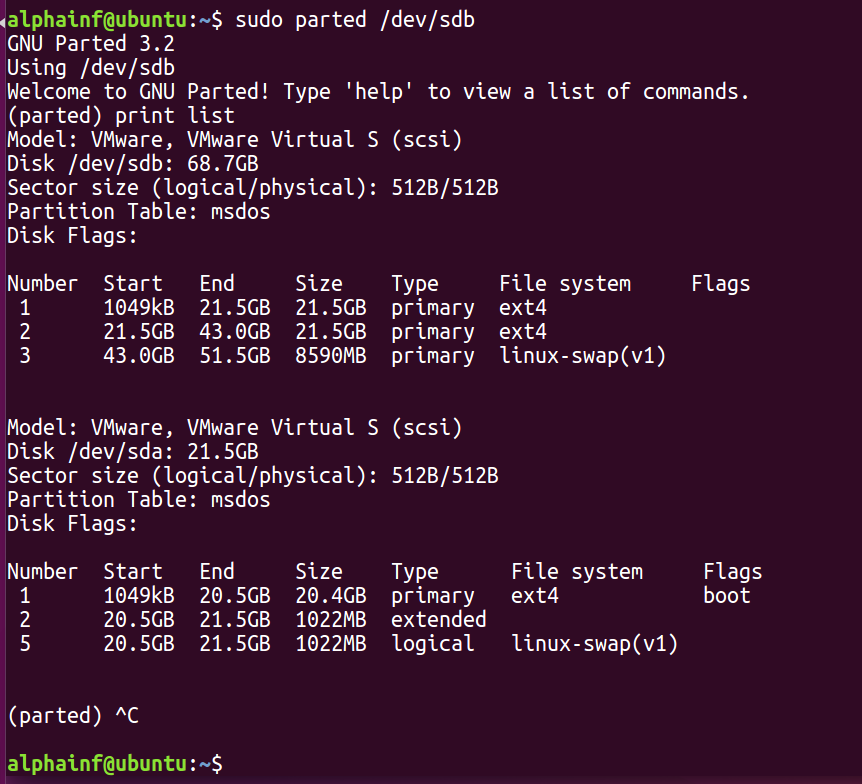
创建完成后,我们可以先输入sudo parted /dev/sdb ,再输入print list查看分区文件系统类型
设置$LFS环境变量
在接下来的配置中,为了方便设置,我们将多次使用LFS变量
设置LFS的代码如下:
export LFS=/mnt/lfs
我们可以使用echo $LFS进行确认
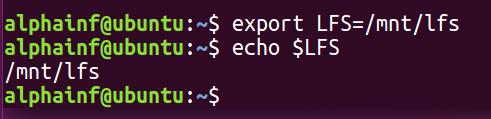
经确认,环境变量已正确设置
挂载分区
将分区/dev/sdb2挂载到/mnt/lfs中,代码如下:
sudo mkdir -pv $LFS

sudo mount -v -t ext4 /dev/sdb2 $LFS
设置交换分区代码如下
sudo /sbin/swapon -v /dev/sdb3
以上构建LFS分区的准备工作已完成
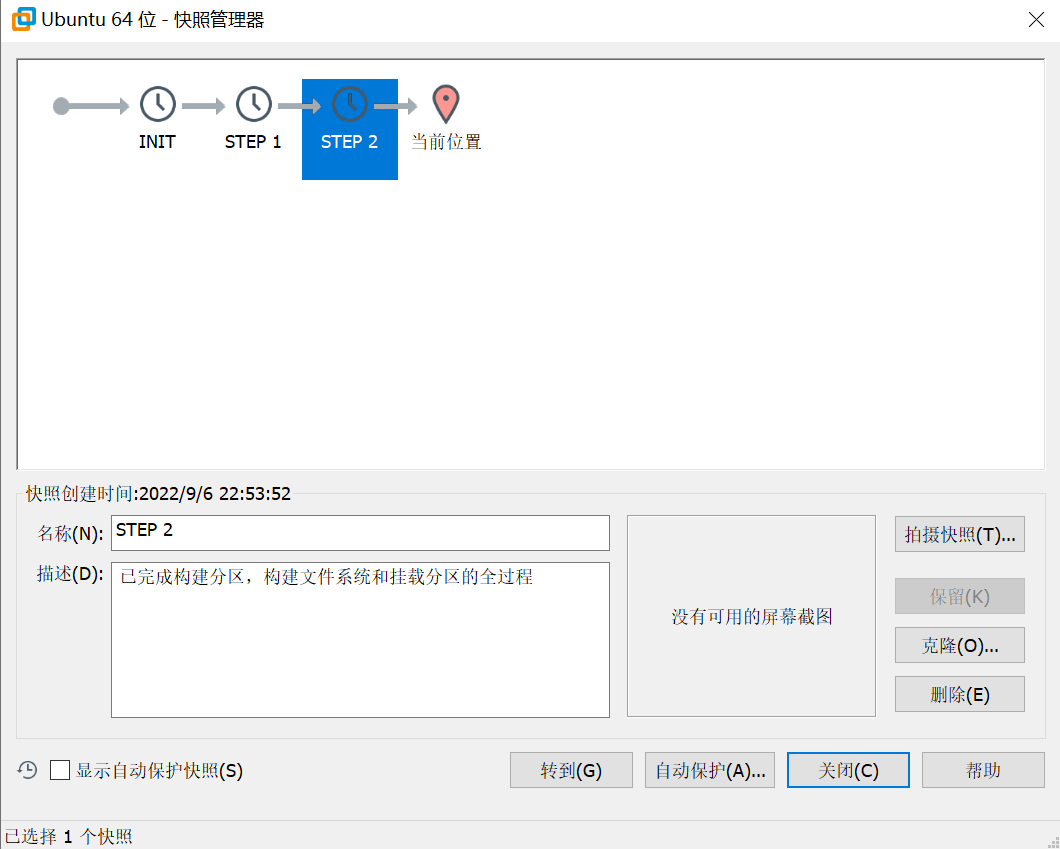
记得进行快照的保存,命名为STEP 2,并进行备注
LFS(Linux From Scratch)构建过程全记录(二):磁盘分区的更多相关文章
- LFS(Linux From Scratch)构建过程全记录(五):交叉工具链的构建
写在前面 本文将详细讲述如何构建工具链 前置知识 在LFS-BOOK中,我们需要学习一些关于"交叉编译"的内容,详见书本 安装Binutils-2.39 我们cd到sources文 ...
- LFS(Linux From Scratch)构建过程全记录(三):下载所需的软件包
写在前面 本文将记录构建LFS的过程中,下载软件包的全过程 准备下载的路径 注意请确保$LFS已经设置完毕 我们需要创建一个文件夹,地址为$LFS/sources,用于保存对应的源码 输入的指令如下: ...
- LFS(Linux From Scratch)构建过程全记录(一):准备工作
写在前面 本人修学了一门课,名曰<操作系统课程设计>,其任务为基于LFS以编译源代码的方式制作一个基本的Linux操作系统,并且编写在linux下的GUI软件. 本操作系统构建的全过程将分 ...
- LFS(Linux From Scratch)构建过程全记录(七):进入Chroot并构建临时工具
写在前面 本章将完成临时系统构建的最后缺失部分和各种包构建所需的工具. 解决了所有循环依赖关系后,就可以使用与主机操作系统完全隔离的"chroot"环境进行构建. 注意:接下来的指 ...
- LFS(Linux From Scratch)构建过程全记录(六):交叉编译临时工具
写在前面 本章将展示如何使用刚刚构建的跨工具链来交叉编译基本实用程序. M4安装 和前文一样,先进行解压,然后cd进入 注意:不需要构建build文件夹,直接输入以下配置文件 ./configure ...
- LFS(Linux From Scratch)构建过程全记录(四):最后的准备
写在前面 本章将进行一系列的环境配置 目录创建 在LFS中创建文件目录 我们可以用以下的指令来创建一些基础的目录,并进行连接 mkdir -pv $LFS/{etc,var} $LFS/usr/{bi ...
- 在CentOS6上配置MHA过程全记录
在CentOS6上配置MHA过程全记录 MHA(Master High Availability)是一款开源的MariaDB or MySQL高可用程序,为MariaDB or MySQL主从复制架构 ...
- 在CentOS7上通过RPM安装实现LAMP+phpMyAdmin过程全记录
在CentOS7上通过RPM安装实现LAMP+phpMyAdmin过程全记录 时间:2017年9月20日 一.软件环境: IP:192.168.1.71 Hostname:centos73-2.sur ...
- SAP S4HANA1610/Fiori安装过程全记录
经历各种坑,从硬件到文件,终于安装成功. 有需要安装或使用S4HANA(含Fiori)的同学可以参考. 安装文件分享给大家 链接:http://pan.baidu.com/s/1mi7LfIS 密码: ...
随机推荐
- bat-windows系统激活
激活命令 slmgr -ipk M7XTQ-FN8P6-TTKYV-9D4CC-J462D slmgr -skms kms.03k.org slmgr -ato slmgr -dlv 激活异常处理方法 ...
- nextInt和nextLine以及next方法的区别
1.nextInt() 只读取整型的数据,输入读取完之后,光标仍在当前行. 2.nextLine() 扫描到一行内容,当遇见换行符时,结束扫描.一旦输入读取完毕,该方法会将光标移到下一行开始的位置. ...
- 静态static关键字修饰成员方法和静态static的内存图
当 static 修饰成员方法时,该方法称为类方法 .静态方法在声明中有 static ,建议使用类名来调用,而不需要 创建类的对象.调用方式非常简单 ~类方法:使用 static关键字修饰的成员方法 ...
- HMS Core安全检测服务如何帮助大学新生防范电信诈骗?
一年一度的高考结束了,很多学生即将离开父母,一个人踏入大学生活,但由于人生阅历较少,容易被不法分子盯上. 每年开学季也是大一新生遭受诈骗的高峰期,以下是一些常见的案例.有的骗子会让新生下载注册一些恶意 ...
- Spring Data JPA 在 @Query 中使用投影的方法
Spring Data JPA 在 @Query 中使用投影的方法 关于投影的基本使用可以参考这篇文章:https://www.baeldung.com/spring-data-jpa-project ...
- Neo4j应用
CQL函数 1. 字符串函数 功能 描述 UPPER 将所有字母改为大写 LOWER 将所有字母改为小写 SUBSTRING 将获取指定范围的子字符串 REPLACE 替换一个字符串的子字符串 mat ...
- 如何在Rust中打印变量的类型?
#![feature(core_intrinsics)] fn print_type_of<T>(_: T) { println!("{}", unsafe { std ...
- 常用的函数式接口_Function接口练习_自定义函数模型拼接
package com.yang.Test.FunctionStudy; import java.util.function.Function; /** * 练习:自定义函数模型拼接 * 题目: * ...
- Ubu18开机自启动-Systemd
参考链接: https://blog.csdn.net/qq_16268979/article/details/114771854 本文内容为个人测试记录,具体文件目录请以读者自己电脑为准,此处只是提 ...
- js for和while两种99乘法表
<script type="text/javascript"> for(var i=1; i<=9; i++) { for(var j=1; j<=i;j+ ...