Android IPC机制之AIDL
什么是AIDL
AIDL:Android Interface Definition Language,即Android接口定义语言。
服务端:
1、创建一个AIDL文件,实际上是一个interface,声明一个方法
2、创建一个服务,利用AIDL文件的Stub方法在服务中实例化AIDL文件,实现AIDL文件中接口中定义的方法,返回一个IBinder对象
3、当绑定服务时将这个IBinder对象返回
客户端:
1、创建一个和服务端一模一样的AIDL文件,声明同样的方法
2、绑定服务,得到服务端返回的IBinder对象
3、将IBinder对象转换为本地定义AIDL文件,实际上是一个已经实例化的AIDL对象
4、用这个AIDL对象就可以调用服务端的方法
服务端的代码:
首先在Android Studio中创建一个aidl文件,Android Studio会自动创建一个aidl的文件夹:
创建一个aidl文件 IMyAdd,其中定义个简单的加法运算:
 // IMyAdd.aidl

 package com.jiao.myaidl;

 // Declare any non-default types here with import statements

 interface IMyAdd {

     /**

      * Demonstrates some basic types that you can use as parameters

      * and return values in AIDL.

      */

     int add(int first,int second);

 }
然后创建一个service
 package com.jiao.myaidl;

 import android.app.Service;

 import android.content.Intent;

 import android.os.Binder;

 import android.os.IBinder;

 import android.os.RemoteException;

 import android.support.annotation.Nullable;

 /**

  * Created by jiaocg on 2016/3/9.

  */

 public class MyAddService extends Service {

     public MyAddService() {

     }

     private Binder mBinder = new IMyAdd.Stub() {

         @Override

         public int add(int first, int second) throws RemoteException {

             return first + second;

         }

     };

     @Nullable

     @Override

     public IBinder onBind(Intent intent) {

         return mBinder;

     }

 }
在清单文件中注册service
  <service android:name="com.jiao.myaidl.MyAddService">

             <intent-filter>

                 <action android:name="com.jiao.myaidl.action.MYADD_SERVICE" />

                 <category android:name="android.intent.category.DEFAULT" />

             </intent-filter>

         </service>
客户端代码
和服务端一样首先创建同样的aidl文件,并且声明同样的方法(注意,一定要在同一个包名下)
创建aidl文件:
 // IMyAdd.aidl

 package com.jiao.myaidl;

 // Declare any non-default types here with import statements

 interface IMyAdd {

     /**

      * Demonstrates some basic types that you can use as parameters

      * and return values in AIDL.

      */

     int add(int first,int second);

 }
客户端调用代码:
 package com.jiao.myaidl;

 import android.content.ComponentName;

 import android.content.Context;

 import android.content.Intent;

 import android.content.ServiceConnection;

 import android.os.Bundle;

 import android.os.IBinder;

 import android.os.RemoteException;

 import android.support.v7.app.AppCompatActivity;

 import android.view.View;

 import android.widget.Button;

 import android.widget.Toast;

 import com.jiao.myaidl.client.R;

 public class MainActivity extends AppCompatActivity implements View.OnClickListener {

     private boolean mIsBindService;

     private IMyAdd mIMyAdd;

     private ServiceConnection mConnection = new ServiceConnection() {

         @Override

         public void onServiceConnected(ComponentName name, IBinder service) {

             Toast.makeText(MainActivity.this, "绑定服务成功", Toast.LENGTH_SHORT).show();

             mIMyAdd = IMyAdd.Stub.asInterface(service);

         }

         @Override

         public void onServiceDisconnected(ComponentName name) {

             bindService();

         }

     };

     private Button bt_aidl_add;

     private Button bt_aidl_bind;

     private Button bt_aidl_unbind;

     @Override

     protected void onCreate(Bundle savedInstanceState) {

         super.onCreate(savedInstanceState);

         setContentView(R.layout.activity_main);

         initView();

     }

     private void initView() {

         bt_aidl_bind = (Button) findViewById(R.id.bt_aidl_bind);

         bt_aidl_unbind = (Button) findViewById(R.id.bt_aidl_unbind);

         bt_aidl_add = (Button) findViewById(R.id.bt_aidl_add);

         bt_aidl_add.setOnClickListener(this);

         bt_aidl_bind.setOnClickListener(this);

         bt_aidl_unbind.setOnClickListener(this);

     }

     //绑定服务

     private void bindService() {

         Intent intent = new Intent();

         intent.setAction("com.jiao.myaidl.action.MYADD_SERVICE");

         bindService(intent, mConnection, Context.BIND_AUTO_CREATE);

         mIsBindService = true;

     }

     //解绑服务

     private void unbindService() {

         if (mIsBindService) {

             mIsBindService = false;

             unbindService(mConnection);

         }

     }

     @Override

     public void onClick(View v) {

         switch (v.getId()) {

             case R.id.bt_aidl_bind:

                 bindService();

                 break;

             case R.id.bt_aidl_unbind:

                 Toast.makeText(this, "解绑成功", Toast.LENGTH_SHORT).show();

                 unbindService();

                 break;

             case R.id.bt_aidl_add:

                 if (mIsBindService && mIMyAdd != null) {

                     try {

                         int result = mIMyAdd.add(5, 5);

                         Toast.makeText(this, result + "", Toast.LENGTH_SHORT).show();

                     } catch (RemoteException e) {

                         e.printStackTrace();

                     }

                 } else {

                     Toast.makeText(this,"没有绑定服务", Toast.LENGTH_SHORT).show();

                 }

                 break;

         }

     }

 }
布局代码:
 <?xml version="1.0" encoding="utf-8"?>

 <LinearLayout xmlns:android="http://schemas.android.com/apk/res/android"

     android:layout_width="match_parent"

     android:layout_height="match_parent"

     android:orientation="vertical">

     <Button

         android:layout_marginTop="50dp"

         android:id="@+id/bt_aidl_bind"

         android:layout_width="match_parent"

         android:layout_height="wrap_content"

         android:text="绑定服务" />

     <Button

         android:id="@+id/bt_aidl_unbind"

         android:layout_width="match_parent"

         android:layout_height="wrap_content"

         android:text="解绑服务" />

     <Button

         android:id="@+id/bt_aidl_add"

         android:layout_width="match_parent"

         android:layout_height="wrap_content"

         android:text="AIDL测试" />

 </LinearLayout>
上述步骤完成之后,将两个工程同时运行,即可测试客户端能否调用服务端的方法
二 AIDL的高级应用
上个例子是用来说明客户端通过绑定服务的方式来调用服务端的方法,下面再介绍一种客户端用来获取
服务端的对象和数据,实现服务端和客户端的数据共享;
步骤和第一个例子的步骤是一样的,首先要创建一个对象类,我们设为 Computer
创建一个computer AIDL文件来声明这个对象:
服务端代码:
 // Computer.aidl

 package com.jiao.myaidl.entity;

 // Declare any non-default types here with import statements

 parcelable Computer;
然后创建Computer对象类
 package com.jiao.myaidl.entity;

 import android.os.Parcel;

 import android.os.Parcelable;

 /**

  * Created by jiaocg on 2016/3/9.

  */

 public class Computer implements Parcelable {

     public int computerId;

     public String name;

     public String model;

     public Computer(int computerId, String name, String model) {

         this.computerId = computerId;

         this.name = name;

         this.model = model;

     }

     protected Computer(Parcel in) {

         computerId = in.readInt();

         name = in.readString();

         model = in.readString();

     }

     public static final Creator<Computer> CREATOR = new Creator<Computer>() {

         @Override

         public Computer createFromParcel(Parcel in) {

             return new Computer(in);

         }

         @Override

         public Computer[] newArray(int size) {

             return new Computer[size];

         }

     };

     @Override

     public int describeContents() {

         return 0;

     }

     @Override

     public void writeToParcel(Parcel dest, int flags) {

         dest.writeInt(computerId);

         dest.writeString(name);

         dest.writeString(model);

     }

 }
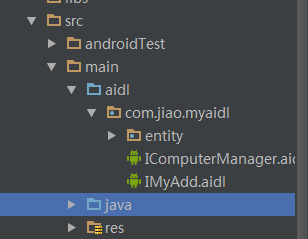
这里要特别注意创建的ComputerAIDL文件和Computer对象类 要在同一个包里:
如下图所示:
然后创建一个IComputerManager aidl文件,其中声明两个方法:
添加对象和获取所有对象
 // IComputerManager.aidl

 package com.jiao.myaidl;

 // Declare any non-default types here with import statements

 import com.jiao.myaidl.entity.Computer;

 interface IComputerManager {

    void addComputer(in Computer computer);

    List<Computer> getComputerList();

 }
创建一个ComputerService
 package com.jiao.myaidl;

 import android.app.Service;

 import android.content.Intent;

 import android.os.IBinder;

 import android.os.RemoteException;

 import com.jiao.myaidl.entity.Computer;

 import java.util.List;

 import java.util.concurrent.CopyOnWriteArrayList;

 public class ComputerService extends Service {

     public ComputerService() {

     }

     private CopyOnWriteArrayList<Computer> mComputerList = new CopyOnWriteArrayList<>();

     private final IComputerManager.Stub mBinder = new IComputerManager.Stub() {

         @Override

         public void addComputer(Computer computer) throws RemoteException {

             mComputerList.add(computer);

         }

         @Override

         public List<Computer> getComputerList() throws RemoteException {

             return mComputerList;

         }

     };

     @Override

     public void onCreate() {

         super.onCreate();

         mComputerList.add(new Computer(0, "苹果", "model1"));

         mComputerList.add(new Computer(1, "联想", "model2"));

         mComputerList.add(new Computer(2, "华为", "model3"));

     }

     @Override

     public IBinder onBind(Intent intent) {

         // TODO: Return the communication channel to the service.

 //        throw new UnsupportedOperationException("Not yet implemented");

         return mBinder;

     }

 }
清单文件声明服务:
  <service android:name="com.jiao.myaidl.ComputerService">

             <intent-filter>

                 <action android:name="com.jiao.myaidl.action.COMPUTER_SERVICE" />

                 <category android:name="android.intent.category.DEFAULT" />

             </intent-filter>

         </service>
客户端代码:
首先和服务端一样要创建同样的Computer AIDL文件和Computer对象 并且包名要一致
(即客户端 Computer aidl文件的包名和Computer对象的包名要一致 同时 也要和服务器存放computer的包名一致)
创建Computer AIDL文件
 // Computer.aidl

 package com.jiao.myaidl.entity;

 // Declare any non-default types here with import statements

     /**

      * Demonstrates some basic types that you can use as parameters

      * and return values in AIDL.

      */

     parcelable Computer;
创建Computer对象
 package com.jiao.myaidl.entity;

 import android.os.Parcel;

 import android.os.Parcelable;

 /**

  * Created by jiaocg on 2016/3/10.

  */

 public class Computer implements Parcelable {

     public int computerId;

     public String name;

     public String model;

     public Computer(int computerId, String name, String model) {

         this.computerId = computerId;

         this.name = name;

         this.model = model;

     }

     protected Computer(Parcel in) {

         computerId = in.readInt();

         name = in.readString();

         model = in.readString();

     }

     public static final Creator<Computer> CREATOR = new Creator<Computer>() {

         @Override

         public Computer createFromParcel(Parcel in) {

             return new Computer(in);

         }

         @Override

         public Computer[] newArray(int size) {

             return new Computer[size];

         }

     };

     @Override

     public int describeContents() {

         return 0;

     }

     @Override

     public void writeToParcel(Parcel dest, int flags) {

         dest.writeInt(computerId);

         dest.writeString(name);

         dest.writeString(model);

     }

 }
客户调用代码
 package com.jiao.myaidl;

 import android.content.ComponentName;

 import android.content.Context;

 import android.content.Intent;

 import android.content.ServiceConnection;

 import android.os.Bundle;

 import android.os.IBinder;

 import android.os.RemoteException;

 import android.support.v7.app.AppCompatActivity;

 import android.view.View;

 import android.widget.Button;

 import android.widget.Toast;

 import com.google.android.gms.appindexing.AppIndex;

 import com.google.android.gms.common.api.GoogleApiClient;

 import com.jiao.myaidl.client.R;

 import com.jiao.myaidl.entity.Computer;

 import java.util.List;

 public class Main2Activity extends AppCompatActivity implements View.OnClickListener {

     private boolean mIsBindService;//是否绑定了服务

     private IComputerManager mRemoteComputerManager;

     private Button bt_aidl_add;

     private Button bt_aidl_bind;

     private Button bt_aidl_unbind;

     //在IBinder代表的进程退出时被调用 IBinder死亡时调用

     //自定义的死亡通知接受者必须要重写父类DeathRecipient的成员函数binderDied。

     // 当Binder驱动程序通知一个Binder代理对象它所引用的Binder本地对象已经死亡时,

     // 就会调用它所指定的死亡通知接受者的成员函数binderDied。

     private IBinder.DeathRecipient mDeathRecipient = new IBinder.DeathRecipient() {

         @Override

         public void binderDied() {

             if (mRemoteComputerManager != null) {

                 mRemoteComputerManager.asBinder().unlinkToDeath(mDeathRecipient, 0);

                 mRemoteComputerManager = null;

                 bindService();

             }

         }

     };

     private ServiceConnection mConnection = new ServiceConnection() {

         @Override

         public void onServiceConnected(ComponentName name, IBinder service) {

             mIsBindService = true;

             Toast.makeText(Main2Activity.this, "绑定服务成功", Toast.LENGTH_SHORT).show();

             mRemoteComputerManager = IComputerManager.Stub.asInterface(service);

             try {

                 //注册 IBinder 死亡通知

                 mRemoteComputerManager.asBinder().linkToDeath(mDeathRecipient, 0);

             } catch (RemoteException e) {

                 e.printStackTrace();

             }

         }

         @Override

         public void onServiceDisconnected(ComponentName name) {

             mRemoteComputerManager = null;

         }

     };

     /**

      * ATTENTION: This was auto-generated to implement the App Indexing API.

      * See https://g.co/AppIndexing/AndroidStudio for more information.

      */

     private GoogleApiClient client;

     @Override

     protected void onCreate(Bundle savedInstanceState) {

         super.onCreate(savedInstanceState);

         setContentView(R.layout.activity_main2);

         initView();

         // ATTENTION: This was auto-generated to implement the App Indexing API.

         // See https://g.co/AppIndexing/AndroidStudio for more information.

         client = new GoogleApiClient.Builder(this).addApi(AppIndex.API).build();

     }

     private void initView() {

         bt_aidl_bind = (Button) findViewById(R.id.bt_aidl_bind);

         bt_aidl_unbind = (Button) findViewById(R.id.bt_aidl_unbind);

         bt_aidl_add = (Button) findViewById(R.id.bt_aidl_add);

         bt_aidl_add.setOnClickListener(this);

         bt_aidl_bind.setOnClickListener(this);

         bt_aidl_unbind.setOnClickListener(this);

     }

     @Override

     public void onClick(View v) {

         switch (v.getId()) {

             case R.id.bt_aidl_bind:

                 bindService();

                 break;

             case R.id.bt_aidl_unbind:

                 Toast.makeText(this, "解绑成功", Toast.LENGTH_SHORT).show();

                 unbindService();

                 break;

             case R.id.bt_aidl_add:

                 if (!mIsBindService || mRemoteComputerManager == null){

                     Toast.makeText(this,"not bind service",Toast.LENGTH_SHORT).show();

                     return;

                 }

                 try {

                     List<Computer> computerList = mRemoteComputerManager.getComputerList();

                     for (int i =0;i<computerList.size();i++){

                         String str = "computerId:" + String.valueOf(computerList.get(i).computerId) +

                                 " brand:" + computerList.get(i).name +

                                 " model:" + computerList.get(i).model ;

                         System.out.println(str);

                     }

                 } catch (RemoteException e) {

                     e.printStackTrace();

                 }

                 break;

         }

     }

     private void bindService() {

         Intent it = new Intent();

         it.setAction("com.jiao.myaidl.action.COMPUTER_SERVICE");

         it.setPackage("com.jiao.myaidl.server");

         mIsBindService = bindService(it, mConnection, Context.BIND_AUTO_CREATE);

     }

     private void unbindService() {

         if (!mIsBindService) {

             return;

         }

         mIsBindService = false;

         unbindService(mConnection);

     }

 }
以上就实现了客户端从服务器获取对象,并使用对象,实现了服务端和客户端的数据共享。
Android IPC机制之AIDL的更多相关文章
- Android IPC机制(三)在Android Studio中使用AIDL实现跨进程方法调用
在上一篇文章Android IPC机制(二)用Messenger进行进程间通信中我们介绍了使用Messenger来进行进程间通信的方法.可是我们能发现Messenger是以串行的方式来处理client ...
- Android IPC通信和AIDL技术应用
首先我们了解一下 IPC和AIDL IPC:进程间通信 AIDL:Android Interface Definition Language,即Android接口定义语言. 为什么使用: Androi ...
- Android IPC机制全解析<一>
概要 多进程概念及多进程常见注意事项 IPC基础:Android序列化和Binder 跨进程常见的几种通信方式:Bundle通过Intent传递数据,文件共享,ContentProvider,基于Bi ...
- Android IPC机制基础
概要 多进程概念及多进程常见注意事项 IPC基础:Android序列化和Binder 跨进程常见的几种通信方式:Bundle通过Intent传递数据,文件共享,ContentProvider,基于Bi ...
- android IPC 机制 (开发艺术探索)
一.IPC 机制介绍 IPC是Inter-Process Communication的缩写,含义就是进程间通信或者跨进程通信,是指两个进程之间进行数据交换的过程.那么什么是进程,什么是线程,进程和线程 ...
- Android IPC机制—Binder的工作机制
进程和线程的关系 IPC机制即为跨进程通信,是inter-Process Communication的缩写.是指两个进程之间进行通信.在说进程通信之前,我们的弄明白什么是线程,什么是进程.进程和线程是 ...
- 深入理解Android IPC机制之Binder机制
Binder是Android系统进程间通信(IPC)方式之一.Linux已经拥有的进程间通信IPC手段包括(Internet Process Connection): 管道(Pipe).信号(Sign ...
- 【Android - IPC】之AIDL简介
参考资料: 1.<Android开发艺术探索>第二章2.4.4 2.Android AIDL Binder框架解析:http://blog.csdn.net/lmj623565791/ar ...
- Android IPC机制(三)使用AIDL实现跨进程方法调用
上一篇文章中我们介绍了使用Messenger来进行进程间通信的方法,但是我们能发现Messenger是以串行的方式来处理客户端发来的信息,如果有大量的消息发到服务端,服务端仍然一个一个的处理再响应客户 ...
随机推荐
- HtmlAgilityPack搭配 ScrapySharp或HtmlAgilityPack.CssSelectors
Html Agility Pack 源码中的类大概有28个左右,其实不算一个很复杂的类库,但它的功能确不弱,为解析DOM已经提供了足够强大的功能支持,可以跟jQuery操作DOM媲 美:)Html A ...
- 获取MS SQL TABLE列名列表
在MS SQL Server中,想获取表的所有列名,可以使用下面SQL语句: SELECT [COLUMN_NAME] FROM [INFORMATION_SCHEMA].[Columns] WHER ...
- 会员管理系统的设计和开发(2)-- RDLC报表的设计及动态加载
在上篇<会员管理系统的设计和开发(1)>介绍了关于会员系统的一些总体设计思路和要点,经过一段时间开发,软件终于完成并发布.在这期间,碰到了不少技术难点,并积累了不少开发心得和经验,本篇继续 ...
- c#获取当前应用程序所在路径
一.获取当前文件的路径1. System.Diagnostics.Process.GetCurrentProcess().MainModule.FileName 获取模块的完整路径,包括文 ...
- iOS阶段学习第15天笔记(NSArray与NSMutableArray 数组)
iOS学习(OC语言)知识点整理 一.OC中的数组 1)数组:也是一个对象,数组中存放的是对象的地址,可以存放任意类型对象的地址,只能是对象不能是具体的数值,数组是有序的, 可以存放重复的元 ...
- java的spilt(“,”)方法bug处理
java split方法以逗号分隔如字符串",,,,,," 这样会得到一个空的数组 String str ={1,2,3,,,,, } String[] str1 =spilt(& ...
- shell脚本(管理守护进程)
工作中常常会遇到处理消息队列的消费者进程,这样的进程是一个守护进程,即一个服务.服务通常写个shell脚本来管理,查询服务的status ,启动start 关闭stop 重启reload.最近在学 ...
- MySQL 运行环境建议规范
一.操作系统环境 操作系统版本选择 CentOS/RHRL/ORACLE Linux 5.x/6.x x86_64 发行版 建议磁盘分区规则 MySQL 运行环境建议规范 挂载点 大小 分区类型 分区 ...
- [Tool] Chrome内的本地网页,使用XMLHttpRequest读取本地档案
[Tool] Chrome内的本地网页,使用XMLHttpRequest读取本地档案 问题情景 开发Cordova这类以网页内容作为UI的Hybrid APP时,开发人员可以使用IDE的功能将程序布署 ...
- json 对象 数组
一.json写法以及获得其数据的方法 var jsons={ name:'wen', age:12, price:'qq' } console.log(typeof jsons);//object c ...