thinkphp5 二维码生成 composer
进入extend文件夹
composer require endroid/qrcode
2.将二维码生成封装为服务

QrcodeServer.php代码如下:
<?php

/**

 * Created by PhpStorm.

 * User: cdjyj21

 * Date: 2018/9/4

 * Time: 11:57

 */

namespace app\services;

//引入刚刚添加的composer安装的类  里面的自动加载类
use think\facade\App;
require_once App::getRootPath().'/extend/vendor/autoload.php';
use Endroid\QrCode\ErrorCorrectionLevel;

use Endroid\QrCode\LabelAlignment;

use Endroid\QrCode\QrCode;

class QrcodeServer

{

    protected $_qr;

    protected $_encoding        = 'UTF-8';              // 编码类型

    protected $_size            = ;                  // 二维码大小

    protected $_logo            = false;                // 是否需要带logo的二维码

    protected $_logo_url        = '';                   // logo图片路径

    protected $_logo_size       = ;                   // logo大小

    protected $_title           = false;                // 是否需要二维码title

    protected $_title_content   = '';                   // title内容

    protected $_generate        = 'display';            // display-直接显示  writefile-写入文件

    protected $_file_name       = './static/qrcode';    // 写入文件路径

    const MARGIN           = ;                        // 二维码内容相对于整张图片的外边距

    const WRITE_NAME       = 'png';                     // 写入文件的后缀名

    const FOREGROUND_COLOR = ['r' => , 'g' => , 'b' => , 'a' => ];          // 前景色

    const BACKGROUND_COLOR = ['r' => , 'g' => , 'b' => , 'a' => ];    // 背景色

    public function __construct($config) {

        isset($config['generate'])      &&  $this->_generate        = $config['generate'];

        isset($config['encoding'])      &&  $this->_encoding        = $config['encoding'];

        isset($config['size'])          &&  $this->_size            = $config['size'];

        isset($config['logo'])          &&  $this->_logo            = $config['logo'];

        isset($config['logo_url'])      &&  $this->_logo_url        = $config['logo_url'];

        isset($config['logo_size'])     &&  $this->_logo_size       = $config['logo_size'];

        isset($config['title'])         &&  $this->_title           = $config['title'];

        isset($config['title_content']) &&  $this->_title_content   = $config['title_content'];

        isset($config['file_name'])     &&  $this->_file_name       = $config['file_name'];

    }

    /**

     * 生成二维码

     * @param $content //需要写入的内容

     * @return array | page input

     */

    public function createServer($content) {

        $this->_qr = new QrCode($content);

        $this->_qr->setSize($this->_size);

        $this->_qr->setWriterByName(self::WRITE_NAME);

        $this->_qr->setMargin(self::MARGIN);

        $this->_qr->setEncoding($this->_encoding);

        $this->_qr->setErrorCorrectionLevel(ErrorCorrectionLevel::HIGH);   // 容错率

        $this->_qr->setForegroundColor(self::FOREGROUND_COLOR);

        $this->_qr->setBackgroundColor(self::BACKGROUND_COLOR);

        // 是否需要title

        if ($this->_title) {

            $this->_qr->setLabel($this->_title_content, , null, LabelAlignment::CENTER);

        }

        // 是否需要logo

        if ($this->_logo) {

            $this->_qr->setLogoPath($this->_logo_url);

            $this->_qr->setLogoWidth($this->_logo_size);

        }

        $this->_qr->setValidateResult(false);

        if ($this->_generate == 'display') {

            // 展示二维码

            // 前端调用 例:<img src="http://localhost/qr.php?url=base64_url_string">

            header('Content-Type: ' . $this->_qr->getContentType());

            return $this->_qr->writeString();

        } else if ($this->_generate == 'writefile') {

            // 写入文件

            $file_name = $this->_file_name;

            return $this->generateImg($file_name);

        } else {

            return ['success' => false, 'message' => 'the generate type not found', 'data' => ''];

        }

    }

    /**

     * 生成文件

     * @param $file_name //目录文件 例: /tmp

     * @return array

     */

    public function generateImg($file_name) {

        $file_path = $file_name . DIRECTORY_SEPARATOR . uniqid() . '.' . self::WRITE_NAME;

        if (!file_exists($file_name)) {

            mkdir($file_name, , true);

        }

        try {

            $this->_qr->writeFile($file_path);

            $data = [

                'url' => $file_path,

                'ext' => self::WRITE_NAME,

            ];

            return ['success' => true, 'message' => 'write qrimg success', 'data' => $data];

        } catch (\Exception $e) {

            return ['success' => false, 'message' => $e->getMessage(), 'data' => ''];

        }

    }

}
3.调用
例:
<?php

/**

 * Created by PhpStorm.

 * User: cdjyj21

 * Date: 2018/9/4

 * Time: 11:57

 */

namespace app\test\controller;

use app\services\QrcodeServer;

class Qrcode

{

    /**

     * 直接输出二维码 + 生成二维码图片文件

     */

    public function create(){

        // 自定义二维码配置

        $config = [

            'title'         => true,

            'title_content' => 'test',

            'logo'          => true,

            'logo_url'      => './logo.png',

            'logo_size'     => ,

        ];

        // 直接输出

        $qr_url = 'http://www.baidu.com?id=' . rand(, );

        $qr_code = new QrcodeServer($config);

        $qr_img = $qr_code->createServer($qr_url);

        echo $qr_img;

        // 写入文件

        $qr_url = '这是个测试二维码';

        $file_name = './static/qrcode';  // 定义保存目录

        $config['file_name'] = $file_name;

        $config['generate']  = 'writefile';

        $qr_code = new QrcodeServer($config);

        $rs = $qr_code->createServer($qr_url);

        print_r($rs);

        exit;

    }

}
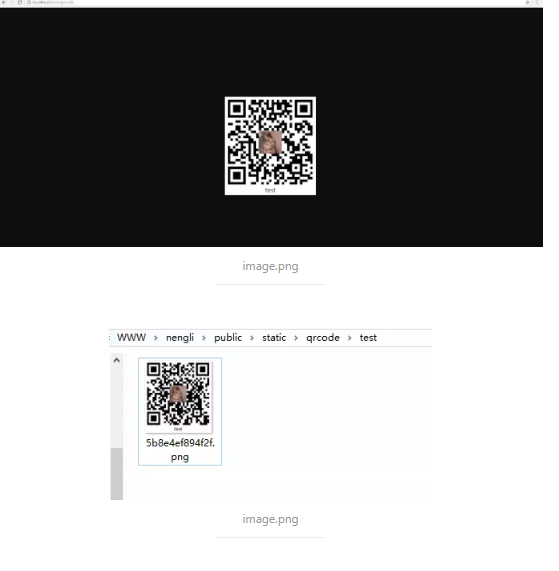
在浏览器中直接访问create()方法,会直接输出二维码,同时会在自定义保存目录下生成一张二维码图片。效果如下:
那这种直接输出的二维码怎么应用于项目中呢,一般都是直接写在html 中的 <img> 标签中,例如:
<img src="http://localhost:8080/projecttest/qrtest?id=1234" alt="这是一个二维码" />
这里罗列下我看懂的几个参数,也算给自己做个笔记吧。
| 参数名 | 描述 | 示例 |
|---|---|---|
| setText | 设置文本 | https://www.baidu.com |
| setSize | 设置二维码的大小,这里二维码应该是正方形的,所以相当于长宽 | 400 |
| setMargin | 设置二维码边距 | 10 |
| setForegroundColor | 设置前景色,RGB颜色 | array('r' => 0, 'g' => 0, 'b' => 0, 'a' => 0) |
| setBackgroundColor | 设置背景色,RGB颜色 | array('r' => 0, 'g' => 0, 'b' => 0, 'a' => 0) |
| setEncoding | 设置编码 | utf8 |
| setErrorCorrectionLevel | 设置错误级别(low / medium / quartile / high) | high |
| setLogoPath | 设置logo路径 | logo.png |
| setLogoWidth | 设置logo大小 | 50 |
| setLabel | 设置标签 | test |
| setLabelFontSize | 设置标签字体大小 | 16 |
| setLabelFontPath | 设置标签字体路径 | null |
| setLabelAlignment | 设置标签对齐方式(left / center / right) | center |
| setLabelMargin | 设置标签边距 | array('t' => 10,'r' => 20,'b' => 10,'l' => 30) |
| setWriterRegistry | ||
| setWriter | ||
| setWriterByName | 写入文件的后缀名 | png |
| setWriterByPath | ||
| setWriterByExtension | ||
| setValidateResult | ||
| writeString | ||
| writeDataUri | ||
| writeFile | 写入文件 | test.png |
thinkphp5 二维码生成 composer的更多相关文章
- thinkphp5 二维码生成
1.下载二维码插件Phpqrcode,地址 https://sourceforge.net/projects/phpqrcode/files/,把下载的文件夹放到\thinkphp\vendor下 2 ...
- 【thinkphp5.1】 endroid/qrcode 二维码生成
composer 链接: https://packagist.org/packages/endroid/qrcode 注意:PHP版本 要求 7.1+ 1. 使用 composer 安装 endroi ...
- PHP 自定义二维码生成
环境:PHP 7.*.* ,Composer 包管理工具.QrCode 效果如下: 使用 Composer 安装 QrCode QrCode 类库基于 php 的 GD 库,用于生成任意尺寸的二维码, ...
- [开源]C#二维码生成解析工具,可添加自定义Logo
二维码又称 QR Code,QR 全称 Quick Response,是一个近几年来移动设备上超流行的一种编码方式,它比传统的 Bar Code 条形码能存更多的信息,也能表示更多的数据类型:比如:字 ...
- 聊聊 Web 项目二维码生成的最佳姿势
在设计和实现的过程之后,你永远不知道部署上去的程序会已什么样的姿势运行. 本篇借一次生成二维码逻辑的不同实现,阐述 Web 项目中二维码生成的正确姿势. 文中如有批量,欢迎各位看客老爷拍砖.试运行前5 ...
- .NET 二维码生成(ThoughtWorks.QRCode)
引用ThoughtWorks.QRCode.dll (源代码里有) 1.简单二维码生成及解码代码: //生成二维码方法一 private void CreateCode_Simple(string n ...
- iOS开发 二维码生成
基于libqrencode的二维码生成 + (void)drawQRCode:(QRcode *)code context:(CGContextRef)ctx size:(CGFloat)size { ...
- PHP二维码生成的方法(google APi,PHP类库,libqrencode等)
原文地址: http://blog.csdn.net/liuxinmingcode/article/details/7910975 ================================== ...
- Android 二维码 生成和识别(附Demo源码)
今天讲一下目前移动领域很常用的技术——二维码.现在大街小巷.各大网站都有二维码的踪迹,不管是IOS. Android.WP都有相关支持的软件.之前我就想了解二维码是如何工作,最近因为工作需要使用相关技 ...
随机推荐
- JAVA 基础编程练习题7 【程序 7 处理字符串】
7 [程序 7 处理字符串] 题目:输入一行字符,分别统计出其中英文字母.空格.数字和其它字符的个数. 程序分析:利用 while 语句,条件为输入的字符不为'\n'. package cskaoya ...
- (转)Linux用户登录记录日志和相关查看命令汇总
原文地址:http://www.cnblogs.com/lizhaoxian/p/5981029.html # 1 utmp.wtmp.btmp文件 Linux用户登录信息放在三个文件中: 1 /va ...
- 转载:深入浅出 Java 8 Lambda 表达式
原文地址:http://viralpatel.net/blogs/Lambda-expressions-java-tutorial/ OneAPM for Java 能够深入到所有 Java 应用内部 ...
- Spring Cloud health节点通过注册中心扫描状态的简单实现
package com.zjs.web; import com.netflix.appinfo.InstanceInfo; import com.zjs.FallbackApiApplication; ...
- 计蒜客习题:蒜头君的积木 (状压DP 枚举子集)
问题描述 蒜头君酷爱搭积木,他用积木搭了 n 辆重量为 wi的小车和一艘最大载重量为 W 的小船,他想用这艘小船将 n 辆小车运输过河.每次小船运载的小车重量不能超过 W.另外,小船在运载小车时,每辆 ...
- input框改变默认样式
input[type="radio"] { width: 2rem; height: 2rem; -webkit-appearance: none; /*清除复选框默认样式*/ ...
- 【Python】【demo实验28】【练习实例】【递归函数练习】
原题: 有5个人坐在一起,问第五个人多少岁?他说比第4个人大2岁.问第4个人岁数,他说比第3个人大2岁.问第三个人,又说比第2人大两岁.问第2个人,说比第一个人大两岁.最后问第一个人,他说是10岁.请 ...
- xtrabackup备份失败(error writing file 'UNOPENED')
xtrabackup备份失败 解决了,是因为limit open files值设置太小了 (3)修改资源限制参数 vi /etc/security/limits.conf nproc:用户创建进程数限 ...
- VMware虚拟机下安装CentOS 6.10并配置访问外网
VMware安装包以及CentOS 6.5安装包 链接:https://pan.baidu.com/s/1wQi5GSgp4klXhtd84aoMSA 提取码:9l5y 链接:https://pan. ...
- idea的配置文件------application.properties和application.yml
当application.yml 和 application.properties 两个文件同时存在的时候,application.properties的优先级是高于application.yml的, ...