springboot学习入门简易版二---springboot2.0项目创建
2 springboot项目创建(5)
环境要求:jdk1.8+
项目结构: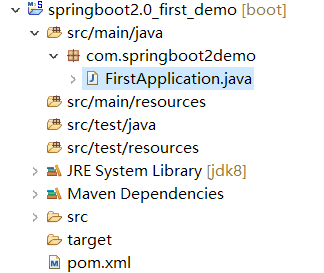
2.1创建maven工程
Group id :com.springbootdemo
Artifact id: springboot2.0_first_demo
Packaging: jar
2.2pom文件配置
<project xmlns="http://maven.apache.org/POM/4.0.0" xmlns:xsi="http://www.w3.org/2001/XMLSchema-instance" xsi:schemaLocation="http://maven.apache.org/POM/4.0.0 http://maven.apache.org/xsd/maven-4.0.0.xsd">

  <modelVersion>4.0.0</modelVersion>

  <groupId>com.springbootdemo</groupId>

  <artifactId>springboot2.0_first_demo</artifactId>

  <version>0.0.1-SNAPSHOT</version>

  <!-- spring-boot-starter-parent 整合第三方常用框架依赖信息(包含各种依赖信息) -->

  <parent>

      <groupId>org.springframework.boot</groupId>

      <artifactId>spring-boot-starter-parent</artifactId>

      <version>2.0.0.RELEASE</version>

  </parent>

  <!-- spring-boot-starter-web springboot整合springmvc web

      实现原理:maven依赖继承关系,相当于把第三方常用maven依赖信息,在parent项目中已封装

  -->

  <dependencies>

      <!-- 根据需要选择parent中封装的第三方框架 -->

      <dependency>

          <groupId>org.springframework.boot</groupId>

          <artifactId>spring-boot-starter-web</artifactId>

          <!-- 不需要写版本号,因为在parent中已封装好版本号 -->

      </dependency>

  </dependencies>

</project>
2.3创建测试类及启动类(6)
Springboot启动原理:使用springmvc注解方式启动(不需要xml配置文件)
2.3.1创建启动类和测试类
简洁起见,可将启动类和controller在同一个类中(一般分别创建controller类和启动类)
@RestController

@SpringBootApplication //或使用@EnableAutoConfiguration配置

//@EnableAutoConfiguration //自动配置,根据pom文件引入的依赖信息,自动配置对应的组件;扫包范围,默认在当前类中

public class FirstApplication {

    @RequestMapping("/test")

    public String test(){

        return "springboot2.0 first application";

    }

    /**

     * 程序入口

     *  SpringApplication.run 相当于java代码创建内置tomcat,加载springmvc注解启动

     * @param args

     */

    public static void main(String[] args) {

        SpringApplication.run(FirstApplication.class, args);

    }

}
2.3.2启动springboot项目
1 FirstApplication类--》右键-->run as或debug as--》java app或springboot app。
启动成功日志:
2019-05-12 12:10:58.560 INFO 12436 --- [ main] o.s.b.w.embedded.tomcat.TomcatWebServer : Tomcat started on port(s): 8080 (http) with context path ''
2019-05-12 12:10:58.563 INFO 12436 --- [ main] com.springboot2demo.FirstApplication : Started FirstApplication in 2.555 seconds (JVM running for 2.97)
2 页面访问
报错:
Whitelabel Error Page
This application has no explicit mapping for /error, so you are seeing this as a fallback.
Sun Apr 14 22:15:23 CST 2019
There was an unexpected error (type=Method Not Allowed, status=405).
Request method 'GET' not supported
Get方式不支持,修改类中的PostMapping为RequestMapping,方便测试。
重启再次访问成功:
springboot2.0 first application
git代码:https://github.com/cslj2013/springboot2.0_log_aop.git
springboot学习入门简易版二---springboot2.0项目创建的更多相关文章
- springboot学习入门简易版三---springboot2.0启动方式
2.4使用@componentscan方式启动 2.4.1 @EnableAutoConfiguration 默认只扫描当前类 @EnableAutoConfiguration 默认只扫描当前类,如果 ...
- springboot学习入门简易版四---springboot2.0静态资源访问及整合freemarker视图层
2.4.4 SpringBoot静态资源访问(9) Springboot默认提供静态资源目录位置需放在classpath下,目录名需要符合如下规则 /static /public /resourc ...
- springboot学习入门简易版八---springboot2.0多环境配置、整合mybatis mysql8+(19-20)
2.11 SpringBoot多环境配置(19) application.properties中配置 Spring.profiles.active=prd 配置环境: Application-dev ...
- springboot学习入门简易版六---springboot2.0整合全局捕获异常及log4j日志(12-13)
使用Aop实现 1创建异常请求 在原有项目基础上,jspController中创建一个可能发生异常的请求: /** * 全局捕获异常测试 * @param i * @return */ @Reques ...
- springboot学习入门简易版五---springboot2.0整合jsp(11)
springboot对jsp支持不友好,内部tomcat对jsp不支持,需要使用外部tomcat,且必须打包为war包. 1 创建maven项目 注意:必须为war类型,否则找不到页面. 且不要把js ...
- springboot学习入门简易版九---springboot2.0整合多数据源mybatis mysql8+(22)
一个项目中配置多个数据源(链接不同库jdbc),无限大,具体多少根据内存大小 项目中多数据源如何划分:分包名(业务)或注解方式.分包名方式类似多个不同的jar,同业务需求放一个包中. 分包方式配置多数 ...
- springboot学习入门简易版一---springboot2.0介绍
1.1为什么用springboot(2) 传统项目,整合ssm或ssh,配置文件,jar冲突,整合麻烦.Tomcat容器加载web.xml配置内容 springboot完全采用注解化(使用注解方式启动 ...
- springboot学习入门简易版七---springboot2.0使用@Async异步执行方法(17)
1启动类开启异步调用注解 @SpringBootApplication @EnableAsync //开启异步调用 public class StartApplication { 不开启则异步调用无效 ...
- angular入门一之环境安装及项目创建
angular入门一之环境安装及项目创建 1.安装node.js 下载,安装,在终端测试安装是否成功:node -v(查看nodejs版本) npm -v(查看npm版本) 下载地址:https:// ...
随机推荐
- Qt编写气体安全管理系统22-报警联动
一.前言 报警联动功能不是一个常规的功能,一般是给客户定制的功能,比如探测器采集到的数据报警了,不仅本地要播放报警声音,存储报警记录,发送报警短信和邮件,还需要触发警号面板灯进行报警,而警号面板指示灯 ...
- Django自定义用户认证系统之自定义用户模型
参考文档:http://python.usyiyi.cn/django/topics/auth/customizing.html Django 自带的认证系统足够应付大多数情况,但你或许不打算使用现成 ...
- linux中信号的API详解实例
/************************************************************************* > File Name: signal.c ...
- Spring切面编程AOP
- oracle 存储过程详细介绍(创建,删除存储过程,参数传递等)
这篇文章主要介绍了oracle 创建,删除存储过程,参数传递,创建,删除存储函数,存储过程和函数的查看,包,系统包等相关资料,需要的朋友可以参考下 oracle 创建,删除存储过程,参数传递,创建 ...
- htm5手机端实现拖动图片
htm5手机端实现拖动图片 <pre> <!doctype html><html><head> <title>Mobile Cookbook ...
- LocalDate LocalTime LocalDateTime Instant的操作与使用
一.简介 LocalDate表示当前(或指定)日期,格式为:yyyy-MM-dd LocalTime表示当前(或指定)时间,格式为:HH:mm:ss SSS LocalDateTime表示当前(或指定 ...
- EFCore 通过实体Model生成创建SQL Server数据库表脚本
在我们的项目中经常采用Model First这种方式先来设计数据库Model,然后通过Migration来生成数据库表结构,有些时候我们需要动态通过实体Model来创建数据库的表结构,特别是在创建像临 ...
- CentOS7 搭建 Consul 集群
环境准备: ssh shell工具: 远程连接 三个CentOS示例: 部署集群 配置好各个实例之间的网络访问,以及ssh免密登录. 下载&上传: 1.下载 Consul: Download ...
- hashCode和identifyHashCode的区别
API: System类提供一个identifyHashCode(Object o)的方法,该方法返回指定对象的精确hashCode值,也是根据该对象的地址计算得到的HashCode值.当某个类的ha ...