在 Ubuntu16.04上安装anaconda+Spyder+TensorFlow(支持GPU)
TensorFlow 官方文档中文版
http://www.tensorfly.cn/tfdoc/get_started/introduction.html
https://zhyack.github.io/posts/2016_09_30-Configurate-TensorFlow-On-Ubuntu.html
https://www.leiphone.com/news/201606/ORlQ7uK3TIW8xVGF.html
一、下载并安装Anaconda
下载方式
1.官方网站
目前最新版本Anaconda 4.3.1 For Linux。分Python3.6和2.7版本,32和64位 。选择合适版本
速度慢些
2.清华大学的Anaconda
速度快
在清华大学 TUNA 镜像源选择对应的操作系统与所需的Python版本下载Anaconda安装包。Windows环境下的安装包直接执行.exe文件进行安装即可,Ubuntu环境下在终端执行
$ bash Anaconda2-4.3.1-Linux-x86_64.sh #Python 2.7版本或者
$ bash Anaconda3-4.3.1-Linux-x86_64.sh #Python 3.5 版本安装方法
打开终端,进入Anaconda所在的文件夹下
运行该命令:bash Anaconda3-4.3.0-Linux-x86_64.sh
这里注意,如果提示权限问题,可使用:sudo bash Anaconda3-4.3.0-Linux-x86_64.sh
但是采用sudo这种方式会对接下来安装Tensorflow有点影响,下面细说。


Anaconda安装
在清华大学 TUNA 镜像源选择对应的操作系统与所需的Python版本下载Anaconda安装包。Windows环境下的安装包直接执行.exe文件进行安装即可,Ubuntu环境下在终端执行
$ bash Anaconda2-4.3.1-Linux-x86_64.sh #Python 2.7版本或者
$ bash Anaconda3-4.3.1-Linux-x86_64.sh #Python 3.5 版本在安装的过程中,会询问安装路径,按回车即可。之后会询问是否将Anaconda安装路径加入到环境变量(.bashrc)中,输入yes,这样以后在终端中输入python即可直接进入Anaconda的Python版本(如果你的系统中之前安装过Python,自行选择yes or no)。安装成功后,会有当前用户根目录下生成一个anaconda2的文件夹,里面就是安装好的内容
查询安装信息
$ conda info查询当前已经安装的库
$ conda list安装库(***代表库名称)
$ conda install ***更新库
$ conda update ***Anaconda仓库镜像
官方下载更新工具包的速度很慢,所以继续添加清华大学 TUNA提供的Anaconda仓库镜像,在终端或cmd中输入如下命令进行添加
$ conda config --add channels https://mirrors.tuna.tsinghua.edu.cn/anaconda/pkgs/free/

$ conda config --set show_channel_urls yes

$ conda install numpy   #测试是否添加成功
之后会自动在用户根目录生成“.condarc”文件,Ubuntu环境下路径为~/.condarc,Windows环境下路径为C:\用户\your_user_name\.condarc
channels:

 - https://mirrors.tuna.tsinghua.edu.cn/anaconda/pkgs/free/

 - defaults

show_channel_urls: yes
如果要删除镜像,直接删除“.condarc”文件即可
使用
1.安装好之后即可在终端输入spyder,类似pycharm的一个IDE
2.自带notebook IDE。打开方式,终端输入ipython notebook即可打开该IDE。关于notebook,可自行了解
3.Linux 本身安装的2.7版本仍然存在,Python3和anaconda合并
4.关于conda命令,终端输入conda list 即可查看已经安装的模块 。conda install * conda update *
5.综上,我们安装好以后,今后使用ipython即可,方便好用
在ubuntu上卸载anaconda的步骤 :
(一)删除整个anaconda目录:
由于Anaconda的安装文件都包含在一个目录中,所以直接将该目录删除即可。到包含整个anaconda目录的文件夹下,删除整个Anaconda目录:
rm -rf anaconda文件夹名
(二)建议清理下.bashrc中的Anaconda路径:
1.到根目录下,打开终端并输入:
sudo gedit ~/.bashrc
2.在.bashrc文件末尾用#号注释掉之前添加的路径(或直接删除):
#export PATH=/home/lq/anaconda3/bin:$PATH
保存并关闭文件
3.使其立即生效,在终端执行:
source ~/.bashrc
4.关闭终端,然后再重启一个新的终端,这一步很重要,不然在原终端上还是绑定有anaconda.
二、下载并安装Tensorflow
anaconda安装方式
$ conda create -n tensorflow

$ source activate tensorflow

$ pip install --ignore-installed --upgrade https://storage.googleapis.com/tensorflow/linux/cpu/tensorflow-1.1.0-cp36-cp36m-linux_x86_64.whl
这里,如果想安装其他版本(CPU only 和 GPU support 都有),参考
tensorflow on Ubuntu
注意:如果anaconda采用的是sudo 安装方式,则当前用户安装tensorflow时会提示权限不够,因为anaconda文件夹及其子文件(夹)的所有者和组都是root。这时需要修改:
$ sudo chown -R 用户 anaconda3/

$ sudo chgrp -R 用户 anaconda3/

(用户为自己用户名)
2. 建立一个tensorflow的运行环境
- # Python 2.7
- $ conda create -n tensorflow python=2.7
- # Python 3.4
- $ conda create -n tensorflow python=3.4
- # Python 3.5
- $ conda create -n tensorflow python=3.5
3.在conda环境中安装tensorflow
在conda环境中安装tensorflow的好处是可以便捷的管理tensorflow的依赖包。分为两个步骤:激活上一步建立的名为tensorflow的conda环境;用conda或者pip工具安装Tensorflow,作者选择的是pip方式。
3.1 pip方式
pip方式需要首先激活conda环境
- $ source activate tensorflow
然后根据要安装的不同tensorflow版本选择对应的一条环境变量设置export语句(操作系统,Python版本,CPU版本还是CPU+GPU版本)- # Ubuntu/Linux 64-bit, CPU only, Python 2.7
- (tensorflow)$ export TF_BINARY_URL=https://storage.googleapis.com/tensorflow/linux/cpu/tensorflow-0.10.0-cp27-none-linux_x86_64.whl
- # Ubuntu/Linux 64-bit, GPU enabled, Python 2.7
- # Requires CUDA toolkit 7.5 and CuDNN v5. For other versions, see "Install from sources" below.
- (tensorflow)$ export TF_BINARY_URL=https://storage.googleapis.com/tensorflow/linux/gpu/tensorflow-0.10.0-cp27-none-linux_x86_64.whl
- # Mac OS X, CPU only, Python 2.7:
- (tensorflow)$ export TF_BINARY_URL=https://storage.googleapis.com/tensorflow/mac/cpu/tensorflow-0.10.0-py2-none-any.whl
- # Mac OS X, GPU enabled, Python 2.7:
- (tensorflow)$ export TF_BINARY_URL=https://storage.googleapis.com/tensorflow/mac/gpu/tensorflow-0.10.0-py2-none-any.whl
- # Ubuntu/Linux 64-bit, CPU only, Python 3.4
- (tensorflow)$ export TF_BINARY_URL=https://storage.googleapis.com/tensorflow/linux/cpu/tensorflow-0.10.0-cp34-cp34m-linux_x86_64.whl
- # Ubuntu/Linux 64-bit, GPU enabled, Python 3.4
- # Requires CUDA toolkit 7.5 and CuDNN v5. For other versions, see "Install from sources" below.
- (tensorflow)$ export TF_BINARY_URL=https://storage.googleapis.com/tensorflow/linux/gpu/tensorflow-0.10.0-cp34-cp34m-linux_x86_64.whl
- # Ubuntu/Linux 64-bit, CPU only, Python 3.5
- (tensorflow)$ export TF_BINARY_URL=https://storage.googleapis.com/tensorflow/linux/cpu/tensorflow-0.10.0-cp35-cp35m-linux_x86_64.whl
- # Ubuntu/Linux 64-bit, GPU enabled, Python 3.5
- # Requires CUDA toolkit 7.5 and CuDNN v5. For other versions, see "Install from sources" below.
- (tensorflow)$ export TF_BINARY_URL=https://storage.googleapis.com/tensorflow/linux/gpu/tensorflow-0.10.0-cp35-cp35m-linux_x86_64.whl
- # Mac OS X, CPU only, Python 3.4 or 3.5:
- (tensorflow)$ export TF_BINARY_URL=https://storage.googleapis.com/tensorflow/mac/cpu/tensorflow-0.10.0-py3-none-any.whl
- # Mac OS X, GPU enabled, Python 3.4 or 3.5:
- (tensorflow)$ export TF_BINARY_URL=https://storage.googleapis.com/tensorflow/mac/gpu/tensorflow-0.10.0-py3-none-any.whl
最后根据是python 2还是3版本选择一句进行安装。
- # Python 2
- (tensorflow)$ pip install --ignore-installed --upgrade $TF_BINARY_URL
- # Python 3
- (tensorflow)$ pip3 install --ignore-installed --upgrade $TF_BINARY_URL
3.2 conda方式
conda上面目前有人已经做好了tensorflow的pkg,但是版本不一定最新,且只有CPU版本,不支持GPU。
步骤也是首先激活conda环境,然后调用conda install 语句安装.
- $ source activate tensorflow
- (tensorflow)$ # Your prompt should change
- # Linux/Mac OS X, Python 2.7/3.4/3.5, CPU only:
- (tensorflow)$ conda install -c conda-forge tensorflow
上面的步骤完成后,从conda环境中退出:
- (tensorflow)$ source deactivate
4. 测试安装
- $ source activate tensorflow
- (tensorflow)$ # Your prompt should change.
- # Run Python programs that use TensorFlow.
- ...
- # When you are done using TensorFlow, deactivate the environment.
- (tensorflow)$ source deactivate
tensorflow自带几个示例程序,详细位置如下:
…/anaconda2/envs/tensorflow/lib/python2.7/site-packages/tensorflow/models
Anaconda2是Anaconda的安装位置,第一个tensorflow为conda创建的名字为tensorflow的环境,第二个tensorflow即安装的tensorflow包。进入image下的mnist目录,然后运行python convolutional.py就是对mnist的训练过程。
5. spyder里import tensorflow报错显示没有tensorflow模块解决
安装完anaconda后anaconda会自带spyder这个IDE,但是我们在打开这个IDE输入import tensorflow会显示没有TensorFlow这个模块的错误,不对啊,明明我们已经安装了TensorFlow,而且在终端下也测试了没问题啊。这里我也查看了网上关于这个问题地许多教程,感觉都不太明朗,这里给出我不知在哪儿看到的解决方案:
之所以会出现这个问题大概是anaconda自带的spyder没有工作在tensorflow环境下的原因。想要在TensorFlow环境下使用spyder,那就在tensorflow环境下再安装一个spyder嘛。好,那我们开始安装。
在tensorflow环境下,在终端用conda安装spyder。输入一下命令:
conda install spyder然后会看见安装目录位于我们之前建好的tensorflow环境下,也会看到安装spyder会安装许多依赖包,然后输入y,大概10分钟后就安装好了。这时我们在终端输入spyder打开spyder,在IPython console下输入import tensorflow,如果没有报错则表明安装成功了。
总结:
注意每次要使用tensorflow时,一定要先在终端激活tensorflow环境:source activate tensorflow 然后输入spyder打开spyder,这里的这个spyder是tensorflow环境下的spyder,不使用tensorflow时使用以下命令关掉tensorflow环境source deactivate
在anaconda中创建了一个环境tensorflow,里面安装了tensorflow。
# 创建一个环境

conda create --name tensorflow python=2.7

# 使用一个环境

source activate tensorflow然后在这个环境下打开spyder。然后import tensorflow,报错,说找不到tensorflow。
解决办法是在tensorflow这个环境下,安装spyder。

然后在这个环境下打开spyder:

这样就可以在spyder中使用tensorflow了:

sudo pip install spyder conda install QtPy conda install Pylint
test code:
from skimage import io img=io.imread('d:/dog.jpg') io.imshow(img)
将其中的d:/dog.jpg 改成你的图片位置
然后点击上面工具栏里的绿色三角进行运行,最终显示

如果右下角“ Ipython console" 能显示出图片,说明我们的运行环境安装成功。
我们可以选择右上角的 ” variable explorer" 来查看图片信息,如

我们可以把这个程序保存起来,注意python脚本文件的后缀名为py.
Protobuf pip 包 3.1
如果没有遇到和 protobuf pip 包相关的问题,你可以跳过这个部分。
注意: 如果你的 TensorFlow 运行缓慢,你可能遇到了一个 protobuf pip 包相关的问题。
TensorFlow pip 包依赖于 protobuf pip 包 3.1。 从 PyPI 下载的 protobuf 是 proto 序列化/反序列化的纯 Python 实现的库, 其速度比 C++ 实现慢10-50倍。Protobuf 支持二进制扩展,速度更快,基于 C++。 但该扩展无法在纯Python实现的 pip 包中获取。我们制作了包含该二进制扩展的protobuf pip 包。 如下命令可安装该自定义的 protobuf pip 包:
for Python 2.7:
$ pip install --upgrade \

https://storage.googleapis.com/tensorflow/linux/cpu/protobuf-3.1.0-cp27-none-linux_x86_64.whl
for Python 3.5:
$ pip3 install --upgrade \

https://storage.googleapis.com/tensorflow/linux/cpu/protobuf-3.1.0-cp35-none-linux_x86_64.whl
安装这个 protobuf 包会覆盖已经存在的 protobuf 包。 注意该二进制 pip 包已经支持大于 64MB 的问题,修复了如下问题:
[libprotobuf ERROR google/protobuf/src/google/protobuf/io/coded_stream.cc:207]

Protocol message 被拒绝,因为太大(大于 67108864 字节)。

为增大限制或禁用报警,

在 google/protobuf/io/coded_stream.h 中查看 CodedInputStream::SetTotalBytesLimit()
Spyder报错:
import tensorflow as tf
Traceback (most recent call last):
File "<ipython-input-1-41389fad42b5>", line 1, in <module>
import tensorflow as tf
File "/home/jz/anaconda2/lib/python2.7/site-packages/tensorflow/__init__.py", line 24, in <module>
from tensorflow.python import *
File "/home/jz/anaconda2/lib/python2.7/site-packages/tensorflow/python/__init__.py", line 49, in <module>
from tensorflow.python import pywrap_tensorflow
File "/home/jz/anaconda2/lib/python2.7/site-packages/tensorflow/python/pywrap_tensorflow.py", line 52, in <module>
raise ImportError(msg)
ImportError: Traceback (most recent call last):
File "/home/jz/anaconda2/lib/python2.7/site-packages/tensorflow/python/pywrap_tensorflow.py", line 41, in <module>
from tensorflow.python.pywrap_tensorflow_internal import *
File "/home/jz/anaconda2/lib/python2.7/site-packages/tensorflow/python/pywrap_tensorflow_internal.py", line 28, in <module>
_pywrap_tensorflow_internal = swig_import_helper()
File "/home/jz/anaconda2/lib/python2.7/site-packages/tensorflow/python/pywrap_tensorflow_internal.py", line 24, in swig_import_helper
_mod = imp.load_module('_pywrap_tensorflow_internal', fp, pathname, description)
ImportError: libcudnn.so.6: cannot open shared object file: No such file or directory
Failed to load the native TensorFlow runtime.
See https://www.tensorflow.org/install/install_sources#common_installation_problems
for some common reasons and solutions. Include the entire stack trace
above this error message when asking for help.
问题描述:
进入python3,然后import tensorflow,无法import,错误代码:libcudnn.so.6:cannot open sharedobject file: No such file or directory
问题解决:
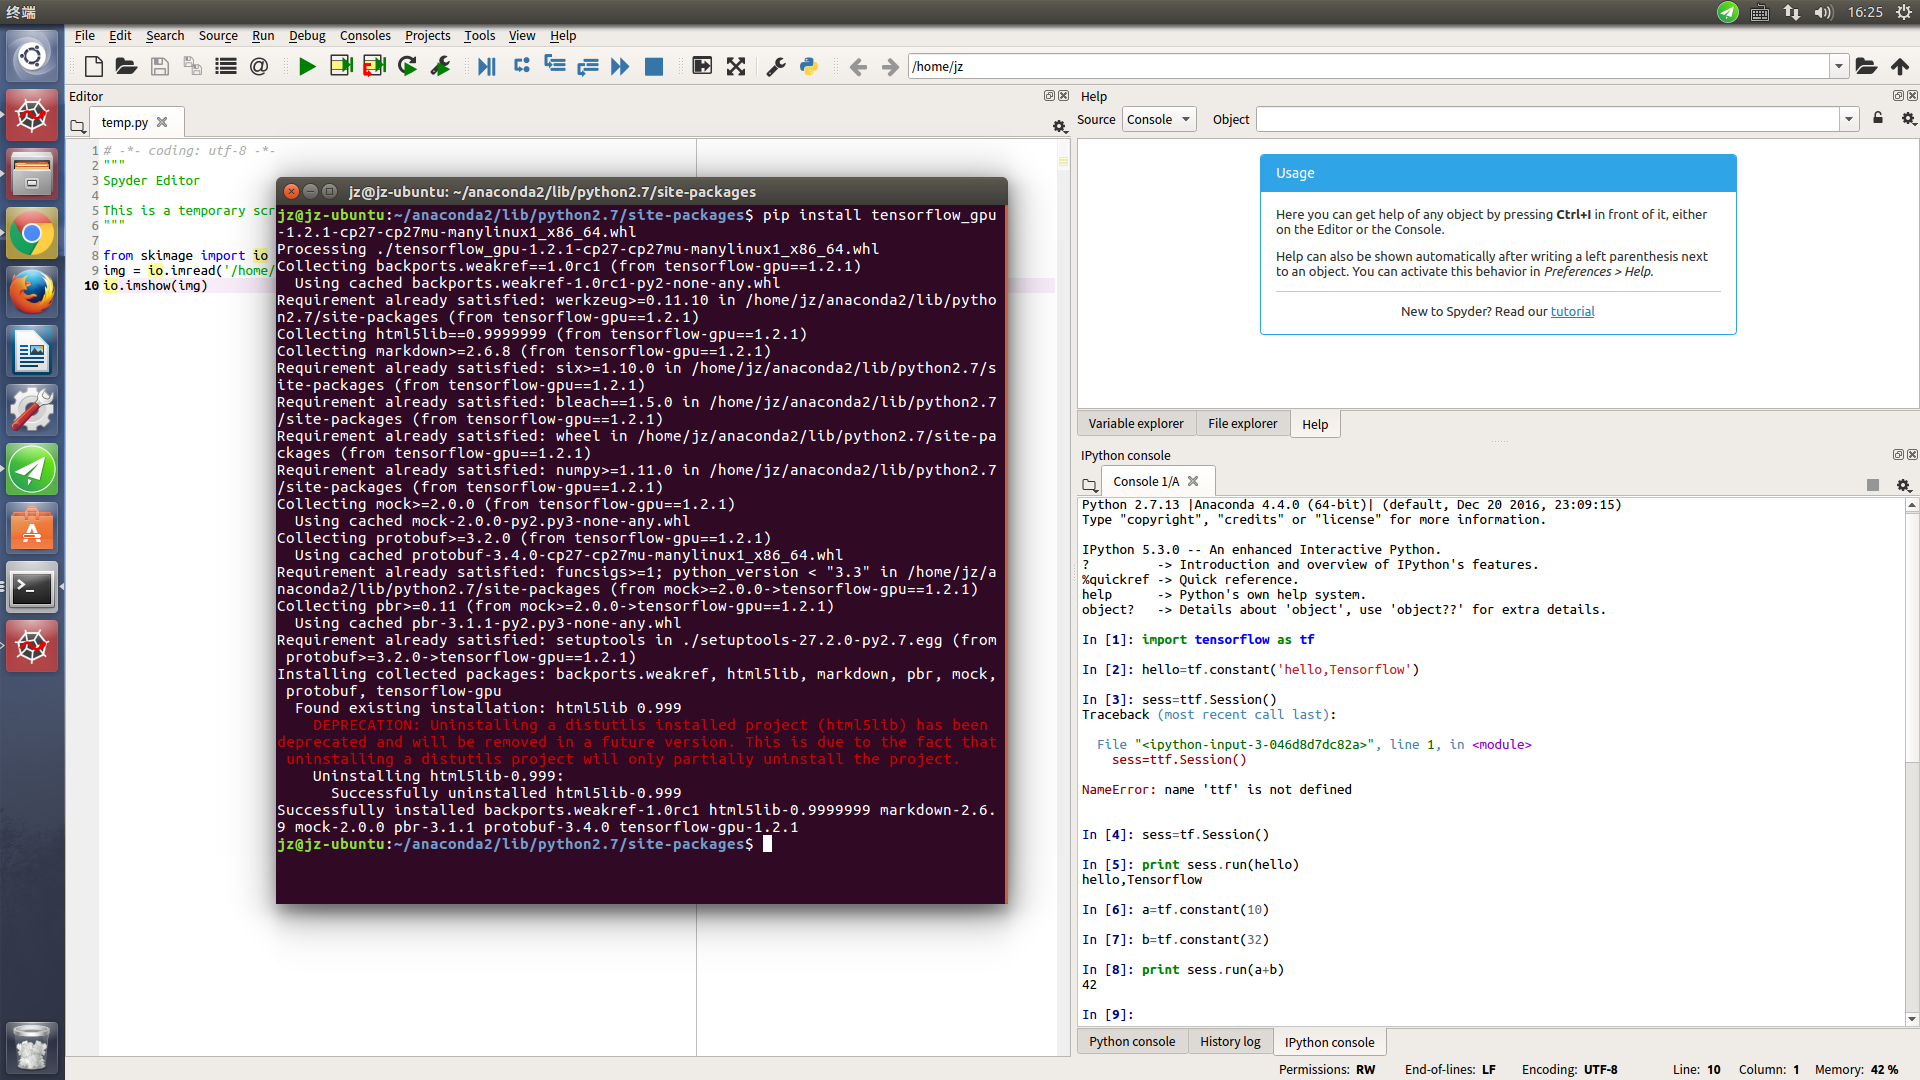
pip uninstall tensorflow-gpupip install tensorflow-gpu==1.2问题解释:
根据错误代码,应该是找不到libcudnn.so.6。这个时候笔者就没有注意最后是6而不是5,就开始各种试路径啊,硬链接软链接啥的。实质上是因为当前时间(2017.8),虽然tensorflow官网install教程里面说的是安装cudnn5.1,而tensorflow-gpu1.3已经开始去找cudnn6了(也就是说是用cudnn6编译的)。。。 理论上可以安装cudnn6试试看,但笔者本身没有追逐最新版的习惯(天知道还有什么新坑),所以直接换到了tensorflow-gpu1.2版本,就解决问题了。
另注:通常情况下这类问题是真的找不到文件,而不是找错文件。这个时候笔者通常会先查一下各种路径有没有设置错误(写错啊,路径之间的冒号啊),然后去指定路径看看有没有这个文件,最后去查一下链接问题(这个就有些复杂了,而且改动起来有风险,建议备份先)。
3.安装tensorflow
虽然谷歌官网推荐使用anaconda的安全环境安装,但是我觉的太麻烦,想用ipython notebook 或者 spyder 就很麻烦,不如直接安装进去 site-packages

所以这里 不用直接 进入终端,
# Python 2.7

$ conda create -n tensorflow python=2.7
$ source activate tensorflow
(tensorflow)$ # Your prompt should change
# Ubuntu/Linux 64-bit, CPU only:

(tensorflow)$ pip install --ignore-installed --upgrade https://storage.googleapis.com/tensorflow/linux/cpu/tensorflow-0.8.0rc0-cp27-none-linux_x86_64.whl

# Ubuntu/Linux 64-bit, GPU enabled. Requires CUDA toolkit 7.5 and CuDNN v4.  For

# other versions, see "Install from sources" below.

(tensorflow)$ pip install --ignore-installed --upgrade https://storage.googleapis.com/tensorflow/linux/gpu/tensorflow-0.8.0rc0-cp27-none-linux_x86_64.whl
打开你的anaconda文件夹,找到envs 打开tensorflow 将sitepack-ages里面的东西都考到 anaconda/lib/python2.7/sitepack-ages
4.运行tensorflow
打开终端,输入 spyder 或者ipython notebook 就可以实验了
5.今天发现新办法,安装了anaconda之后
在终端直接输入:conda install -c https://conda.anaconda.org/jjhelmus tensorflow 就可以了,不用那么麻烦了,因为将虚拟环境中一出来可能使conda命令失效,安装了anaconda之后

如果说权限不够的, 可以 使用指令: sudo chmod 777 -R anaconda2  之后就可以安装tensorflow了
6.其余解决办法:
如果你试了上面几种办法都不好用,那么可以下载tensorflow
https://storage.googleapis.com/tensorflow/linux/cpu/tensorflow-0.8.0rc0-cp27-none-linux_x86_64.whl,将whl文件放到你的anaconda2/lib/python2.7/site-packages/ 里面,然后打开终端: pip install
tensorflow-0.8.0rc0-cp27-none-linux_x86_64.whl 就可以了
13:test
在test之前,开启gpu支持
$ export LD_LIBRARY_PATH="$LD_LIBRARY_PATH:/usr/local/cuda/lib64:/usr/local/cuda/extras/CUPTI/lib64"

$ export CUDA_HOME=/usr/local/cuda
2017-9-15日更(成功)
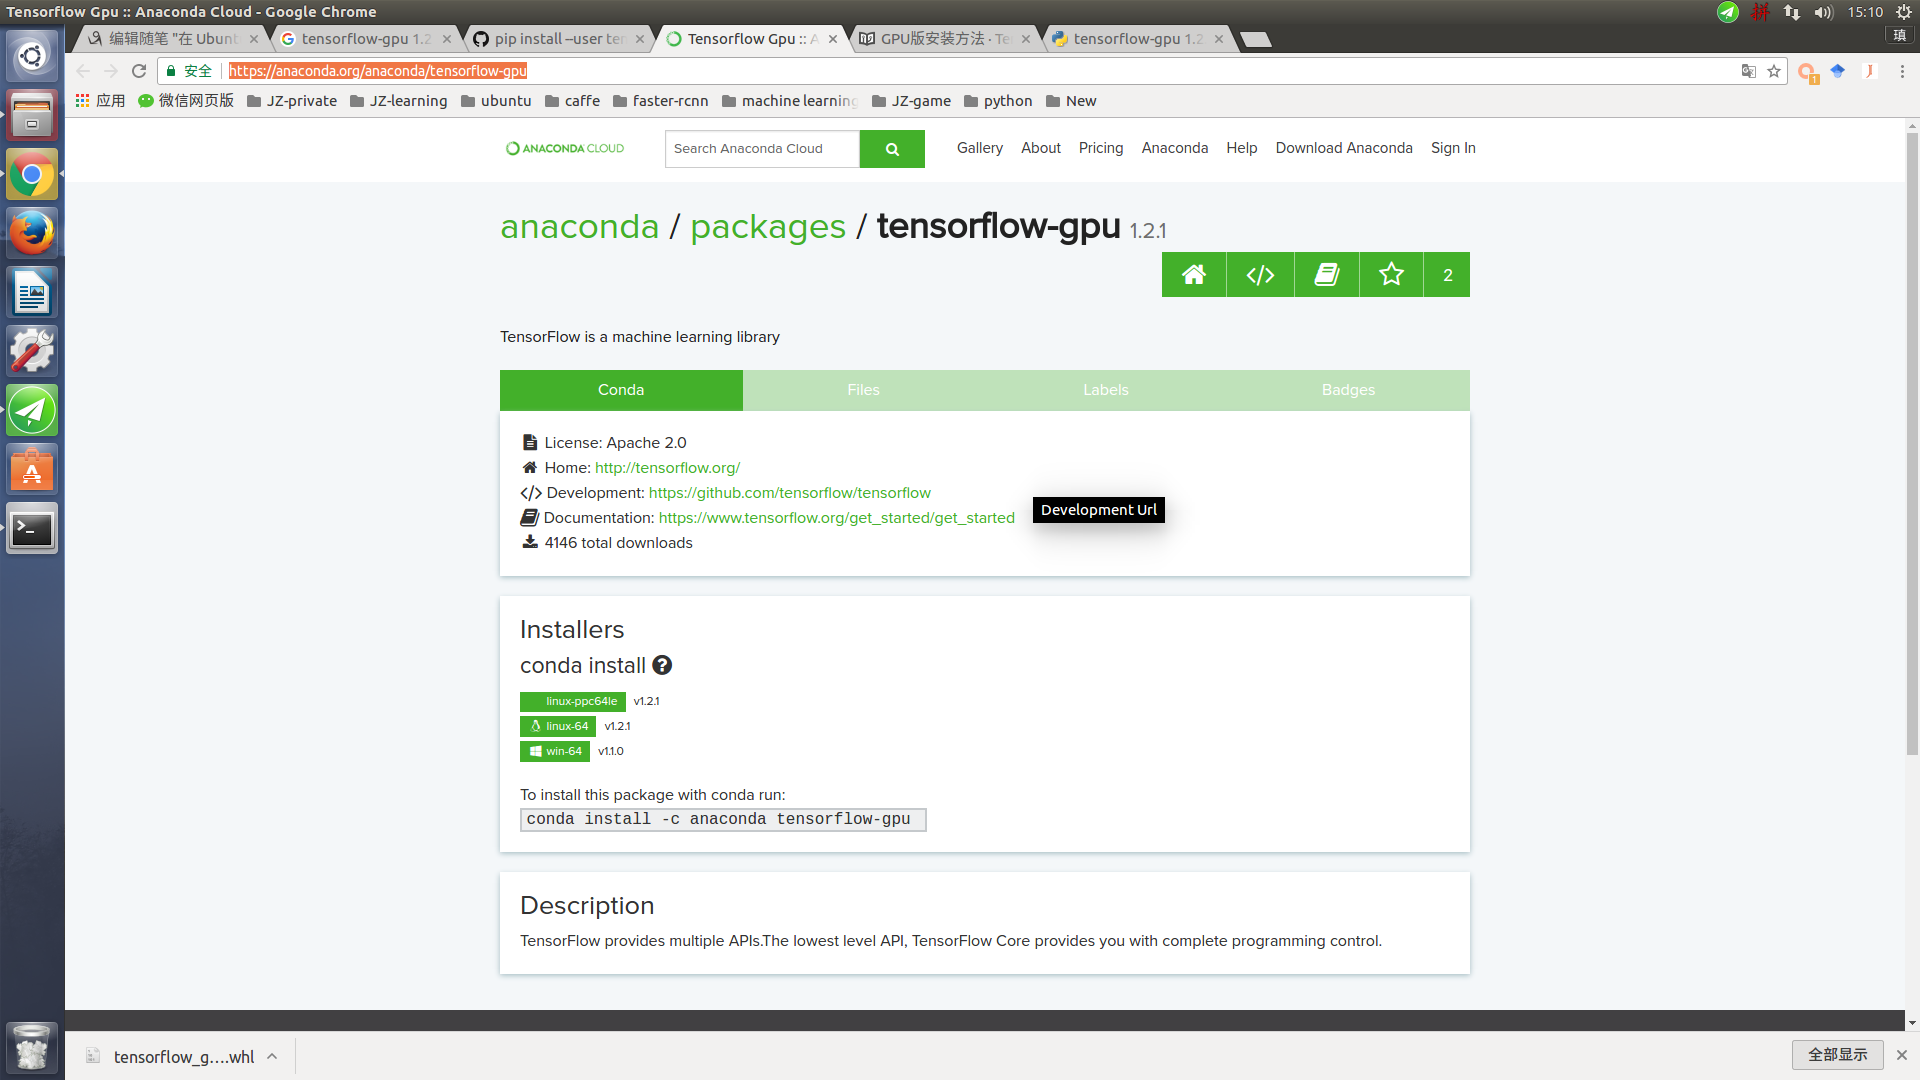
下载1.2版本的whl文件:https://pypi.python.org/pypi/tensorflow-gpu/1.2.1
或者https://anaconda.org/anaconda/tensorflow-gpu
TensorBoard
TensorBoard的官网教程如下:
https://www.tensorflow.org/versions/r0.7/how_tos/summaries_and_tensorboard/index.html
简单解释下:TensorBoard是个可视化工具,可以用来查看TensorFlow的图以及过程中的各种值和图像等。
1. 在tensorflow程序中给需要的节点添加“summary operations”,“summary operations”会收集该节点的数据,并标记上第几步、时间戳等标识,写入事件文件。
事件文件的形式如下所示:

2. TensorBoard读取事件文件,并可视化Tensorflow的流程。
Demo演示
- 利用官网提供的例子进行演示,官方例子提供了一个基于mnist的例子,我的文件的路径如下:
~/libsource/tensorflow/tensorflow/examples/tutorials/mnist,
其中~/libsource/tensorflow/改为用户自己的tensorflow路径即可。
上述目录下有一个mnist_with_summaries.py文件,即为加入了“summary operations”的mnist demo。 - 启动mnist_with_summaries.py,
python mnist_with_summaries.py

mnist_with_summaries.py的源码如下:
# Copyright 2015 The TensorFlow Authors. All Rights Reserved.

#

# Licensed under the Apache License, Version 2.0 (the 'License');

# you may not use this file except in compliance with the License.

# You may obtain a copy of the License at

#

#     http://www.apache.org/licenses/LICENSE-2.0

#

# Unless required by applicable law or agreed to in writing, software

# distributed under the License is distributed on an 'AS IS' BASIS,

# WITHOUT WARRANTIES OR CONDITIONS OF ANY KIND, either express or implied.

# See the License for the specific language governing permissions and

# limitations under the License.

# ==============================================================================

"""A simple MNIST classifier which displays summaries in TensorBoard.

 This is an unimpressive MNIST model, but it is a good example of using

tf.name_scope to make a graph legible in the TensorBoard graph explorer, and of

naming summary tags so that they are grouped meaningfully in TensorBoard.

It demonstrates the functionality of every TensorBoard dashboard.

"""

from __future__ import absolute_import

from __future__ import division

from __future__ import print_function

import tensorflow as tf

from tensorflow.examples.tutorials.mnist import input_data

flags = tf.app.flags

FLAGS = flags.FLAGS

flags.DEFINE_boolean('fake_data', False, 'If true, uses fake data '

                     'for unit testing.')

flags.DEFINE_integer('max_steps', 1000, 'Number of steps to run trainer.')

flags.DEFINE_float('learning_rate', 0.001, 'Initial learning rate.')

flags.DEFINE_float('dropout', 0.9, 'Keep probability for training dropout.')

flags.DEFINE_string('data_dir', '/tmp/data', 'Directory for storing data')

flags.DEFINE_string('summaries_dir', '/tmp/mnist_logs', 'Summaries directory')

def train():

  # Import data

  mnist = input_data.read_data_sets(FLAGS.data_dir,

                                    one_hot=True,

                                    fake_data=FLAGS.fake_data)

  sess = tf.InteractiveSession()

  # Create a multilayer model.

  # Input placehoolders

  with tf.name_scope('input'):

    x = tf.placeholder(tf.float32, [None, 784], name='x-input')

    y_ = tf.placeholder(tf.float32, [None, 10], name='y-input')

  with tf.name_scope('input_reshape'):

    image_shaped_input = tf.reshape(x, [-1, 28, 28, 1])

    tf.image_summary('input', image_shaped_input, 10)

  # We can't initialize these variables to 0 - the network will get stuck.

  def weight_variable(shape):

    """Create a weight variable with appropriate initialization."""

    initial = tf.truncated_normal(shape, stddev=0.1)

    return tf.Variable(initial)

  def bias_variable(shape):

    """Create a bias variable with appropriate initialization."""

    initial = tf.constant(0.1, shape=shape)

    return tf.Variable(initial)

  def variable_summaries(var, name):

    """Attach a lot of summaries to a Tensor."""

    with tf.name_scope('summaries'):

      mean = tf.reduce_mean(var)

      tf.scalar_summary('mean/' + name, mean)

      with tf.name_scope('stddev'):

        stddev = tf.sqrt(tf.reduce_sum(tf.square(var - mean)))

      tf.scalar_summary('sttdev/' + name, stddev)

      tf.scalar_summary('max/' + name, tf.reduce_max(var))

      tf.scalar_summary('min/' + name, tf.reduce_min(var))

      tf.histogram_summary(name, var)

  def nn_layer(input_tensor, input_dim, output_dim, layer_name, act=tf.nn.relu):

    """Reusable code for making a simple neural net layer.

    It does a matrix multiply, bias add, and then uses relu to nonlinearize.

    It also sets up name scoping so that the resultant graph is easy to read,

    and adds a number of summary ops.

    """

    # Adding a name scope ensures logical grouping of the layers in the graph.

    with tf.name_scope(layer_name):

      # This Variable will hold the state of the weights for the layer

      with tf.name_scope('weights'):

        weights = weight_variable([input_dim, output_dim])

        variable_summaries(weights, layer_name + '/weights')

      with tf.name_scope('biases'):

        biases = bias_variable([output_dim])

        variable_summaries(biases, layer_name + '/biases')

      with tf.name_scope('Wx_plus_b'):

        preactivate = tf.matmul(input_tensor, weights) + biases

        tf.histogram_summary(layer_name + '/pre_activations', preactivate)

      activations = act(preactivate, 'activation')

      tf.histogram_summary(layer_name + '/activations', activations)

      return activations

  hidden1 = nn_layer(x, 784, 500, 'layer1')

  with tf.name_scope('dropout'):

    keep_prob = tf.placeholder(tf.float32)

    tf.scalar_summary('dropout_keep_probability', keep_prob)

    dropped = tf.nn.dropout(hidden1, keep_prob)

  y = nn_layer(dropped, 500, 10, 'layer2', act=tf.nn.softmax)

  with tf.name_scope('cross_entropy'):

    diff = y_ * tf.log(y)

    with tf.name_scope('total'):

      cross_entropy = -tf.reduce_mean(diff)

    tf.scalar_summary('cross entropy', cross_entropy)

  with tf.name_scope('train'):

    train_step = tf.train.AdamOptimizer(FLAGS.learning_rate).minimize(

        cross_entropy)

  with tf.name_scope('accuracy'):

    with tf.name_scope('correct_prediction'):

      correct_prediction = tf.equal(tf.argmax(y, 1), tf.argmax(y_, 1))

    with tf.name_scope('accuracy'):

      accuracy = tf.reduce_mean(tf.cast(correct_prediction, tf.float32))

    tf.scalar_summary('accuracy', accuracy)

  # Merge all the summaries and write them out to /tmp/mnist_logs (by default)

  merged = tf.merge_all_summaries()

  train_writer = tf.train.SummaryWriter(FLAGS.summaries_dir + '/train',

                                        sess.graph)

  test_writer = tf.train.SummaryWriter(FLAGS.summaries_dir + '/test')

  tf.initialize_all_variables().run()

  # Train the model, and also write summaries.

  # Every 10th step, measure test-set accuracy, and write test summaries

  # All other steps, run train_step on training data, & add training summaries

  def feed_dict(train):

    """Make a TensorFlow feed_dict: maps data onto Tensor placeholders."""

    if train or FLAGS.fake_data:

      xs, ys = mnist.train.next_batch(100, fake_data=FLAGS.fake_data)

      k = FLAGS.dropout

    else:

      xs, ys = mnist.test.images, mnist.test.labels

      k = 1.0

    return {x: xs, y_: ys, keep_prob: k}

  for i in range(FLAGS.max_steps):

    if i % 10 == 0:  # Record summaries and test-set accuracy

      summary, acc = sess.run([merged, accuracy], feed_dict=feed_dict(False))

      test_writer.add_summary(summary, i)

      print('Accuracy at step %s: %s' % (i, acc))

    else:  # Record train set summaries, and train

      if i % 100 == 99:  # Record execution stats

        run_options = tf.RunOptions(trace_level=tf.RunOptions.FULL_TRACE)

        run_metadata = tf.RunMetadata()

        summary, _ = sess.run([merged, train_step],

                              feed_dict=feed_dict(True),

                              options=run_options,

                              run_metadata=run_metadata)

        train_writer.add_run_metadata(run_metadata, 'step%d' % i)

        train_writer.add_summary(summary, i)

        print('Adding run metadata for', i)

      else:  # Record a summary

        summary, _ = sess.run([merged, train_step], feed_dict=feed_dict(True))

        train_writer.add_summary(summary, i)

def main(_):

  if tf.gfile.Exists(FLAGS.summaries_dir):

    tf.gfile.DeleteRecursively(FLAGS.summaries_dir)

  tf.gfile.MakeDirs(FLAGS.summaries_dir)

  train()

if __name__ == '__main__':

  tf.app.run()
其中
flags.DEFINE_string('summaries_dir', '/tmp/mnist_logs', 'Summaries directory')标识了事件文件的输出路径。该例中,输出路径为/tmp/mnist_logs
- 打开TensorBoard服务
tensorboard --logdir=/tmp/mnist_logs/

- 在浏览器中进行浏览http://0.0.0.0:6006,在这个可视化界面中,可以查看tensorflow图和各种中间输出等。

Error 2 Bug解决
通过pip方式安装的tensorflow,在使用tensorboard的时候,可能会出现如下Bug:
WARNING:tensorflow:IOError [Errno 2] No such file or directory: '/usr/local/lib/python2.7/dist-packages/tensorflow/tensorboard/TAG' on path /usr/local/lib/python2.7/dist-packages/tensorflow/tensorboard/TAG

WARNING:tensorflow:Unable to read TensorBoard tag

Starting TensorBoard  on port 6006
解决方案:
下载tensorflow的github的源代码,将tensorflow的tensorboard目录下的TAG文件拷贝到python下面的tensorboard目录下即可,我的目录如下:
sudo cp ~/libsource/tensorflow/tensorflow/tensorflow/tensorboard/TAG /usr/local/lib/python2.7/dist-packages/tensorflow/tensorboard/在 Ubuntu16.04上安装anaconda+Spyder+TensorFlow(支持GPU)的更多相关文章
- Ubuntu16.04上安装neo4j数据库
什么是neo4j数据库? neo4j数据库是图数据库的一种,属于nosql的一种,常见的nosql数据库还有redis.memcached.mongDB等,不同于传统的关系型数据库,nosql数据也有 ...
- 在ubuntu16.04上安装eclipse
在ubuntu16.04上安装eclipse 一.下载 首先我们需要安装jdk1.8及其以上,然后从官网:https://www.eclipse.org/downloads/上下载,需要注意 ...
- Ubuntu16.04上安装cudnn教程和opencv
https://blog.csdn.net/wang15061955806/article/details/80791112 Ubuntu16.04上安装cudnn教程 2018年06月24日 14: ...
- 通过Anaconda在Ubuntu16.04上安装 TensorFlow(GPU版本)
一. 安装环境 Ubuntu16.04.3 LST GPU: GeForce GTX1070 Python: 3.5 CUDA Toolkit 8.0 GA1 (Sept 2016) cuDNN v6 ...
- Ubuntu16.04 上安装MySQL5.7
Ubuntu版本:16.04.4 1.先更新最新的源 sudo apt-get update 2.查看是否已经安装过mysql sudo netstat -tap | grep mysq 如果没有安装 ...
- ubuntu16.04上安装配置DHCP服务的详细过程
DHCP服务器是为客户端机器分配IP地址的,所有分配的IP地址都保存在DHCP服务器的数据库中.为了在子网中实现DHCP分配IP地址,需要在目标主机上安装配置DHCP服务 1. 安装DHCP服务 安装 ...
- MacOS上安装Anaconda+Pycharm+TensorFlow+Keras
一.安装Anaconda 登录https://www.anaconda.com/download/#macos,下载Anaconda3-5.3.1-MacOSX-x86_64.pkg 二.安装Pych ...
- ubuntu16.04上安装深度学习基本框架caffe2 pytorch tensorflow opencv
anaconda3.5.2.0----python3.6: conda install tensorflow-gpu -y --prefix /media/wkr/diskHgst/ubun ...
- 在Ubuntu16.04上安装virtualbox后无法装载vboxdrv模块
首先按照:http://blog.csdn.net/ipsecvpn/article/details/52175279 这个网址上的教程安装, 安装完成后报错:大体意思就是vboxdrv没有被内核装载 ...
随机推荐
- JY播放器【喜马拉雅FM电脑端,附带下载功能】
今天给大家带来一款神器----JY播放器.可以不用打开网页就在电脑端听喜马拉雅FM的节目,而且可以直接下载,对于我这种强迫症患者来说真的是神器.我是真的不喜欢电脑任务栏上面密密麻麻的. 目前已经支持平 ...
- RyuBook1.0案例一:Switching Hub项目源码分析
开发目标 实现一个带MAC地址学习功能的二层交换机 Openflow交换机与Openflow控制器安全通道建立步骤 switch and controller建立未加密TCP连接或者加密的TLS连接 ...
- 宿主机ssh免密登录docker容器
一.检查系统内核 二.安装docker 1.yum install docker -y 2.docker version #查看docker版本 3.syste ...
- asp之GetArray提取链接地址,以$Array$分隔的代码
'================================================== '函数名:GetArray '作 用:提取链接地址,以$Array$分隔 '参 数:ConStr ...
- Java 学习笔记 ------第五章 对象封装
本章学习目标: 了解封装的概念与实现 定义类.构造函数与方法 使用方法重载与不定长度自变量 了解static方法 一.Java封装概念 在面向对象程式设计方法中,封装(英语:Encapsulation ...
- Android源码项目目录结构
src: 存放java代码 gen: 存放自动生成文件的. R.java 存放res文件夹下对应资源的id project.properties: 指定当前工程采用的开发工具包的版本 libs: 当前 ...
- 团队Alpha冲刺(十)
目录 组员情况 组员1(组长):胡绪佩 组员2:胡青元 组员3:庄卉 组员4:家灿 组员5:凯琳 组员6:翟丹丹 组员7:何家伟 组员8:政演 组员9:黄鸿杰 组员10:刘一好 组员11:何宇恒 展示 ...
- 元素相加交换另解&puts的一个用法
#include<iostream> using namespace std; int main(){ int a,b; cin>>a>>b; a^=b; b^=a ...
- Java中按值传递与按引用传递的区别
值传递:(形式参数类型是基本数据类型):方法调用时,实际参数把它的值传递给对应的形式参数,形式参数只是用实际参数的值初始化自己的存储单元内容,是两个不同的存储单元,所以方法执行中形式参数值的改变不影响 ...
- 软工网络15团队作业4-DAY7
每日例会 昨天的工作. 张陈东芳:sql连接的基本完成,尝试被其他类调用,未导入全部商品信息: 吴敏烽:基本完成商品信息的调用: 周汉麟:设定商品的调用规则: 林振斌:设计缓存区代码,用于存取最近浏览 ...